8-PAGE MINI PHOTO BOOK
A simple folding technique
 The 8-page photo mini-album....
On the previous page, you learned how to fold an A4 sheet so that it turns into an 8-page mini-album.

You will now create the "grid" which, once filled with your photos, will give you when it is printed, by folding the mini-album photos as it appears on the photo.
Start your favorite image processing software.... For me, it's PHOTOSHOP... but PhotoFilter, PhotoImpact, or PaintShop Pro... are perfect!
If you don't want to build the grid... you can build it or download all ready HERE
 Grid construction
Just a little bit of mathematics... the page measures 21x29.7 and we will put 8 images on it... Here is the quickly drawn plan with page numbering:
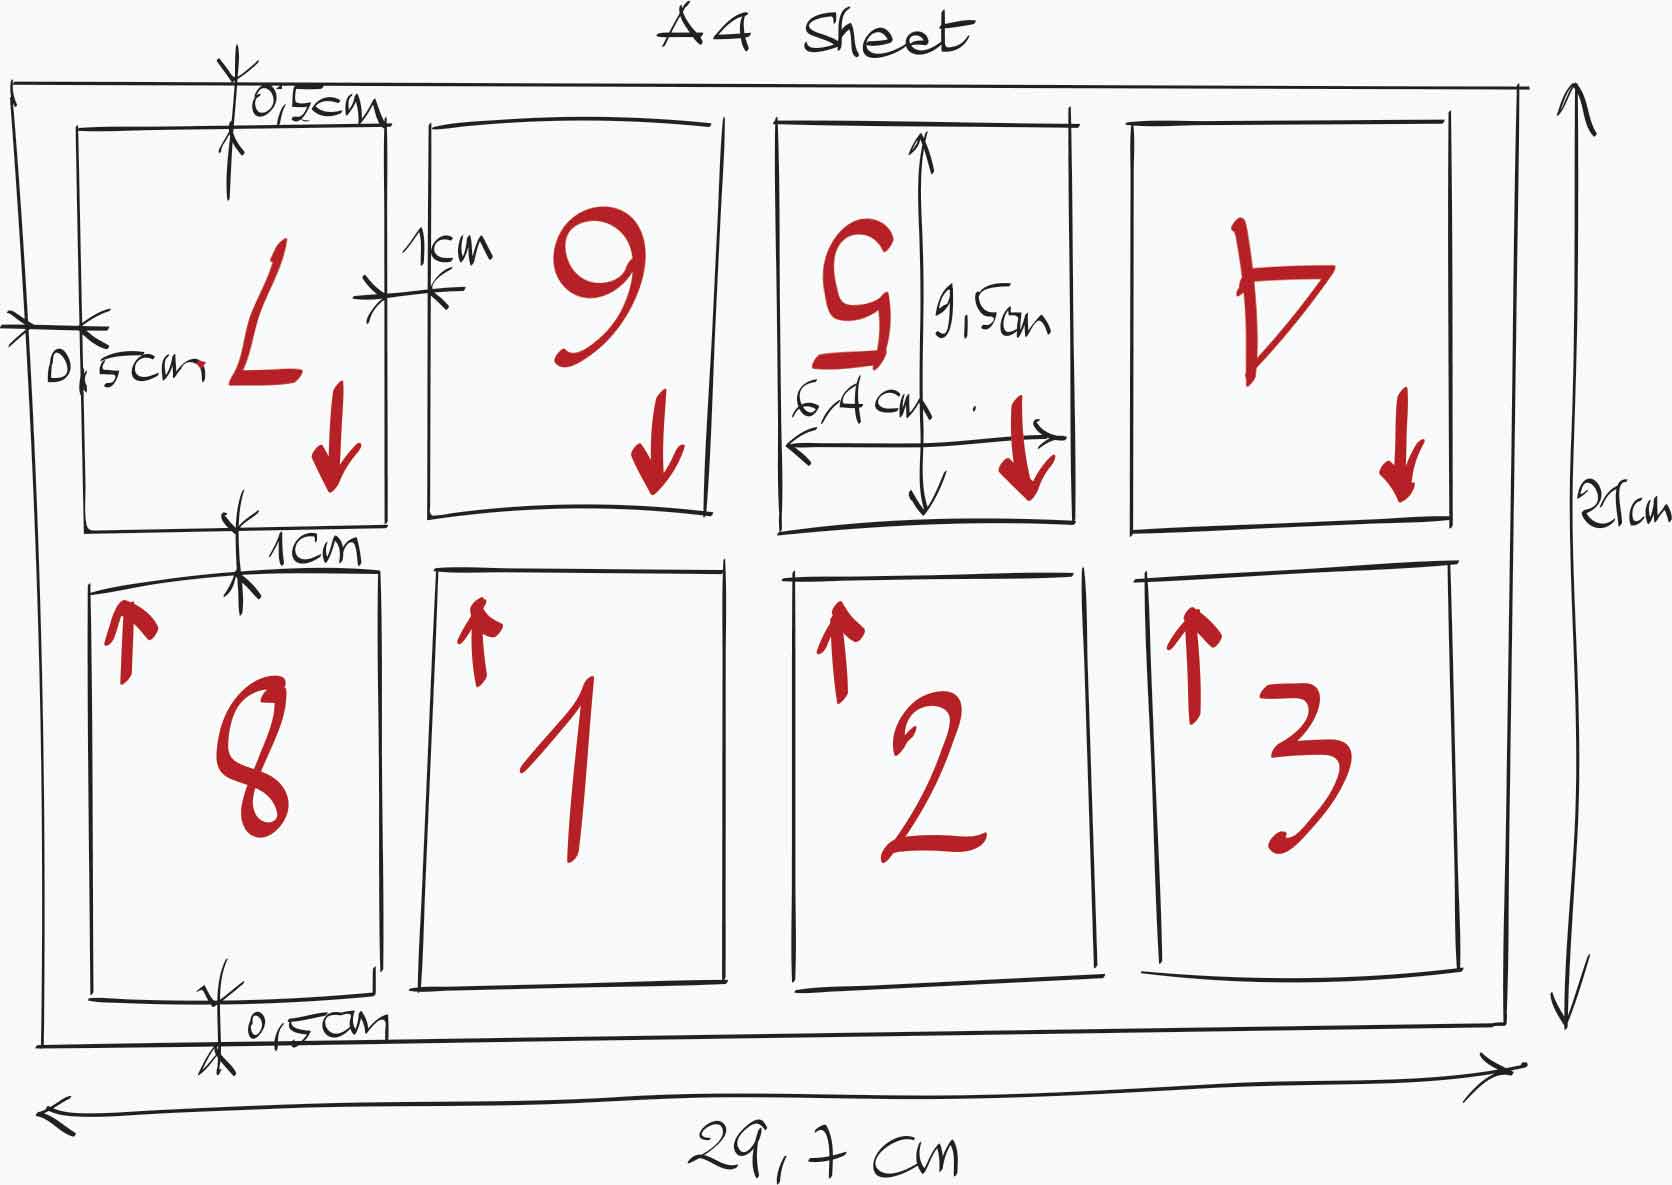
The external margins will be 0.5cm and, between each photo we could take 1cm and 1cm for the central line....
Each location must therefore be 9.5 cm high and 6.8 cm wide... Unfortunately, this does not correspond to standard proportions of photos.... It is therefore necessary to adapt!
 Method using PHOTOSHOP
To make the manipulations simple, I chose to create a pattern first and then use this pattern to create the grid for placing the thumbnails of the mini album....
 Creating the pattern
So start by creating a new image with the dimensions Width10.5cm and Height 7,4cm.
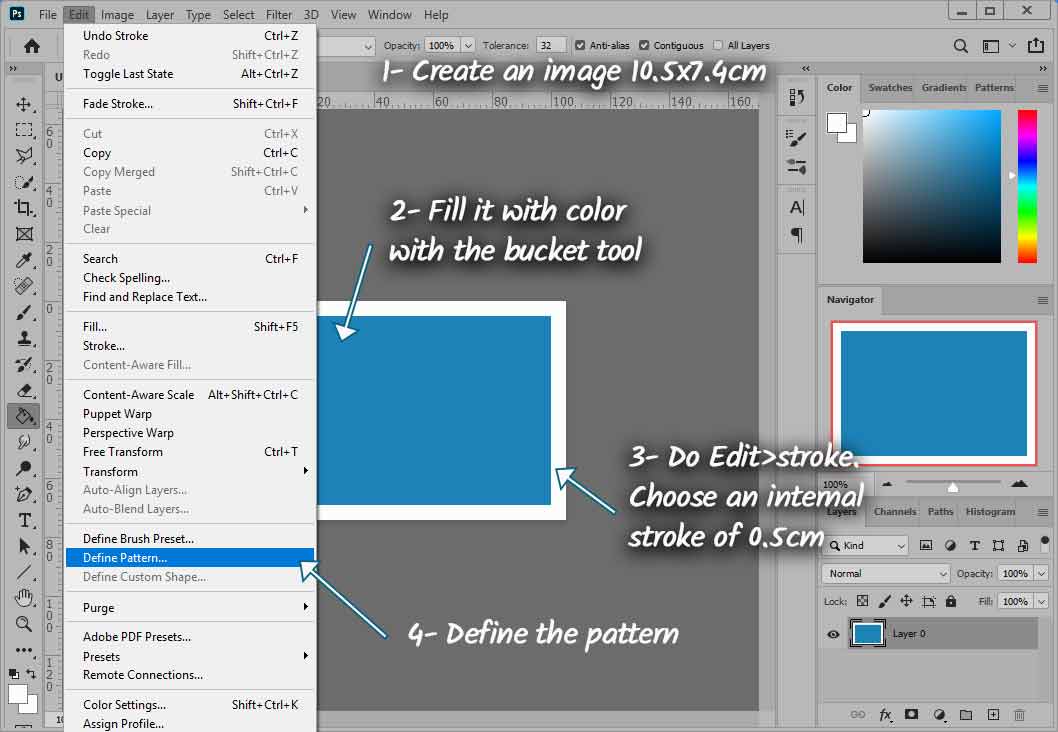
With the paint bucket, fill this image with any color (I chose blue).
And it is this image, which you will save as a pattern by doing: Edit>Define pattern.
Fill in the window that opens by giving a name to your pattern (e. g. Thumbnail) and validate.
 Creation of the A4 grid
Do now: File>New to create an image in A4 format, it's the standard european format for sheets of paper
Confirm by clicking on OK.... Your new image appears. In the layers window its name is Background.
Start by double-clicking on Background in the layer window and, in the window that opens, click on OK. The layer on the A4 sheet is now called layer 0.
Now click on the Paint Bucket tool. Then select the option: Pattern and choose your "Thumbnail" pattern.
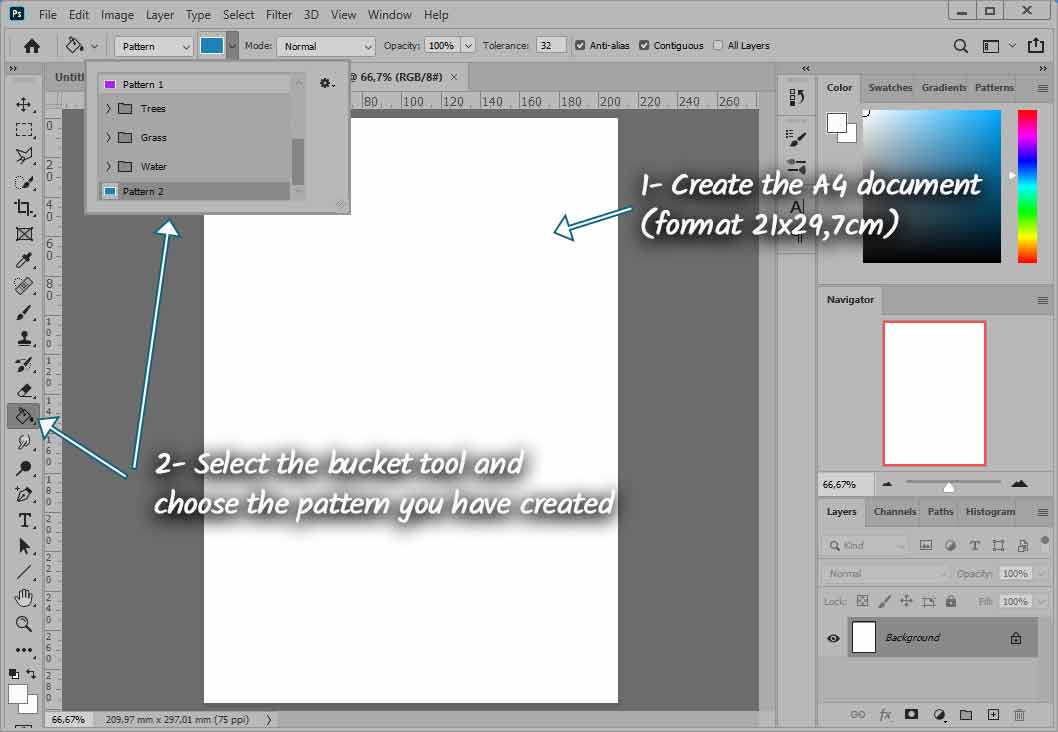
Now click with the bucket tool in your A4 image.... It's magical! Your A4 sheet is filled with 8 "Thumbnails" correctly placed.
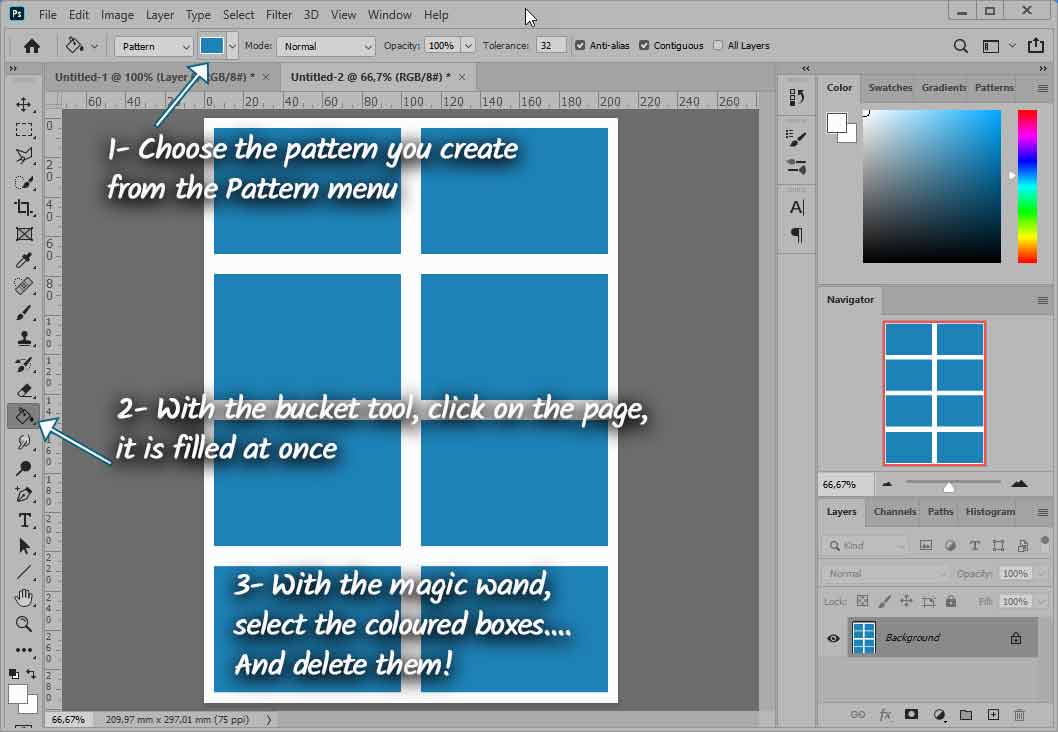
All that remains is to hollow out the A4 sheet.... by removing these pretty Parma-coloured thumbnails!
Take the Magic Wand tool....
If necessary, uncheck the option Adjacent pixels... in the horizontal menu at the top.
Click on one of the thumbnails: all the thumbnails are then selected... Press the delete key.... All Parma thumbnails disappear....
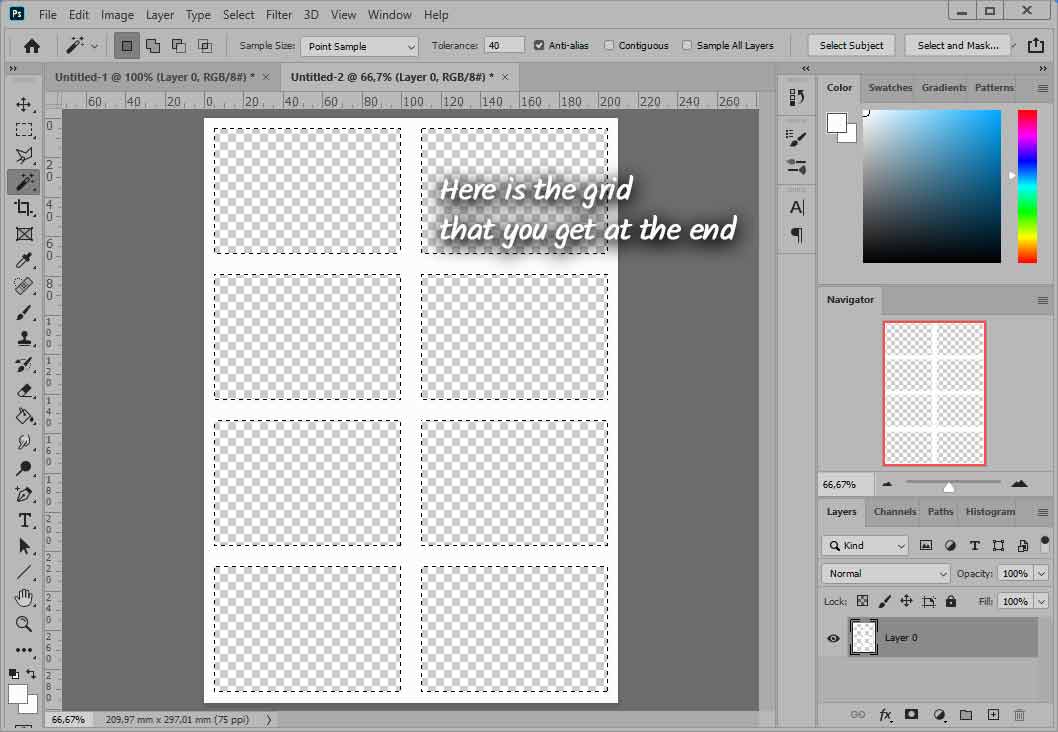
And all you have left is the grid... ready to be filled with your photos...
Save your work: I named mine GrillePhotoA4.psd (Photoshop) for further use.
Click to access the last part: Setting up the photos