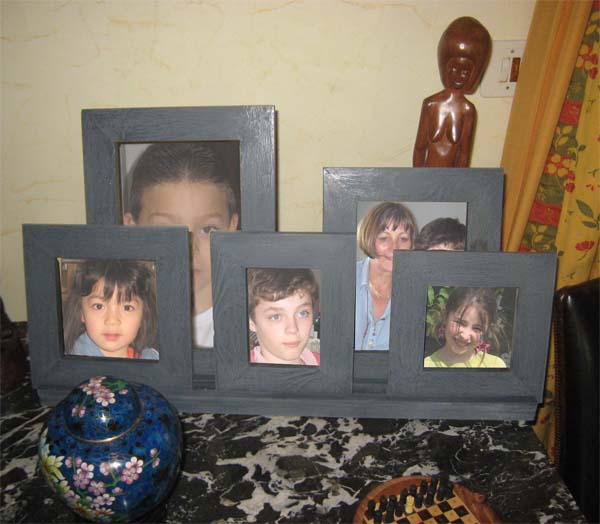
ALL IN THE FAMILY PHOTO FRAME
MAKE YOUR OWN !
It is still a multiple frame that I propose you to make on this page.
Of course, if you can not make it yourself, you can get it in a store for about 30 US$...
Besides, I wonder if it is good "profitable" to make your own!
But it's so nice to say "it's me who did it !"... and it is not too difficult!
Equipment to collect ...
-> 10x10 square lumber
-> 10x30 rectangular lumber
-> Good quality Wood Glue (eg Pattex)
-> Various clamps ...
-> Framer band clamp ... Very, very useful!
-> A picture framer miter saw (like this) equipped with its adjustment stop.
Picture Frame "All in the Family" making of.
 The slide
In 10x30 batten , cut 2 lengths of 55cm. Coat with wood glue the edge of one of these two lengths and assemble with the other. Tighten the assembly with two clamps (the more you tight during the drying and better it is!)

So you get a 6cm wide base .
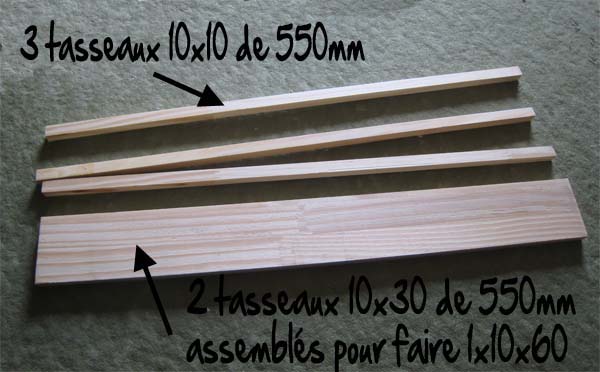
Now cut 3 lengths of 55cm in the 10x10 square lumber and paste these cleats on the 6cm basis to create two grooves 1.5 cm wide.
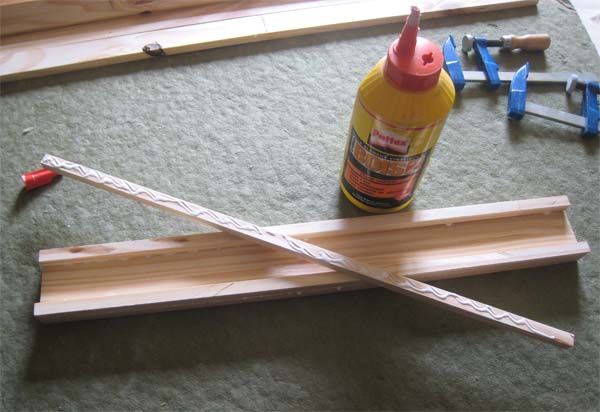
I covered the three 10x10 with a piece of board and put 2 clamps ... Please, when you put the clamps, check your assembly has not slipped. Check the glue is dry before loosening.

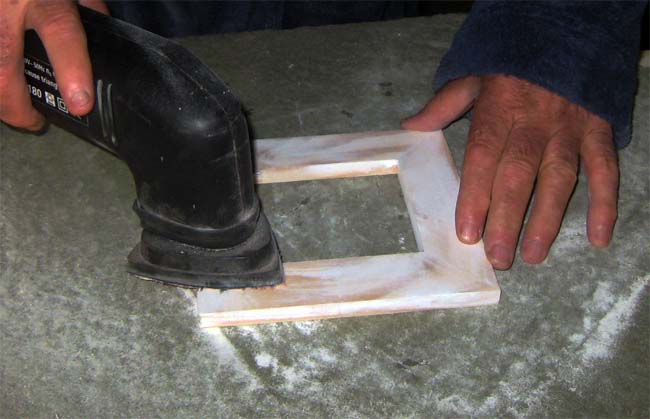
When everything is dry, remove the clamps and sand the slide to remove any small imperfections in the wood.
 The frames : making of
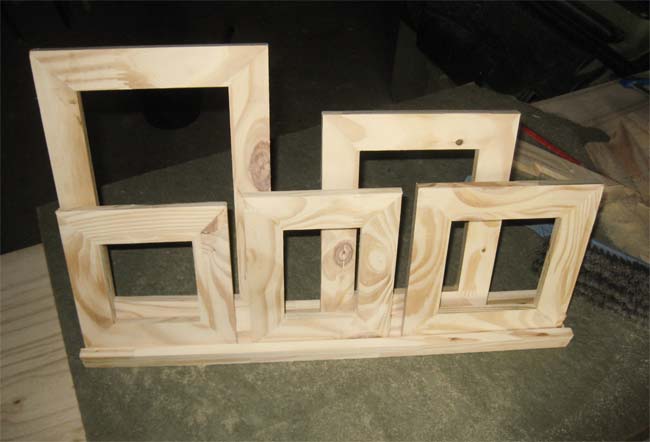
There are 5 frames of different sizes, which avoids any monotony in the presentation of pictures!
The width of the frame members are the same for all: 3cm. The simplest is to cut the frame members with a picture framer saw equipped with its adjustment stop.
This stop system consists of a sliding device on a rod screwed to the framer saw. When cutting the first member, simply flatten the stop device against one end (by sliding on the rod) ... which automatically takes the measure of the member.
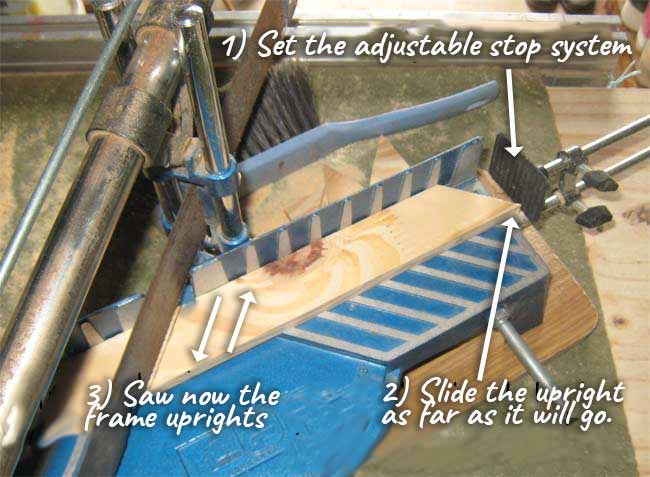
When cutting the second member, we slide it until he comes "butt" against the stop device : so you can then cut the second member to be so exactly the same length as the first.
Optionally, see that page of the website dedicated to cutting with stop.
You can give your frames the dimensions you want ...
As a guide, here are the ones I made:
1 frame: 21x30
1 frame: 19x24
1 frame: 18x18
1 frame: 15x18
1 frame: 16x16
So just cut the frame uprights to the right size ...
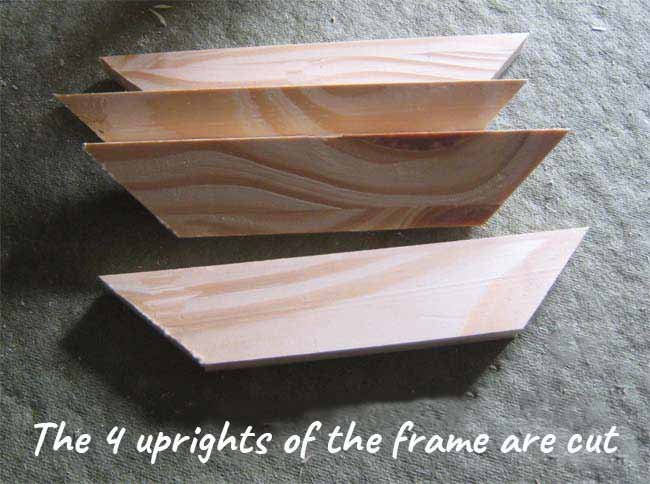
... Then glue the cormers to assemble, join and tighten in place with the strap clamp press.
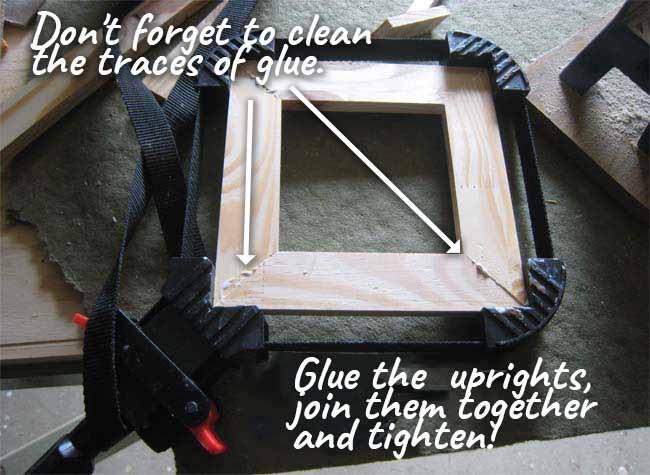
Wood glue I use a fast setting, so it is practically possible to assemble the frames as soon as when their members are cut.
Remember to wipe the glue smudges with a damp sponge : before drying it is easier! (See the sags on photo above).
Place your frames in the slide for a last fitting before going to the finishing frames part...
 Frames finishing
Several finishes are possible ... You must choose one that best suits your home.
If this one is rather old rustic, then stained and waxed finish is best suited. So you dyed your all-in the family "with the shade of wood color desired, then apply the furniture wax with a brush.
Leave to dry and finish the wax by rubbing it with a fine steel wool: what will give your frames a very smooth to touch multi-satin.
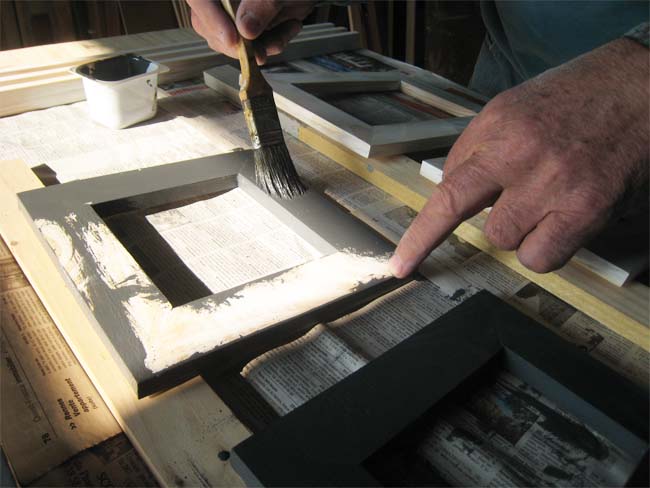
Rather I chose a painted finish. It begins with a first acrylic primer layer. I use a brush to coat all parts that will be visible.
Acrylic paint has the advantage of slightly raising the wood fibers and thus better enable their removal to sanding.
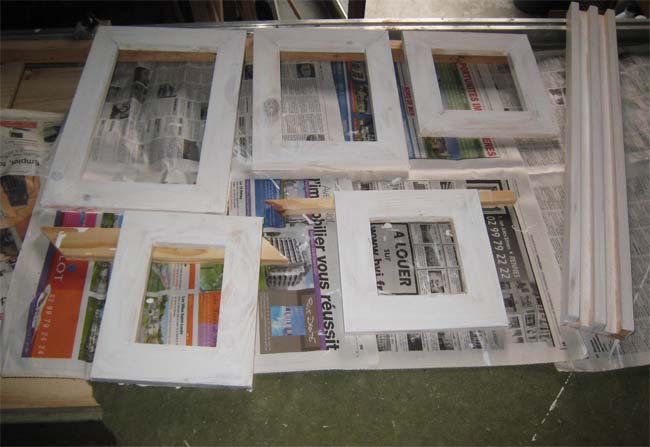
Wait the drying of the primer paint and then sand with a fine sandpaper. You almost eliminate all traces of paint to achieve a very smooth timber, ready for final painting ...
Then, you have to give 2 coats of paint of your choice: it becomes difficult to find glycero paint ... which has a better outfit.
If not, paint them with acrylic paint, more environmentally friendly.
 Back frame slide
These frames do not include a rabbet (not a problem!), Pictures that we put inside will be dragged from behind along the bottom cardboard .
Example for the 21x30 frame. Its interior window measure 15x24. Drag a cardstock from behind and, with a sharp pencil, mark the location of the window. Increase of 1.5 cm on all sides: you get a 18x27 rectangle ...
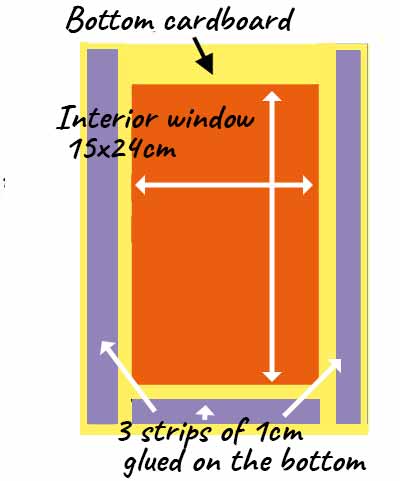
Cut this rectangle and paste on its 3 sides a 1cm cardboard strip ...
Then glue the assembly to the frame: this will determine a sort of slide in which you can drag your pictures (after you've cut them to size)!
Crude but effective!
The Complete Photo
Guide to Framing and
Displaying Artwork
by Vivian Carli Kistler
(click for +)
The author provides inspiration and helpful examples to show people how to display their artwork using basic design principles in a manner that is easily grasped.
An Amazon best !
Home Book of Picture
Framing
by Ken Oberreicht
One of the best ! I think ! Over 40,000 copies of the first edition sold : it cannot be an error !
(Click for +)
This home Book of Picture Framing is the most comprehensive guide to mounting, matting, and framing oil paintings, watercolors, posters, photographs, calendar pages, and greeting cards without spending a fortune...
The first phrase : No do-it-yourself activity will save the homeowner or apartment dweller more money than the mounting, matting, and framing of artwork, photographs, posters, documents, and collectibles....
Frame It!
(Paperback)
Tonia Davenport
(click for +)
Customers review are the better test for the book!
... The book is an extremely comprehensive guide for standard framing techniques, but what I really love are the more creative, non-standard techniques Tonia shows as well... (by Corey)
...Framing can be intimidating, but she glides and guides us right past that with clear basic guidelines, classy projects, and her own very creative artwork... (by Gloria)
Domino : the book of
decorating
Deb Needleman, Sara Costello...
Domino: The Book of Decorating cracks the code to creating a beautiful home, bringing together inspiring rooms, how-to advice and insiders' secrets from today's premier tastemakers in an indispensable style manual.