DIY your Picture Frame Ledge
A simple shelf to layout your frames!
If you prefer to build yourself your photo shelf, it is perfectly possible to do it from cleats sold in DIY stores ...
Do not expect, however, to realize a big saving compared to the shelves with frames of the trade: at least you will have the pleasure to have realized them yourself and to your exact dimensions.
Here is the way to proceed.
 The making of
 Here is the list of supplies needed to create 2 x 110cm shelves
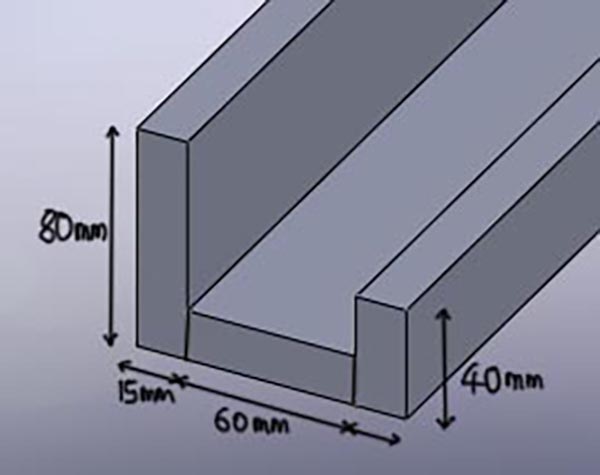
Fir slats in 220cm length
- A slat of 220x80x15
- A slat of 220x60x15
- a slat of 220x40x15If you have trouble finding these dimensions (it's not always obvious), you can cut (or have it cut) strips of the same width in 16 or 19mm medium .... Medium is a good wood to diy shelves!
 Implementation of a shelf of 110cm.
Begin by cutting 1 strip of 110cm into the batten of 80 and then cut two strips of the same length into the other two battens.
Glue the edges and assemble according to the plan. Place your clamps while the glue is setting... If your gluing is carried out correctly, it is not absolutely necessary to consolidate the assembly with fine nails or screws.
When the glue is dry, sand the wood to remove the unavoidable roughness and apply a coat of coating with a knife. Sand again when it is dry.
Your shelf is now ready to be painted in a color that matches where you will be fixing it. Look at this special page on how to "finish" your painting shelf.
 Fixing the picture shelf in place...
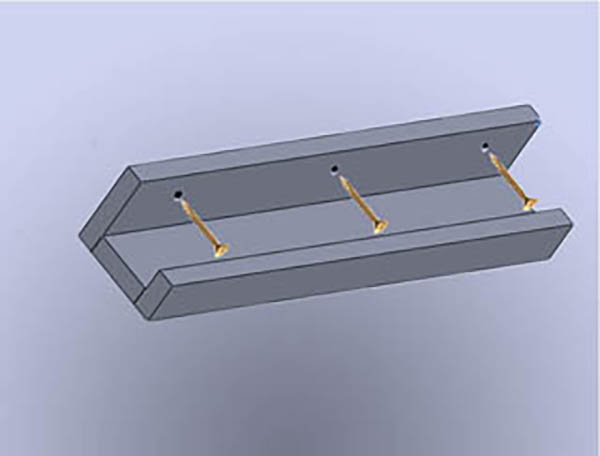
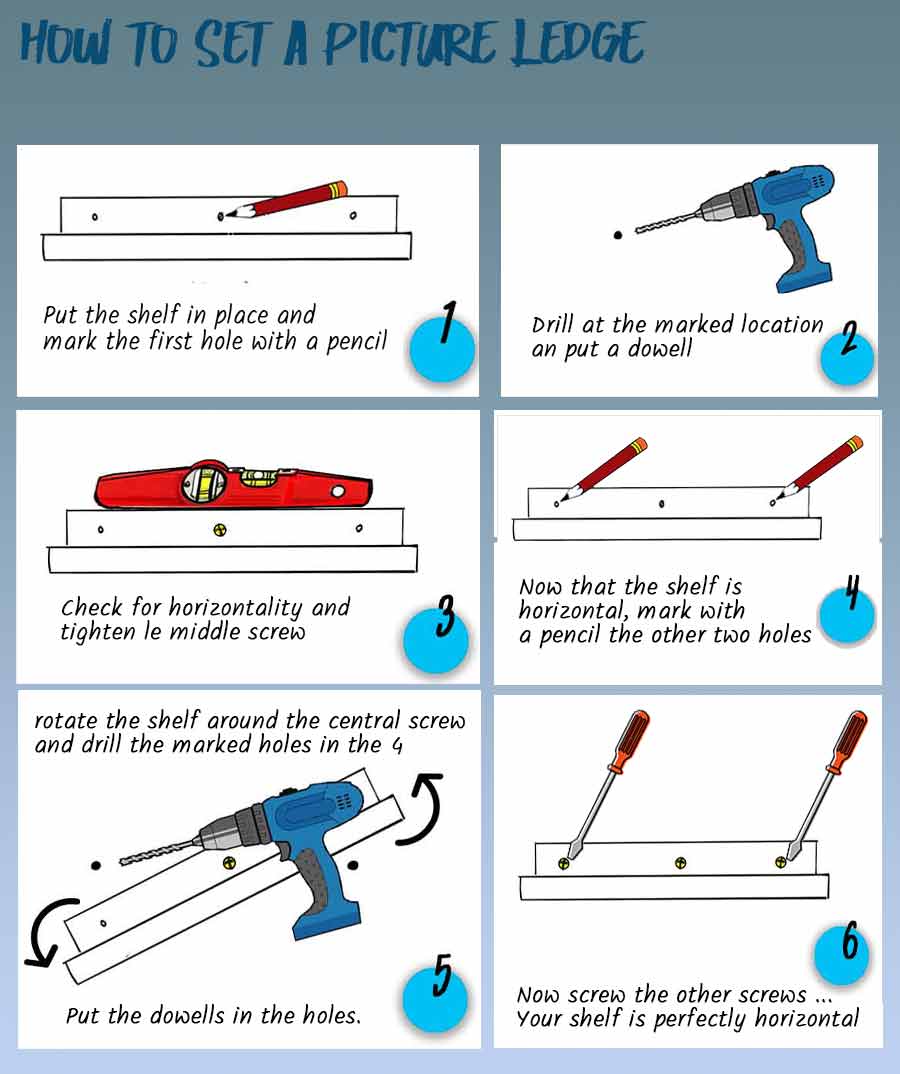
With the drill, prepare the holes through which you insert the fastening screws into the wall (3 holes in the diagram).
Here is how to proceed to drill without any problem in the wall...
Put the shelf in place and, with a pencil lead passing through one of the holes, mark on the wall the location of the first dowel, usually the center hole is marked. Remove the shelf and drill the wall. Put your dowel in place, present the shelf and then screw the first screw.
Now plumb your shelf (use a level if necessary) and mark with a pencil the location of the other two dowels... You can now drill your wall in all tranquility: the holes will correspond well to those of the shelf...
If you want put your ledge perfectly horizontal, have a look on this page
If you want to hide these fixing screws, seal the holes over the screws with plaster, sand after drying and make the last paint touch-ups (but very often, these screws are hidden by the frames resting on the shelf).
This method is explained further here ...
 How to arrange the frames?
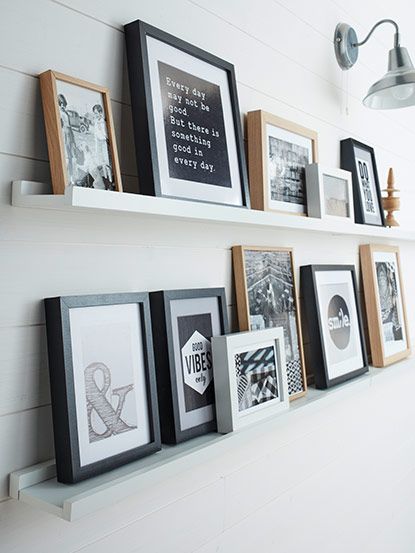
Always think : unity and diversity !
In the example below, all the frames except one are black, which gives the exhibition a certain unity. The variety of this unity is ensured by the type of frames used: large, small, multiphotos... as well as by the touches of color of some photos and by the only white frame of the exhibition.
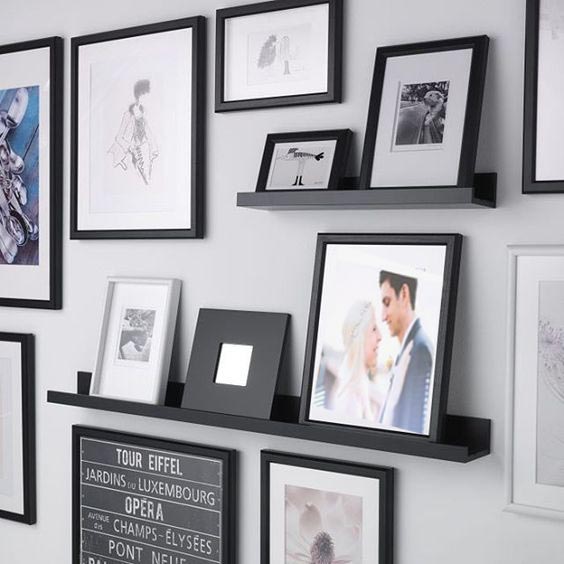
The two principles of unity and diversity are respected and thus give rhythm and balance to this composition.
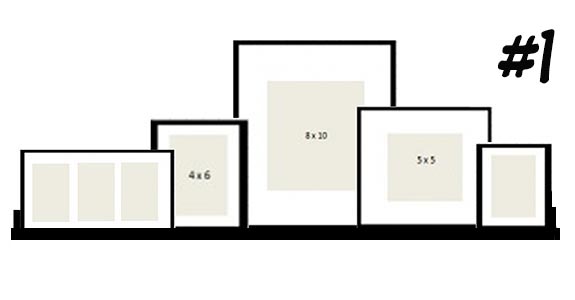
Do not place the frames side by side, with the tail of the bird... arrange them harmoniously so that the small ones partially overlap the larger ones.
Also respect a progression: on a short shelf (55cm) place the larger frames rather in the center by decreasing the size of these by approaching the edges. Arrange an odd number of frames.
On a larger shelf, you can create groups of frames. Don't forget to make the frames "overlap" each other in order to create unity... Introduce some variety: frame of different color (here different shape from the oval frame), unusual object...