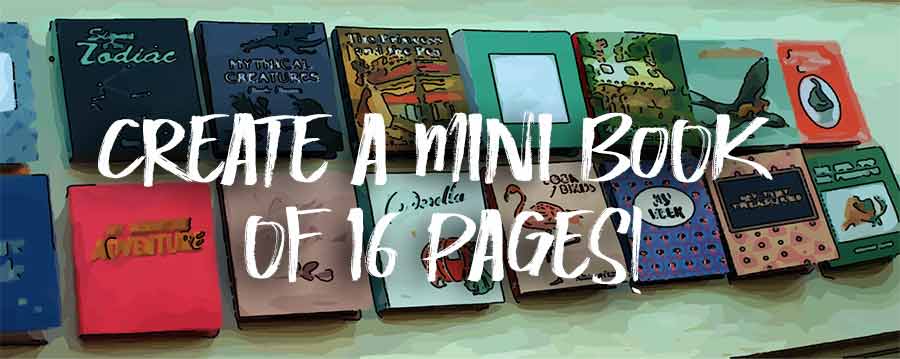
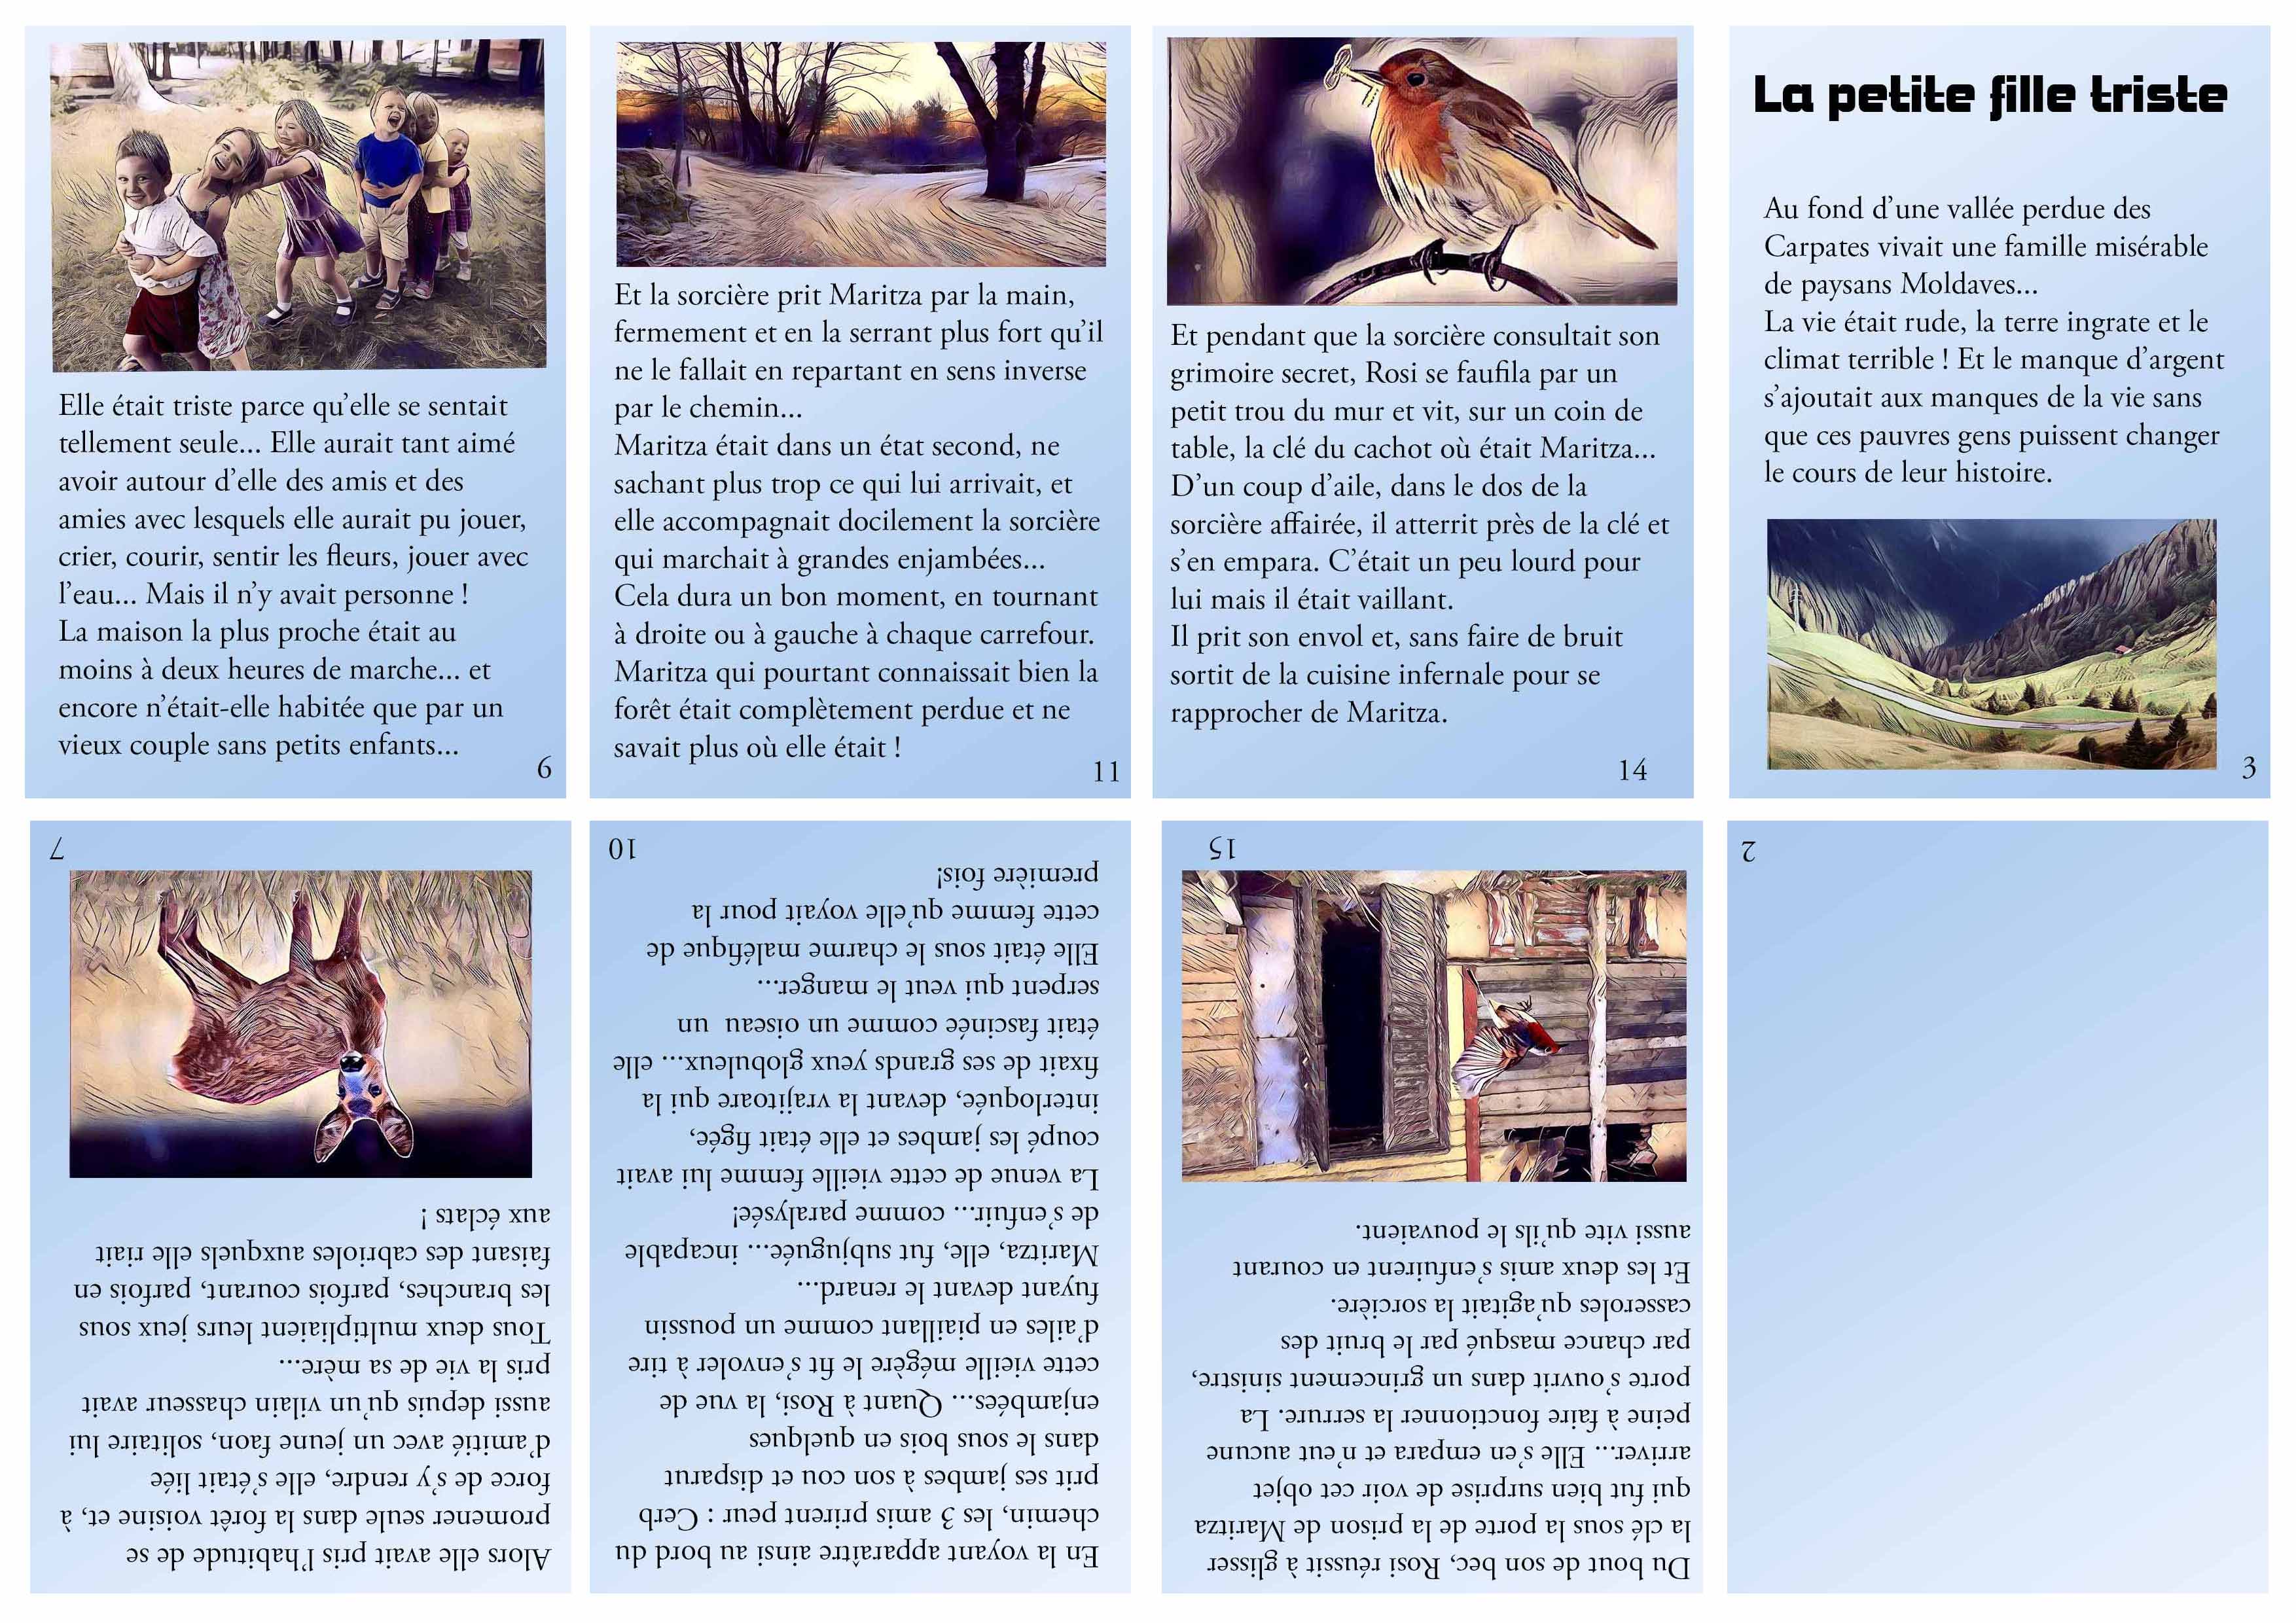
A 16-PAGE MINI-BOOK
How to make a mini book of 16 pages 10x7cm on a simple A4 sheet that you will print yourself ? It's not difficult if you use WORD or an equivalent word processor...
I advise you to first read this page where the way to make a mini-book of 8 pages is described... Two methods are described, one quite elementary with an image processing software like photoshop (or simpler ... and the other one from WORD (or others at your convenience which calls for the filling of text zones...
 Pliage du mini-book...
To correctly reconstruct this mini-book, it is important to always follow these 3 phases in order:
Fold the A4 sheet lengthwise
Ce qui correspond au schéma suivant :
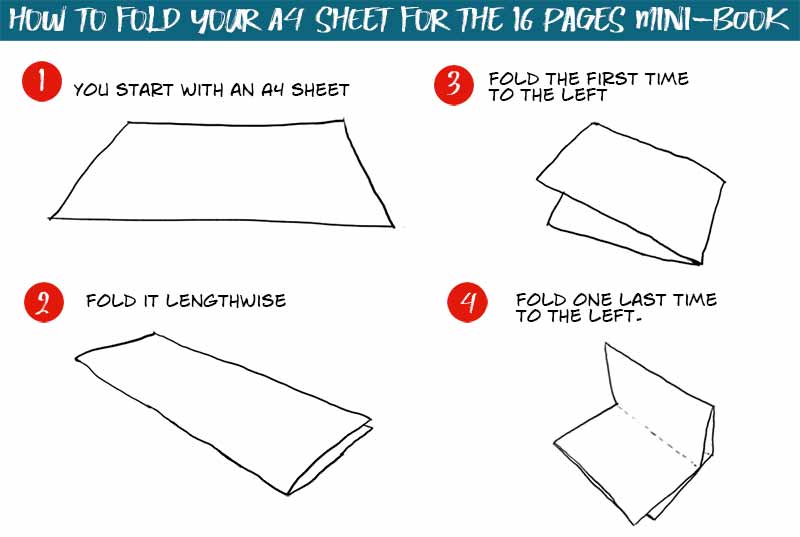
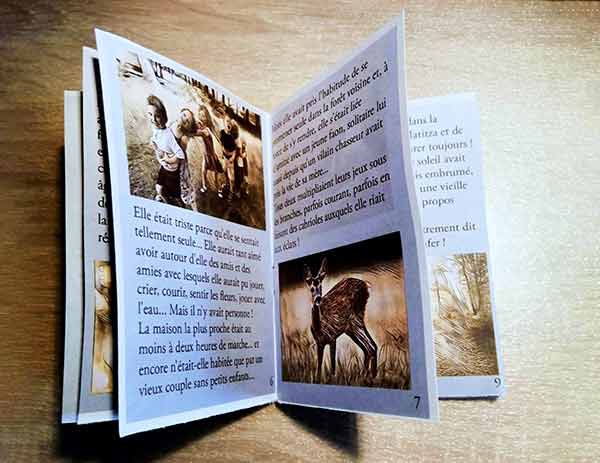
Start with an A4 page and make the 3 proposed foldings... Once this is done, without cutting the pages still attached, you will number these pages from 1 to 16... So, when you unfold your sheet, you will have the arrangement of the pages to complete them later...
 How to arrange the pages...
It's enough to take an A4 sheet and fold it 3 times... then to locate the numbering of the pages... We will come back to this later! Here is how the pages are organized:

 Fill in the pages...
There are several methods to create this 16 pages mini-book... Here, we describe only the simplest one, which consists in creating each page in an image processing software and then putting them on a template layer...
If you prefer to use WORD (or equivalent) to fill the pages automatically, see this page and if you even want a ready-made Word template download it HERE
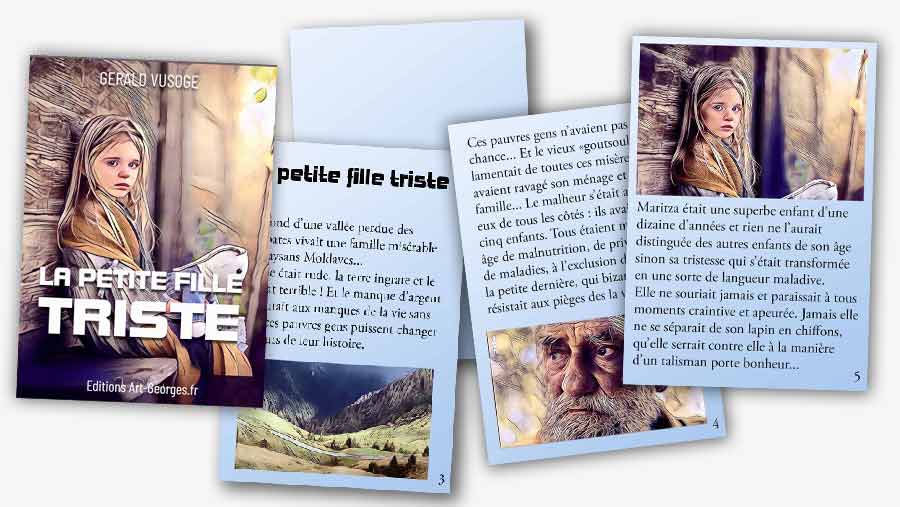
![]() In your image processing software... Photoshop, TheGimp or PhotoFiltre (these last two are free) start by opening an image with dimensions of 7cm by 10cm... This will be page 1 of your mini book, the cover page... (NOTE:If you have problems with the accuracy of the final fold, start with a mini-page of 6.5x9.5 )
In your image processing software... Photoshop, TheGimp or PhotoFiltre (these last two are free) start by opening an image with dimensions of 7cm by 10cm... This will be page 1 of your mini book, the cover page... (NOTE:If you have problems with the accuracy of the final fold, start with a mini-page of 6.5x9.5 )
Arrange it as you wish and when it is ready, save it to set it up later...
Now move on to page 3 (page 2 is left blank as well as page 16!!!)... which you will treat in the same way: create a 7x10 cm image and start telling your story by adding images or photos to text... I added a blue sky background in gradient which will be used for all the pages...
To do this, start by placing your image if there is one... I put it here at the bottom of the page. Now click on the text tool and, while holding the click, draw the text area in which you will write. Then type in your text.
When the page is finished, I advise you to save it in .PSD format (which will still be editable afterwards) and export a copy in .jpg. So 2 files Pag3.PSD and Page3.JPG.
You have understood the principle... Your mini-book has 16 mini-pages... so you have to create in your graphic software as many 7x10 cm images as there are pages... It's a meticulous job because you have to make the story fit in this small space. But with a little bit of care and order, you can easily do it...
If you run out of space on a mini-page, select the text and change the size of the font (1 or 2 points are usually enough)
Small point of detail: when you create your pages, don't forget to number them, this will be important later when you mount them on the A4 page...
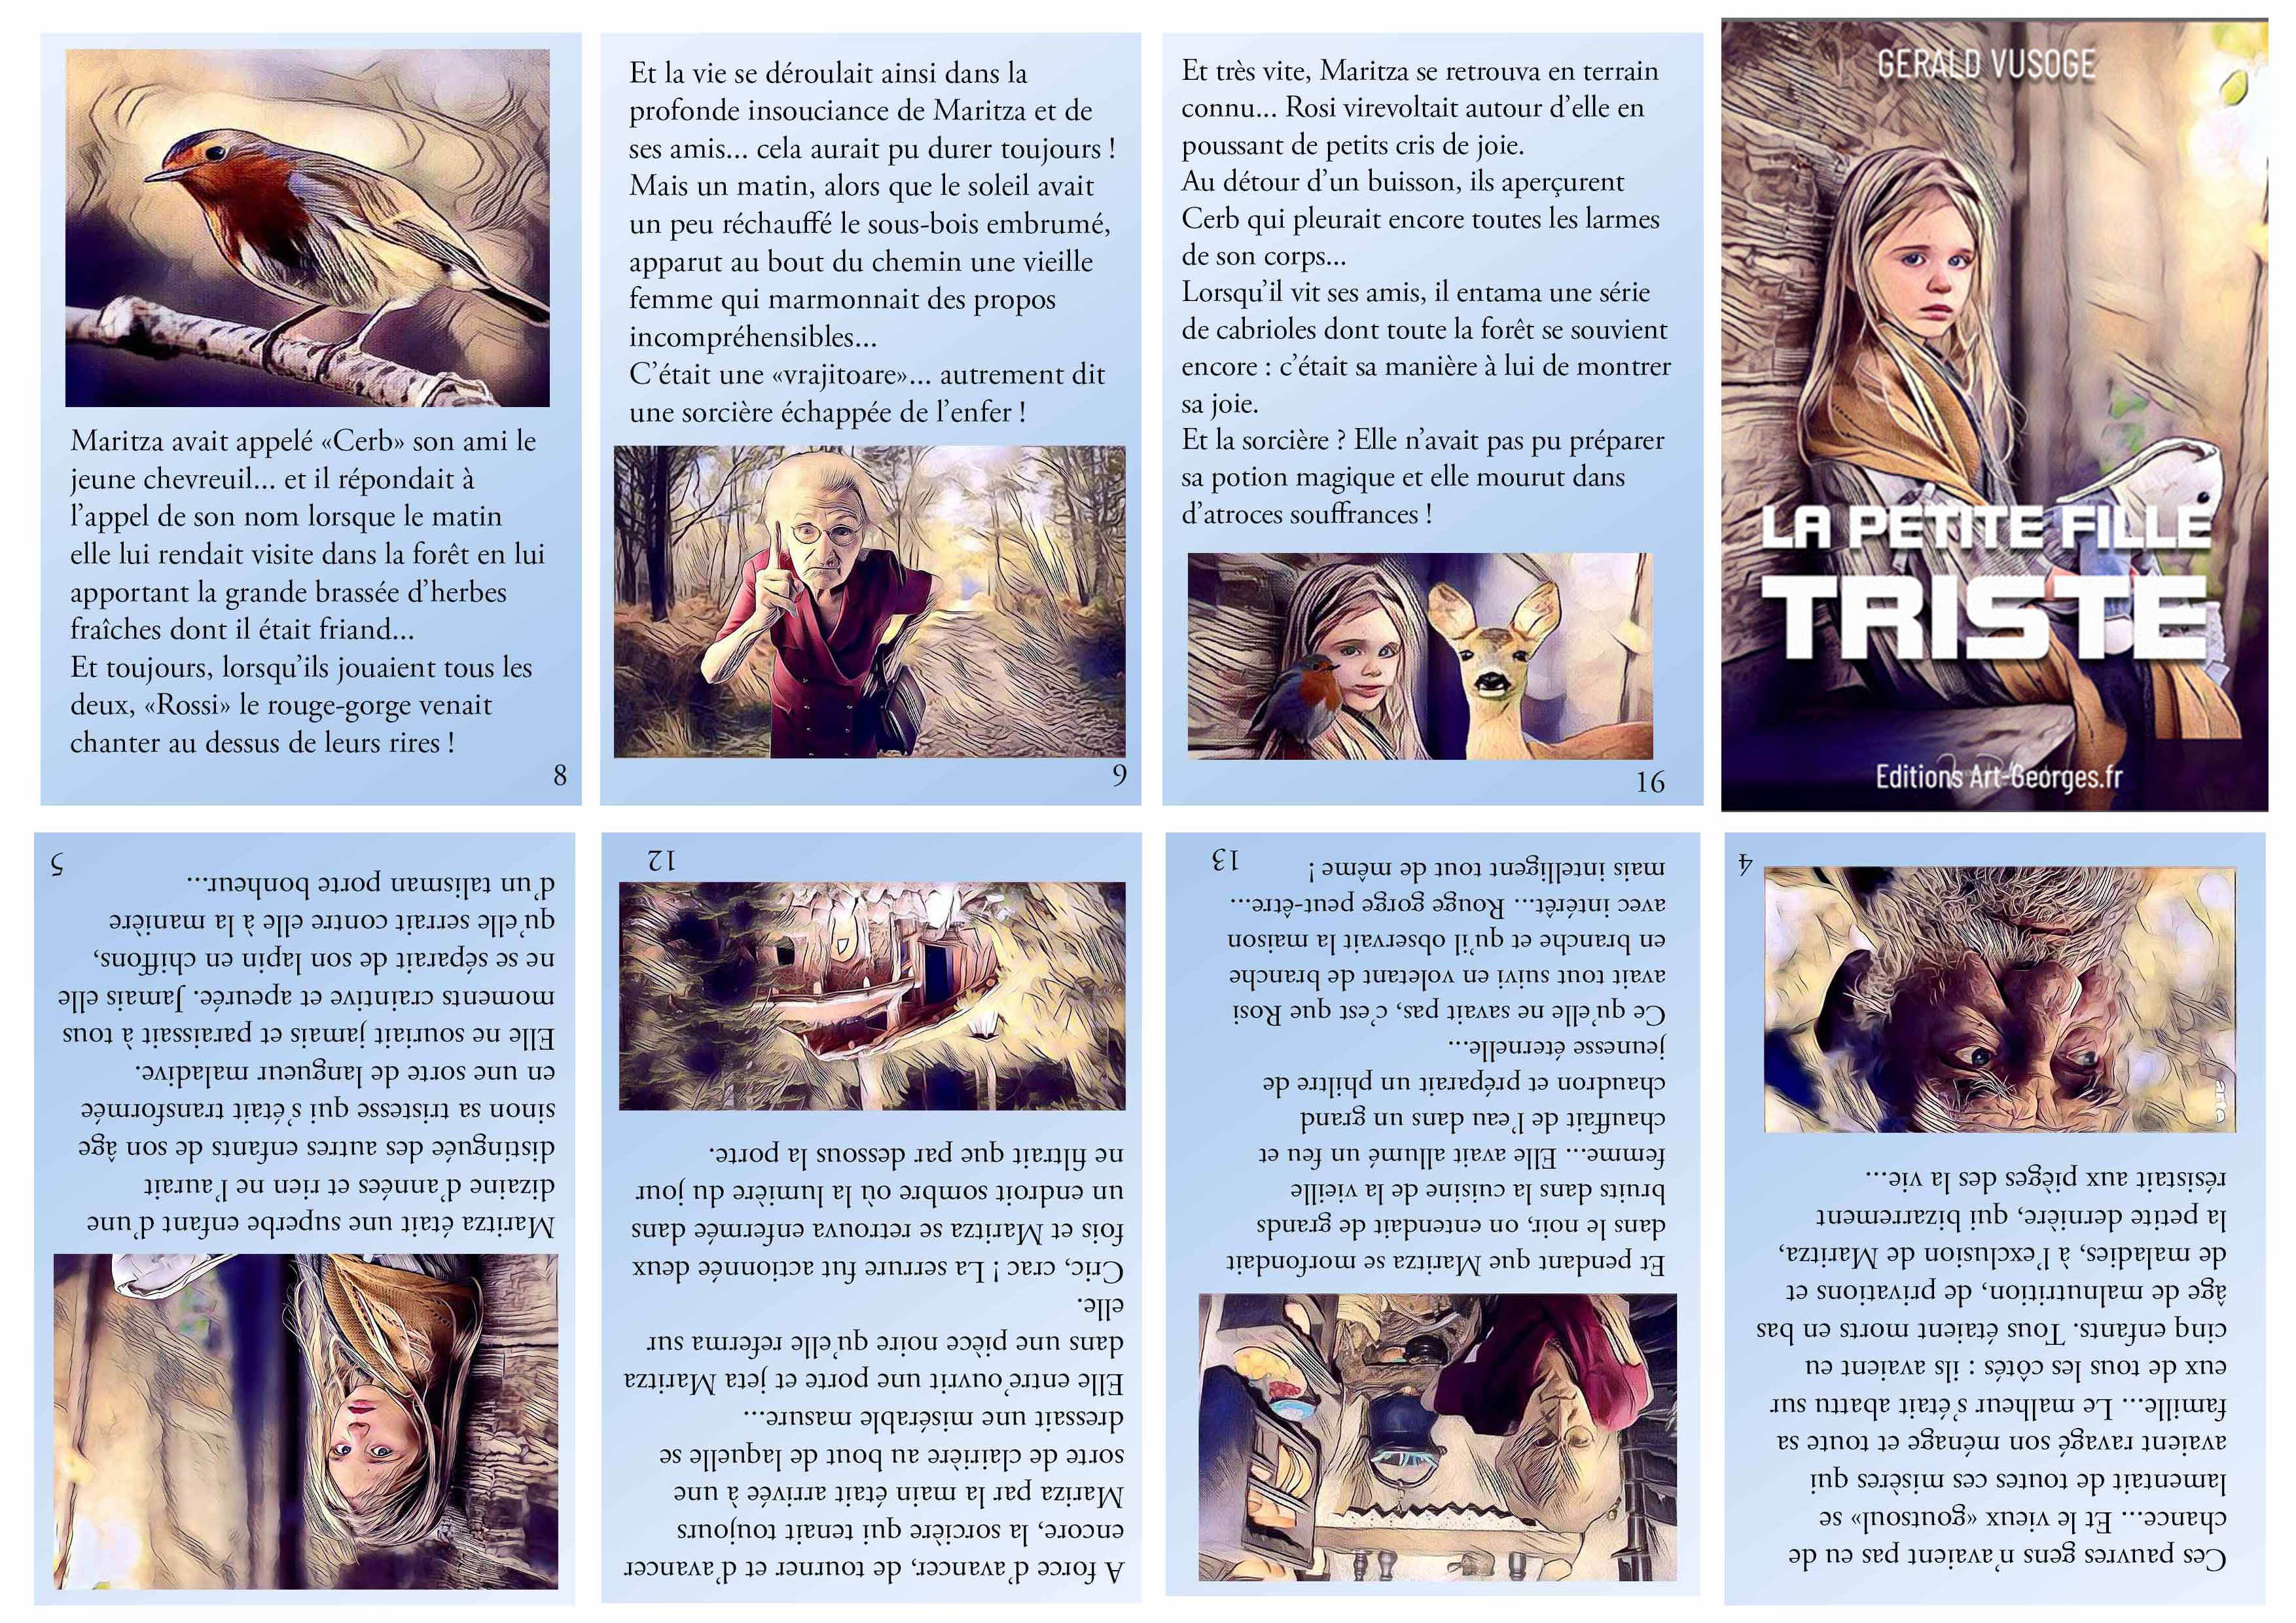
![]() When your 16 pages have been created, you must now mount them on the A4 page which, by folding, will give its final shape to the 16 pages mini-book...
When your 16 pages have been created, you must now mount them on the A4 page which, by folding, will give its final shape to the 16 pages mini-book...
You have in a directory the 16 mini pages you have just created...
Have the template with the numbered pages with you (if needed, download it). Or better yet, work on a numbered page ahead of time (Download RECTO and VERSO by clicking HERE). This will greatly help your set up!
In your image processing software, Photoshop or other, create two A4 pages, one called RECTO and the other VERSO... and, using the template as a guide, start placing your pages in their place... The easiest way is to use the two downloadable templates RECTO and VERSO and to place your mini-pages directly on them
On the picture below, we have placed all the pages... on the RECTO side:
And here is the completed back:
![]() You just have to print these two pages on the same sheet... First print the front side, then take the printed sheet, turn it over widthwise and put it back in the printer to start printing the back side.
You just have to print these two pages on the same sheet... First print the front side, then take the printed sheet, turn it over widthwise and put it back in the printer to start printing the back side.
As it is a two-sided printing, you should take a good quality paper with a high grammage: the colors will be better rendered and you will not see the other side by transparency! You will easily find these papers in a specialized store... otherwise, AMAZON offers a wide choice, for me, my choice was this one in 50lb double sided!
There will be at the beginning small adjustments of margin to make: it depends partly on your printer ... there will be a little mess before finding the right setting. But you will soon get a satisfactory result.
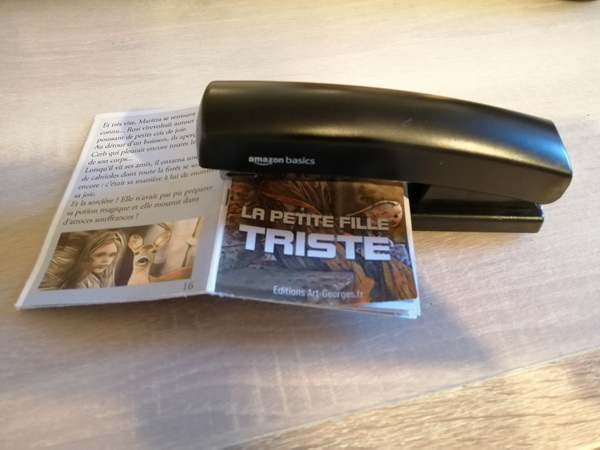
You will have to fold the A4 sheet as indicated above and staple in the center of the mini-book before cutting the pages, some of them are attached, like in the old-fashioned books of the beginning of last century! Your stapler should be large enough to reach the center of the mini-book. You don't have to break the bank for this: here's one for less than $7... with 1000 staples.
It only remains to wish you many readers!
If you just want to try and print these two pages before you start click HERE to download the front and back of this mini story!
And don't forget that to make your text fit on the 16 pages, you can play on the line spacing and the font's size...
![]() If you prefer to work with MICROSOFT WORD, come and download the template on this page of the site where we have detailed the method of the Word text zones...
If you prefer to work with MICROSOFT WORD, come and download the template on this page of the site where we have detailed the method of the Word text zones...
I wish you a good impression and good readers!