Build a multiview frame
and expose your photos!
Another multi-view! It's definitely very trendy at the moment and you just have to launch a "Multi-view frame" search on Google to see the variety of the offer on the merchant sites.
The one I propose you to build on this page will require a minimum of material... and will cost you much less than 10€ ! You want to build it? Then see the continuation!
 Equipment and supplies
. A 20x10 slat in 2m length
. some red paint
. a metal frame saw and its stop .
. fast wood glue
. a piece of sandpaper.
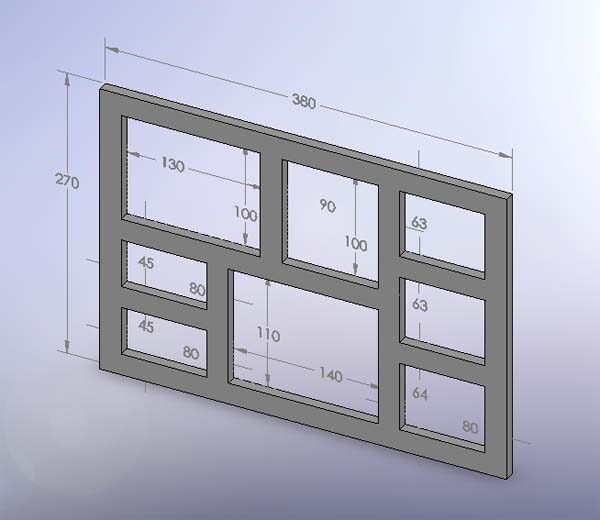
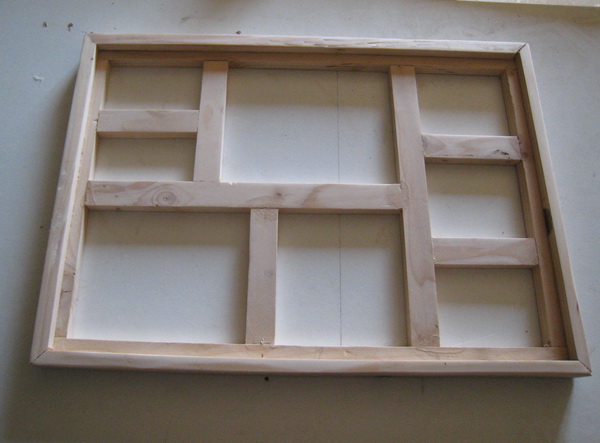
Here is the dimensional drawing of the frame... Of course, the measurements are given only as an example: you can perfectly modify them according to your photos and the slats you may have!
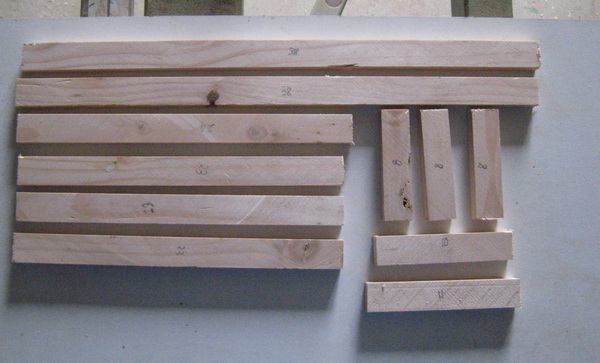
You will therefore need to cut 10 pieces from your 20x10 strip, the details of which are as follows:
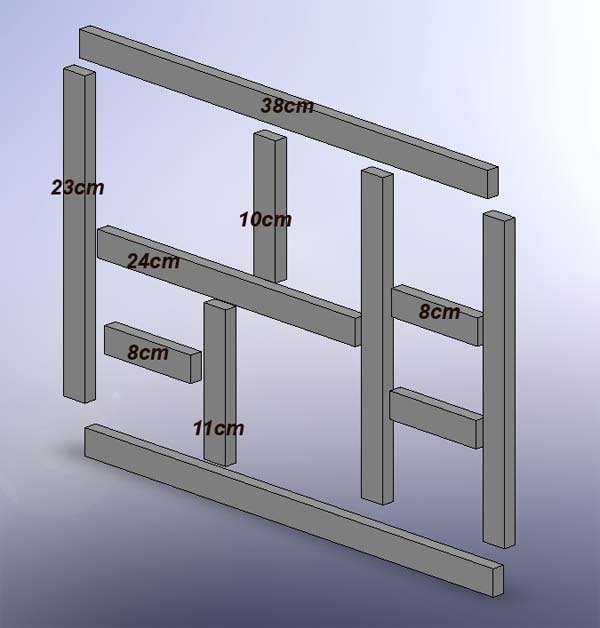
2 uprights of 38cm; 3 uprights of 23cm; 1 crosspiece of 24cm; 3 crosspieces of 8cm; 1 crosspiece of 11cm and 1 crosspiece of 10cm...
For more precision, it is essential to cut the batten using the stop system of your framing saw (if you don't have one, don't deprive yourself of it!): the 23cm uprights for example, must have exactly the same length... see the page working with stops for explanation.
Two pieces have a critical dimension... that of 24cm and that of 11cm... if you lacked precision when cutting them, you will probably have to rectify them so that they fit well in the assembly... but with the technique that I describe below it will not be very difficult!
 The assembly of the elements
There are a lot of elements to assemble and their gluing seems delicate to do... because everything moves! And it is not possible to use a frame clamp or a strap press. So, to make things easier, we will use a small "construction site" very easy to implement.
On a piece of shelf made... I started by fixing, with two thin spikes, a piece of cleat. Along this strip, I put one of the 38cm horizontal uprights.
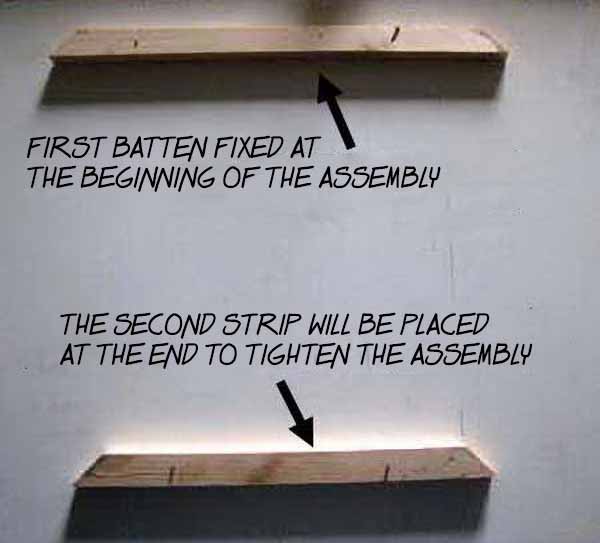
I then glue the ends of the vertical uprights and put them in place (at about their final location), then I finish by placing the second 38cm horizontal upright. To finish, I point, while tightening a little bit the whole, a last strip on the block to maintain the assembly. This first assembly won't move by itself anymore!
With a small hammer, while tapping gently, I gradually put the uprights in their final place.
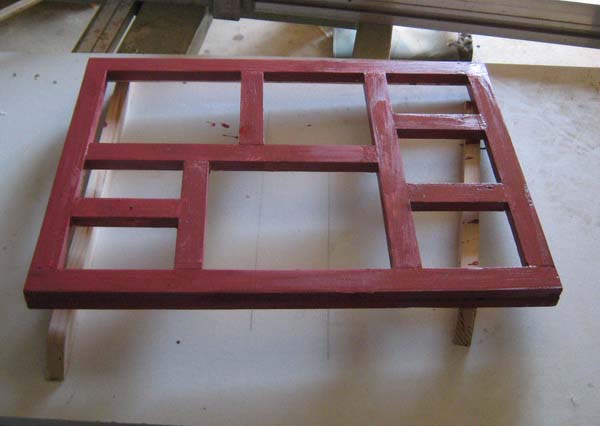
This way, the main elements are held in place and I can now glue the small studs in their place. After a last check for squareness... I tighten them longitudinally with a clamp to ensure a good glueing.
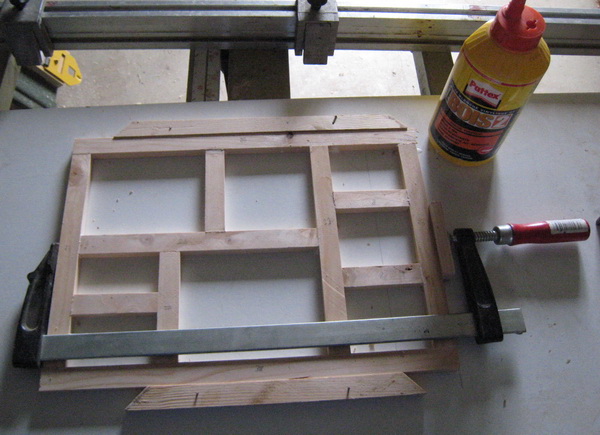
You may have to grind very slightly the 24cm and 11cm crossbeam (finish the assembly with these and use sandpaper to adjust them if necessary). They should be slightly retracted.
Let the glue dry for at least 2 hours (if it is fast glue) otherwise wait for a whole night!
If you wish - it's nicer and more practical afterwards, but not essential - glue a 10x10 stick on the back of your frame to create a fake moulding. This will also give a certain "thickness" to the frame. Assemble these mitered mouldings.
 The finishes
Sand the set with fine sandpaper (there should not be any big irregularities to remove) and apply a first coat of diluted dark red paint on the set... Paint well the inside of the small frames by tapping with your brush.
Allow to dry well, fill in any remaining small defects and sand the entire assembly again.
Now apply a coat of undiluted dark red paint... followed by a second coat avoiding drips.
In a strong cardboard plate (wooden cardboard or, more simply, old bank calendar), cut the back cardboard to the dimensions 36x25 (if you have created the fake moulding, the cardboard just fits into it).
Put it in place... and, with a pencil, trace the location of the 8 windows.
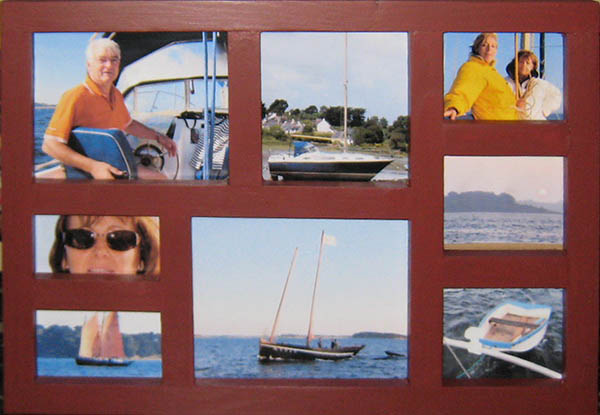
Now all you have to do is cut out and glue your photos on the background cardboard and fit a fastener on the back of your frame...

A fine point on the wall... hang your work...
It is you who made it!