SCRAPBOOKING COFFEE FILTERS ALBUM
by ROMONA
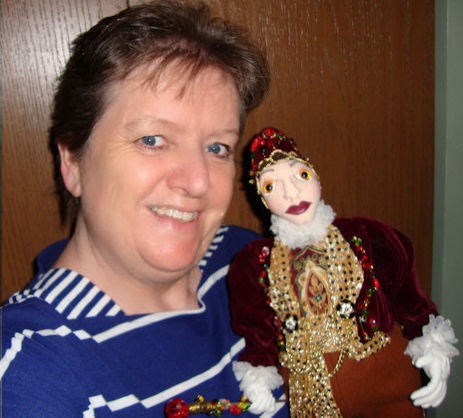
The author...
![]()
My interests are doll making, needlework, sewing and many other hobbies which also includes mixed media.
Since I was a child I was always busy making things and over the years my interests have grown and I’m always wanting to learn new things.
My current passion is my doll making and I hope to one day design my own patterns.
I hope you will enjoy this tutorial I have produced for you and that you will make a beautiful album of your own.
© 2011 Romona King of Northbrook Designs
Visit the ROMONA Website...
Her just wonderful blog ....

And don't forget to sign the guestbook while you're there !
THE TUTORIAL...
This tutorial is yours to get inspired with. Please use it to create your own creative album and all I ask is that you tell others where you got this to give me credit for my efforts. My thanks to Meeri who first showed me what a coffee filter album is. ;o)
Before starting, you may just want to read this on your computer rather than print it. Throughout the tutorial I used a lot of colour illustrations from my own album and that will take a fair bit of ink to print.

To make these albums, you don’t need to been overly artistic or have a big set of skills, but what you do need is the desire to open up your creative mind and let your muse help you.
A lot of time
we get caught up in thinking we can’t make something like another person or do it as well or any
number of thoughts. Remember, everyone starts at the beginning as well and just did what we all
have to do to improve our abilities.
Practice, experiment, and repeat many times. Enjoy the process of making your album and try not to get too hung up on details. Let go of the rules you think exist about what is supposed to match with what, IE: does this lace look right, what about these pictures or colours. Forget that, just relax and play. That’s what kids do, don’t take yourself too seriously. The only thing to decide on before you start is, do you want this album to have a theme. If so you will have to collect your papers etc. based on that theme.
My album is based on Marie Antoinette. I chose all my trims, embellishments, adornments in
general, papers etc. based on the Queen of France.
The doll club hosted a gallery show in 2010, the art pieces I submitted, were loosely based on the Royal Court of Marie Antoinette. I wanted a way to remember what I did for that show, so this album is a pictorial as well as images of the Queen of France past and present (based on the movie with Kirsten Duntz).
Think about what you want your album to mean to you and choose your supplies according to that.
 Supplies you need
The basic supplies include:
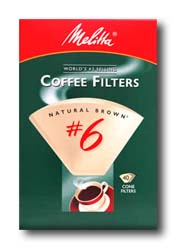 · Melitta coffee filters – either size # 4 or #6, I used the larger size.
· Two pieces of white card stock (8 ½’’ x 11”) printer paper will also work
· Pretty papers for the covers, preferably card stock weight. The papers in the left side
picture below came from our local stamping store. Along with the papers came these
smaller pieces in the right side picture that were part of the same large papers. These will
be perfect to use in small areas.

. Pictures, trims (such as gimp or lace etc.) and assorted embellishments.
· Pencil, scissors, glue stick, tacky glue....
 Other extra supplies
could include:
. Stickers from scrapbooking shops and there’s always the dollar store. . Brads are perfect for this
as well and they come in all kinds of wonderful types. Some with jewels, metallic, shapes like
snowflakes....
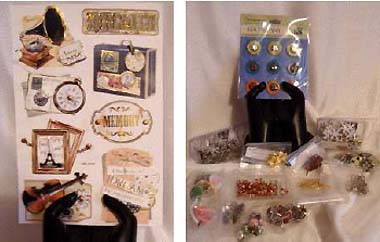
. Find some great free fonts online and make up some personalized sayings.
. Think about rubber stamps and inks, photo corners, grommets metal washers and how about some Steam Punk ephemera and you’ll need some fibres, knitting fibres offer a great range of options. I have a collection of lovely greeting cards that I also used for pictures.
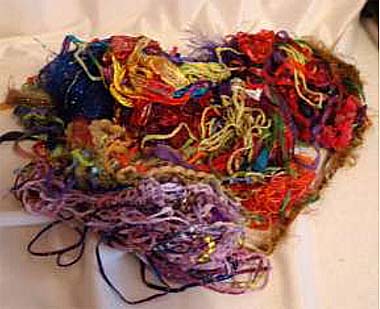
I didn’t realize until I was taking the picture that I had placed the fibres in a heart shape, must
be a good sign. ;o))
You don’t need to pull all your supplies out at one time. As you work on the album, you will definitely find that some things will just naturally work, others won’t. So let’s get started. Read through all the directions before you begin so you understand how each step comes together.
The step by step...
 Step 1
Take one of your coffee filters and lay it on top of a piece of white cardstock or paper. Trace around the filter with your pencil.
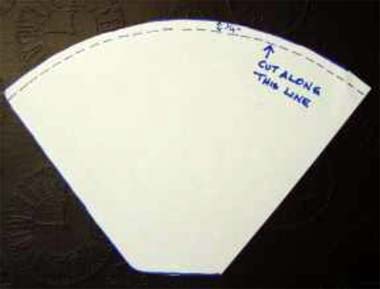
Remove the filter and draw a line 1/4th of an inch inside the traced line. Cut out the drawing along the 1/4th line you drew and now label it as “Cover Template”.
 Step 2
Lay the template you just created on top of another piece of white cardstock and trace the new template. Remove the template and draw a line 1/4th of an inch inside the traced line. Cut this new template out and see if it will fit inside the coffee filter. It should not be forced.
If you find it’s too tight, cut away a little more from the edges until it will slide into the filter. Think ahead a little as to what your sleeves to have on them as that might require you to cut a little bit more away from the sides so the sleeve will fit.
When it fits, label it as the “Sleeve Template”.
 Step 3
Now you’re ready to begin.
Do you know how many covers you want to make? Lay out enough card stock and pretty papers to be able to cut two “cover templates” for each coffee filter. One will be for the front, one for the back.
Trace on the back side of the papers with a pencil and as you cut out the cover papers, cut so that you trim off the pencil line.
Use your glue stick along the edges on the back side of the papers, then carefully center them on the filters and press down to help adhere them.
Continue to apply papers to each filter, back and front.
Look at the picture below: on the left is the coffee filter, in the middle is the card stock labelled as the “cover template” glued to one side of the filter, and to finish, the paper on the right is the "sleeve template" that will fit inside the coffee filter.
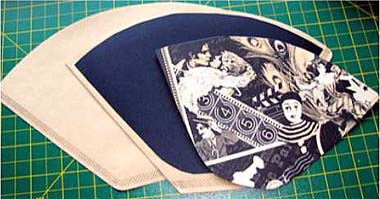
NB: if the paper you choose for the sleeve template has a pattern on both sides, you can cut just one sleeve. If it doesn’t, you may want to cut another sleeve template and glue the two together..
It’s entirely up to you whether you want both sides to have a pattern. Continue to add the covers to both sides of the coffee filters, then cut out the number of sleeve templates you will need.
 Step 4
At this point you are going to have to use your creative energies to decide how to dress up your album covers. This is not a place where I can do much except show you pictures of what I did and you can draw on my ideas to work on your album.
I will give you the order that I used for creating my albums so you will have a starting point.
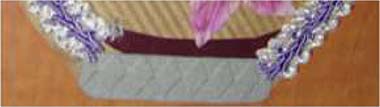
· I cut a piece of trim to place along the long curved edge of the filter and glue those in place. Then I add more trims along the two sides, usually a different trim.
· I do all the fronts and backs that way and then allow them to dry.
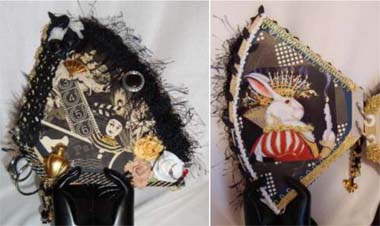
· Then I go through my pictures and decide what I am going to use as either a focal point as
in the Rabbit further down in the tutorial, or a collage of pictures. Google Images is a
great source of images if you have a particular theme as I did with Marie. You just have to
reduce them in size in your graphics/photo editing program.

· After I have arranged my pictures on each front of the filters, I glue them in place, let
them dry a while then flip them over and do the same thing on the back with more
pictures.
· In the picture above you can see that I used photo corners on some of my pictures as well, it gives a nice finish and the corners come in a few colours at art stores, photo shops, scrapbooking and more shops.
· Now you just have the fun of adding your embellishments, like flowers, rhinestones, brads, stickers, strings of beads or make your own.
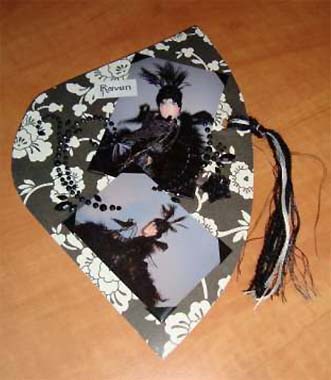
· After all that is done on both sides, you can then work on the sleeves. The sleeves can showcase whatever you want. Family pictures, trips and more. For my album I used pictures of the dolls I brought to a gallery show and again I added some embellishments, but to a lesser degree or they would never have fit into the filters.
· See the tassels. That’s where the fibres come in. You need to punch a small hole on the
long edge and loop some fibres through the hole. Those will be used to pull the sleeves out
of each filter of your album. Nice huh.
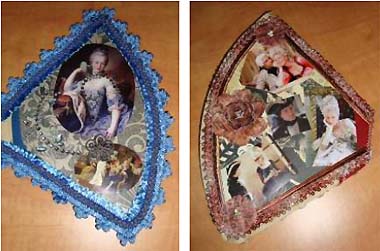
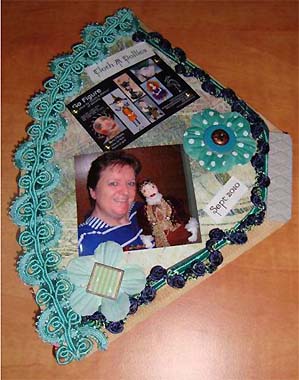
Another thing you should include in your album is you. In my case, this album was created for my dolls in the gallery show, so I just had to add a picture. This is the back side of the first coffee filter in my album.
 Final step
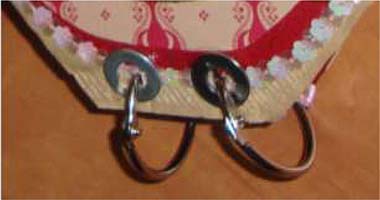
You need to join all the short edges together. You can do this in a number of different ways. Add some kind of stabilizer to the edge.
I tried a few different things, grunge board from Tim Holtz, metal washers and Gaffer Tape by 7 Gypsies. You then have to punch two holes evenly spaced and add a big ring to hook all the covers together.
The metal washers work well but you have to use a very good glue or they will come off. The tape worked well, but it is harder to punch holes into as is the grunge board.
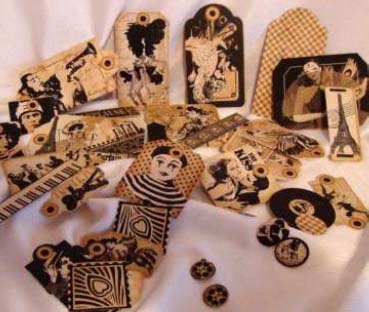
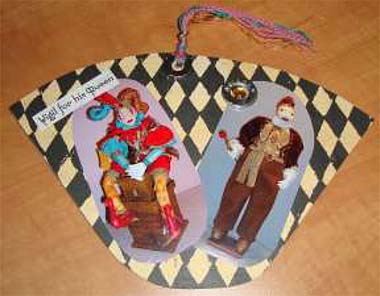
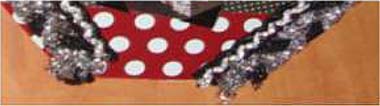
Below are more pictures of my finished coffee filters, to show you a multitude of things you can do to your own. Use a variety of hairy trims, gimp that comes in all styles from metallic to flat cotton types.
I have added a small door knob embellishment in the picture below as it will be the front cover of the album. I got that from joggles.com a product by 7 Gypsies. There are also a variety of paper flowers here and there throughout. I got a bit carried away with embellishments, but it just happens that way.
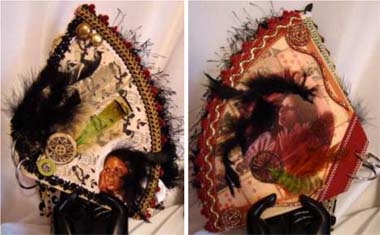
In the pictures below you can see that I have used feathers. The Native women are from
greeting cards and I just loved the look, they gave me a great inspiration to use not only the
feathers but also the large beads, wire embellishments and a decorative cord that I twisted in a
coil at the top and bottom.
By contrast, below the Native women one is soft and feminine and then a theatre theme. You can see how each cover can change dramatically by what you add to them.
There is just no right or wrong, it just is what it is...art. Art is subjective, what one person thinks is breathtaking, another will find absolutely nothing appealing, so always do whatever it is that makes you happy.

Now that you have finished all the coffee filters and the sleeves there’s only one more
thing to do. Put all the sleeves into your filters, and enjoy. You’re allowed to exert your
bragging rights for the work of art you’ve just created....
![]()
© 2011 Romona King of Northbrook Designs
Encyclopedia
of scrapbooking
Creating Keepsakes
Introducing the scrapbooker's new best friend. When it comes to making the most of your memories, take a page from the Creating Keepsakes experts.

(click to enlarge)
Beginners and more experienced scrapbookers alike will turn to this hefty new reference guide time and time again for helpful insights and daily inspiration on tools, techniques, layouts - plus all the can't-miss tips you'd expect...
my opinion : one of the best !
OutStanding
mini album
Jessica ACS
Mini albums have become a popular medium for scrapbookers - they are small enough to complete in a timely manner but big enough to tell a story.
(click to enlarge)
Features 50 albums with step-by-step instructions for over 30 projects - perfect for scrapbookers of all levels.
my opinion : if you love mini album... it's the right book !
Make It in Minutes :
Mini-Books.
Roxi PHILLIPS
So many styles, so many reasons to make them !

Every one of the 45 projects is charming and quick to craft and is perfect for celebrating everything from holiday memories to childhood events...
My opinion : All the basic techniques are covered, along with plenty of tip boxes and many advices on choosing paper and other materials.