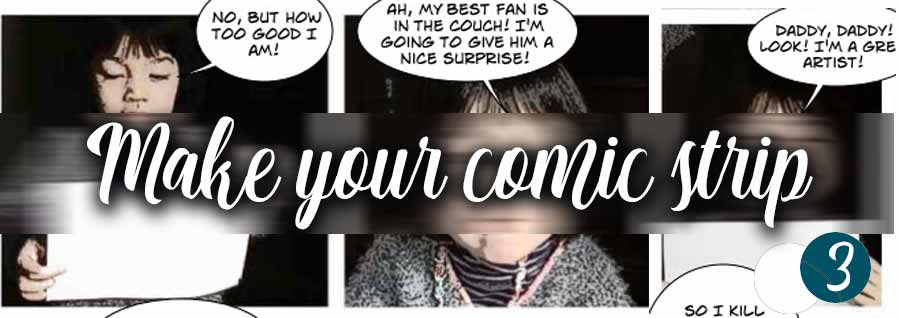
MAKE YOUR COMIC STRIP
FROM PHOTOS (3)
Part 3: BUBBLES AND DIALOGUES
In previous pages you have seen : IMAGE PROCESSING, and PAGES LAYOUT ... Now here's the last part : BUBBLES AND DIALOGUES.
Again, there are many methods to draw the bubbles and fill them with text ... We'll suggest you one that has no complications. And if you do not want to prepare your own empty bubbles, so they are available for download HERE.
Everything is done using PHOTOSHOP CS3 and its basic functions. It should be easy to all translate instructions in another image processor: Paint Shop Pro, Photofiltre or Gimp ...
 Show the forms bubbles in Photoshop ...
In the PHOTOSHOP "forms", there is a small library containing comic bubbles ... Why not use them? Here's how:
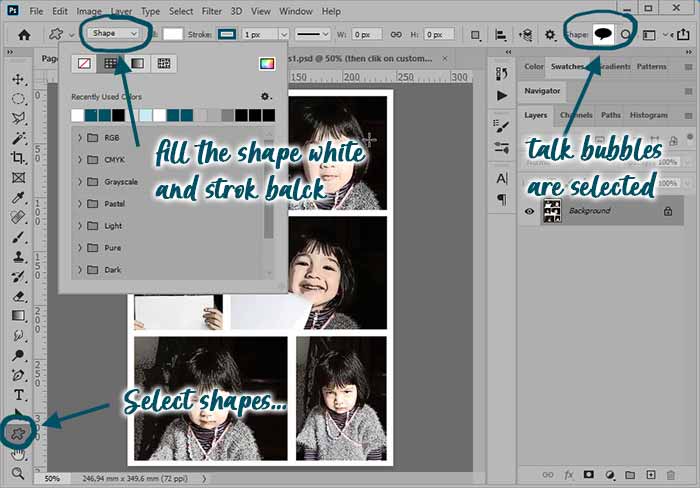
In the toolbar, click on the tool forms and select the custom shape tool:
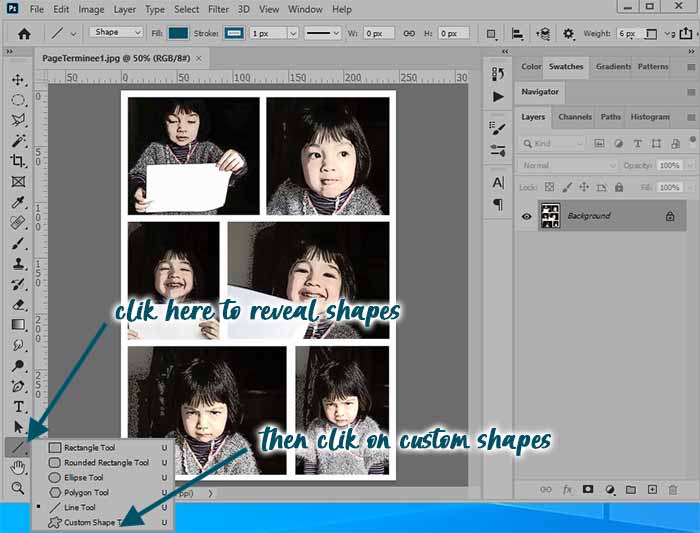
Under the menu bar, open the library of forms ... There is already a bubble but we will reveal others:
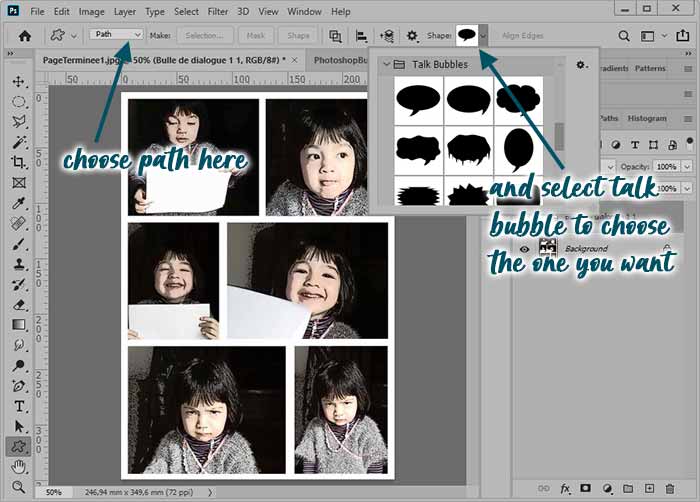
And in the list that appears, click on Talk Bubbles. You now have a library of bubbles of different shapes ...
It remains only to use them !
 Use the PHOTOSHOP's "bubbles" ?
Open your comic strip board ... you can concentrate on the first image ... If the image background is dark you'll choose a light gray color for the bubbles (as an example) so they well stand out...
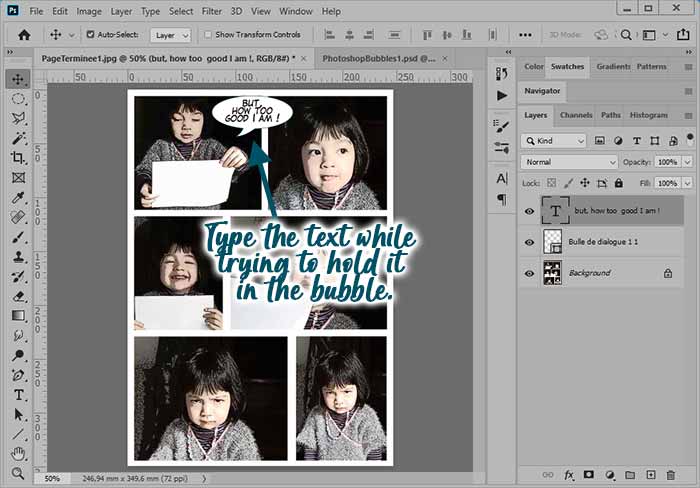
Choose a form of bubble and draw it directly on your picture with the mouse. A new layer appears in the Layers window (F7 if it is not open).
Right click on this layer and choose the option: Rasterize layer. Do not worry about the size of your bubble, you can adjust it after writing the text ...
 How to type your text in the bubble ...
Now take the Text tool, the foreground color Black. Click on your image without releasing the click and draw the zone that will contain your text.
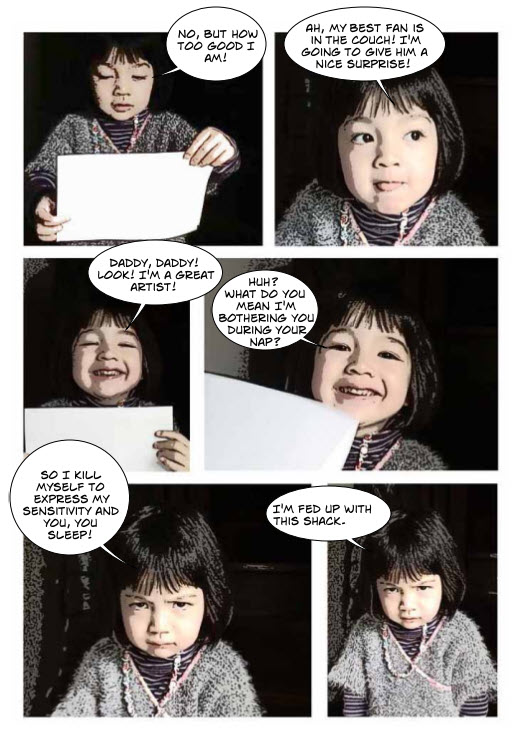
Now type your text ... "BUT HOW TOO GOOD I'M !!!" (Mais comment je suis trop douée, moi !).
Select the bubble layer in the window layer (Forme1). Make Ctrl + T and push the handles to resize the bubble depending on your text.
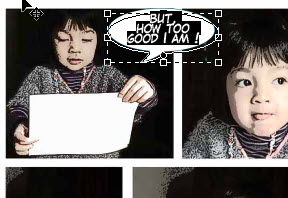
With the handles, adapt the text to the bubble or enlarge the bubble to fit the text...
Choose an adapted font... You can use LAFAYETTE, ANTI HERO INTL BB or COMIC MS fonts... or any other at your convenience. It's probably better if you type in CAPITAL letters as in a "real" comic ...
When everything is correct press ENTER and proceed to the second image...
 Properly orient the bubble ...
PHOTOSHOP bubbles have their "peak" towards the left and down ... If you want a bubble pointing to the right, select the bubble and then do Edit>Transform>Flip Horizontal.
For a bubble upwards, you can do Edit>Transform>Flip Vertical.
Use also the "thinking" bubbles ... if you need ...
To achieve this "special effect": the little girl is shouting her dad : " loooved daaad !"
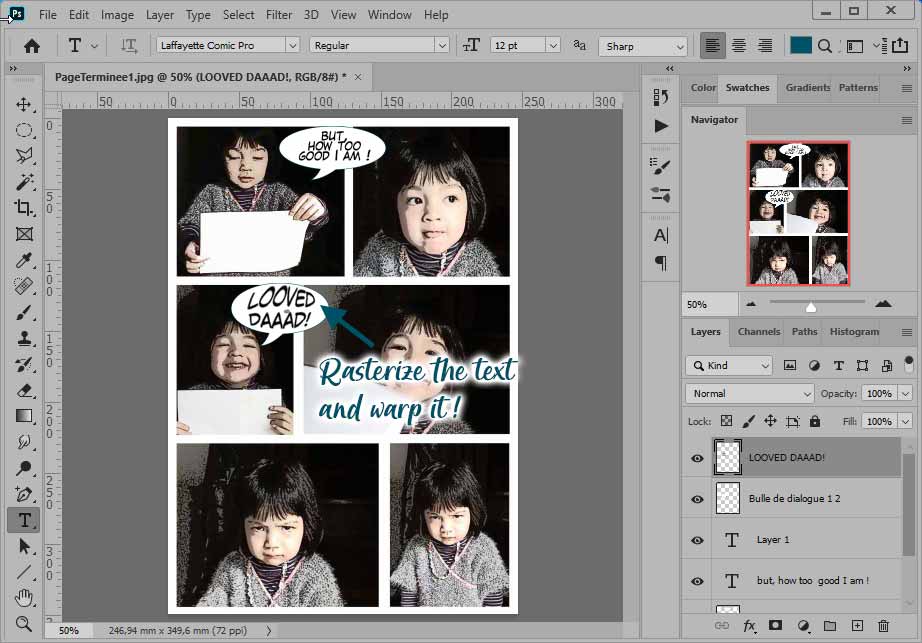
Begin typing your text and right click on the text layer ... and select Rasterize the text. From now on, the text behaves like an object that can bend and deform at will ...
Select the rasterized text and do : Edit>Transform>Warp and act on the handles to stretch and distort your text ...
Feel free to overflow a little bubbles on the panels to the side or even on the margins ... It gives rhythm to your achievement ...
Personnellement, et pour ce dernier exemple, j'ai utilisé le logiciel COMICLIFE de chez Plasq, pour placer les bulles et les remplir...
Learn makingcomics!
Making Comics:
Storytelling Secrets
of Comics,
Manga and Graphic
Novels
Making Comics, like its predecessors, is also an eye-opening trip behind the scenes of art-making, fascinating for anyone reading comics as well as those making them .
Drawing Words
and Writing Pictures:
Making Comics:
Manga, Graphic Novels,
and Beyond
Learn to create your own comics with Drawing Words and Writing Pictures, a richly illustrated collection of 15 in-depth lessons that cover everything from crafting your story to lettering and laying out panels.
Cartoonizing is easy! : From the first pencil stroke to completion [Paperback]
This comprehensive book includes 50 lessons and 50 exercises and put the comic strip making to everyone!
In french language... but easy to understand