MINI ALBUM PHOTO 8 pages
(1) THE FOLDING TECHNIQUE
The manufacturing technique of this mini-album described in this page is not new, far from it! But it is not well known and reminding those who had forgotten it is not useless. It is in any case an ideal technique to produce mini photo books that you can easily reproduce and distribute to those you want....
Teachers, also secondary school teachers, use this technique to distribute "mini-books" to their students that are adapted to their teaching...
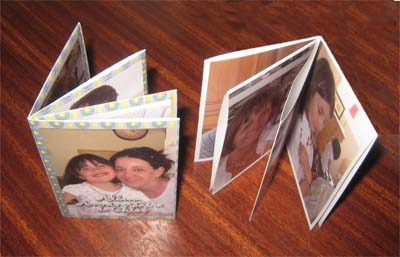
Thanks to this folding, you will be able to quickly make and decorate 8-page mini-book-photos, starting from an A4 sheet.
Then everything is possible: embellishments, cardboard covers... At your convenience! The only obstacle: knowing how to use image processing software (Photoshop, PhotoFilter, PhotoImpact, PaintShop Pro...) to place the photos, which will not be a problem for many of you.
 Example ready to print
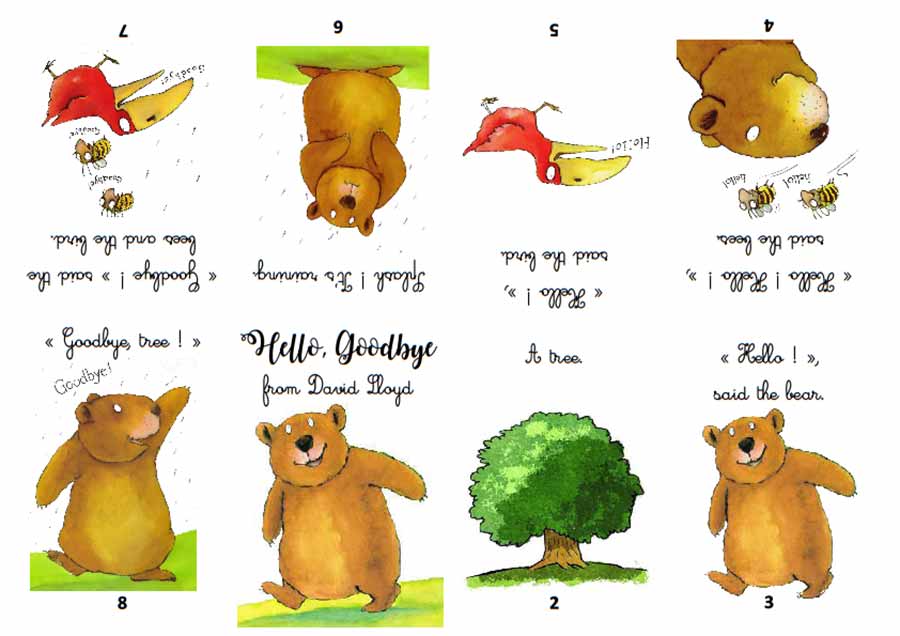
Take a look at this little book "hello Good Bye" made by a teacher in English to start with her students...
You will find all the details HERE. Click on the image to download the pdf...
So take an A4 sheet with you... and let's get started!
 Principle of the production of the mini-album
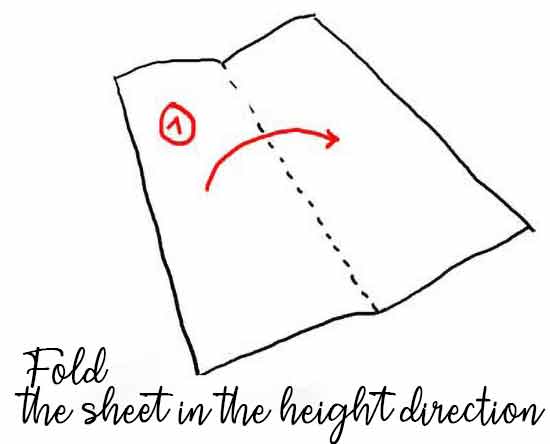
Start by folding your sheet in the height direction. Make sure you mark the fold! Then open the sheet.
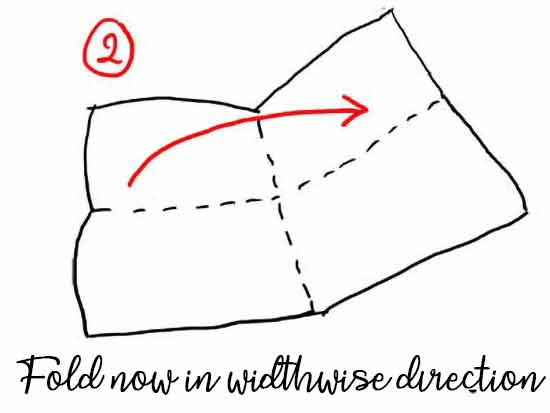
Now fold your sheet in the opposite direction while continuing to mark the folds.
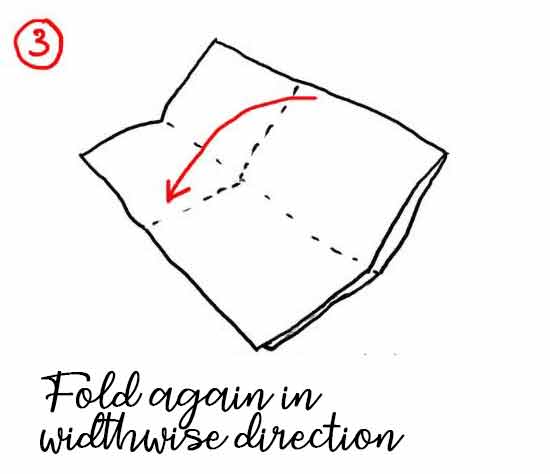
Without opening the previous fold, fold in the same direction again:
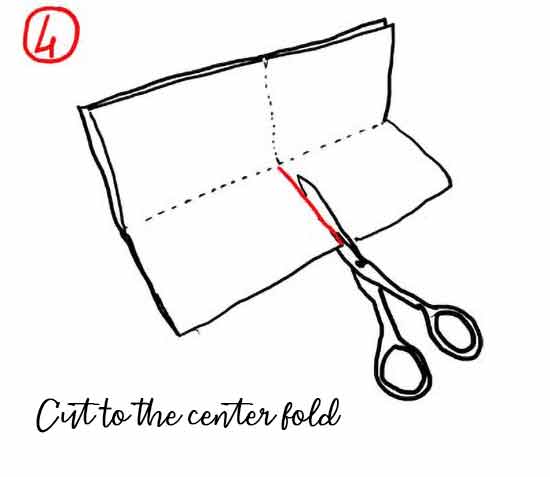
Open the previous fold and cut to the center fold....
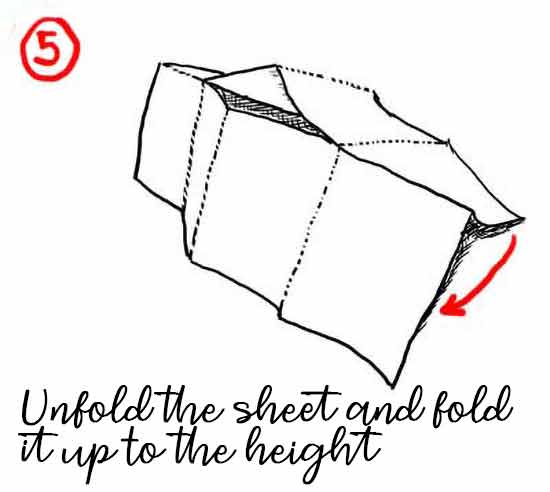
Now open the sheet, and fold it up in the height direction. An opening is formed in the center....
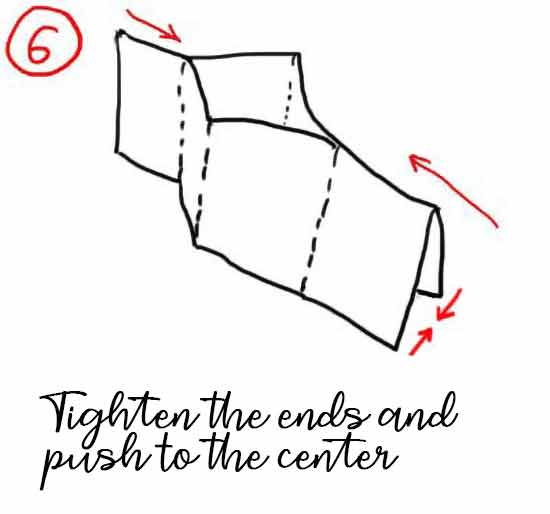
Continue to tighten and push towards the center:
Push again... the two central flaps reform and fold forward, forming 3 pages of the mini-book. Fold the fourth page forward....
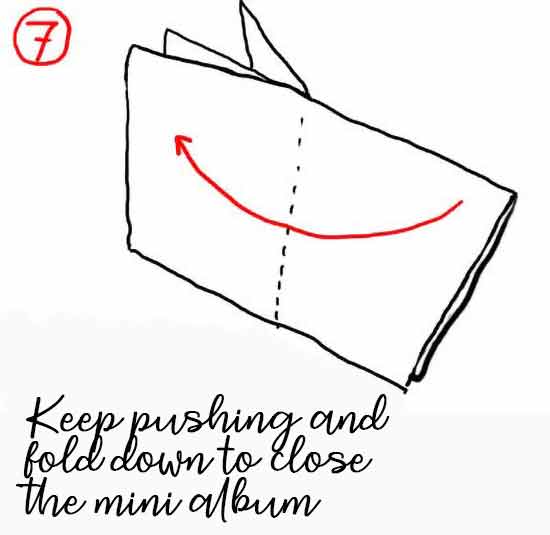
Your mini-book folding is finished!

 How to set up the photos?
On the trial mini-book, you can number the pages, from 1 to 8, by symbolizing with a small arrow, the direction of the photo. By unfolding the mini album completely, you get the map of the page.
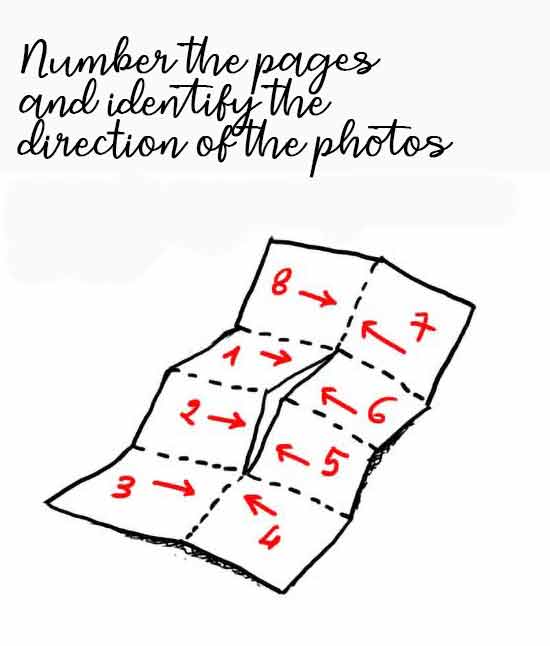
We now know where to put the photos so that by forming the mini-album they can be assembled correctly.... Now it remains to work with your image processing software to place them in the right place....
Go to the next step !