Make your comic book
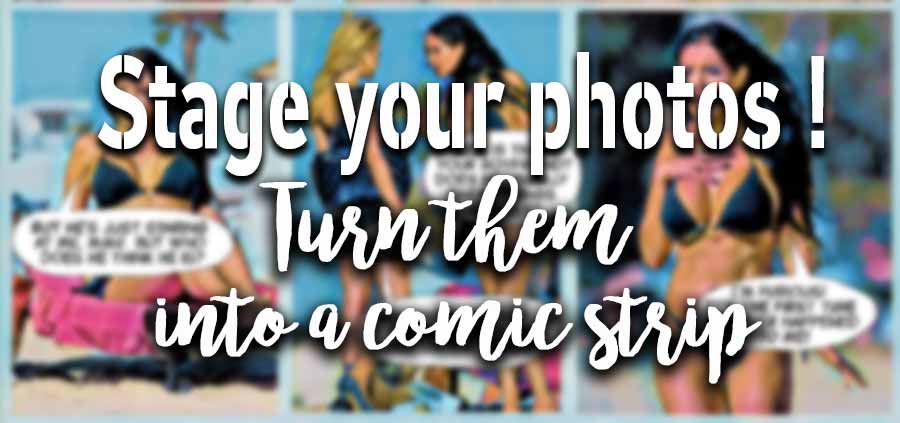
Staging your pictures!
Tell a story with your photos!
You are looking for a better way to present your photos...
It's time to change and start a "photo-novel"... that's gonna have the apect of a comic book!
You took the kids for a walk by the sea and took about 50 pictures... or you shot your girlfriends without measure during the last girls' night out... Why don't you stage these photos and turn them into an original comic book?
That's easy, you'll see... A little photoshop, a little Android... And that's it!
Note that if, instead of photoshop, you prefer to use "TheGimp" or another image processor it's perfectly possible...
Here is a list of free alternatives to Photoshop: GravitDesigner, Gimp, Paint.net, SumoPaint... which perform the same operations as Adobe's software... The important thing (although it is not essential) is to have a graphics processor that allows you to use layers.
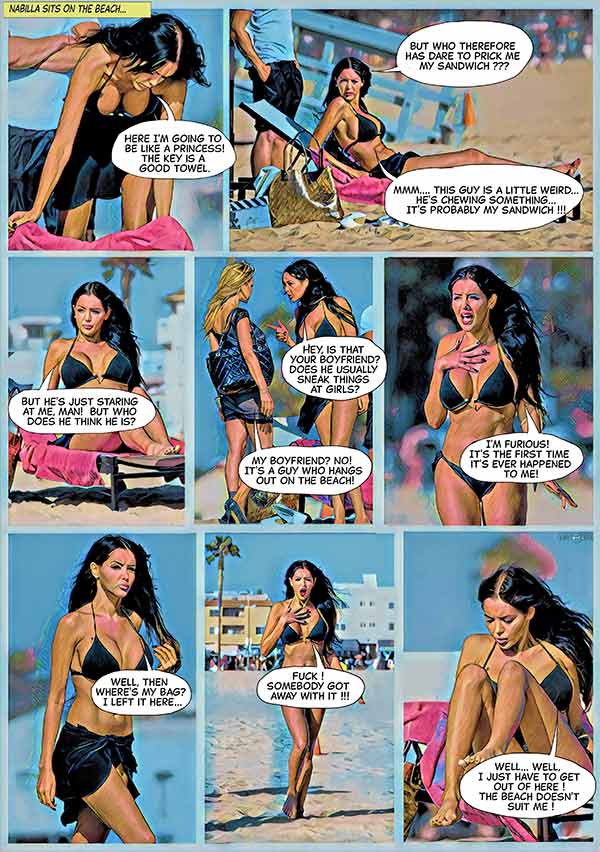
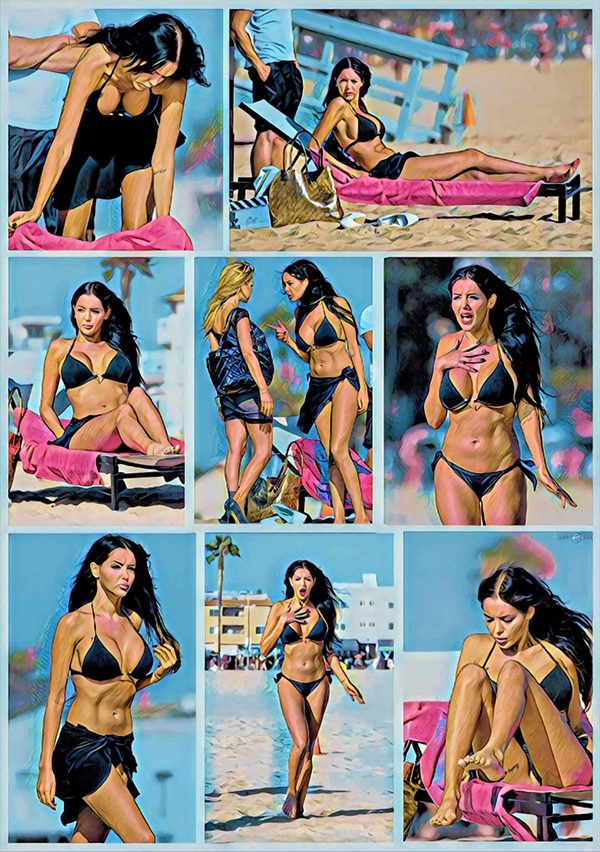
As for the final comic book... here's a little preview, just to give you a picture of the result we can get.
Of course, before putting the photos on the grid, you must have a little idea of your script... and the dialogues that will accompany it. This is an essential step before moving on to the next one!
This complete tutorial is very long... Feel free to use the links below to navigate more quickly through the different phases.
Step 2 Mounting the photo grid >
Step 3 : Setting up the images >
Step 4 : Page processing in PRISMA >
Step 5: Bubbles and speeches >
Collect your pictures !
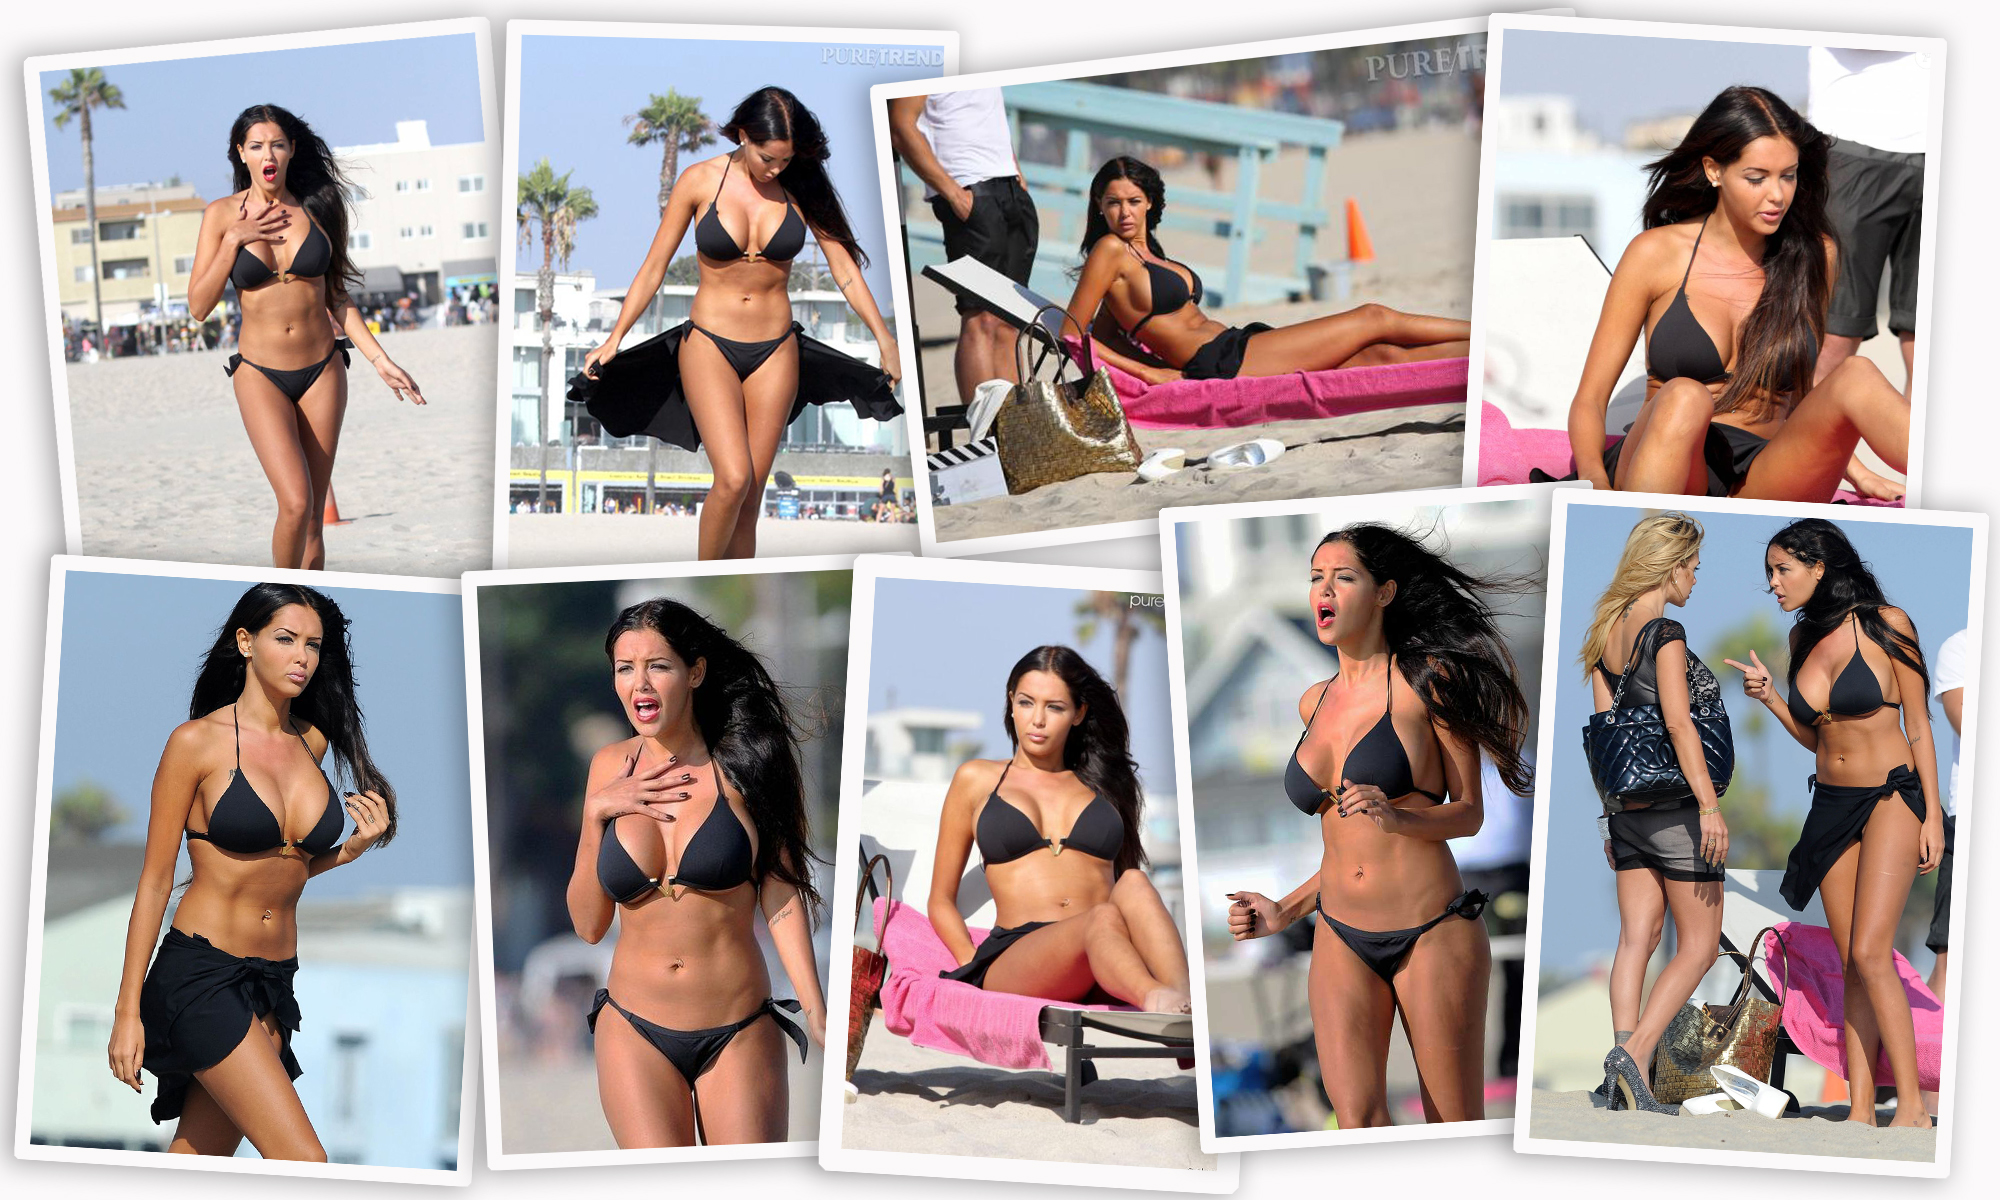
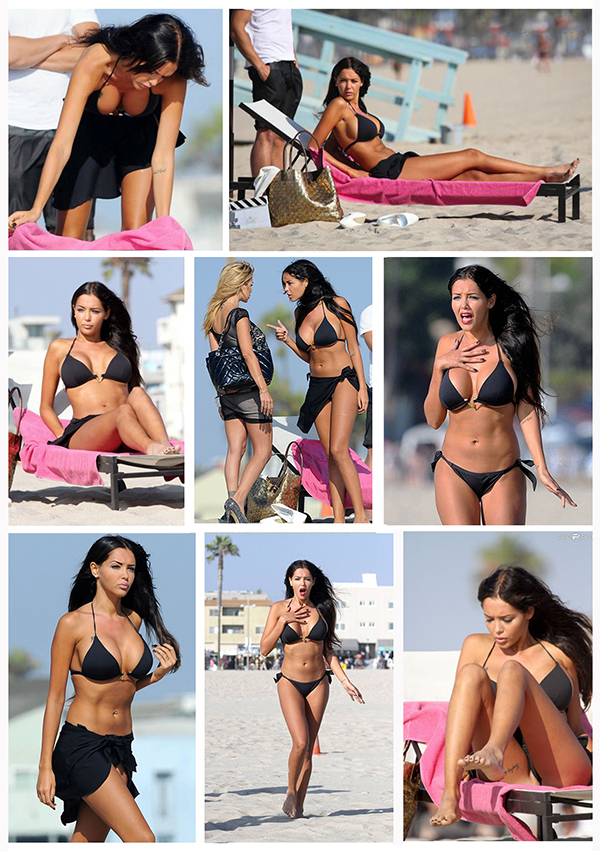
For me, I searched on the net for pictures of our national bimbo Nabilla, shot in a mini black swimsuit on a beach in California... With the intention of creating one or two comic book pages ... Here is part of the result of my research:
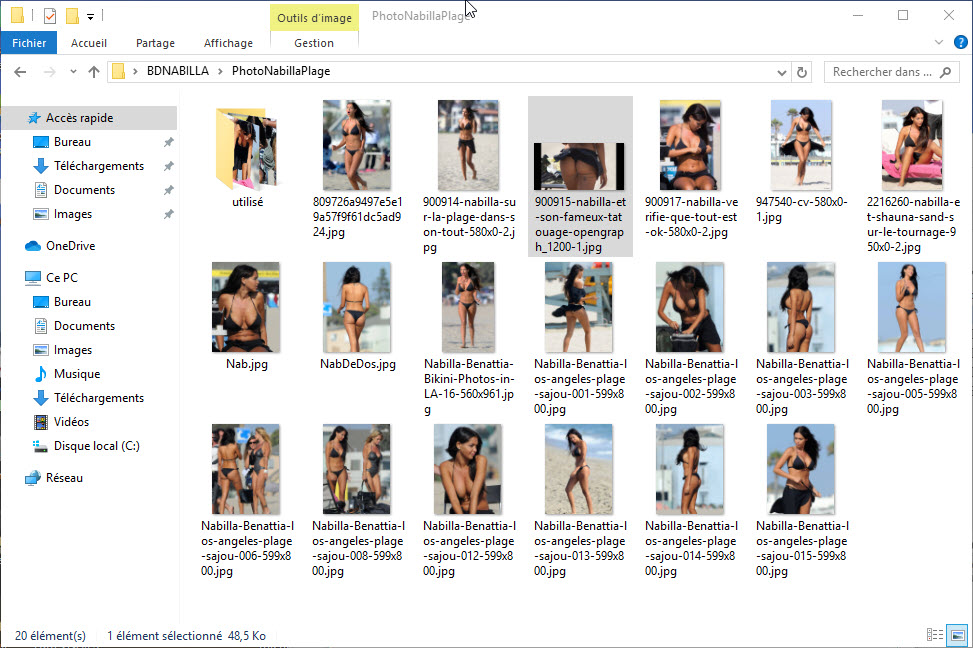
You're going to collect the pictures you want to stage... Collecting them means putting them together in a folder that you will place in a known location.
This way, when you place your photos on the grid of comic boxes, you won't have to look for them... they will all be in the right place... And you can put them in place by simply dragging and dropping them.
A good method is to put aside the photos you've already used: if you only have 6 photos to place, it's not worth it... but if you've launched yourself into several pages (an album, who knows!) you'd better be perfectly organized that's why this directory contains a "used" folder.
No doubt you will be able, while you are putting your photos in the folder, to start imagining the scenario of the story you want to tell ...
Build your comic book grid
Once you have an idea of how your photo-novel will unfold, your first job will be to position the images in order to layout them .
Nothing very complicated here: it is a question of creating on a virtual sheet the places on which your photos will be placed...
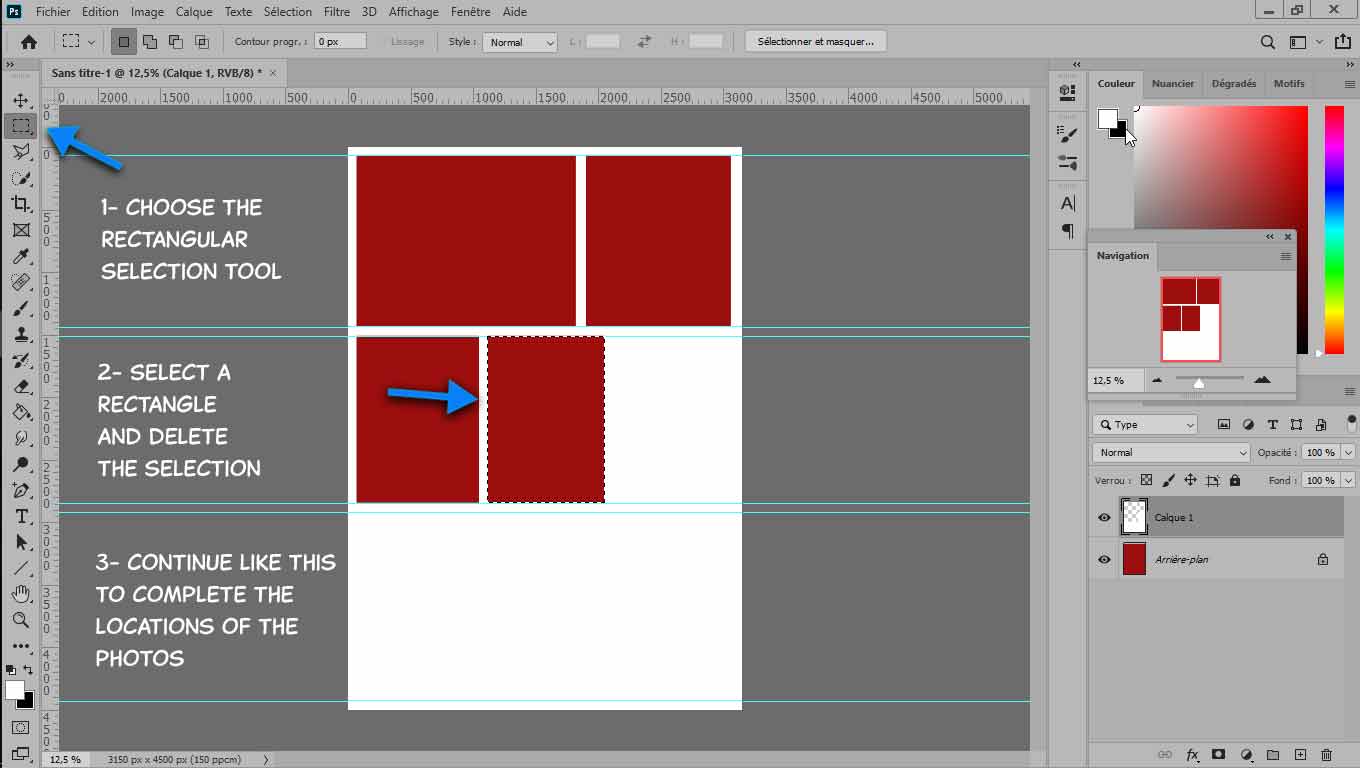
To do this, open photoshop and create a new page in A4 format (21x30cm). For visibility reasons, I chose a red background for this image...
Create a new white layer which will be in the foreground. You will, with the rectangular selection tool, hollow out this white layer to make a kind of stencil. The photos will be inserted between the background and the foreground...
Place yourself on the foreground layer. You can position rulers to divide your sheet into 3 horizontal areas. Don't forget to steel the magnetism of the markers it's easier to line up the squares properly.
Then take the rectangular selection tool and select the location of your first image in the top left corner and press delete to erase your selection. The red background appears...
Continue for each photo location... Here, my page will have a total of 7 photos on 3 lines.
This way you can see where your photos will be placed in the future until the end of the page. This way you get the stencil grid of your comic page.
When all the slots are empty save your grid. You are ready to move on to phase 3 and place your images.
Arrange your photos on the grid
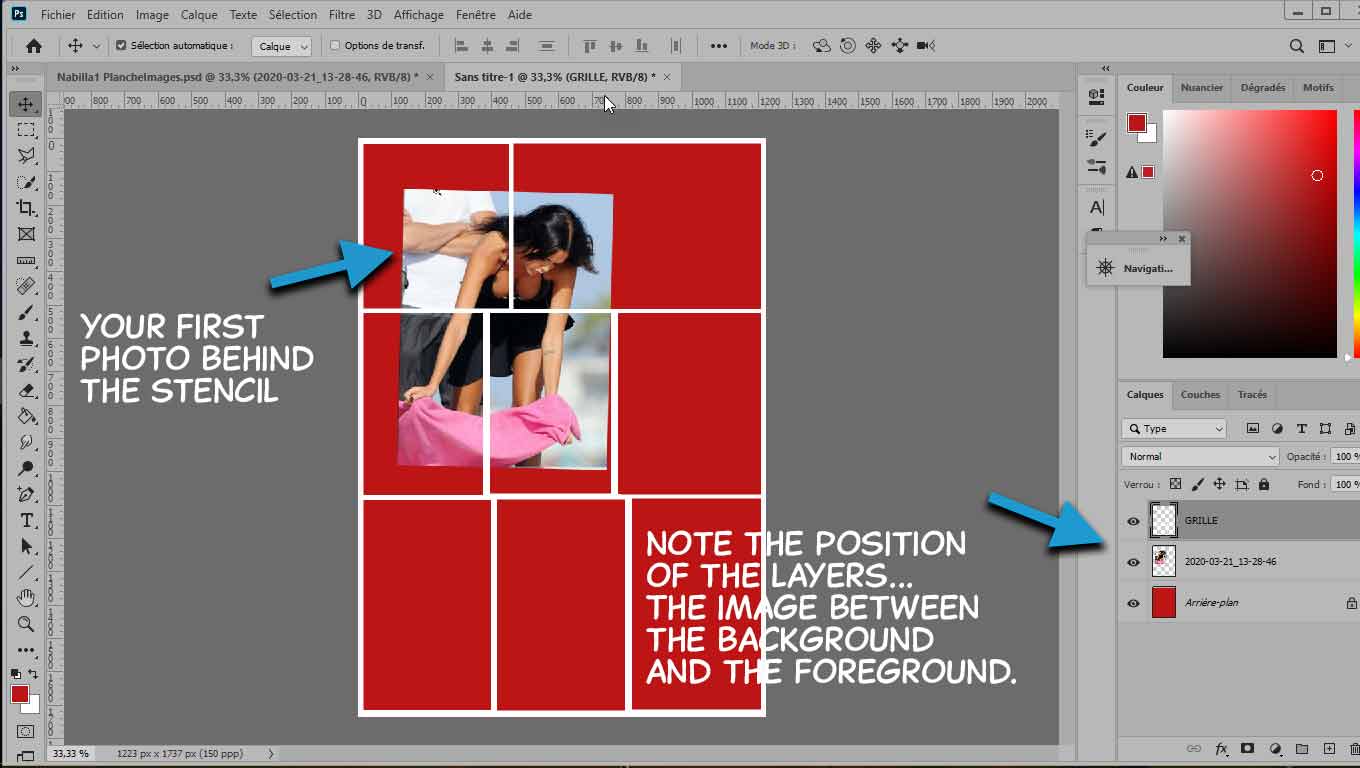
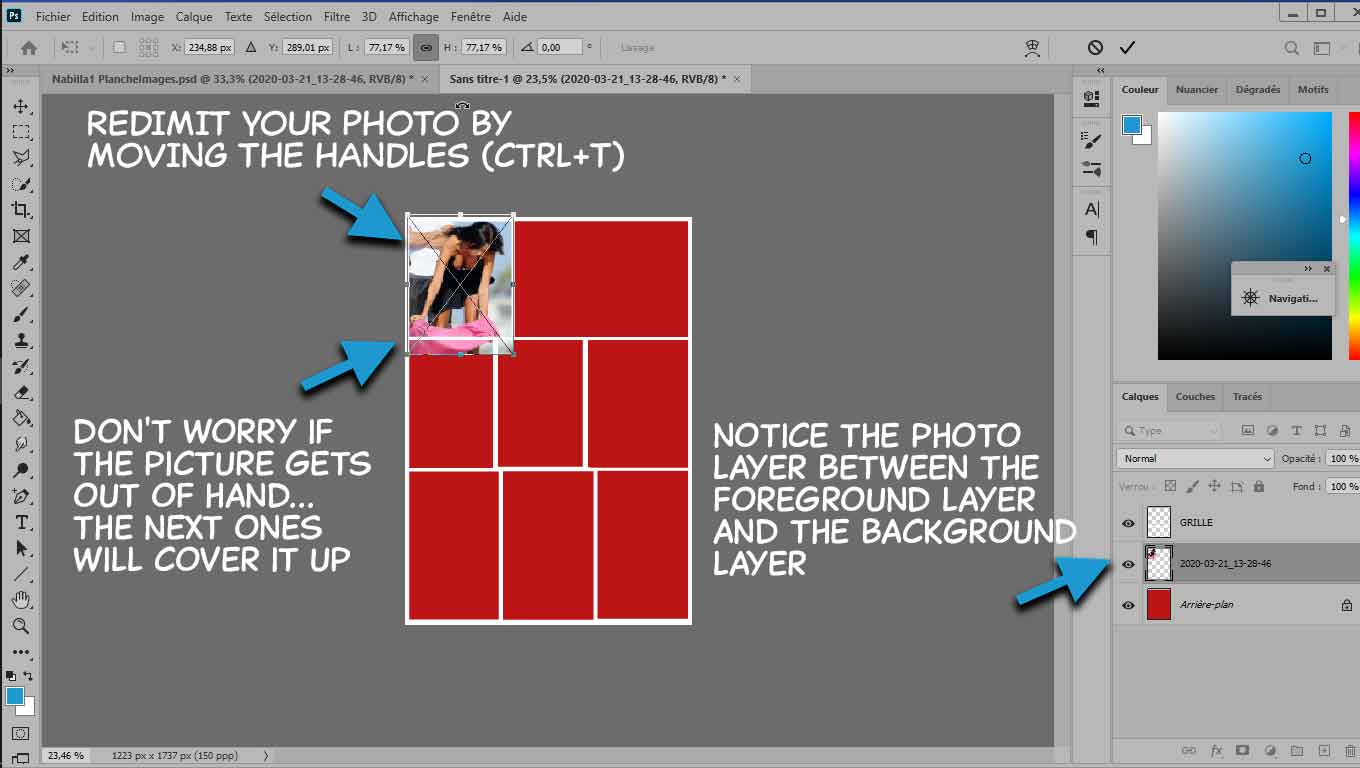
Select the background layer and drag and drop your first image... This image is superimposed on the red background and is partially masked by the white grid above.
For me, it's Nabilla arriving on the beach and settling there...
You will now adapt the image to your grid... To do this, in photoshop, do CTRL+T. Adjustment handles appear. Act on these handles to resize the image... Don't worry if it overflows in places because the following pictures will come over and hide it.
Continue with the other photos until you fill your grid...
Save your work. You now have your "picture board"...
It's time to turn this photo board into a comic book page image...
Pass the photo through the PRISMA filter
There are software to transform a photo into a comic book drawing: you will find the description and the loading links on this site in the GRAPHICS section . But they are a bit dated and don't often work properly...
New image processing softwares, mostly online, have been released since several years. Some of them are excellent because they have some artificial intelligence and really efficient algorithms. One of the first: PRISMA is completely free (at least for what we want to do with it) and gives very good results.
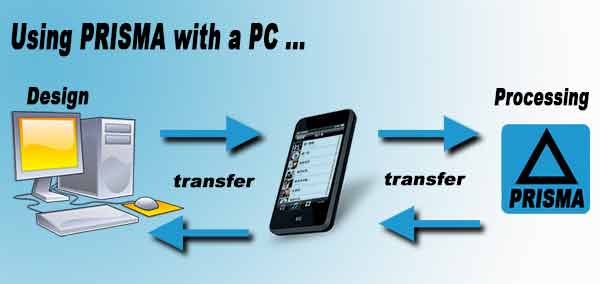
The only problem is that PRISMA is not accessible (at least to my knowledge) directly with a PC... It is only available on a mobile phone (AndroId or IOS) or an Ipad. So there will be a little manipulation to do...
You're going to transfer the image on your mobile phone... With this one you will process the image in PRISMA then, when you are finished, you will transfer the results to the PC...
First get PRISMA on your iPad or mobile phone. To do this go to AppleStore or GooglePlayStore and install the application. No hassle, less than a minute!
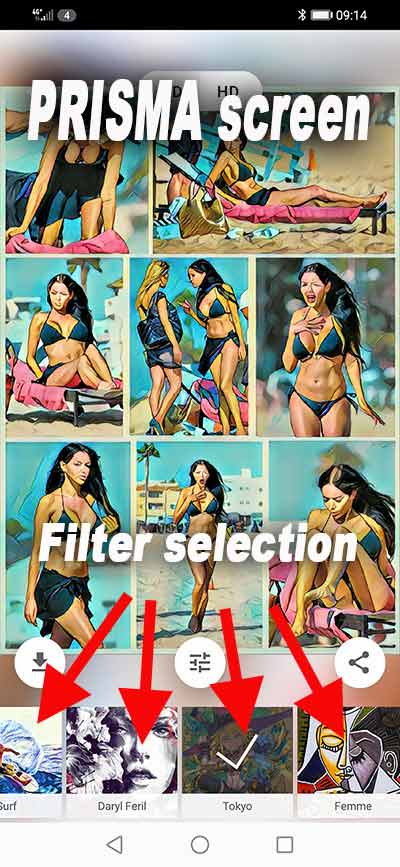
Transfer the image you have to cartoonize in your mobile phone and launch PRISMA... Choose your filter among those available... Here is a screenshot of the screen being processed...
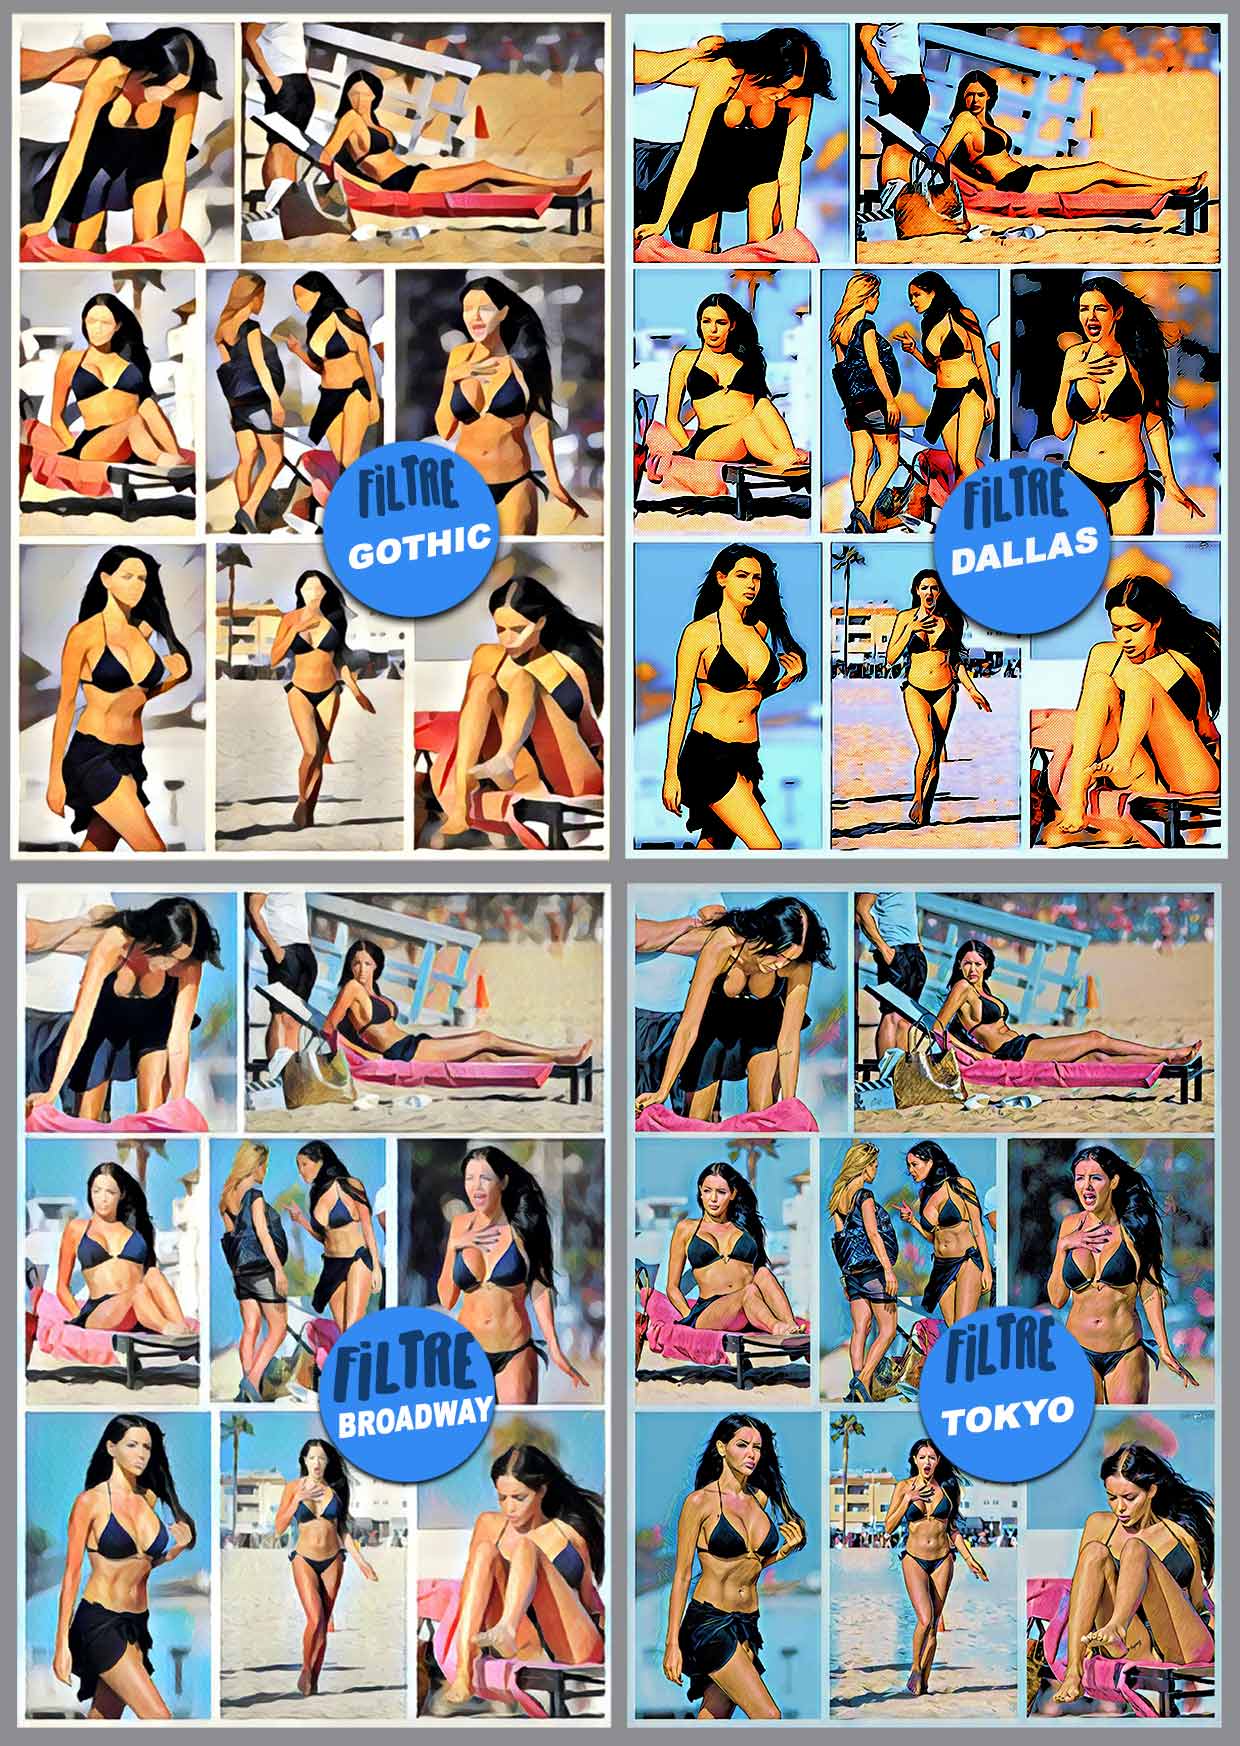
I've tried 5 or 6 of them, recording the results each time... Here are the image boards obtained with 4 of the proposed filters... Try the others !!!
I rather like the result obtained with the "GOTHIC" filter. The colors are perfectly simplified but there is unfortunately no stroke... So I didn't retain it!
And, for this tutorial, I chose the TOKYO filter... Personal choice that might not have been yours !!!
We'll be able to move on to the next phase... bubbles and dialogues...
Set up the bubbles and speeches
There are no real techniques to create bubbles... since you can import them, draw them by hand or use the ready-made bubbles from PHOTOSHOP....
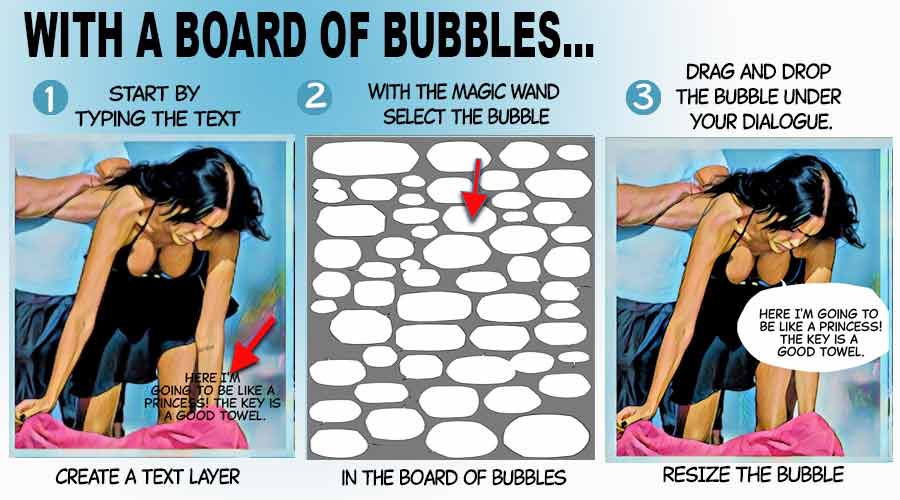
It is easier to write the text first and then draw or copy the bubble just below.
The text will be written with a "special comic" font. You have the choice! I rather like the Captain Comic font that you can download everywhere... The BAMBLOT website is specialized in COMIC fonts... it's a real gold mine!
Once text is typed, in a new layer below the text layer, draw the outline of the bubble with its tail and then with the paint bucket, fill the bubble with the desired color .
Drawing a bubble with the mouse is not easy... it is better to have a graphics tablet... look at this page for more information...
Work on the whole page. For each bubble you will create 2 layers: one for the text and, underneath, the layer for the bubble . Notice in the penultimate thumbnail, the text placed and the bubble moved below... When the bubble and the text are correctly positioned, don't forget to link them by clicking on the padlock... Vous pouvez aussi utiliser des planches de bulles toutes prêtes... You can easily find them on the site deviantart.com more specifically ICI . All you have to do is choose a bubble, select it with the magic wand and stick it in the desired location.
Eventually, give a black outline to this bubble and modify the tail if necessary.
Work on the whole page. For each bubble you will create 2 layers: one for the text and, underneath, the layer for the bubble . Notice in the penultimate thumbnail, the text placed and the bubble moved below... When the bubble and the text are correctly positioned, don't forget to link them by clicking on the padlock...
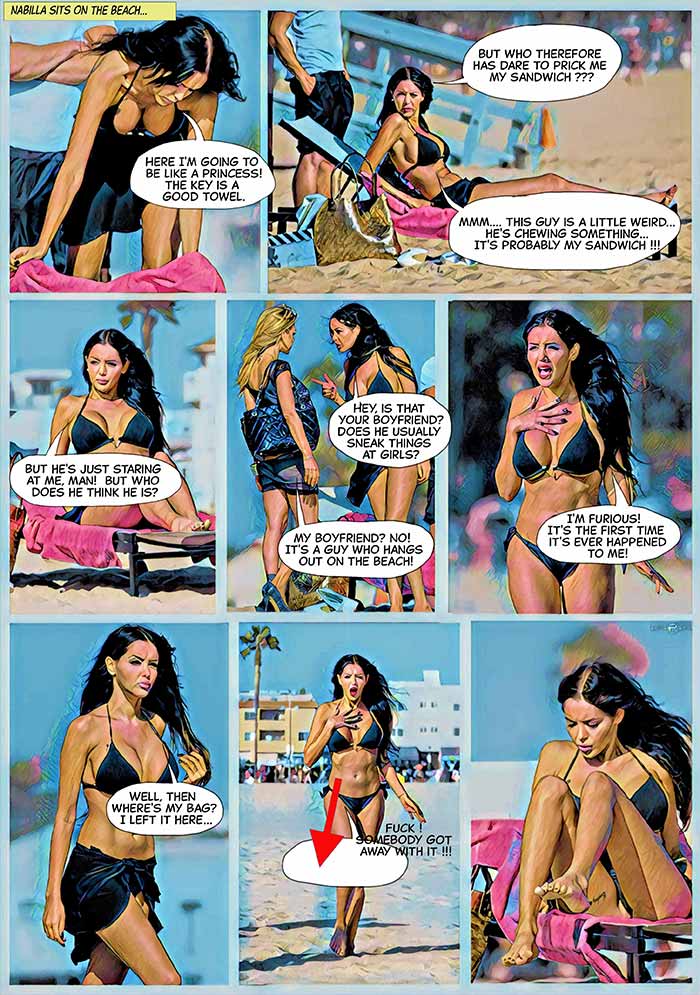
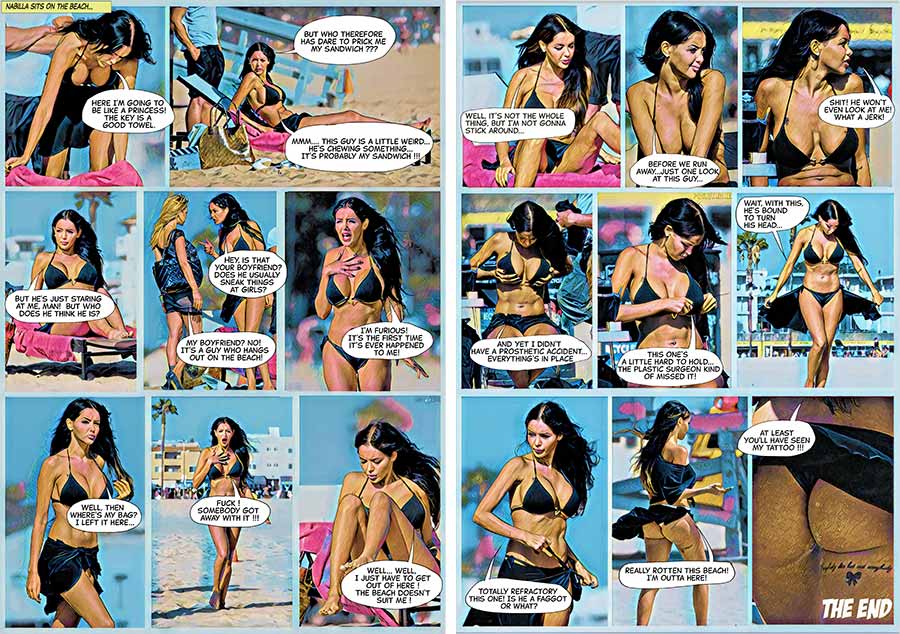
Final Result
We are coming to the end of this tutorial... and wish you all the best! So here is page 1 of "Nabilla goes to the beach"... and it's now up to you to play and create your Comic Strip from your pictures...
Other applications than PRISMA can also do the job... Some online like Befunky (look at this page to remove the tag on the pictures), others on your mobile phones or IPADs: COMICA, PICSART or CARTOON pro. Some of them are available in free versions, others are not free and others are not free... It's up to you to know !
Your comic is now finished... you just have to publish it... But that's another story !!!
G.