
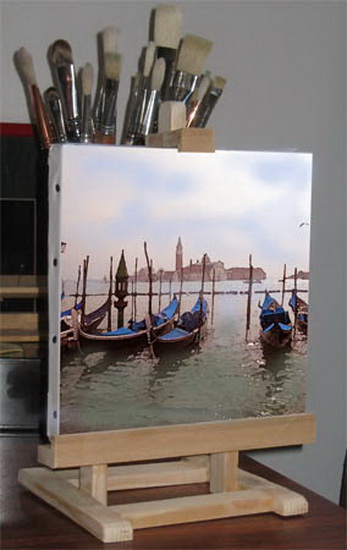
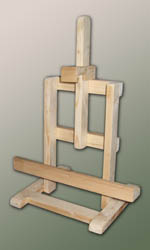
DIY EASY a MINI-EASEL
exhibit your paintings at home
This mini easel is a little more complicated to build... but it is more decorative than precedents!
There are several models! Do not hesitate to get started in building one of them.
I propose to you several methods according to the degree of your knowledge in joinery!
Let us begin by building the simplest! Of course, dimensions are indicative (in fact they have been optimized for a small canvas 12"x10"cm).
Adjust them according to what you want to expose !
List of supplies:
. 2m cleat 0.5"x1".
. Wood glue.
. A picture framer saw.
. Some small clamps...
 The structure: cutting elements
In the cleat 0.5"x1", cut 3 lengths of 8", 4 lengths of 5" and 2 lengths of 6". With these 9 components, you can now build the structure.
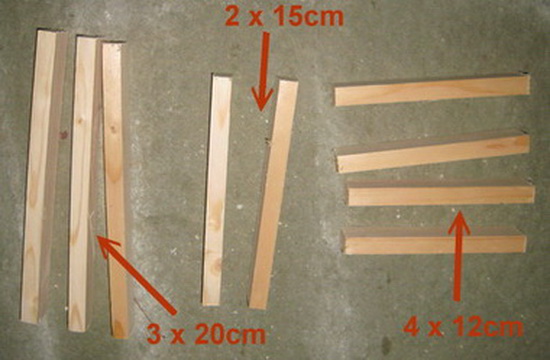
It is important that the 5" components have exactly the same length: so use the stop of your pic framer saw for cutting them!
When the components are ready, sand them to eliminate the inevitable cutting burr.
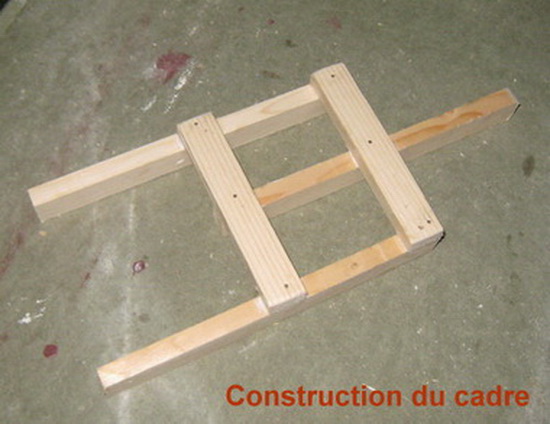
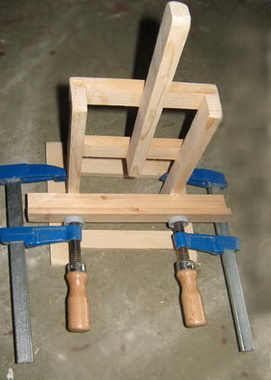
 Assembling the structure
Start by assembling the base of the mini easel. Glue the ends of two lengths of 5" and assemble the two lengths of 6" as in the photo below:

Check the squareness and tighten with a small clamp. remember here that it is the clamp tightening who makes a good collage!
Then assemble the frame with thin nails and wood glue: the 3 lengths of 8" will be made interdependent by two components of 5"
Let completely dry the two parts, frame and base before passing to the final assembly.
Glue the lower ends of the frame, and slip this one into the base. If you've respected measurements strictly, it must engage with just a little rubbing on the base.
Put places from there and tighten with a small screw clamp for a good joining
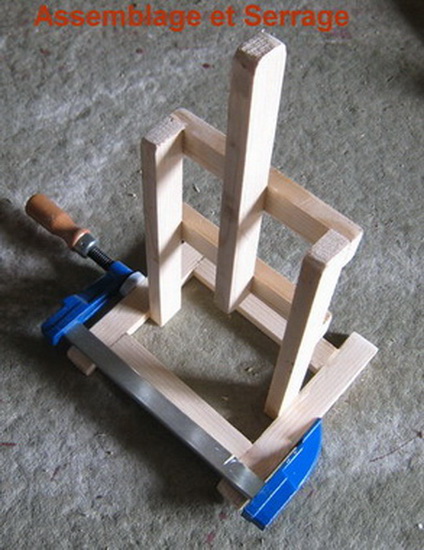
Let dry about ten hours before handling your assembly.
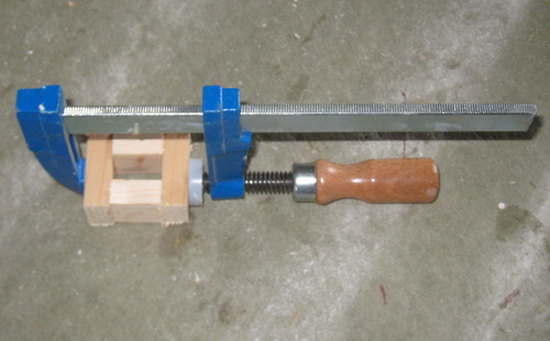
 The top clamp
Due to the smallness of its components, this piece is one of the most difficult to construct. For a "good finish" it will take seriously the sanding after drying.
The top clamp consists of 2 pieces of 1" assembled by bonding two pieces of 1,5" (thus providing a slight clearance in all directions when the slide is on the structure).
Cut your components with the picture framer saw and glue them. Tighten with a small screw clamp.
When your assembly is dry, sand to level all the elements that go beyond ... a belt sander is useful for a good completion (but not essential!) to get thinner the slider.
Following the photo below, then paste a small piece of angle wood made of 2 pieces of wood assembled at right angles.
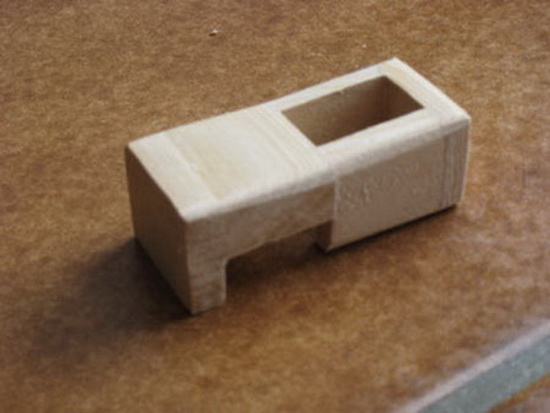
When finished, slide the top-clamp on the central part to hold the canvas.
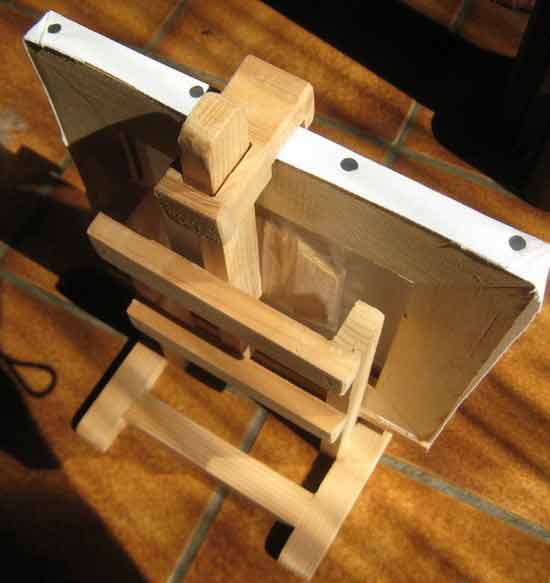
 The low support
The low support consists of two lengths of 8.5" strip.
These two lengths are joined with glue to form an right 90° angle and nailed to ensure the integration of collage.
The angle thus created is then glued and nailed to the frame, to 1,5" ties (... I give you the measurements I used ...). A good clamping, few hours of patience ... and you're done!
 Finishes for this mini-easel ...
The easel may well remain as it is in clear pine ... but you have the option of dyeing and varnish it to fit better in your interior decor.
 A more elaborated easel...
With some power tools (router, saw...) you can build a "better" mini-easel... Click on the picture above to download plans...

 A genuine artist easel !
If you want to build easily a true artist studio easel... you can use when you paint at home, go to that page...

In my workshop, I have 3 studio easels built on this model...
GD
Frame It!
by Tonia Davenport

Framing isn't something one has to leave to the professional.
With Frame It! readers will learn how to use ready-made frames and inexpensive framing materials to create frames perfect for their favorite photo, piece of artwork, canvases or souvenir.
How to Make Your Own
Picture Frames
Ed Reinhardt, Hal Roger
Excellent book for the beginner. Clear and concise. Step-by-step instructions with photos for each and every step.
This book covers all aspects of frame construction, painting, mats, glass-cutting and usage. A great book to trigger your own ideas to create custom frames.
Matting and framing made
easy
Janean Thompson
Since the cost of framing often exceeds the price of the artwork itself, it pays to know how to do it yourself.
Even if you're not ready to invest in specialty tools like a mat cutter or miter box, you'll find useful instructions on working with ready-made frames using simple tools (a ruler and utility knife)...