Cut out the bottom cardboard....
How to frame an art
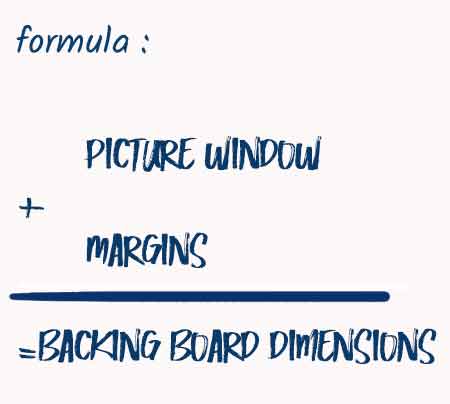
Now that we have seen how to calculate the dimensions of the Image Window we can start for the first element of our frame, namely the bottom cardboard.
It will have the same dimensions as the master key and is calculated using the formula :
As its name suggests, it will form the back of the "package" that we will slide into the frame itself.
 Determine the margins!
To calculate the dimensions of the background cardboard, we will add to the dimensions of the "picture window" the margins that we want to see surrounding the subject to be framed...
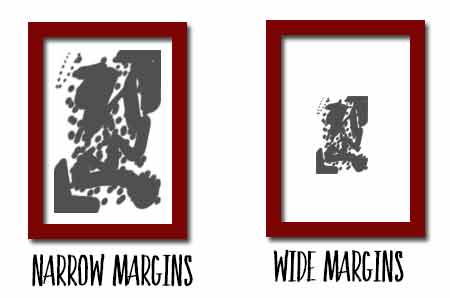
You have the choice of their dimensions: do you want narrow or wide margins?
If this is your first frame, we recommend average and equal margins: 5 or 6 cm... You will therefore add to the dimensions of the image window 5cm or 6cm in all directions to obtain the dimensions of the bottom cardboard.
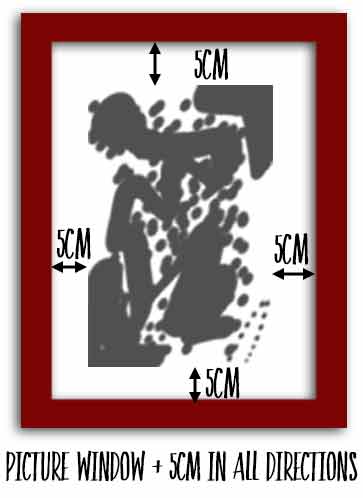
Thus, if the image window is 12.6x18.6 and the margins are 5 cm then the bottom cardboard measures :
(12.6 + 5 + 5 ) x (18.6 + 5+ 5) or 22.6x28.6 !
 The width of the margins....
Most of the time, they are equal... This is the most common case! This simple rule can be departed from without any problems....
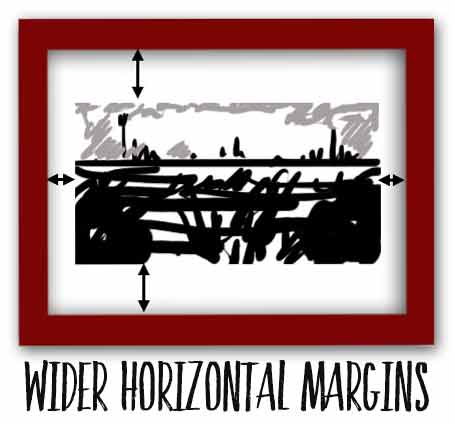
When your subject has horizontal lines (skyline for example) and is in landscape format... you should, to reinforce the impression of perspective, choose larger lateral margins... As in the example below (a little exaggerated, for the example)...
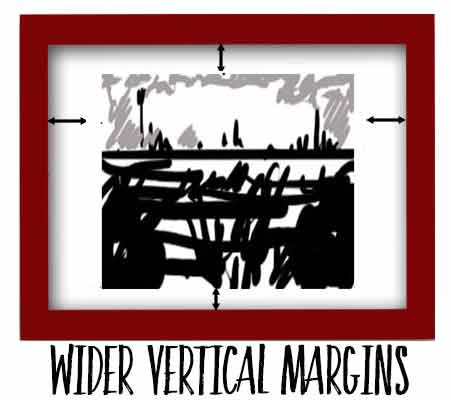
When the subject is on the contrary in portrait format and has vertical lines, you can accentuate this effect visually by choosing unequal margins... The high margin can be smaller than all the others... the low margin, it, larger than all the others? as in the example below...
 Cut out the bottom cardboard
Although any cardboard can be used... even packaging cardboard recovered from crates, it is good to work with rigid cardboard, 3 or 4 mm thick, called wooden cardboard (this is the cardboard to make english or french bevels ).
Others can use "featherboard" composed of a layer of white cardboard and a layer of expanded polystyrene, which is very easy to cut but may lack the necessary rigidity!
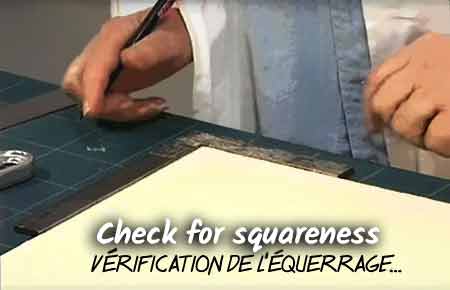
Check the squareness of the cardboard box
Place the bracket on one of the corners of your plate and carefully check the square.
Most of the time, that's okay. Mark the angle with a distinctive sign
If any distortion appears, draw the right angle and cut the plate to "start from square", which is essential for the success of your work.
Report the dimensions found (Image window + margins)
With a pencil, write your dimensions on the cardboard... and draw the bottom cardboard.
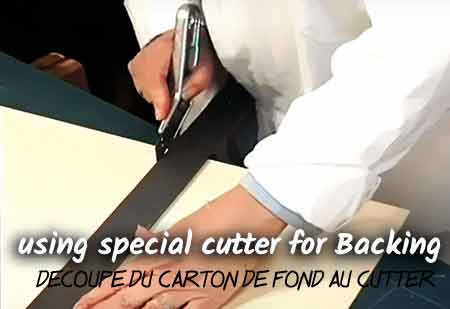
Cut with the cutter
using the heavy ruler.... or the mat-cutter ruler.
Then cut the bottom cardboard in several passes (don't try to cut 4mm of wooden cardboard in a single pass! Run the blade several times and press the cutter firmly but not excessively).To cut, you can use the hand cutter with a heavy ruler
or use the MAPED or LOGAN matcutters
IN CONCLUSION

You first determined the image window, you now know how to calculate the dimensions of the bottom cardboard... The next step is making the passe-partout.... HERE