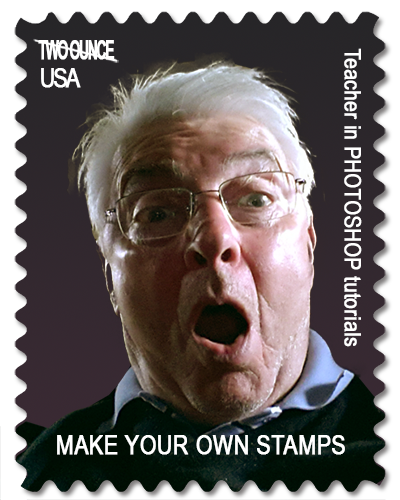
MAKING OF FAUX POSTAGE STAMPS - MAIL ART
Photoshop easy tutoriel
 Why to make false postage stamps?
Today, the "false and counterfeits" abound ... False Lacoste , false Chanel, Faux-Montblanc ... than customs try to intercept when naively you return from Turkey or others with suitcases full of counterfeits!
Not about making false-postage here to mislead anyone! And while someones fun to stamp mails with their own-stamps( see this blog , among others ...) I do not advise you to try to imitate them! You may have big trouble with the postal services!
There are even those who display their "offenses" in books ... Have a look on the book of John Bach: Mail-Art: 350 false-used stamps ...
No no, this is simply to imitate the postage-stamps of our national post service, to delight and adorn our scrapbooking pages. You can even stick them on envelopes that you send ... provided you have properly stamped them with real stamps!

There are several techniques for making fake stamps, including those described on this site: make scrapbooking fake stamps and uses a template system, pads and chalk ...
In this new page, false stamps will be produced from an image processing software: PHOTOSHOP. Only the basic functions will be used: This step by step is fully transferable to your favorite software: PhotoFiltre, GIMP or PaintShopPro ...
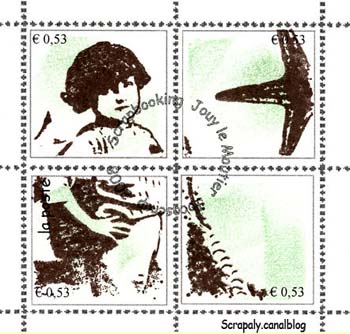
Artist stamps we will get are almost larger than life ... happily and we will replace the "laurel wreaths Marianne's head" by our own portrait ... It's still more interesting!
And remember that there is no question of deceiving US postage ...
But only to create usable artistamps in our pages of scrapbooking!
 Step by Step: Making a false stamp
This tutorial is written for photoshop ... but it uses only basic functions ... and can easily be transposed in "the Gimp" or "PhotoFiltre" ... at your convenience.
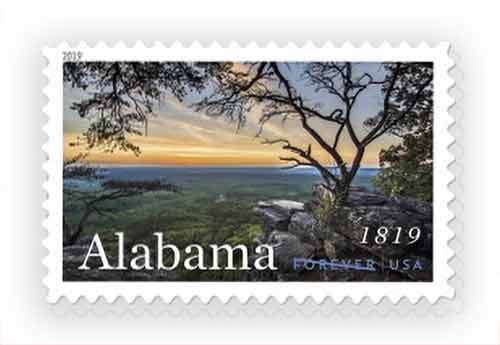
Start with a "real" stamp.
The big problem ... it is the perforations of the stamp ... they are difficult to imitate. So it is best to start with a real stamp which you will recover the structure ...
See on the official website of USPS where are offered all the latest official postal stamps. I suggest you to click on the "Fine Stamps" button and then choose one of the major formats that are available by clicking on one of them.
I've got the image of the stamp with a "screenshot software" ... Mine is SNAGIT but there are many others including many free
Before you start, you have to observe the "little details" of the stamp to reproduce them exactly ...
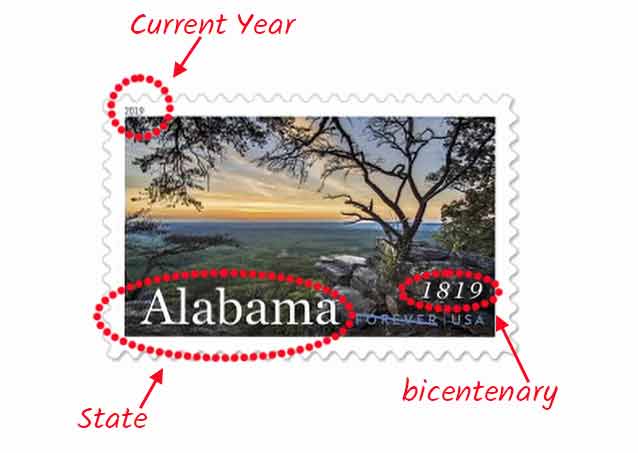
We notice the current year 2019, the name of the state and le year for bicentenary... I forget FOREVER and USA...
We will create a new stamp ... not for the bicentennial, but for the first wedding anniversary of our young friends ... They come back from the Canary Islands where they spent a week...On their scrapbooking page, there is an envelope and a fake-stamp is wanted !
Recovering the structure of the stamp.
Now open your software image processing ...
Open the image of the stamp.
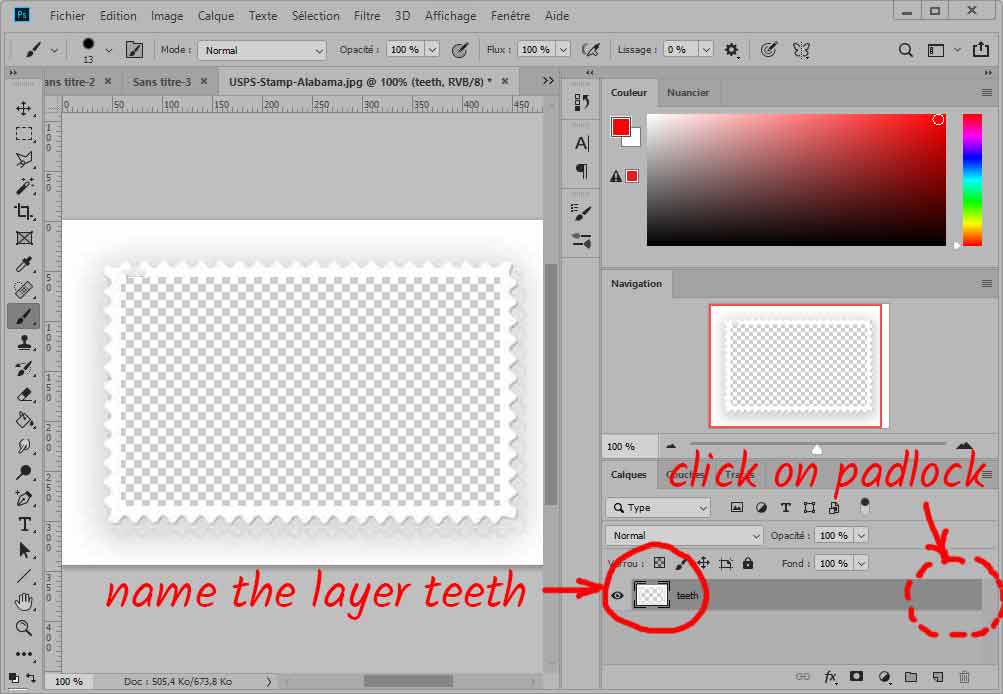
Use the rectangular marquee tool and select the central part of the stamp:
Once central part is selected, delete-it by pressing on the del key.
Click on the padlock of the layer and name it "Teeth".
Setting up your image.
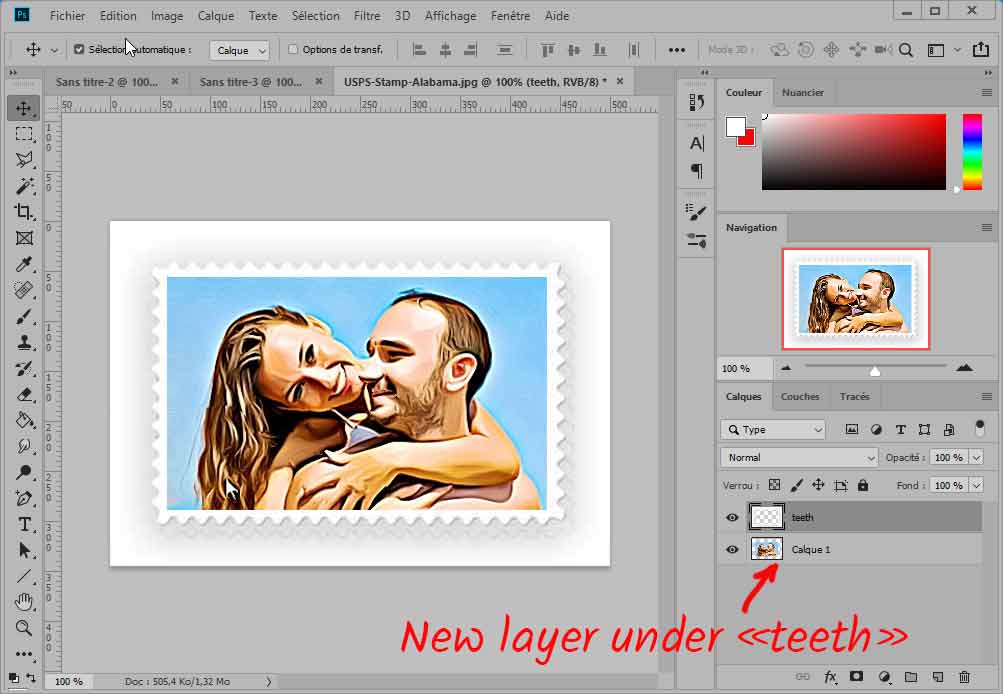
You have chosen an image that will replace that of the ALABAMA stamp... For me, I'll install a picture of my friends during their holidays in canary islands...
Open this new picture and copy it... back to the stamp and paste this new pic in a new layer. Cut the image if necessary...
Put this layer under the layer "teeth" : I named it : "Lovers".

Implementation of the texts.
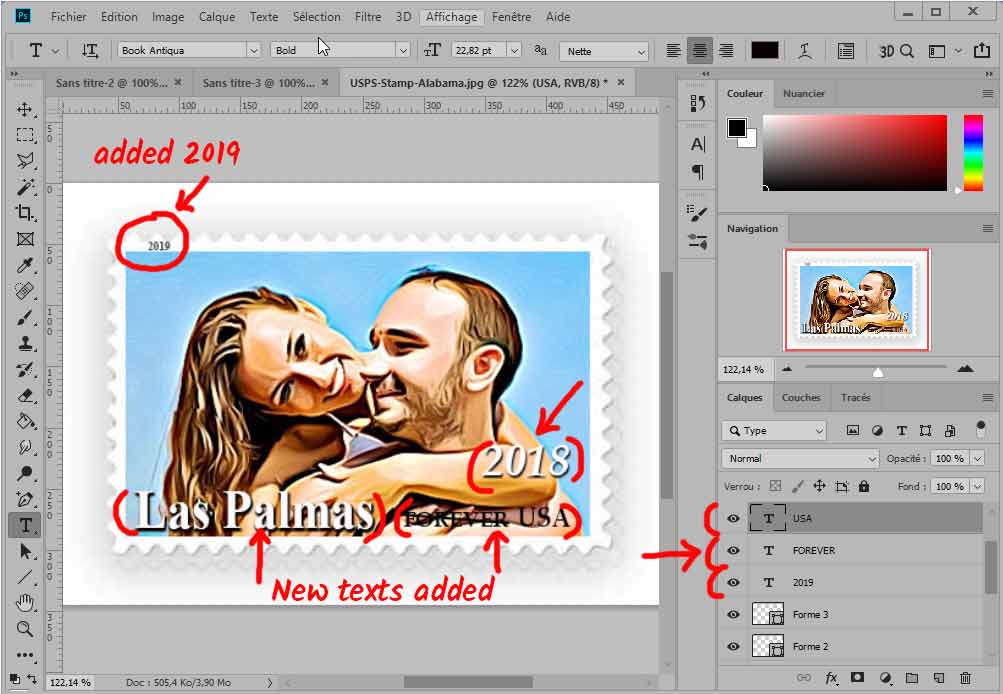
Remember when we watched le real stamp... We have now to put new texts on our stamp.
First, the location of the holidays : Las Palmas ! I used a "TimesNewRoman" font, white color and added some drop shadow
I add, for the proper weight and good measure, the logo of LAPOSTE and named the place shown in the thumbnail: Telgruc sur Mer...
Just work with the text tool ... no particular problems ... As I chose white texts, I've just played with the drop shadow for a better visibility. When it's finished, save your work.
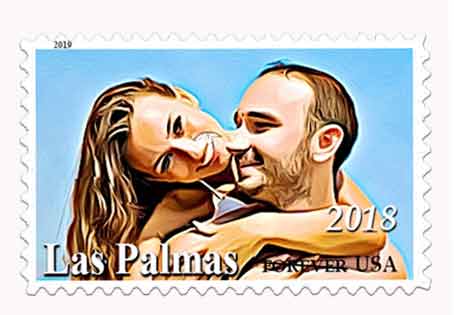
and, finally, you have your fake stamp !!!
Use your fake stamp...
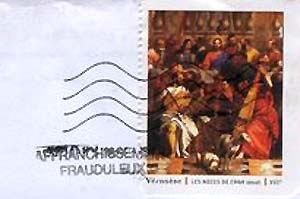
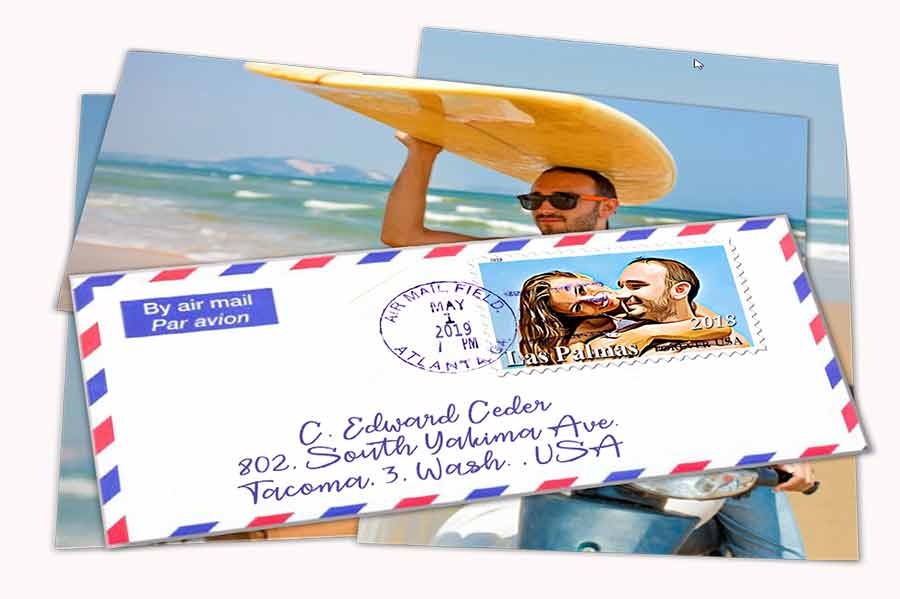
Now use your fake stamp ... on a false envelope, placed on fake photos ... Everything is wrong in this picture, even the obliteration on the stamp!
 How to cancel your false stamps?
To complete the resemblance, your false stamp must be obliterated! As an true!
So it remains for you to browse the net in search of brushes ... or boards of cancellations ... Many from the United States and have nothing to do with those of the Post!
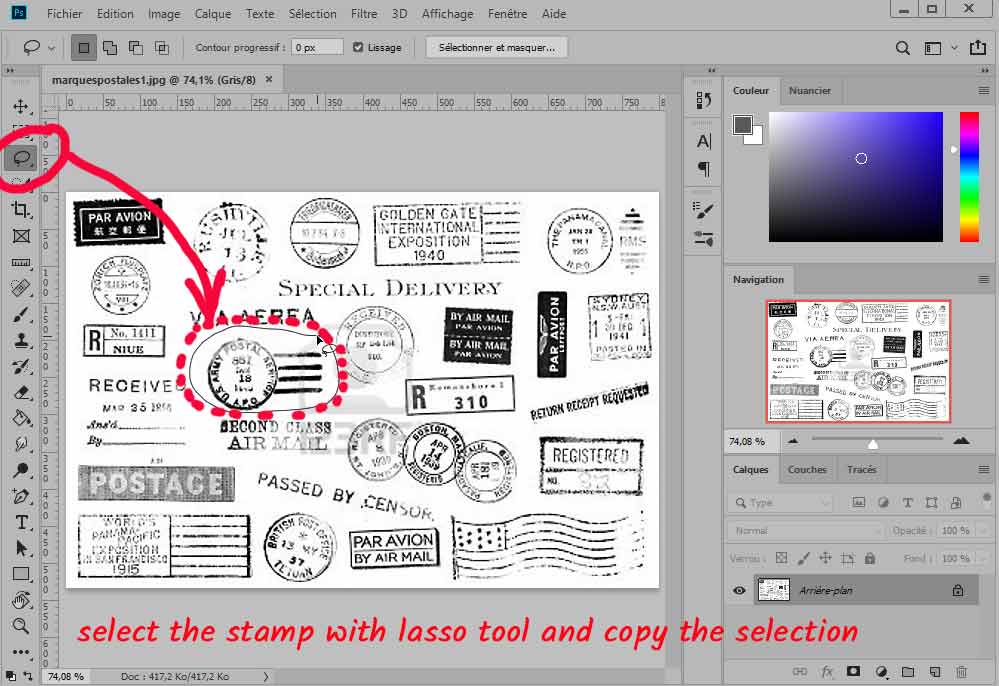
Launch a search on "postmarks and stampss" on google or otherwise, and choose a board with stamps... It's better if it has a white background... Open this board in your image processor : mine is Photoshop...
With the lasso tool, select the postmark you want and copy it !
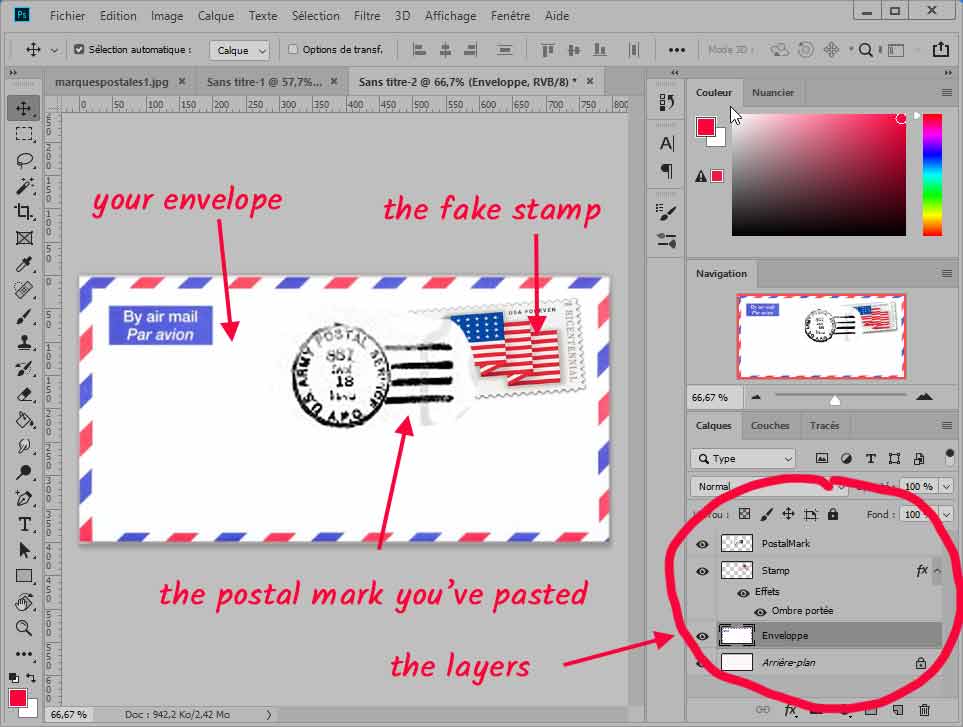
Open now your envelope with the stamp to be cancelled...
Paste on it the postmark you copied in a new layer ... I named this new layer "postmark"
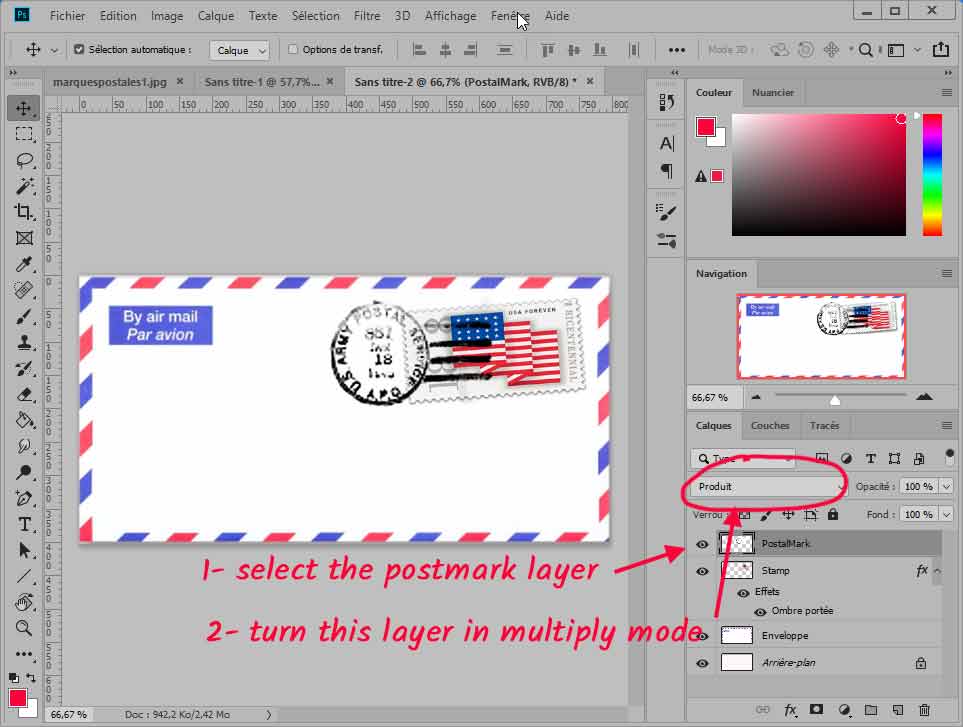
But the postmark is not transparent !!! Select the postmark layer and turn its mode to "multiply"... The postMark set in the stamp. All is OK !
But if you prefer to make by yourself your cancellations ... look at this tutorial: postmarks and false cancellations ... You will learn how to build the stamp and the ripples that accompany it.
HERE is a complete tutorial on how to make fake stamps...