PRINT A 16P MINI-BOOK
WITH WORD
This page is not reserved for those who are new to WORD... the capacities of this word processor will be pushed to their limits. That's why we only give here the main steps of the realization : the detail of the menus to use is not always there !
If you only have one mini-book to make, use the method described on this page instead... you will save time! On the other hand, if you are thinking of starting a series then it is worth trying with WORD.
This is a rather long process that we describe now.
If you prefer to use the ready-made WORD template, you can download it on this page by going here : 16P Template WORD. How use the template
 Creating the 2 pages
![]() Open your word processor and create a page in A4 landscape format. By pressing <ENTER> several times, scroll down to the bottom of the page and create a second page.
Open your word processor and create a page in A4 landscape format. By pressing <ENTER> several times, scroll down to the bottom of the page and create a second page.
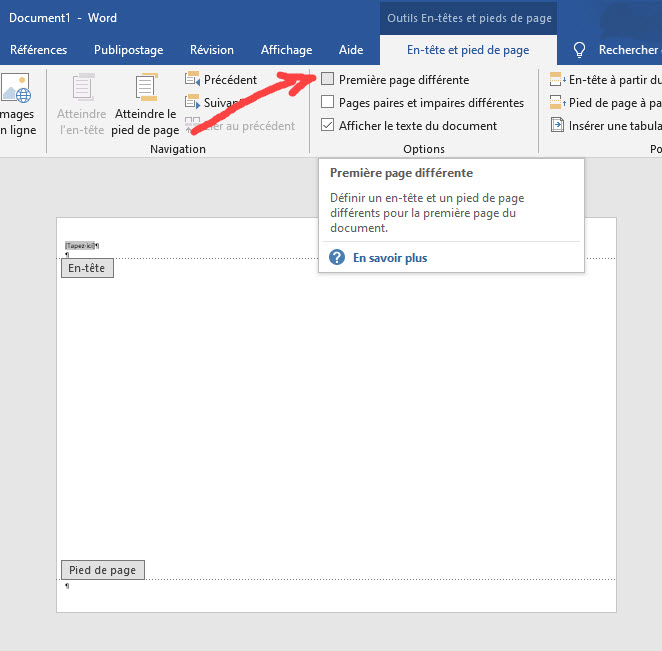
![]() Run Page Setup > Margins and give your page 0.5cm margins in all directions... Then, in Header Tools > Header and footer choose different even and odd pages... which will allow to have, on two consecutive pages, different backgrounds...
Run Page Setup > Margins and give your page 0.5cm margins in all directions... Then, in Header Tools > Header and footer choose different even and odd pages... which will allow to have, on two consecutive pages, different backgrounds...
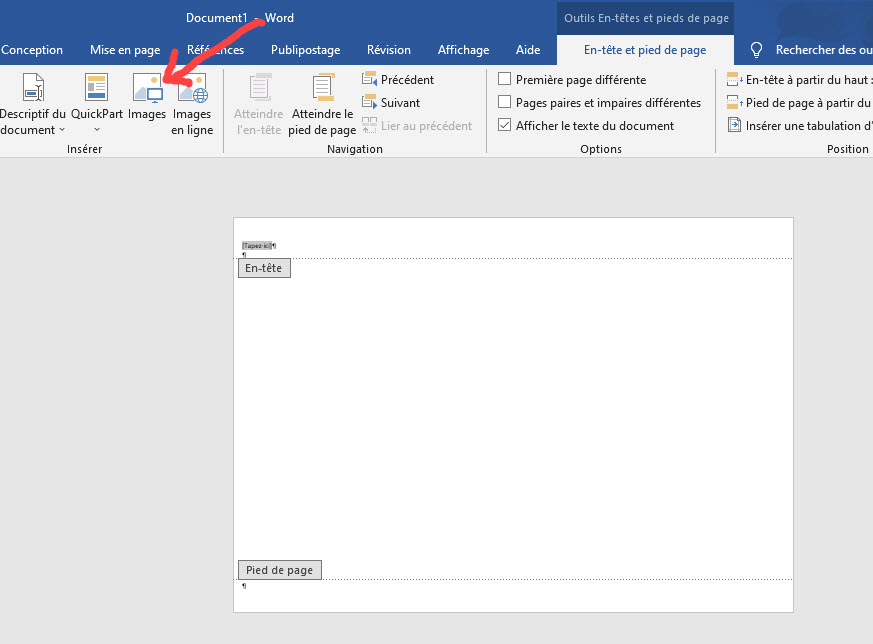
![]() Download HERE the Recto and Verso page backgrounds that include the locations of the future minibook pages.
Download HERE the Recto and Verso page backgrounds that include the locations of the future minibook pages.
Install the Recto page as a header on even numbered pages and the VERSO page as a header on odd numbered pages.
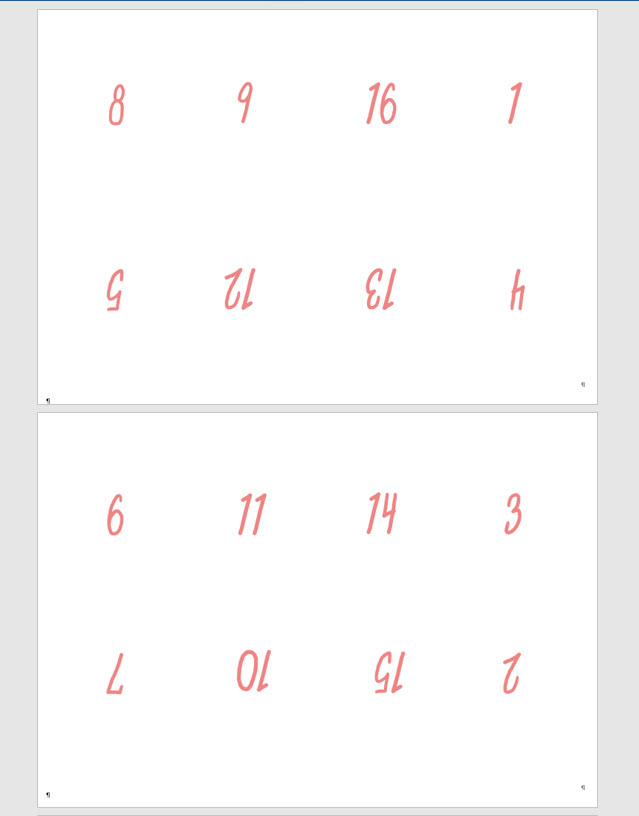
At the end you should be in the following situation:
 Creation of "text zones"
Now that it is possible to find your way around the page thanks to the page numbers, we are going to install text zones that will represent the pages of the mini-book...
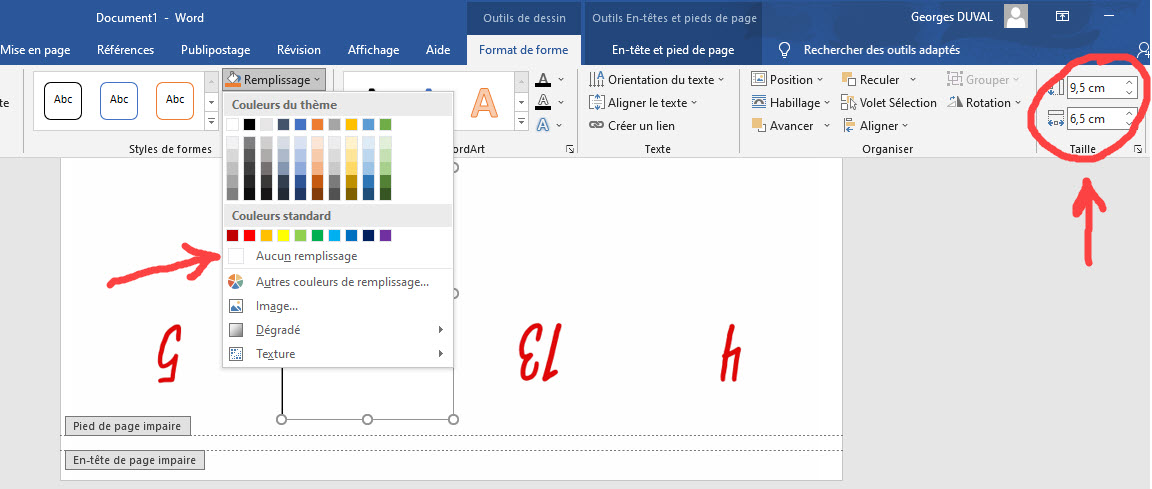
All these text zones will have the following dimensions: Height: 9,5cm and width: 6,5 cm. And they will be linked to each other, so that when you "pour" the text of your story on the first page, it will be distributed, in order, on the other pages!
![]() On the first page, run Insert > Text Area and give this area the dimensions 6.5x9.5... and no fill.
On the first page, run Insert > Text Area and give this area the dimensions 6.5x9.5... and no fill.
![]() Select your text area (by clicking in it) and copy it by Ctrl+C and paste it 3 times in the page. Place the 4 zones at the top of the page by aligning them regularly.
Select your text area (by clicking in it) and copy it by Ctrl+C and paste it 3 times in the page. Place the 4 zones at the top of the page by aligning them regularly.
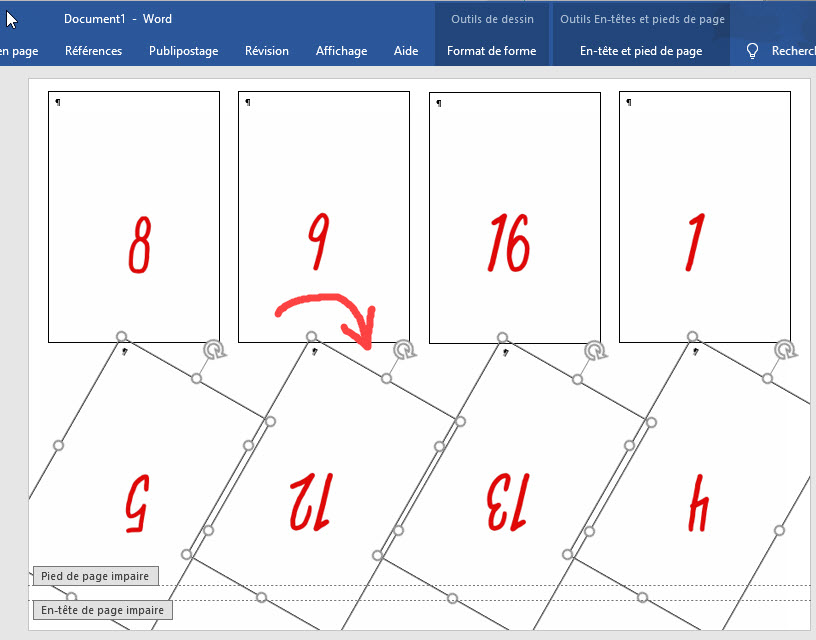
![]() Now select the 4 text zones and do a Ctrl+C to copy the 4 zones, then paste in the page. Act on the handles to rotate these last 4 zones by 180°. Align again if necessary...
Now select the 4 text zones and do a Ctrl+C to copy the 4 zones, then paste in the page. Act on the handles to rotate these last 4 zones by 180°. Align again if necessary...
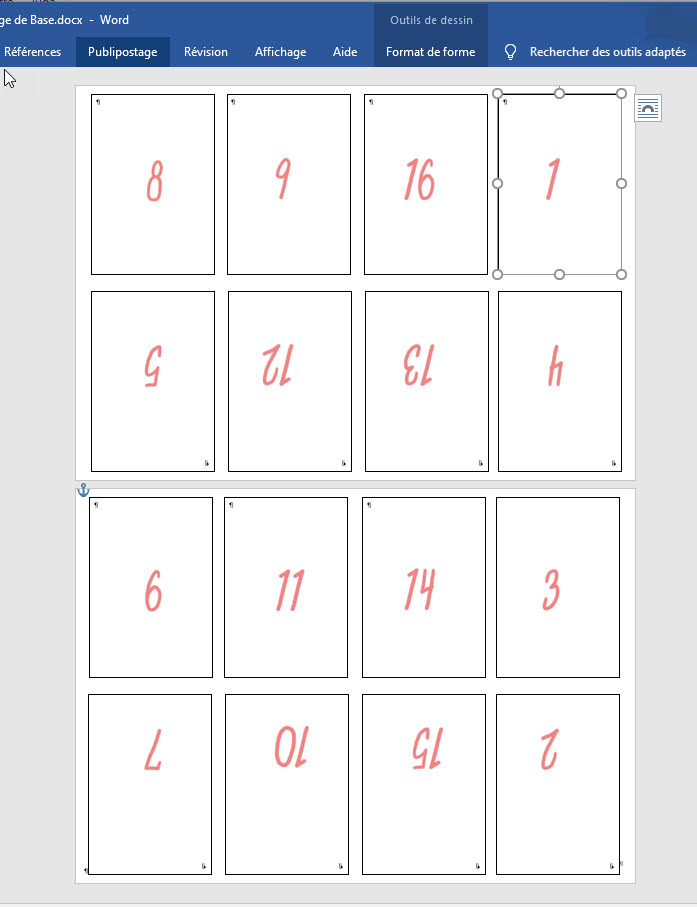
![]() Select all areas of the first Front page. Copy them and paste them into the second Verso page. You will get the mock-ups of your recto-verso pages.
Select all areas of the first Front page. Copy them and paste them into the second Verso page. You will get the mock-ups of your recto-verso pages.
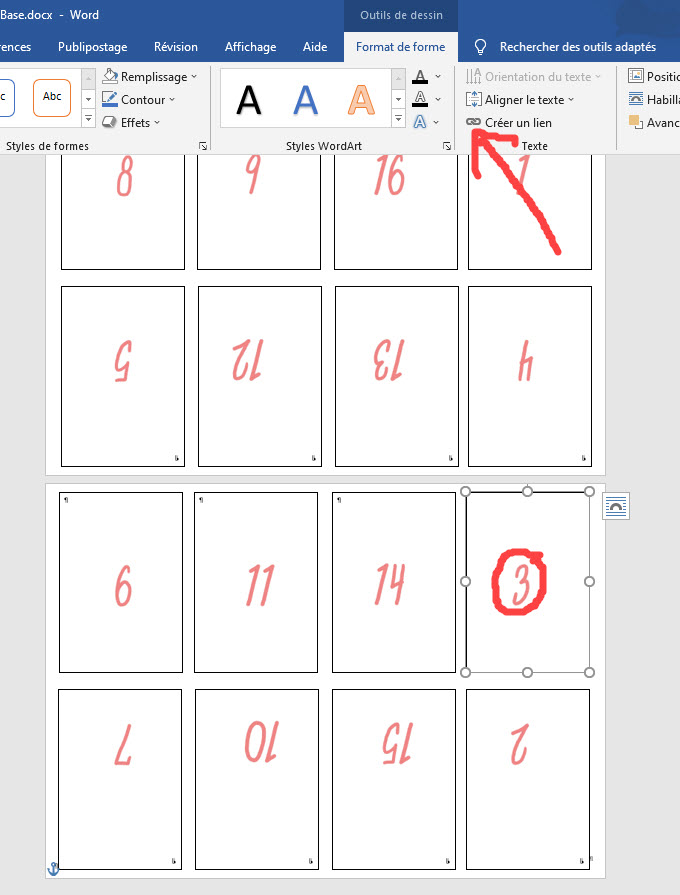
![]() Now we have to link the text zones in the right order... In order to be able to pour the text in the first zone and that it flows then in the following ones...
Now we have to link the text zones in the right order... In order to be able to pour the text in the first zone and that it flows then in the following ones...
We start with page 3... (Page 1: cover, Page 2: miscellaneous). Click on zone 3 and, in the Format menu, click on create a link, the cursor turns into a kind of pitcher and click on zone 4, on the top page...
Continue to link the zones until you reach zone 15...
When all your zones are linked, save the layout...
All you have to do is write your novel (16 pages long !) and find your illustrations !!! note that you can always write it as you go along... the texts will place themselves in the right place !
 Use the template...
This little note just to give the details of how to use this WORD template for this 16 page mini-book...
![]() Start by downloading the WORD template : Template16PWORD.docx
Start by downloading the WORD template : Template16PWORD.docx
![]() Have the text of your mini-book (document in .txt format) on your desk as well as a directory in which your illustrations may be stored.
Have the text of your mini-book (document in .txt format) on your desk as well as a directory in which your illustrations may be stored.
![]() Launch WORD and open the template.
Launch WORD and open the template.
![]() Copy the text to be inserted and PLACE ON PAGE 3 of the template. (page 1 is kept for the cover... and page 2 for the copyrights). Click on the top of this page and paste by Ctrl+V. The text will automatically flow from page to page in the right place...
Copy the text to be inserted and PLACE ON PAGE 3 of the template. (page 1 is kept for the cover... and page 2 for the copyrights). Click on the top of this page and paste by Ctrl+V. The text will automatically flow from page to page in the right place...
![]() All you have to do is insert your images and, if necessary, change the font size or (and) the line spacing so that your text fits on the mini-pages...
All you have to do is insert your images and, if necessary, change the font size or (and) the line spacing so that your text fits on the mini-pages...
 How to fold your page...
All the explanations are given on this page of the site.
And if you want to practice folding, print this story in RECTO-VERSO...
Click on the images to download the pdf or here to download the .docx
Je vous souhaite une bonne impression !