Photoshop Overlay Photos Tutorial
How to superimpose photos
You are always looking for special effects on your photos for your scrapbooking or other albums? In this page, you will see how to create the illusion of an assembly of superimposed photos to create a larger one...
 Simple photo assembly....
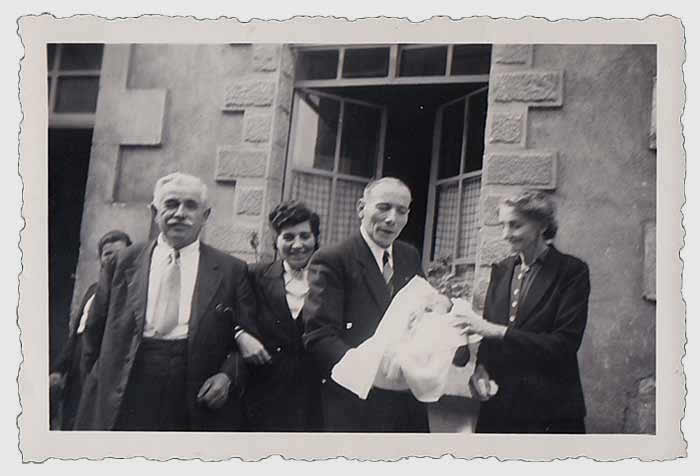
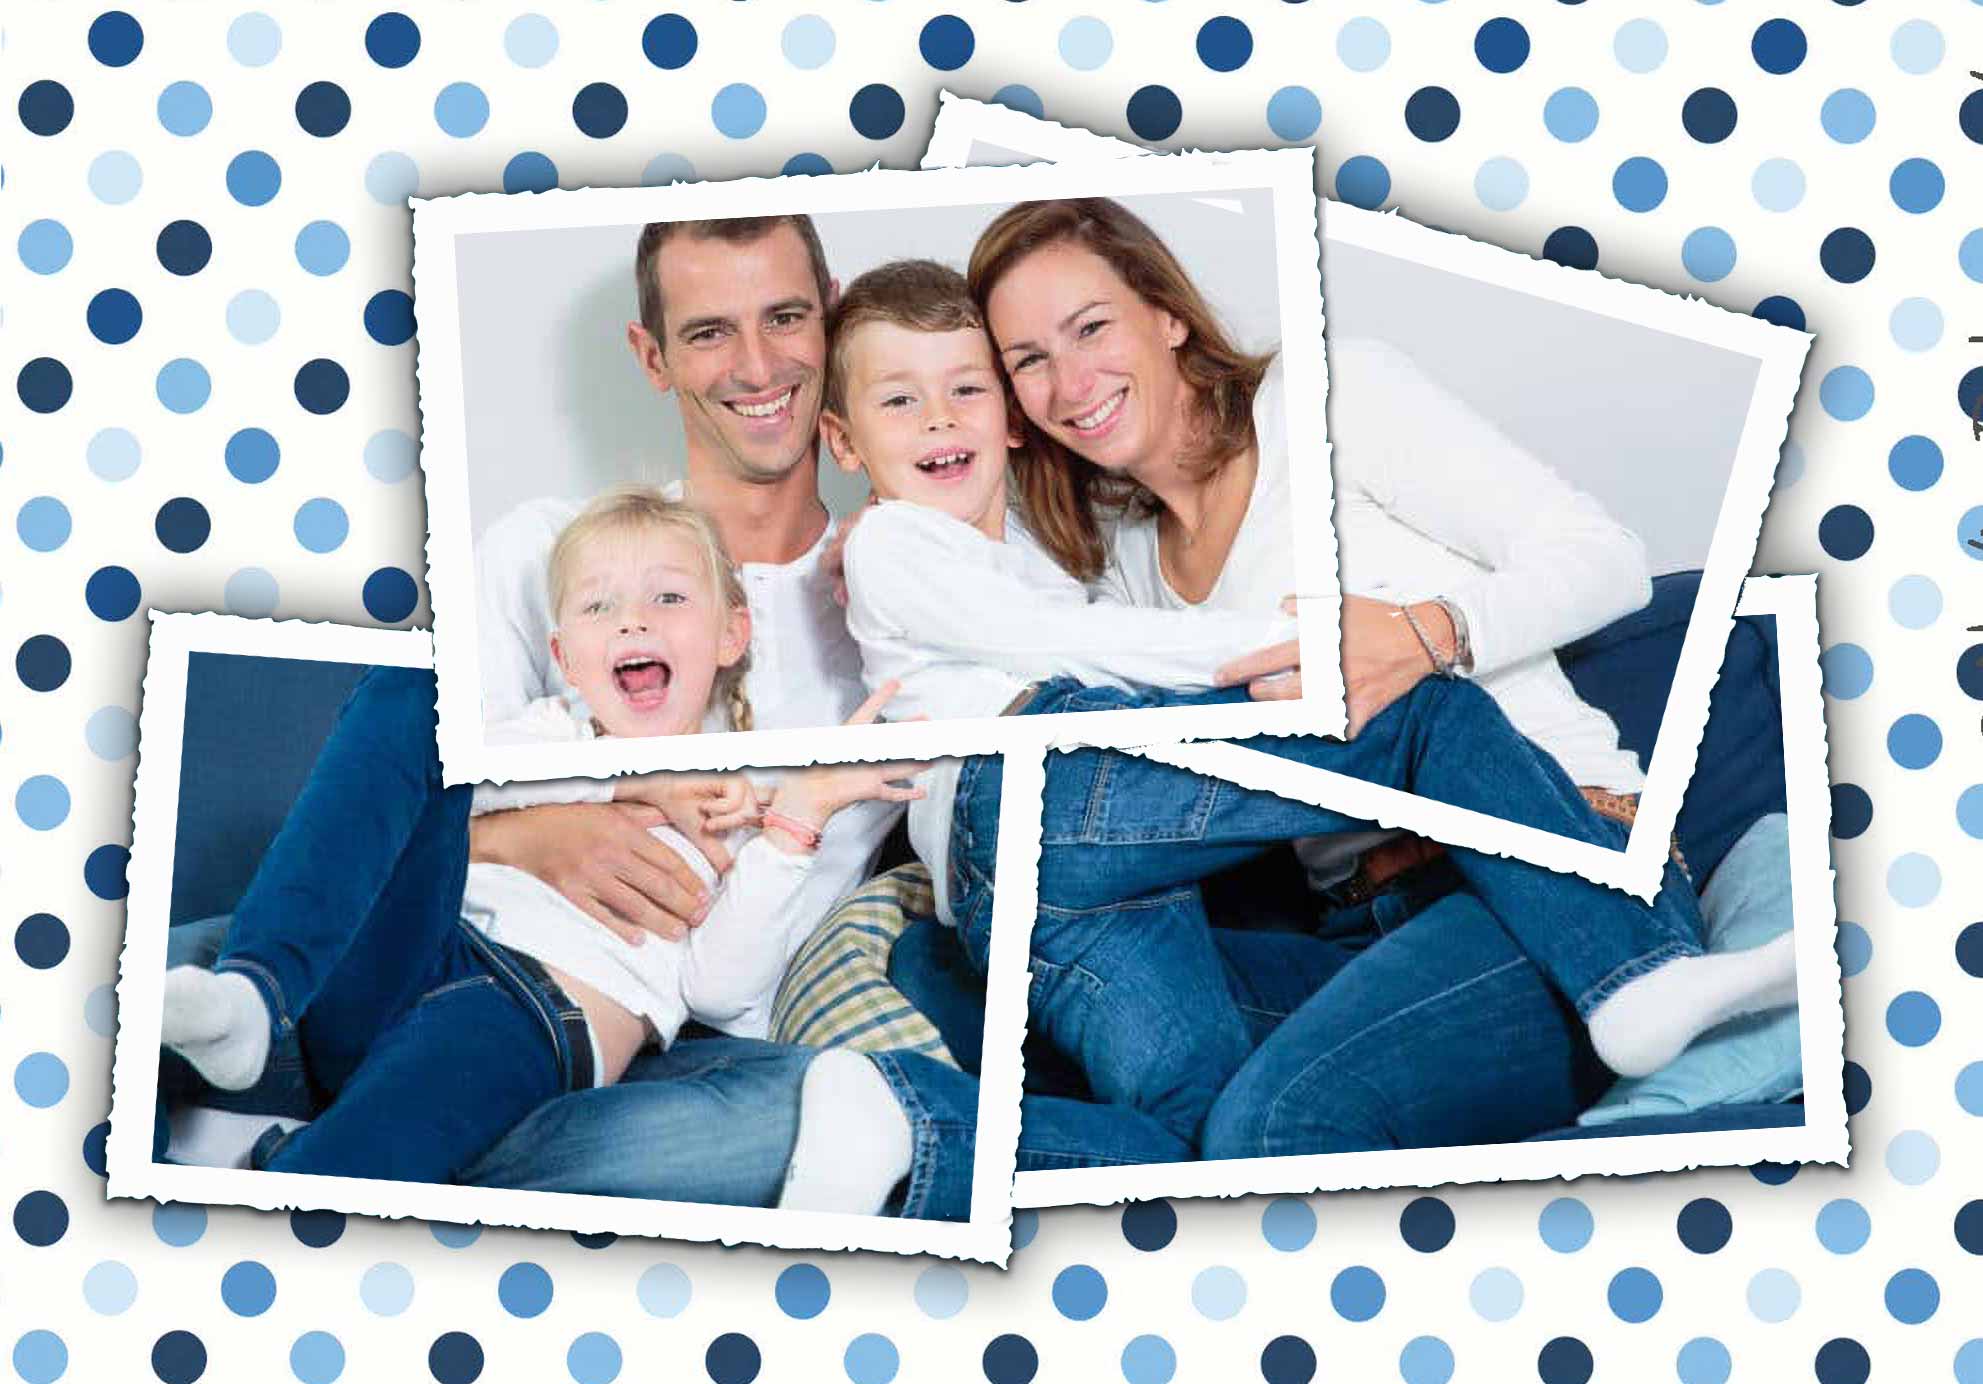
Here is the final effect you will be able to achieve:
The photos are superimposed "roughly" to reconstitute the final image.... We have removed the background to keep only the 5 assembled images... At the end, a sheet of polka dot paper has been added at the back of the result.
Here is the tutorial with Photoshop: no difficulty to transpose it into your image processing software: PhotoFiltre, TheGimp or other...
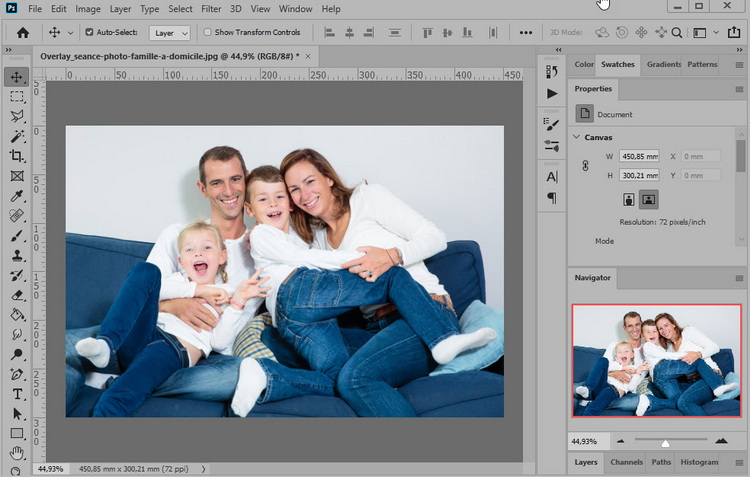
![]() Open the image to be processed in Photoshop...
Open the image to be processed in Photoshop...
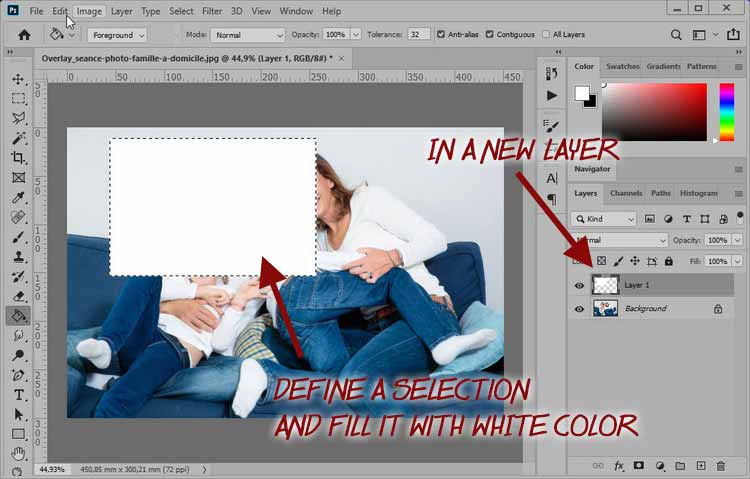
![]() In a new layer (Layer1) define a selection that you will fill with the color White.
In a new layer (Layer1) define a selection that you will fill with the color White.
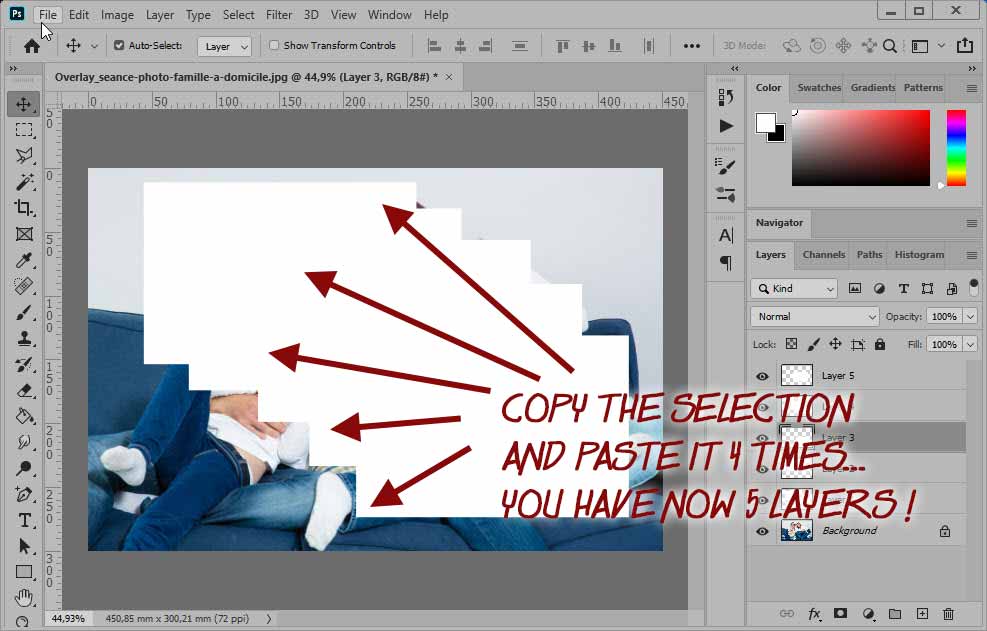
![]() Copy the selection and paste it 4 times in a row: you now have 5 layers (Layer 1... Layer 5).
Copy the selection and paste it 4 times in a row: you now have 5 layers (Layer 1... Layer 5).
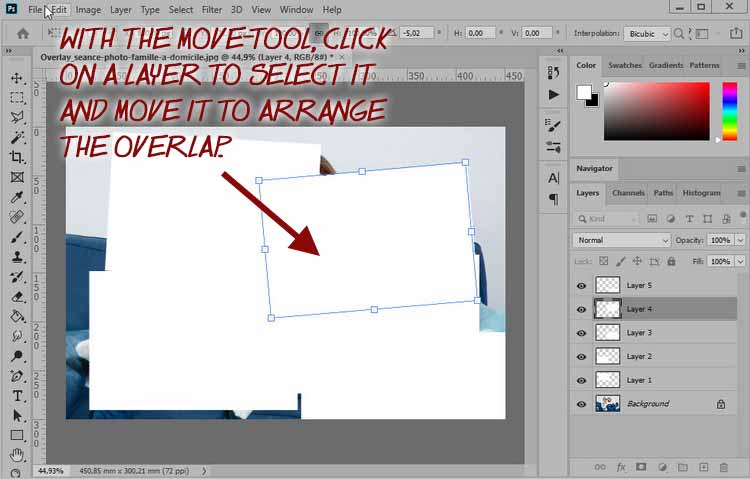
![]() With the move-tool, arrange the 5 white frames so that they cover your photo by making them overlap slightly.
With the move-tool, arrange the 5 white frames so that they cover your photo by making them overlap slightly.
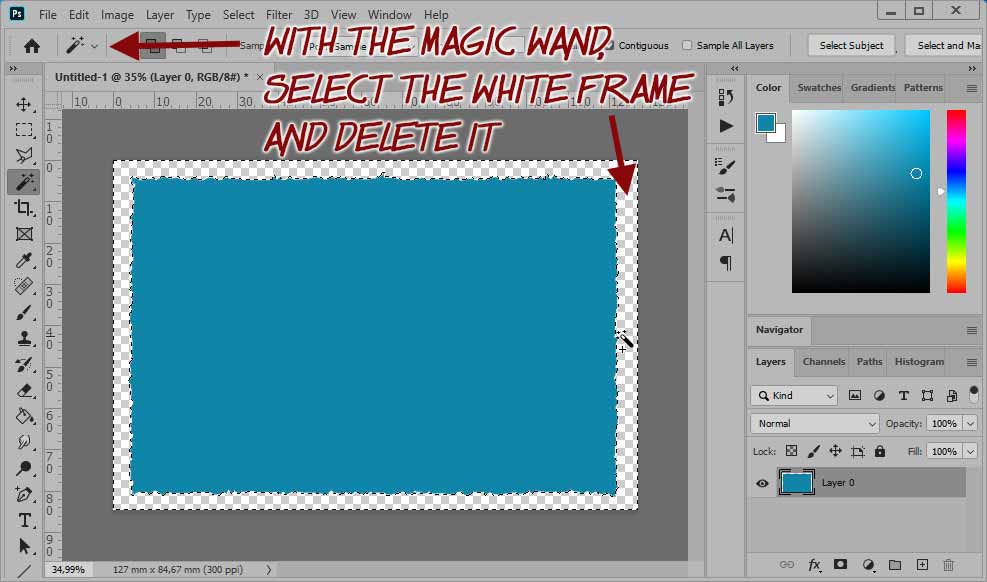
![]() When the overlay is complete, take the magic wand and select the first white frame.
When the overlay is complete, take the magic wand and select the first white frame.
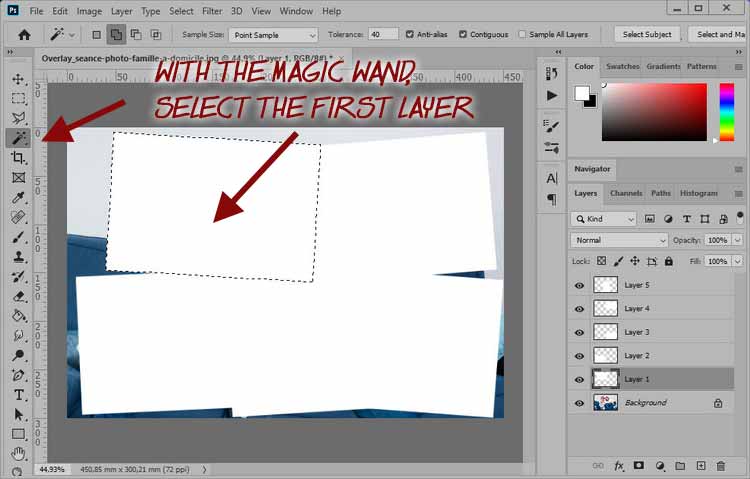
Select the background layer and execute CTRL+C (or Edit>Copy).
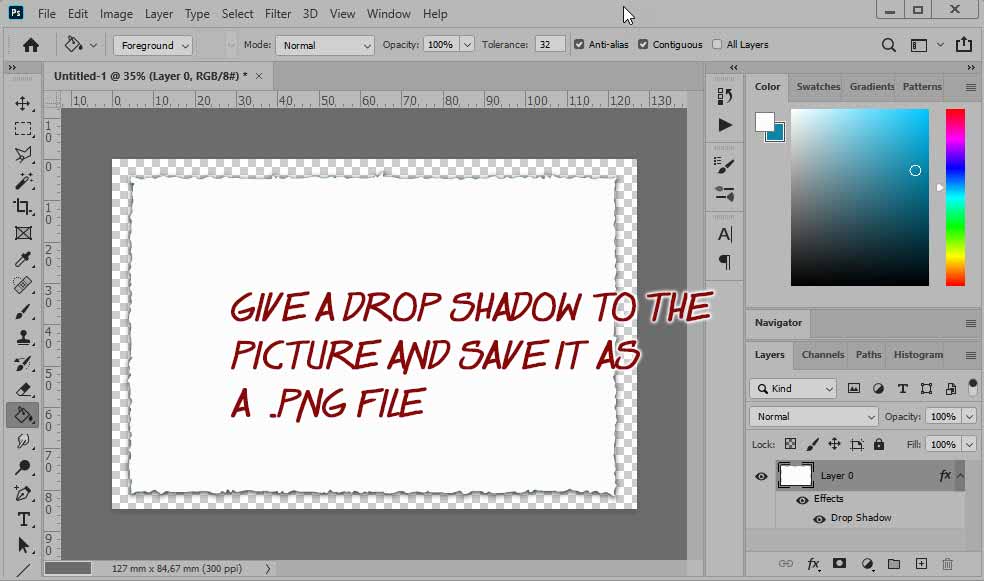
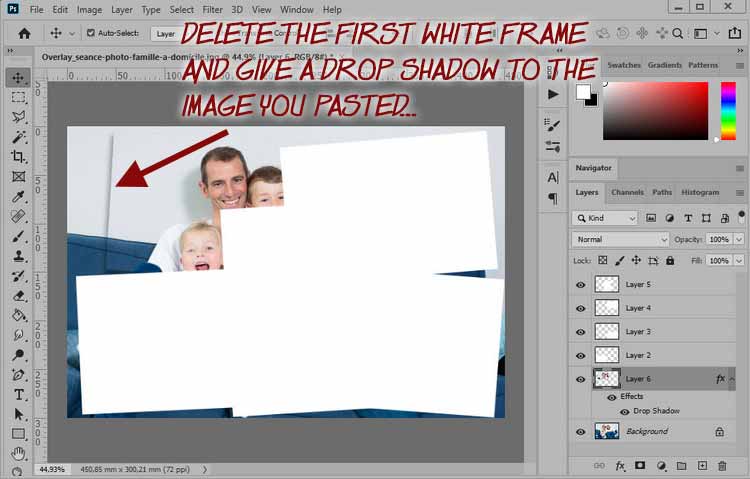
![]() Paste the selection. Give it a drop shadow . Then delete the first white frame.
Paste the selection. Give it a drop shadow . Then delete the first white frame.
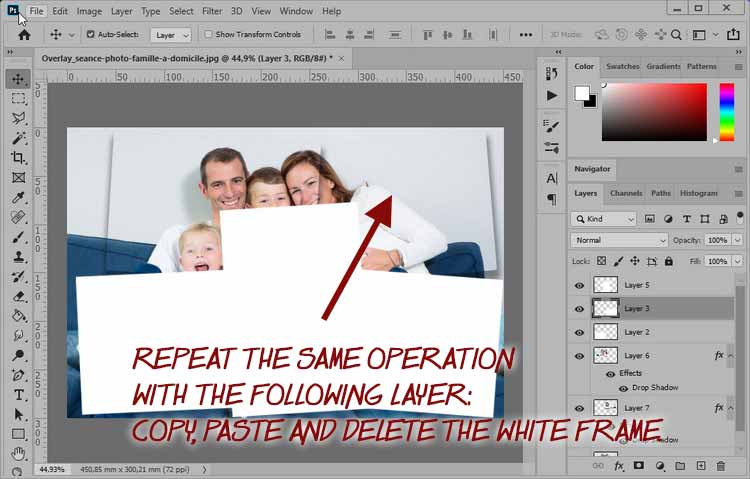
![]() Repeat the same operation with the following layer...
Repeat the same operation with the following layer...
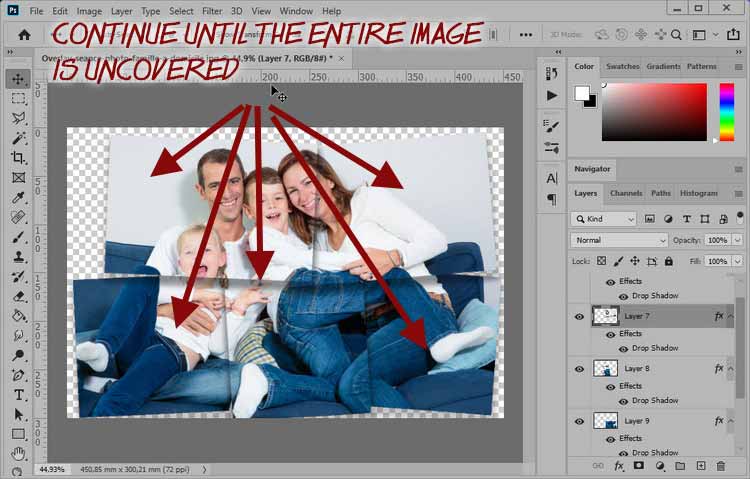
![]() Continuez jusqu'à ce que vous ayez partagé l'image en 5 parties...
Continuez jusqu'à ce que vous ayez partagé l'image en 5 parties...
![]() When everything is finished, you can leave a white background or choose one at your convenience...
When everything is finished, you can leave a white background or choose one at your convenience...
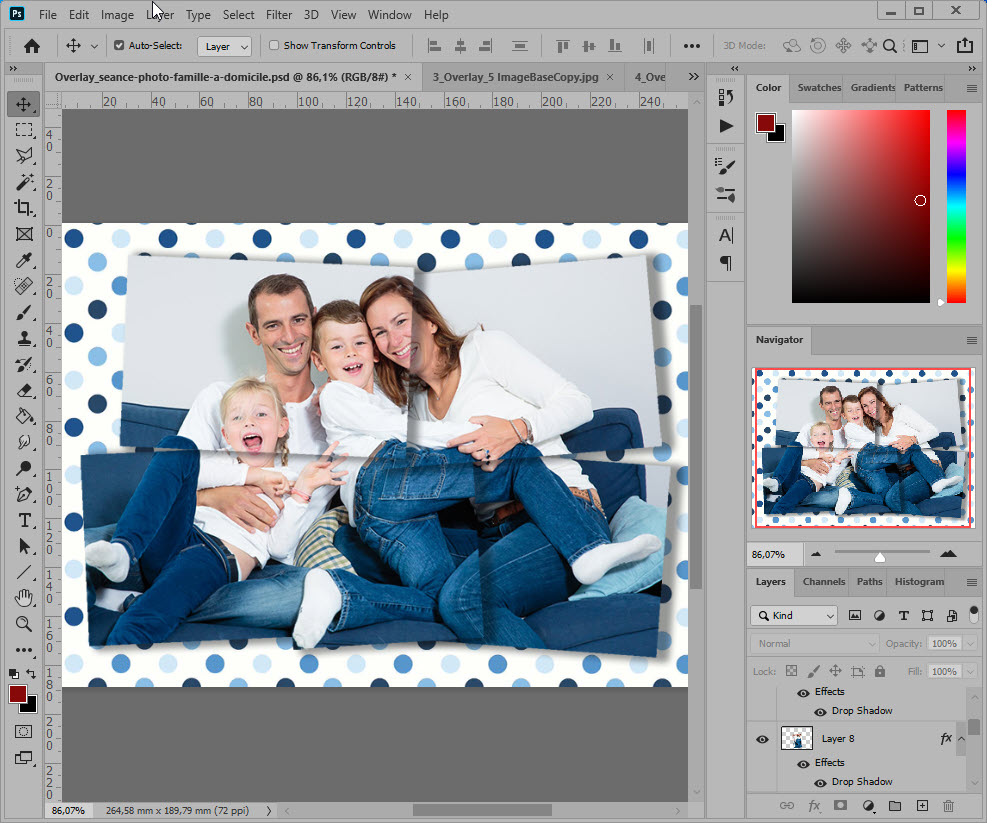
You get a photo similar to this one... ready to decorate one of your albums. Note that to accentuate the idea of editing, we have slightly shifted the images for "more life".
Photos with torn edges....
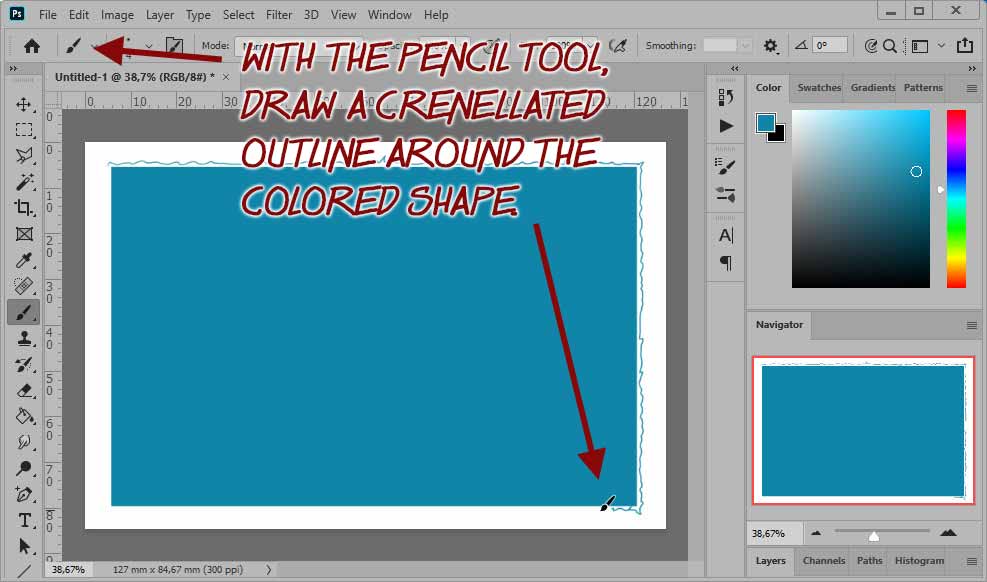
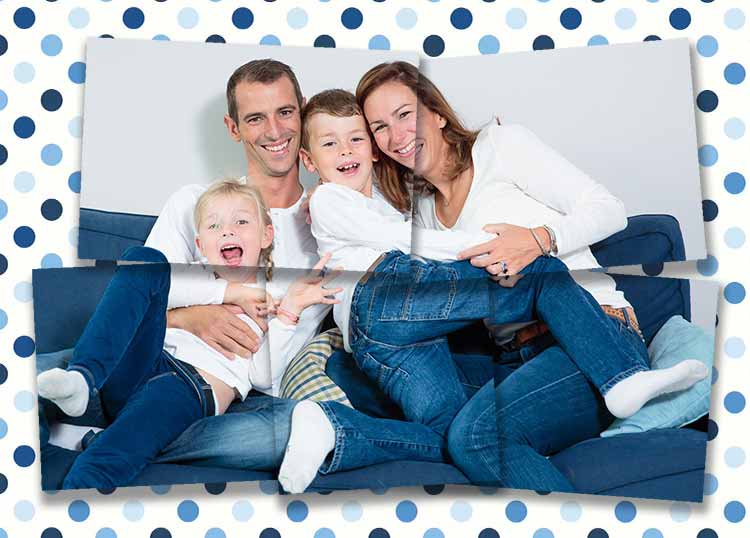
Modern photos, when printed on paper, no longer have a white border... There was a time when these photos were all printed with "torn" edges (also called "crenellated" edges).
It is to give your scrapbooking pages a discreet vintage lok to present your photos with torn edges... Here we will combine the two effects: crenellated edges and photo stitching...
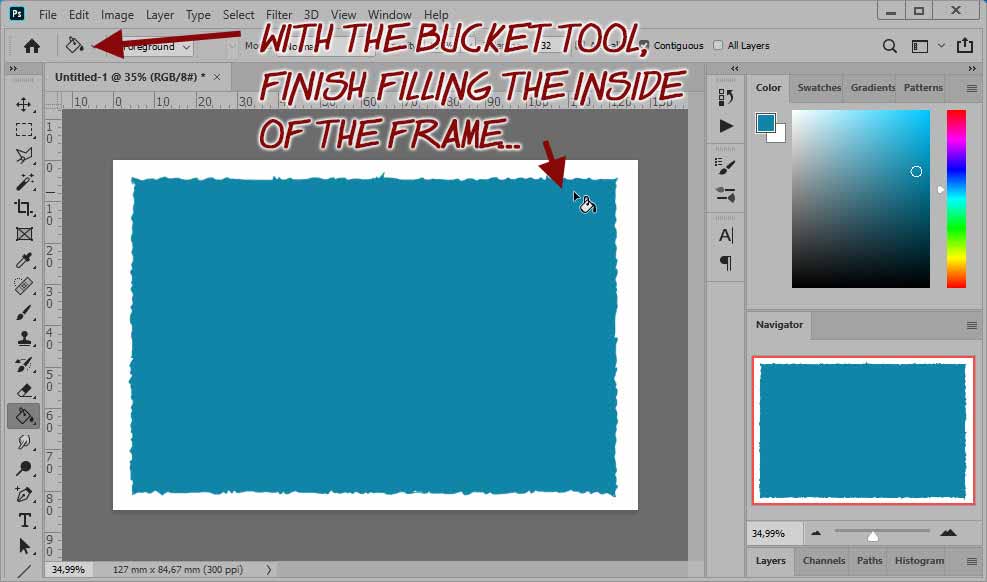
To obtain, in the same way as above, this photo effect reconstituted from photos....
If you wish to obtain the frame with torn edges click HERE
Frame construction with torn edges
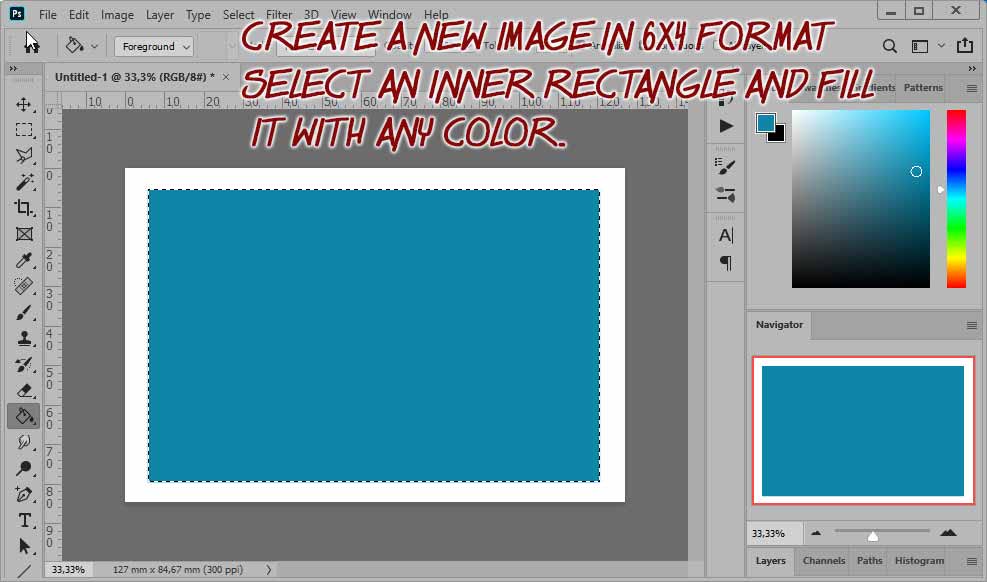
In Photoshop, create a new image with dimensions of 1500x1000 pixels. These dimensions are not critical... you put what you want! I chose these dimensions because they correspond to the most common 6 "x4" photo format.
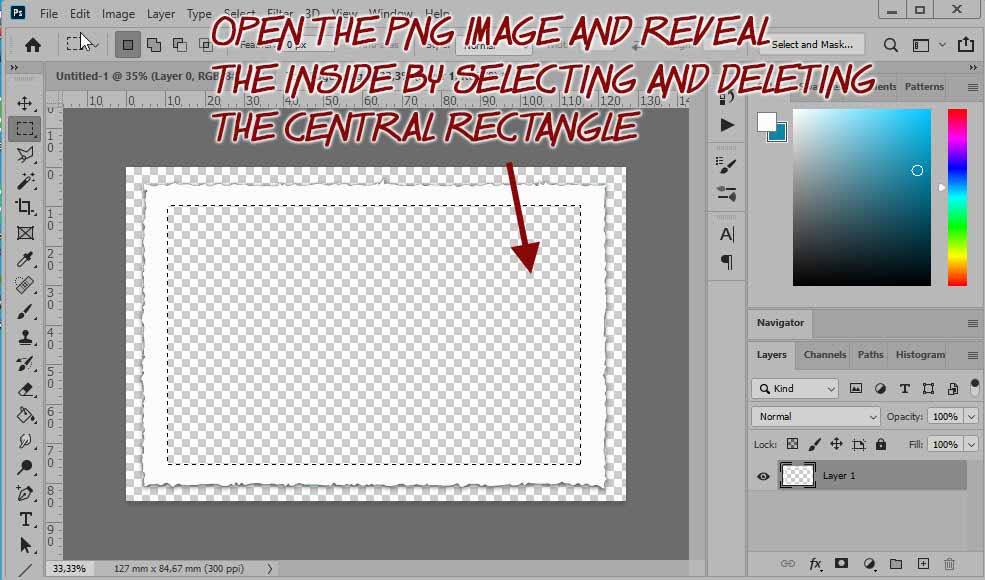
With the rectangular marquee tool, select and then fill a rectangle inside your image with color....
It's OK.
implementation of the frame with torn edges
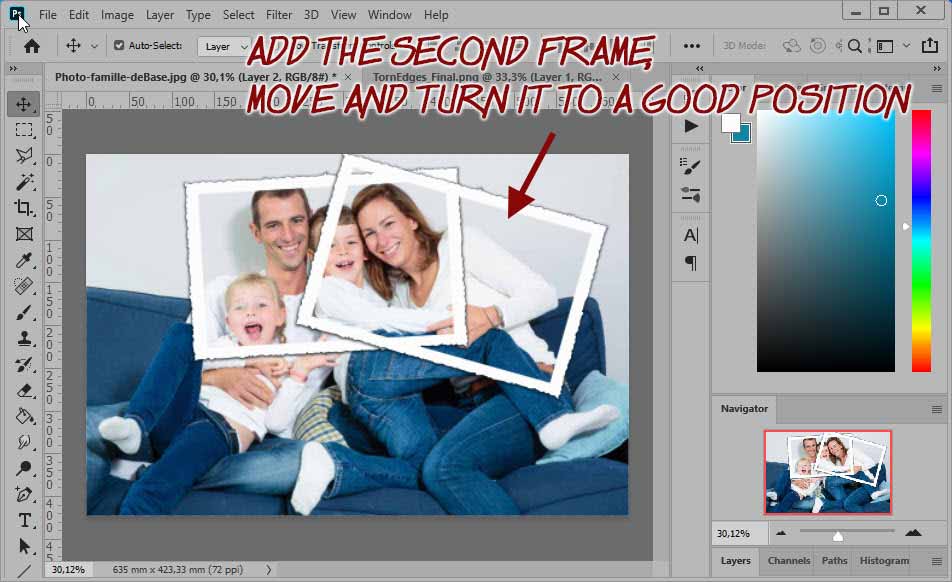
In the same way as at the beginning of this page, we will give the "overlay effect" using the tear-edged template created above.
Here, no photo cutting... we'll just add the frames and give the illusion of a montage with overlapping photosjust by playing with the drop shadow of the frames.
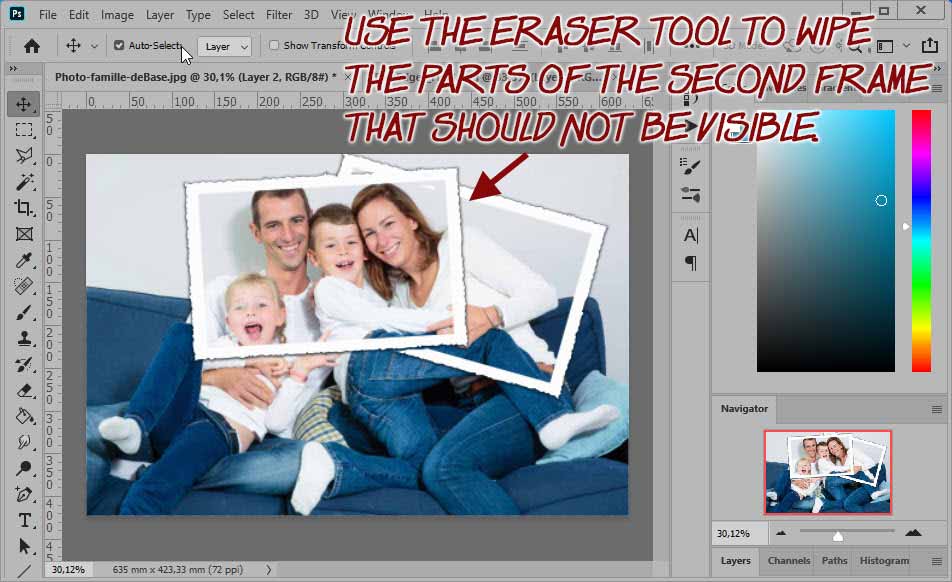
As this frame is supposed to be dragged underneath the first one, you will now take the eraser tool and erase the parts of this frame that are not normally visible.
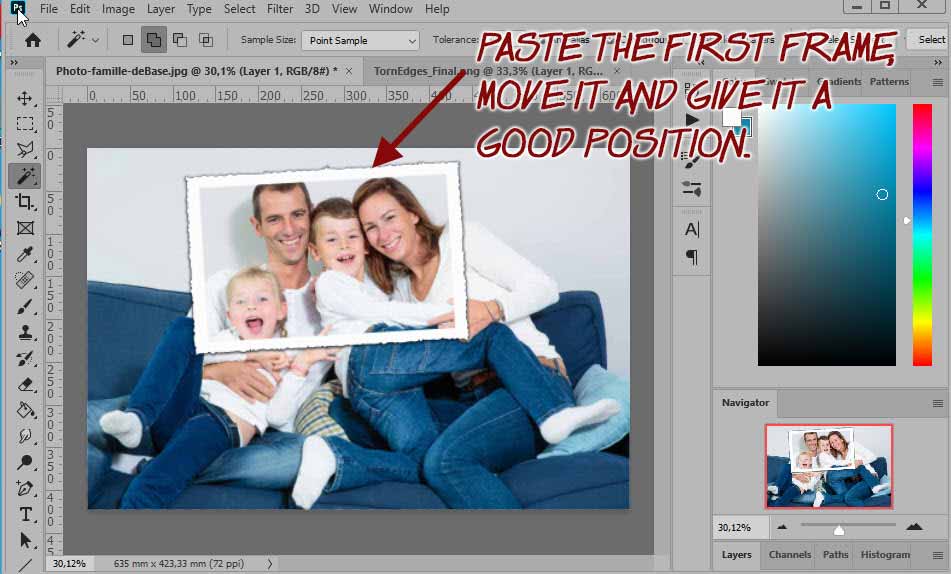
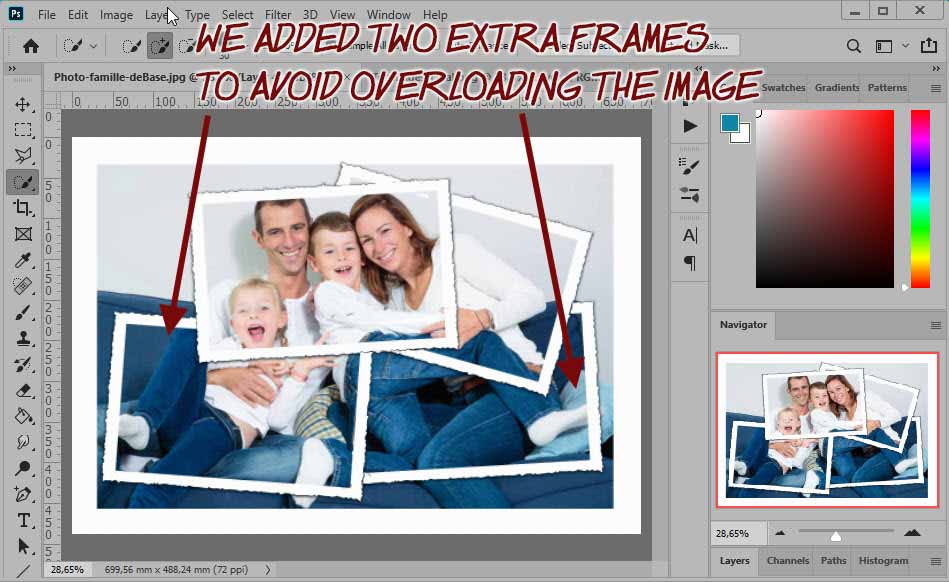
In order not to overload the image, we have added only 2 frames... The set covers well the whole image.
Note: with the crop-tool we have enlarged the image: this explains the white margins that appear.
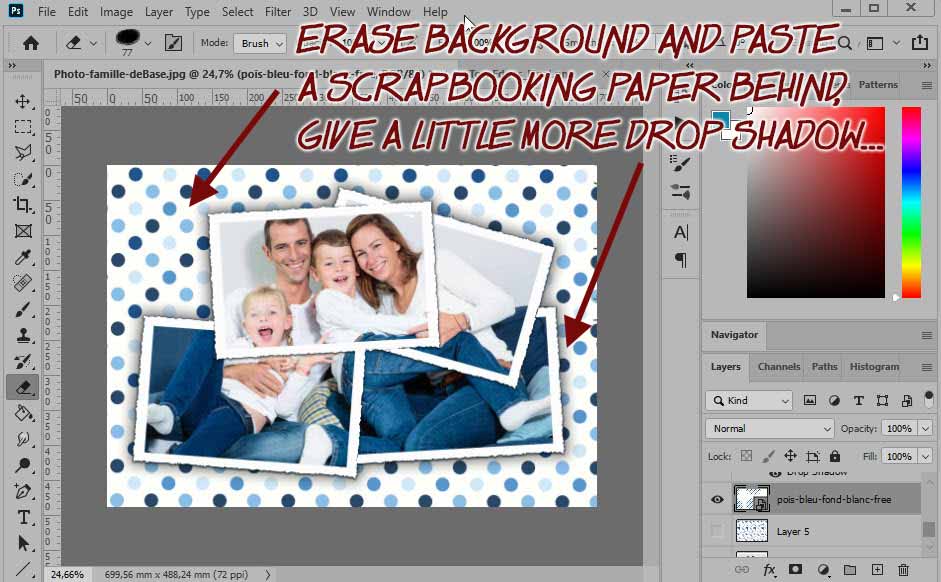
All that's left to do is add a background, a white scrapbooking paper with matching blue polka dots and give a little drop shadow... The assembly is finished.