DIY YOUR MULTIPLE PHOTO FRAME
Making of the linen french pell mell !
 Why to make a french pell mell?
Tired of frames fixed for eternity? You want to have your latest photos constantly under your eyes..!

You want to renew them each time you receive your new package of developed photos..?
To put "on the spot" and easily remove your photos "higgledy-piggledy" in a frame, you need a PELE-MELE also called "multiple photo frame" !
This is not difficult to achieve it and when you're finished, you will understand that those that can be found in stores are sold far too expensive!
In this page, you will build the multiple photo frame inside ... in this other page , you will build the wooden frame that will serve to expose it!
 Equipment and supplies
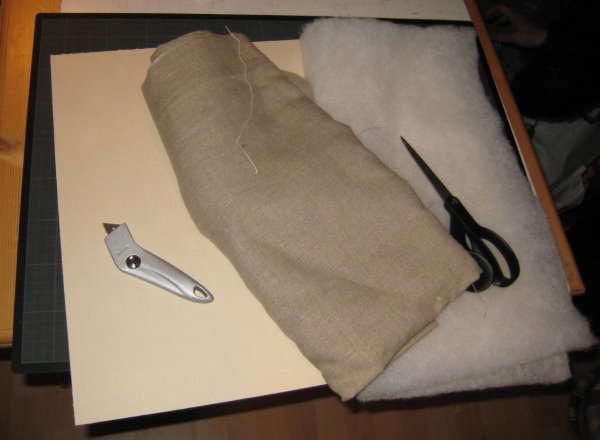
For the backing :
- A thick cardboard (2 to 3mm) 52x42cm or thin plywood.
- A piece of fleece (or duffel) the same size
- A piece of natural linen color fabric a bit bigger.
- Small buttons or fancy brads.
- Linen handmade string .
- 5 decorative buttons (coconut) and 5 small regular buttons.
- Double-sided tape.
- Glue, a cutter, a large needle and sewing thread.
 Making of the backing
The visible part of the pell mell (multiple photo frame) should measure 40cm high x 50cm wide ... It is anticipated that it fits in a timber frame that will be manufactured according to these dimensions.
If you do not want to make yourself the wooden frame, pick up a cheap frame in a store (Gifi, Foirfouille ...) and adjust the measures according to what you find.
In our example, the base board should measure 42cm 52cm. Cut with a cutter in a plate of 3mm cardboard or buy a 6mm plywood made the charge in your DIY store.
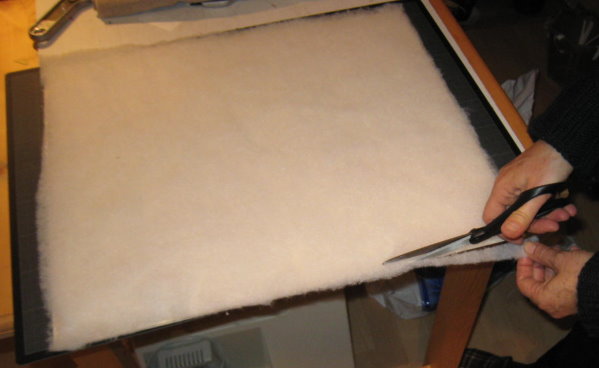
Place a double-sided tape on all edges of the cardboard backing. Then glue the duffel on the backing. Do well to join. Cut the batting with scissors flush with the cardboard.
We have now to cover the whole with the linen fabric.
 Attach the linen cloth on the backing.
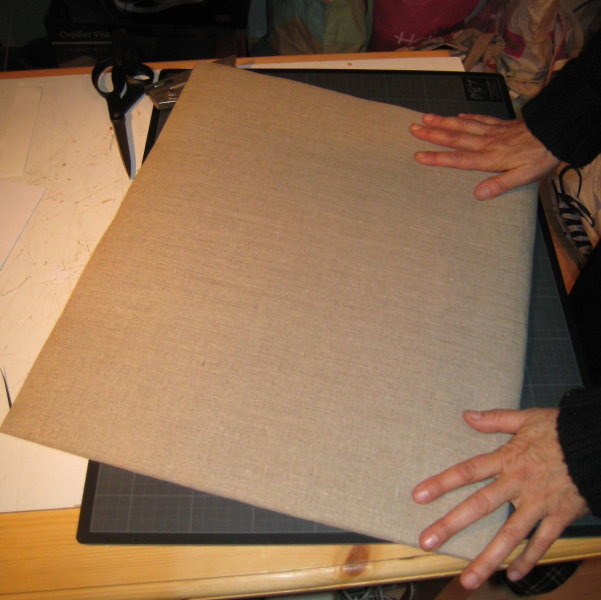
Cut the linen fabric by providing a margin of 6 to 8cm around the cardboard. Iron the fabric before placing it on the duffel.
You will simply staple the fabric to the cardboard background with a small clip-stapler.
Small staples, barely cross the cardboard and will be invisible hand side of the pell-mell.
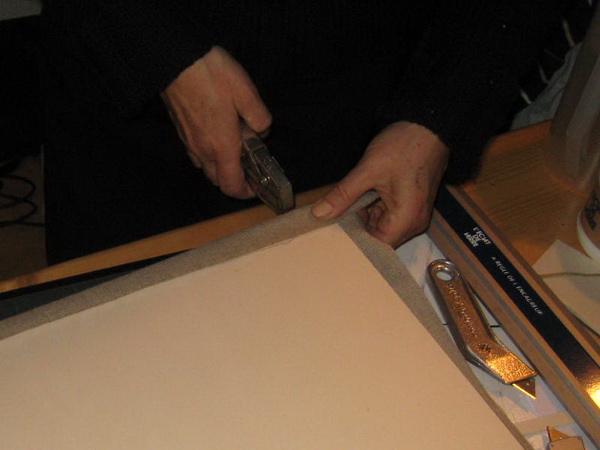
To obtain the correct tension of the canvas and work in line, start with the middles on each side of the backing.
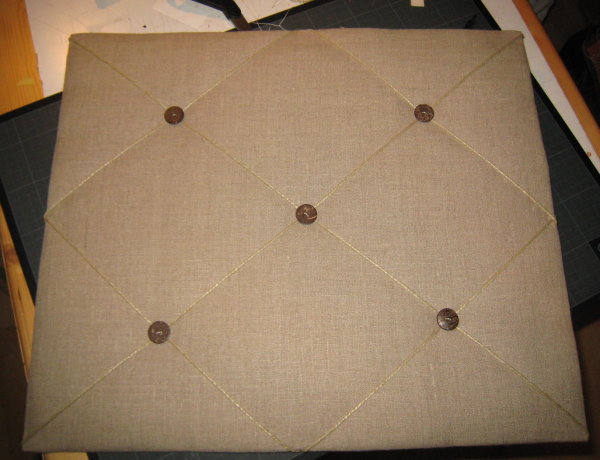
When you're done, the linen fabric will be perfectly stretched over the duffel :
 How to put flax strings
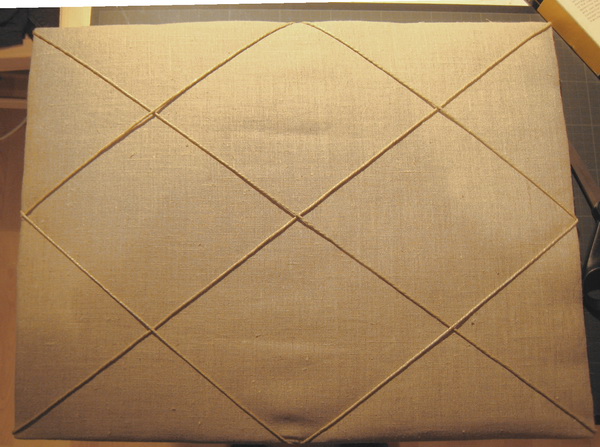
The pictures that you will put in the pell mell will be held by strings diagonally stretched across the face of the multiple photo frame. I chose to une a hand crafted linen string... You can also take silk ribbons ... or otherwise, at your convenience, but a ribbons more mask photos ...
Start with large diagonals : staple on the back the first string (bend its end like on the picture to be sure it fits well)
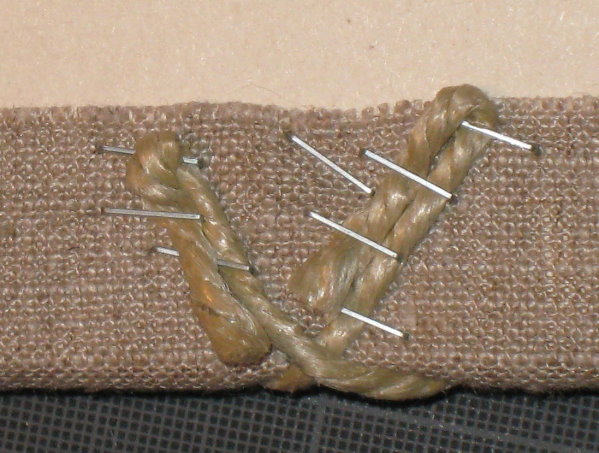
Then mark the midpoints of the sides of the bottom ... and stretch again strings you staple on the back of the pell mell. Possible small folds will disappear when you will put the buttons.
 Button placement
So that the cords perfectly fulfill their role of maintaining, we must fix them on the pell-mell at each of their intersections.
To do this, you will set aside a decorative button front ... and a small button holding on the other side. Make a hole in the box with a big needle and a small hammer while passing through the two strings that cross.
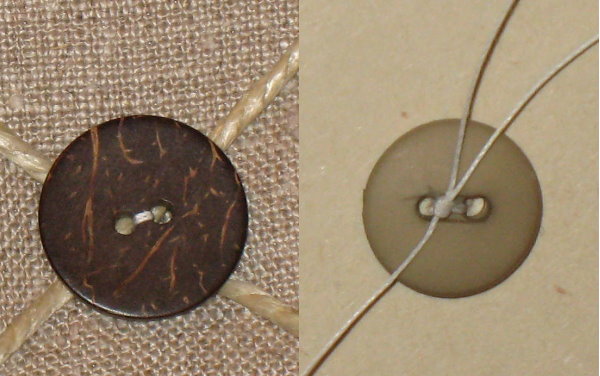
You have to place 5 buttons... on each side !
 The achieved multiple photo frame
If you've already made the wooden frame proposed in the wood section , you're done ... Place your pell-mell into the frame and attach the back with some small nails pressed in through the false rabbet...
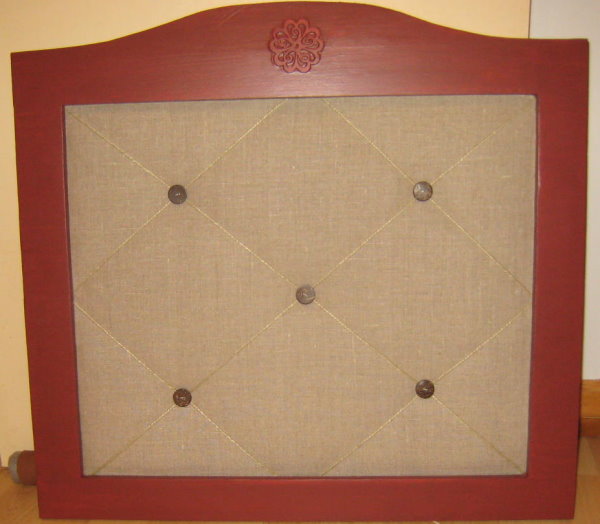
Put some pictures ... and hang it on the wall ! You don't like the pictures anymore, change them!
You've did it !!!
GD
I especially recommend :
Home Book of Picture
Framing
by Ken Oberreicht
One of the best ! I think ! Over 40,000 copies of the first edition sold : it cannot be an error ! A bedside book for u !
(Click for +)
This home Book of Picture Framing is the most comprehensive guide to mounting, matting, and framing oil paintings, watercolors, posters, photographs, calendar pages, and greeting cards without spending a fortune...
Frame It! (Paperback)
Tonia Davenport
(click for +)
Customers review are the better test for this book !
... The book is an extremely comprehensive guide for standard framing techniques, but what I really love are the more creative, non-standard techniques Tonia shows as well... (by Corey)
The Complete Photo Guide to Framing...
Vivian Carli KISTLER

(click for +)
Step-by-step color photos for all areas of matting and framing. This book includes top-notch instructions for archival framing—the correct methods and materials for preserving photos and artwork for posterity.
A best seller !