
How to finish your frames
The various techniques
You have just finished building your frame... in raw wood... and you would like to give it a finish worthy of your interior.
With a little care and good products, you can achieve a result that comes close to the achievements of commercial coaching.
But what are the solutions available to you? What are the different ways to proceed? This is the purpose of this page "FINISHINGS".
Note: I'm not familiar with all the products that can be found in the USA... Each time, I have searched for equivalent products in the on-line sites ... Forgive me if it sometimes lacks precision !
 The painted finish
 Classical method
Painting its wooden frames is, by far, the most commonly used solution: the variety of colours offered and the ease of application of new acrylic paints are the main reasons for this.
There is only one rule, which is intangible whatever your painting: the preparation of the surface! If you apply your colour on a rough surface, the result will be mediocre and disappointing (unless you wanted it that way).
To obtain a perfect surface, here is a way to proceed and you can apply this technique to all your painting:
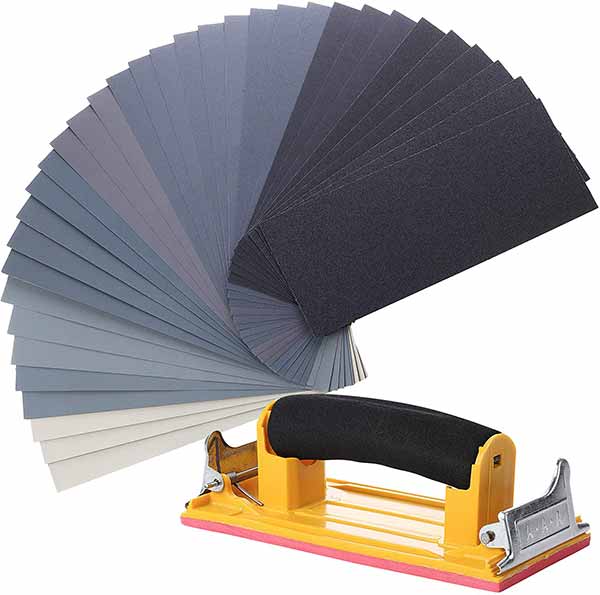
STEP 1 Carefully sand your rough wooden frame with fine sandpaper (80).
At the same time, spot the small defects of the wood that you can't make disappear when sanding: small splinters, cracks, knots, holes....
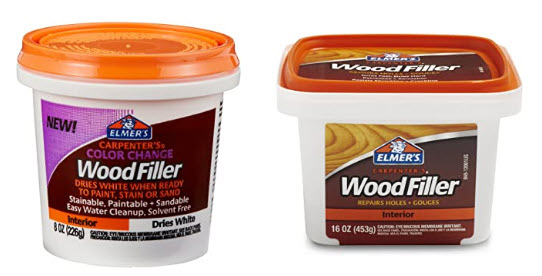
This product, WOODFILLER, is based on vegetable glues, hardens quickly, can be sanded easily and, above all, takes the stain perfectly afterwards!
Allow to dry and sand.
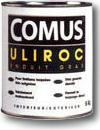
I found an extremely thin plaster, which is easy to apply and dries quickly... its brand: ULIROC. It's the best one I've ever used. It can be sanded very finely and ensures an ideal surface before painting.
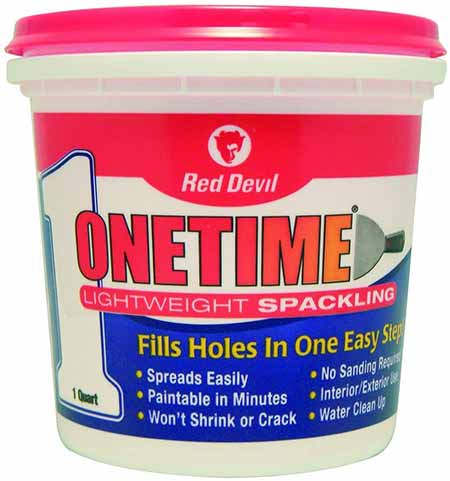
In USA, I've found this RED DEVIL spackling paste very easy to use to fill holes and stripes on the wood...
You can also use Gesso that you will apply with a brush or roller.
A friend of mine makes his own plaster by mixing white acrylic paint with powder plaster... If you feel like patrolling!
Don't forget to dust the frame before painting it, finish by wiping with a damp sponge.
Glycerophtalic paints give good results but are gradually being replaced by acrylic paints... The advantage of the latter is that they are free of petroleum solvents (and therefore odourless) and that tools can be cleaned with soap and water.
Apply a first coat, leave to dry for 24 hours, pass a very fine sandpaper, then apply a second coat.
Don't forget to clean your brushes and other tools as you go along... otherwise it will add to the cost price of your next project!
 Another method proposed by Claude Carpentier...
No need to use sandpaper.
 Giving a frame an aged look
![]() Method 1: In the manner of scrapbookers who ink the contours of their papers to give them an aged look...
Method 1: In the manner of scrapbookers who ink the contours of their papers to give them an aged look...
First, paint your frame with a light colour, then, after it is completely dry, make a small cloth pad that you will soak with dark paint.
You lightly run this pad over the edges of the frame with a movement from the outside to the inside. This will leave a slightly irregular trace on the edges of the corners giving you the desired effect.
![]() Method 2 :The old Louis XVI woodwork is light grey... with red traces of wear and tear... and antique dealers are masters at making patinas that give two hundred years to a piece of furniture made the day before!
Method 2 :The old Louis XVI woodwork is light grey... with red traces of wear and tear... and antique dealers are masters at making patinas that give two hundred years to a piece of furniture made the day before!
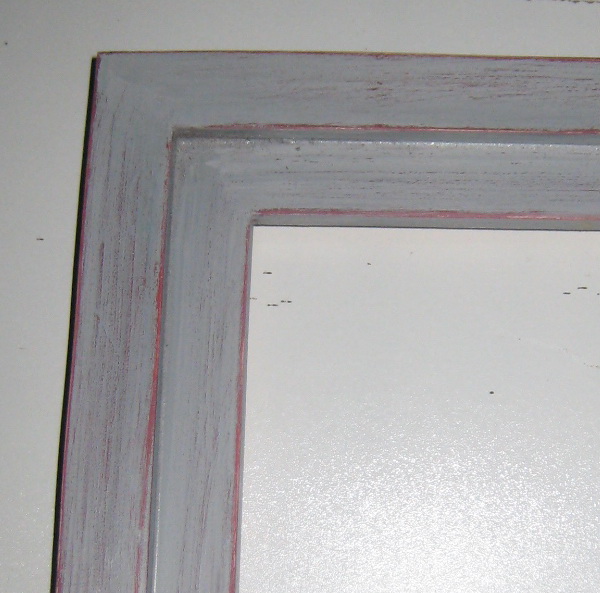
Imitate them! Apply a coat of sustained red paint as a first coat. Let dry well and then apply two coats of light grey paint. After complete drying, pass a very fine sandpaper to remove the grey paint layer in the corners and edges to make the red paint appear in places!
Finally, apply a small coat of wax to restore the satin finish where you sanded and finish with a small steel wool pad.
![]() Distressed Ivory : It is a special aging kit (for furniture, frames...) that you can buy in your DIY store... Easy to implement, guaranteed results. It's a good alternative if you don't trust the methods described above.
Distressed Ivory : It is a special aging kit (for furniture, frames...) that you can buy in your DIY store... Easy to implement, guaranteed results. It's a good alternative if you don't trust the methods described above.
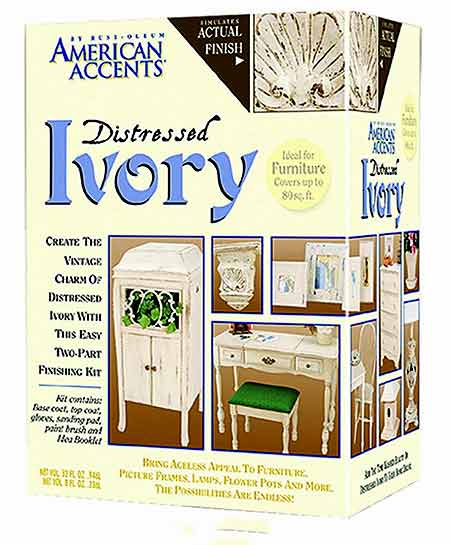
With this kit you achieve a casual vintage look in minutes...This all-in-one kit contains everything you need to easily simulate the shabby-upscale charm of old, weathered paint. Have a look on the site rustoleum.com
 Crackle effect
Cracked paint
You can very easily give a crackling effect to the paint on your frames . The principle is simple, the result is not always exactly predictable... It is necessary to make tests before starting a precise realization!
The crackled effect is obtained by superimposing a crackling paint (the crackling tint), then a crackling gel and a second crackling paint (the dominant tint). You will find the paints and gels in yor DIY store or, if not, on AMAZON... look at this page

Also note that the FRERES NORDIN market a cracking varnish that can be found in all educational leisure shops.
Do you want to try your hand at some experiments ??? Try this... which works very well! Apply a first coat of glycerophtalic paint that you barely let dry and then, directly over it, apply a coat of acrylic paint... Crackling, not always predictable (it depends on the thickness of your layers) will occur... and if you apply a thin layer of furniture polish after drying... you'll get a crackling effect at little cost!
I made a frame with this technique, a light turquoise background followed by a layer of chocolate acrylic... Very nice effects! For other colors
Other method Cracked imitation technique
You need adhesive Kraft (sold in gummed rolls in educational hobby stores). Tear 3 to 5 cm pieces irregularly and glue them together by overlapping them all around your frame . All the wood should be masked in this way.
When your entire frame is completely covered... apply gilding wax sparingly to give a slight metallic look to the reliefs. After drying, pass a colourless wax over the whole...
 Give your frame a metallic look
Always with special paint... of the brand LIBERON available in Europ with 10 different metallic tones.
In the U.S., you should be able to find them all over your DIY stores... Otherwise see on the websites of online stores: HERE for Walmart et there for Amazon...
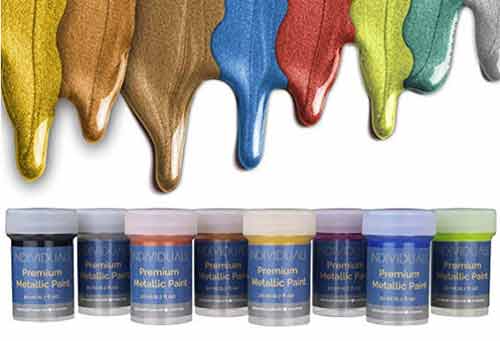
Very easy to use, it gives a "PRO" aspect to your frames. After preparing the surface, you only need to apply two coats of the special paint to obtain the desired effect!
Avoid using it on large frames: it's a bit too much... on the other hand, it gives a precious look to small photo frames...
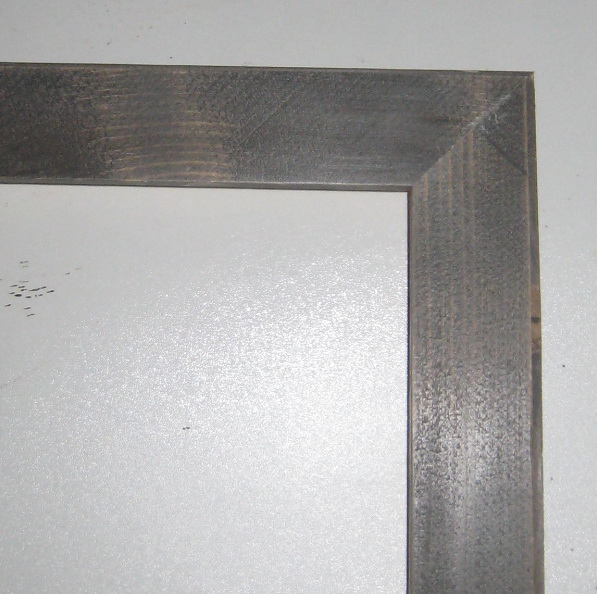
 Waxed finish
It is undoubtedly the most discreet and at the same time the most elegant finish... The frames thus obtained will blend with all styles of interiors without any problem...
It is very easy to apply as it only involves staining the wood to the desired colour and then, after drying, applying a coat of clear furniture wax that will then need to be satin-finished.
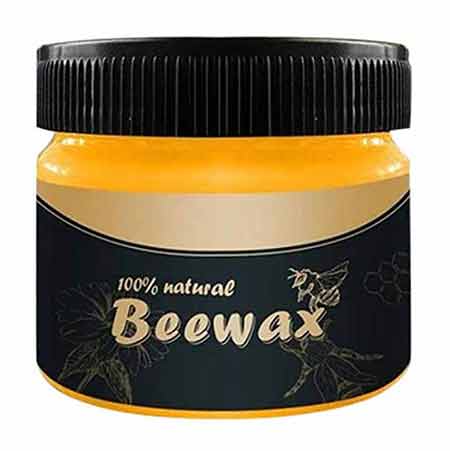
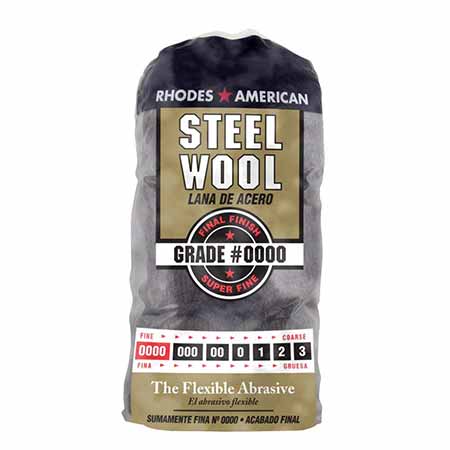
Which wax to use? The simplest you can find: natural beeswax just diluted with a little therebenthine to spread it with a brush. It's very cheap and can be used for all your furniture! Indispensable for the satin finish, the steel wool pads that will give a deep satin look.
 Waxed and coloured finish
The company DIAMANTINE (V33) sells in Europ in some hypermarkets (LECLERC and GEANT) a very practical "colour stain and colour wax" to be used on well sanded wood.
The product, in aqueous phase (the brushes can be cleaned with water), first tints and, after drying, behaves like a wax! Although the instructions for use mention "monolayer", I had to apply two coats to obtain the result I wanted...
I finished with steel wool and passed a last coat of clear wax which I then "shined" with a wool cloth!
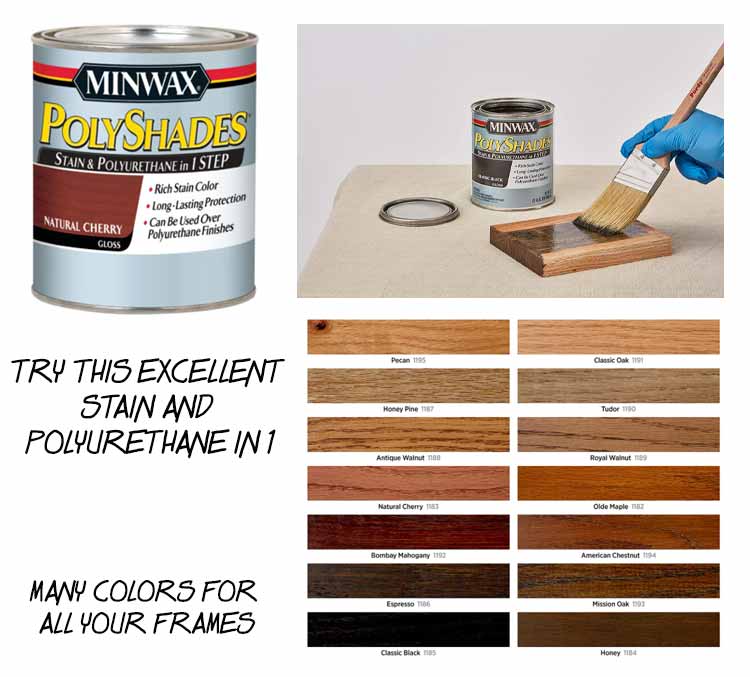
In USA, you can try these products from MinWax brand... Stain and polyurethane in 1... many colors and an impeccable final rendering
If you don't have "Stain and wax"... take shoe polish (shoe polish, not cream...). It gives excellent results. You will be able to tint and then shine your frame with a soft cloth!
Learn How to Finish or Refinish Wood Projects with Stain, Glaze, Milk Paint, Top Coats, and More
How to select and apply the right finish to your frames
The author demystifies the art and science of finishing with clear and up-to-date information, including coverage of spray finishing and the new generation of water-based finishes