Creating a mini-book souvenir of your vacations is not too difficult and with a little learning, you will make your own 8 pages photo album that you will print and distribute quickly.
You will print your photo-album with a simple inkjet printer, on an A4 sheet of paper which, after folding and scissoring, will turn into a mini photo book that you will have created without going through the CEWE or PIXUM!
If you want to print this example on an A4 sheet and make this photo book you can download the page by clicking here
 Layout of the Mini-Album photos
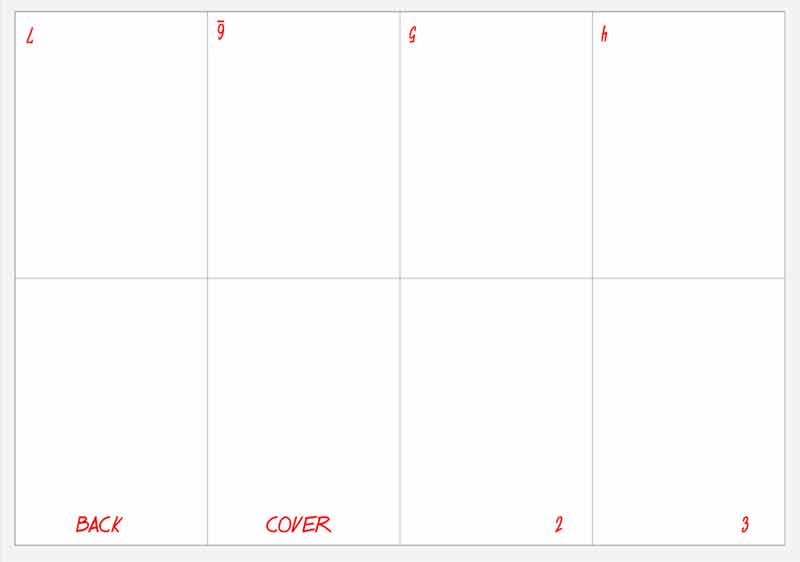
When we create a mini-album of 8 pages from a sheet of A4 paper, we have 8 squares with dimensions 10,5cm x 7,4cm...
Among these boxes, there is a COVER box (page 1) and a BACK box (page 8).
The other boxes can be used individually or grouped together to form a double page... the personalization of your photo book is thus facilitated by the flexibility of the formula: from 4 photos up to 16 photos if you agree to reduce them by half and to place 2 per page.
Between these two extremes, all possibilities are open.
Today, to realize the layout of our mini photo-book, we will use POWERPOINT which, like WORD, is widespread enough not to pose major difficulties of implementation.
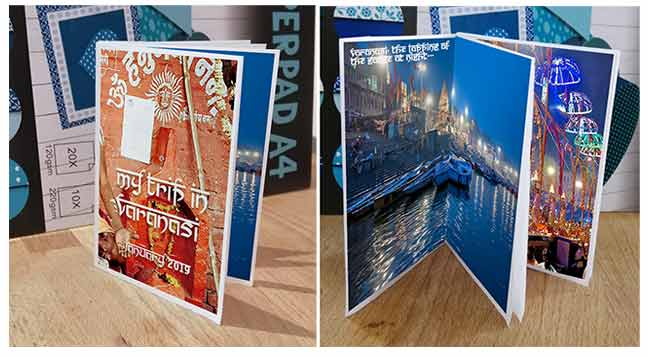
For the example, we have chosen pictures of #BENARES (Varanasi) the sacred city of the Hindus crossed by the sacred river GANGE...
Every evening, along the AARTI ghat, a kind of staircase descending into the river, a spectacular ceremony is held with thousands of devotees praying: when you know the devotion of Hindus!
With a few photos, you can create your own album that you will print yourself...
Choose the paper you will use: coated paper, or thick matte paper is preferable! You can also use A4 sheets of glossy paper... The modern inkjet printers give an excellent quality of printing!
Click on the image to download it, so you can see better what you can do yourself...
 Create your own mini photo book
We are going to give you the necessary steps to carry out this operation with POWERPOINT which seems to be more flexible than Word for this image processing... In fact it is very simple and it takes much longer to explain than to do!
 Start by creating your page.
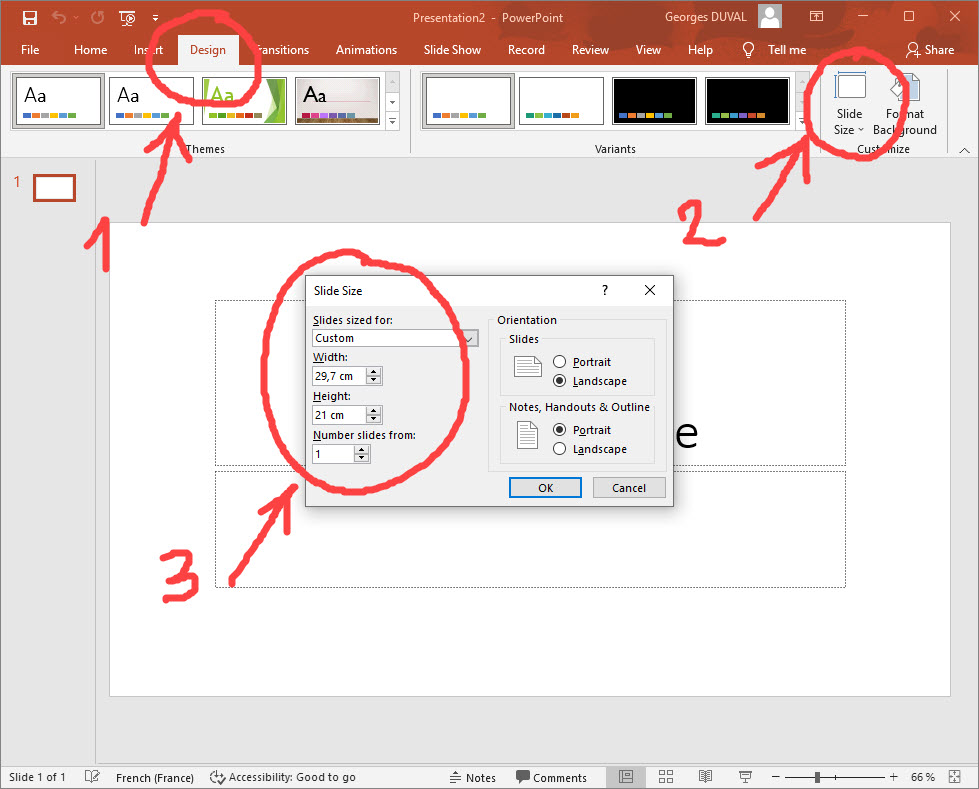
Open PowerPoint and create your first "slide"... In the Design tab set the size of your slide to 29.7cmx21cm, the size of your A4 sheet of paper.
Now use the Insert tab to create a 4 column by 2 row table.
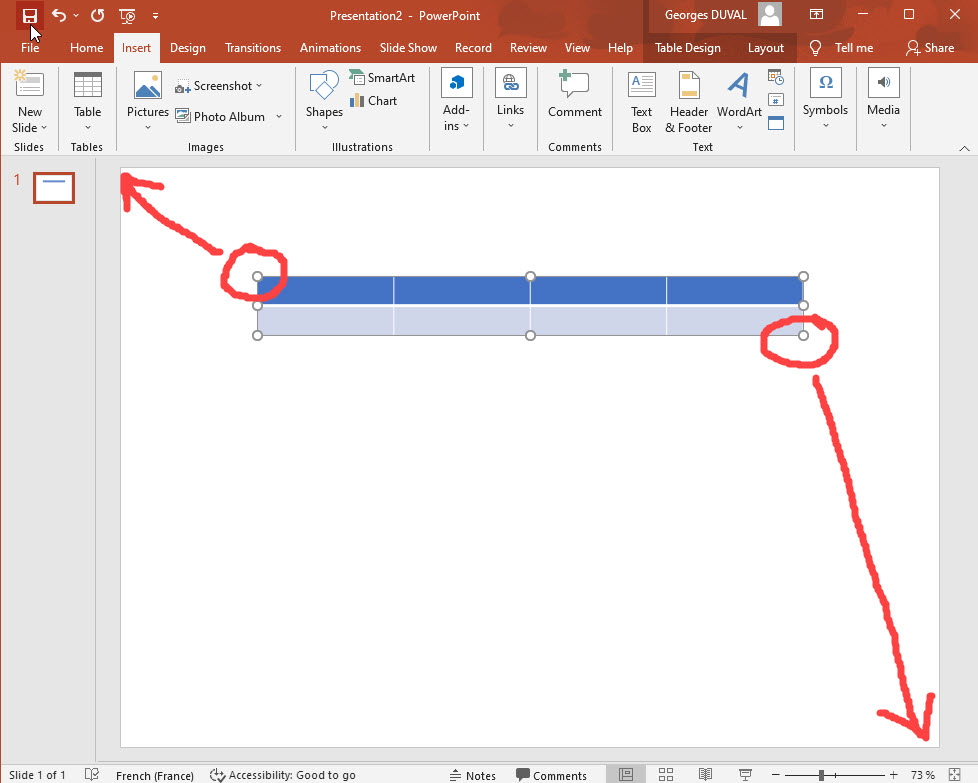
Now act on the handles of the board to adjust it to the dimensions of the A4 sheet
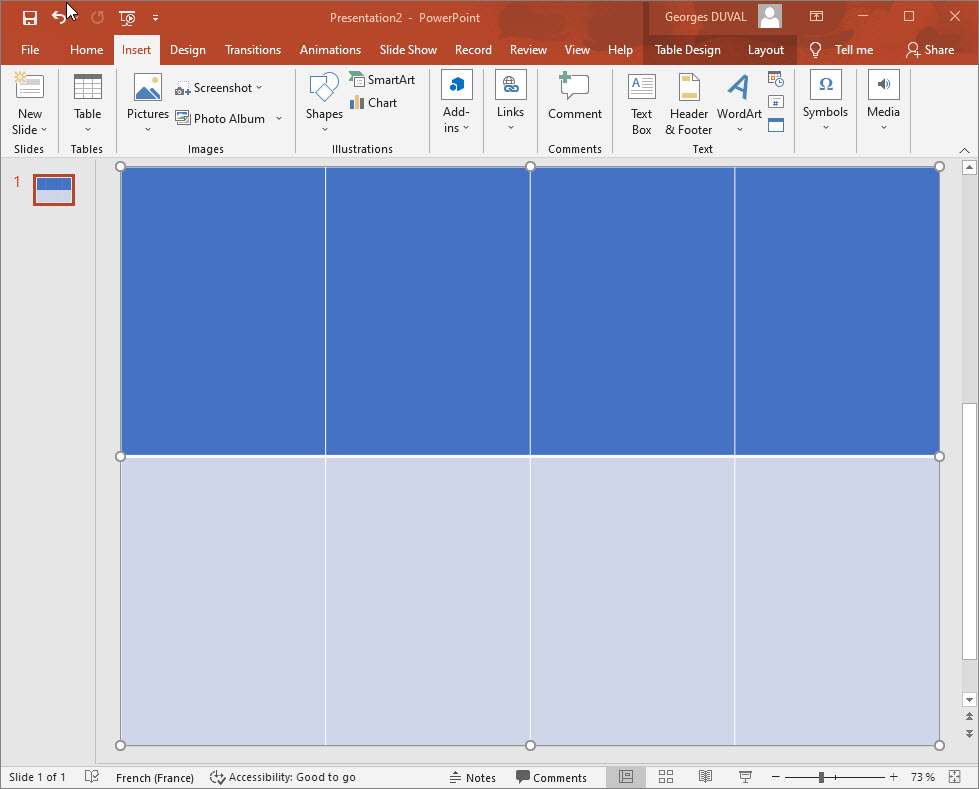
You are now ready to place your photos...
 Place your photos in the photo album
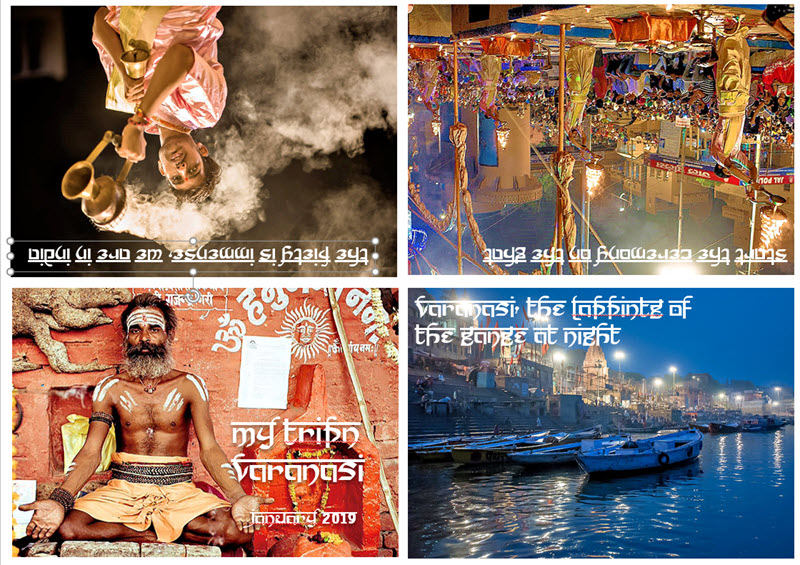
I chose a "horizontal picture" which will occupy 2 pages of the mini-album: p2 and P3.
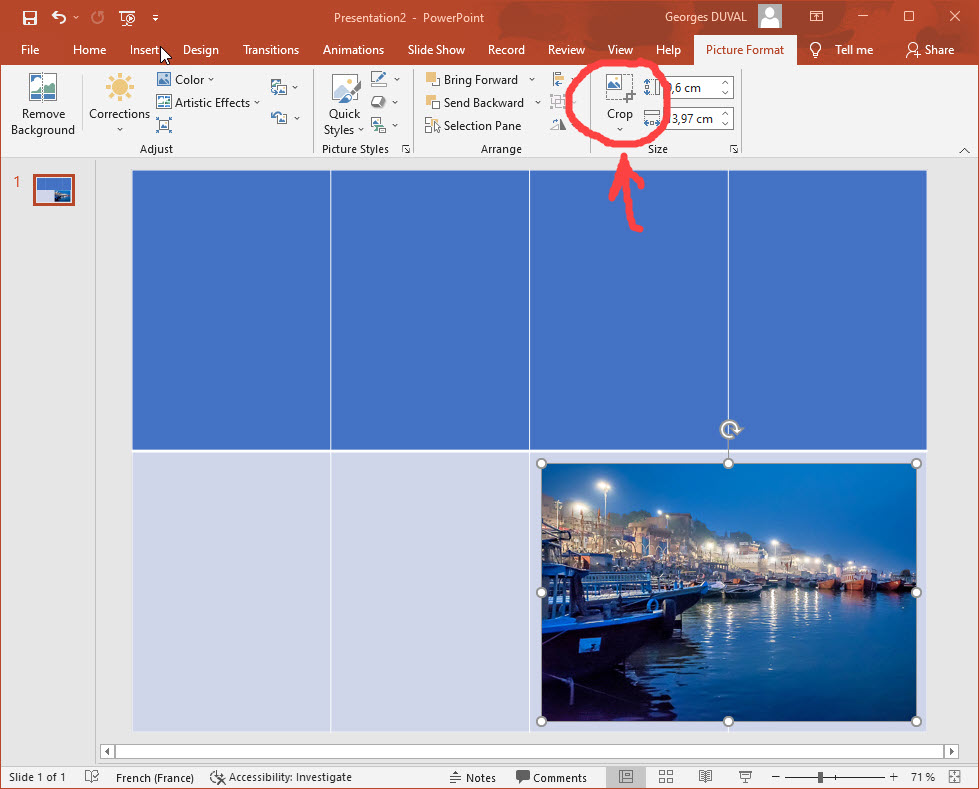
From the desktop, drag your picture on the board... It is of course too big : use the handles to adjust it to the HEIGHT... so it is a little bit bigger on the right...
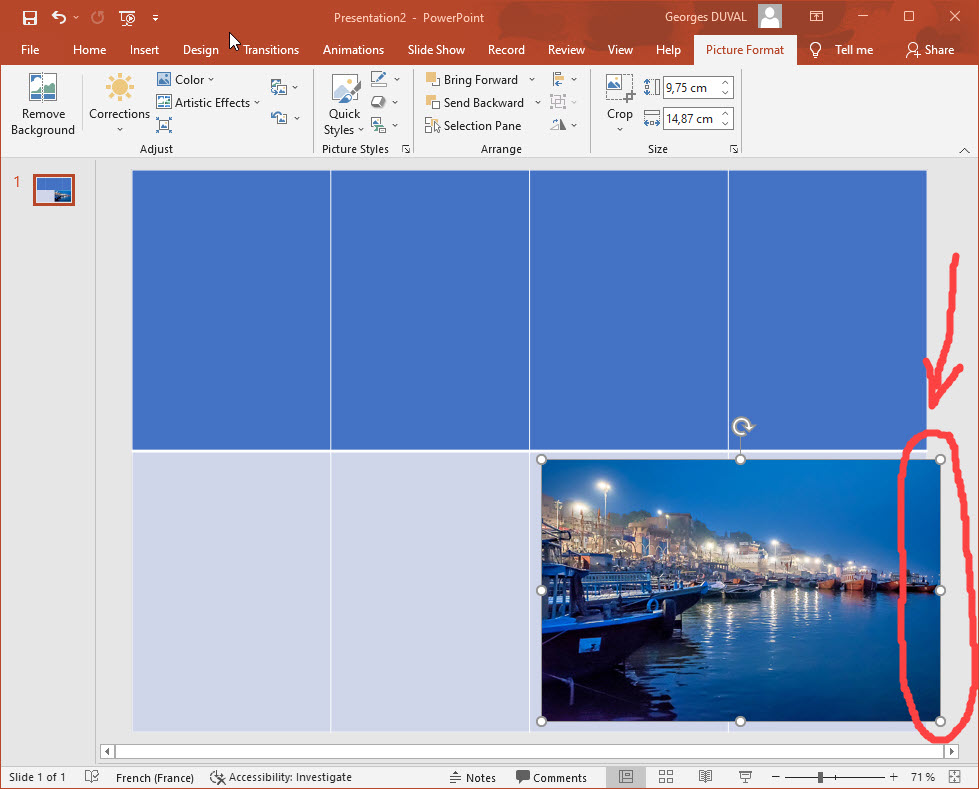
In the tab Format of the image click on "Crop image", you can then act on the "black corners" to modify the size of the image...

When the dimensions are good, click on "crop" in the image format tab...
Continue like this with the other photos... For the second row, don't forget to reverse the photos by using the rotation handle...
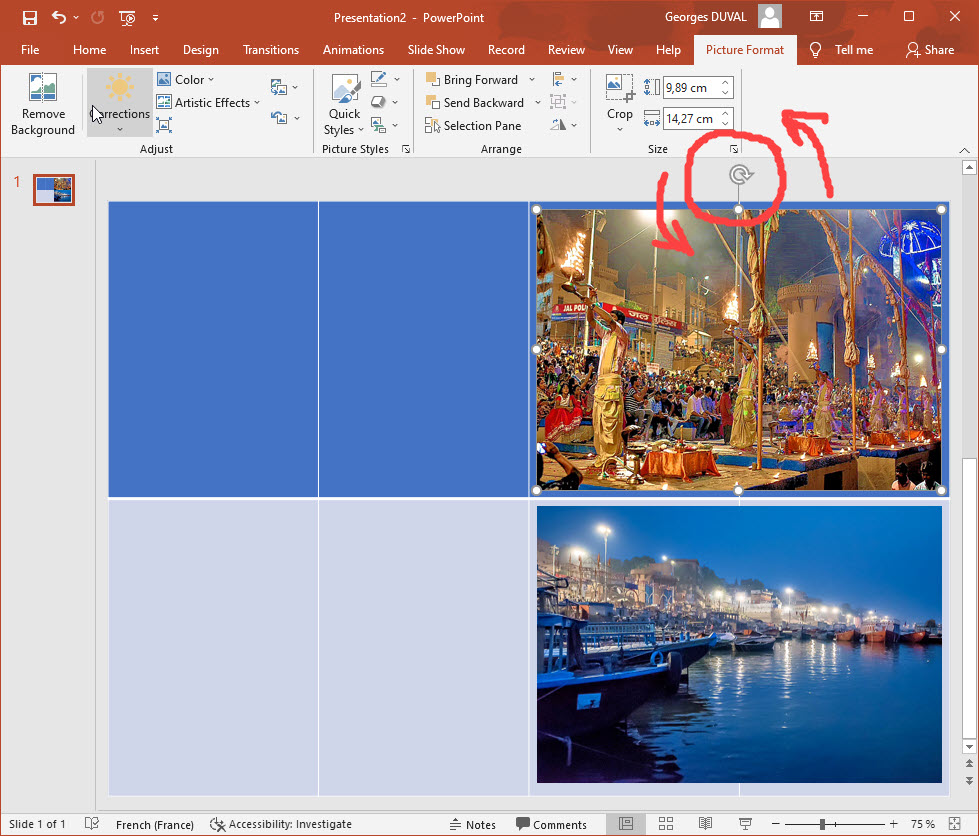
Eventually resize to adjust... moves are done with the mouse or the digital pen... fine moves are done with the keyboard arrows!
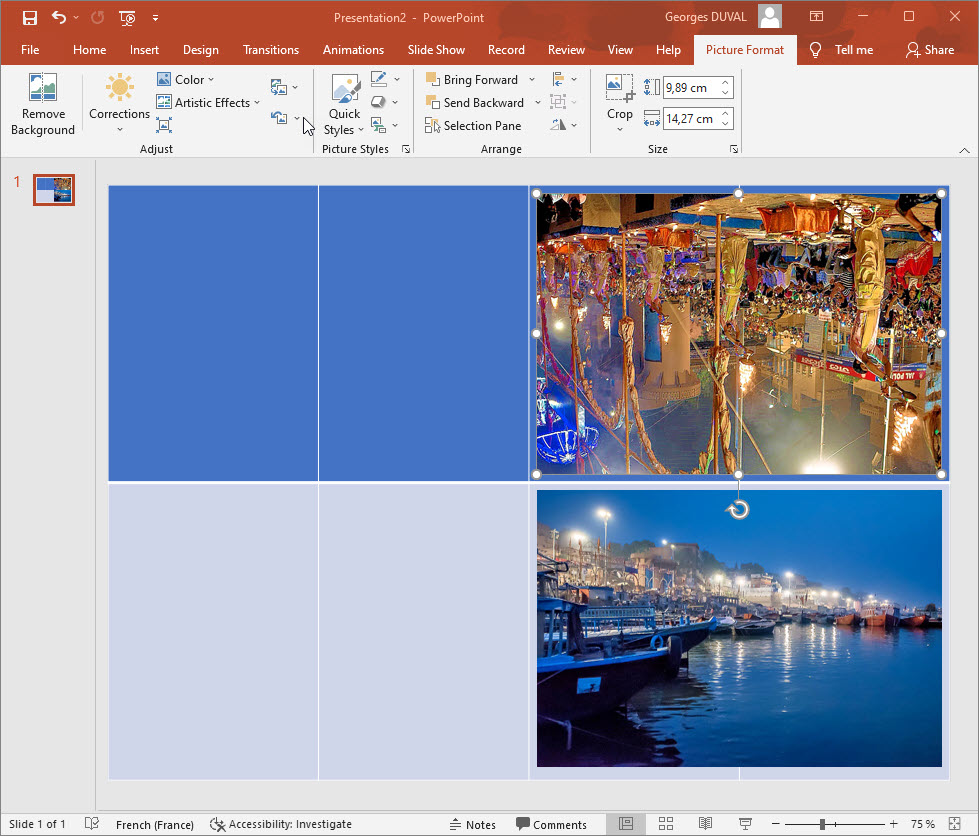
Place all the photos in your photo book! When you are done, click on the picture, between the photos and delete the structure of the table with the "delete" key... (disappearance of the bluish grey background on the top photos)...
 Install your texts now
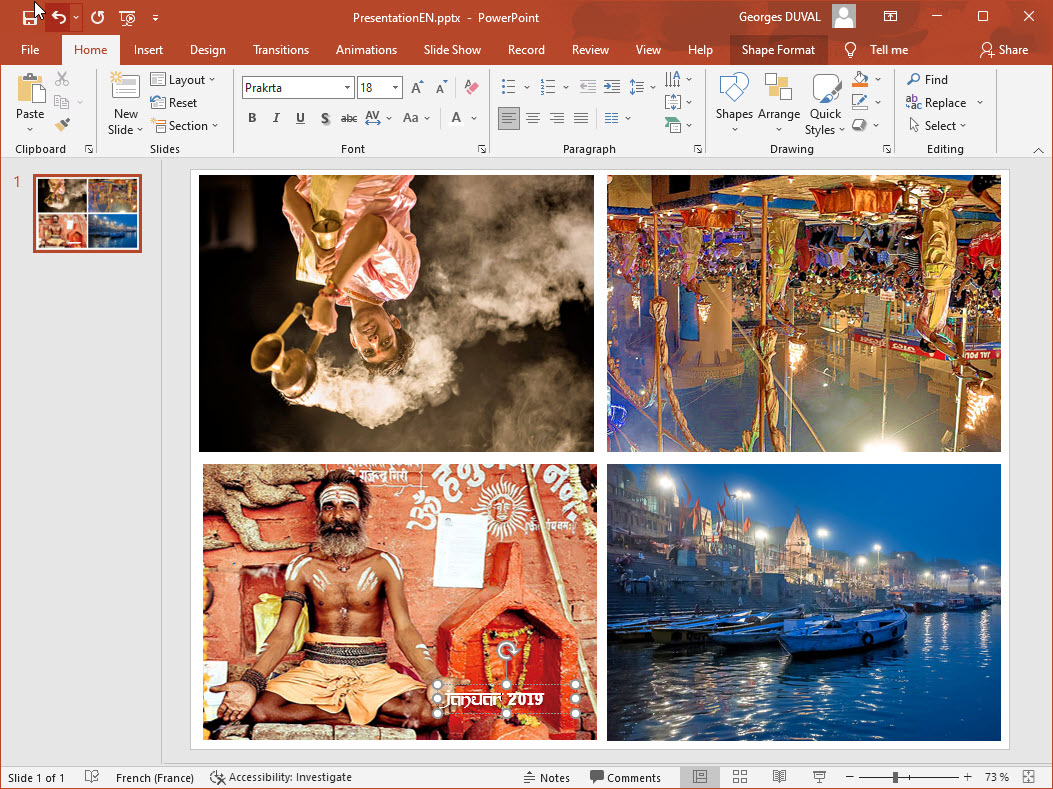
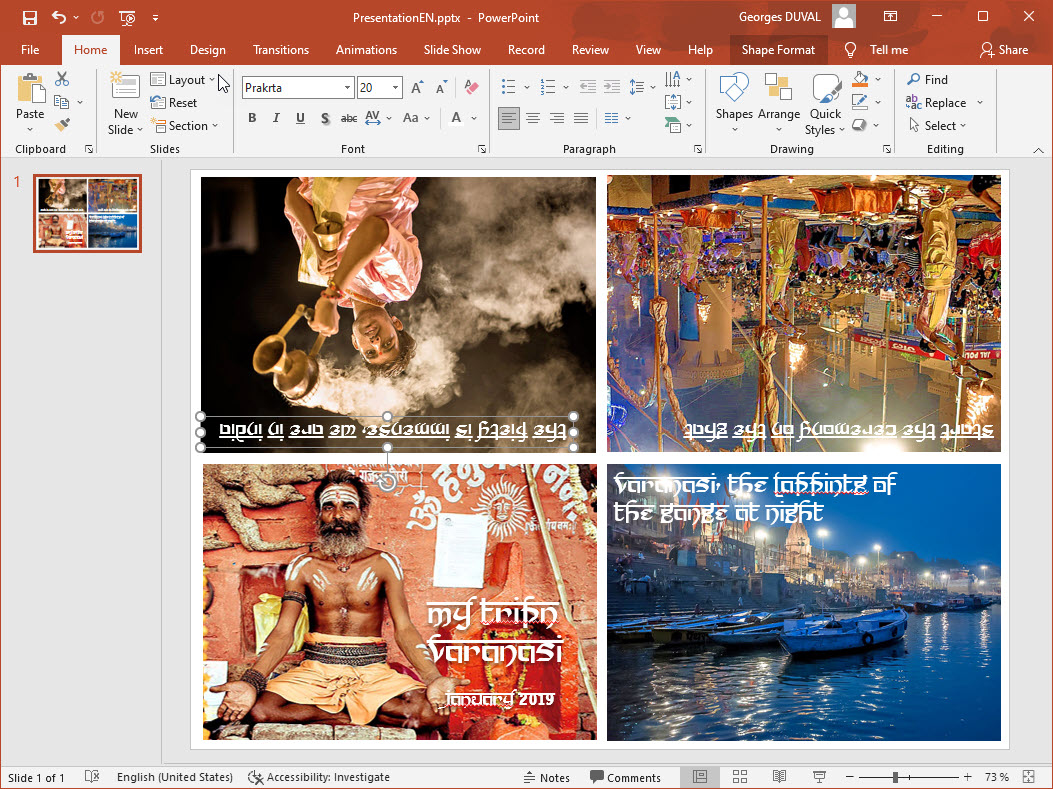
As it is a photo album about India, I chose for the texts in superimposition, a font which reminds the so special writing of the Hindus... it is the PRAKRTA font which you will find easily on the net in free download...
And here is the finished page...
 Print your mini photo book
You will start by saving your work... Use the POWERPOINT option : "save as" ... You have the choice between various formats: personally I choose .JPG or .PDF which are readable and printable everywhere...
Now we come to the last operation: the printing of your digital album. Choose a matte or glossy paper according to your preferences: and print this A4 page that you have just created.
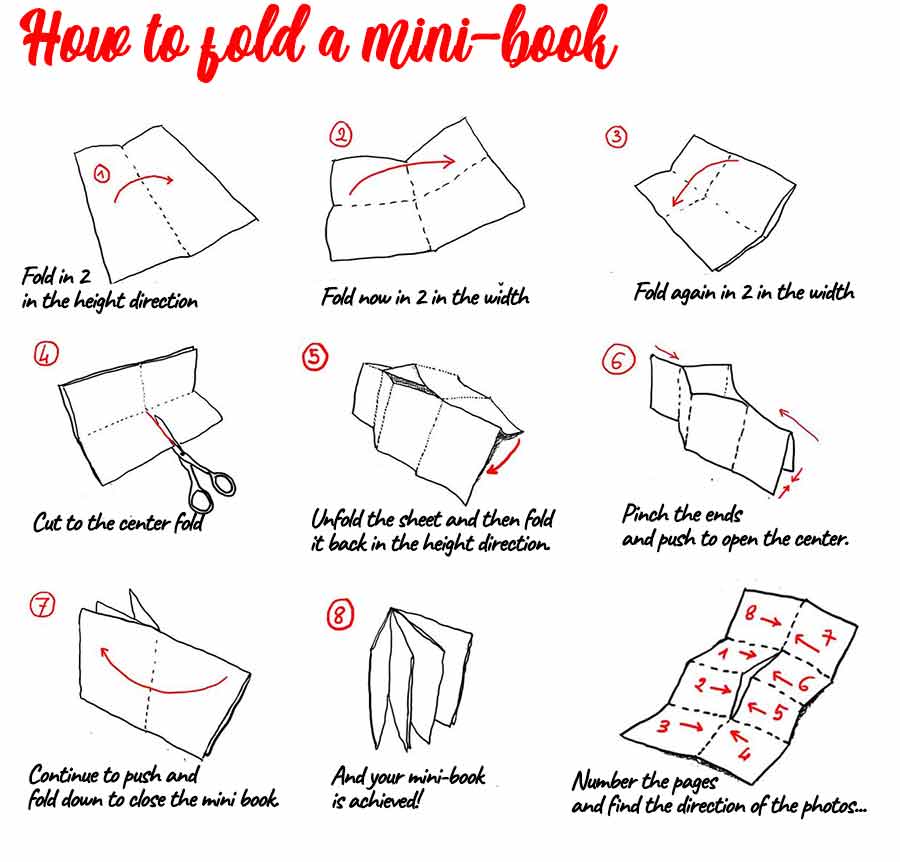
Then follow the folding method described above, cut the paper with scissors and you have your mini photo album ready to be distributed to your family or friends!
Click on the image below to download and print this mini photo book in which we have placed the 3 formats of photos that can be used for these small albums...

Happy editing!