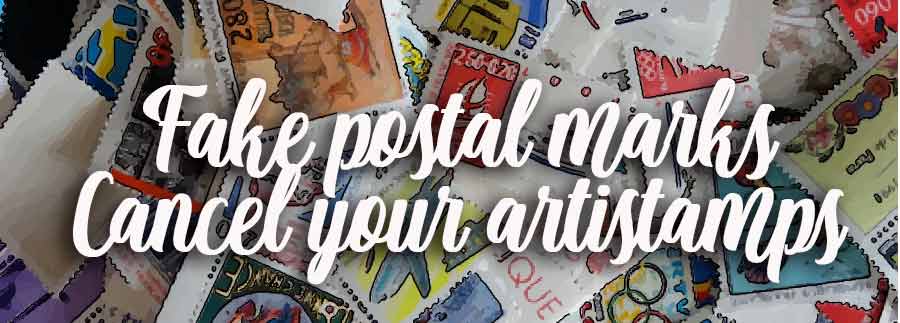
MAKE FAKE POSTAL MARKS
and CANCEL YOUR ARTISTAMPS !
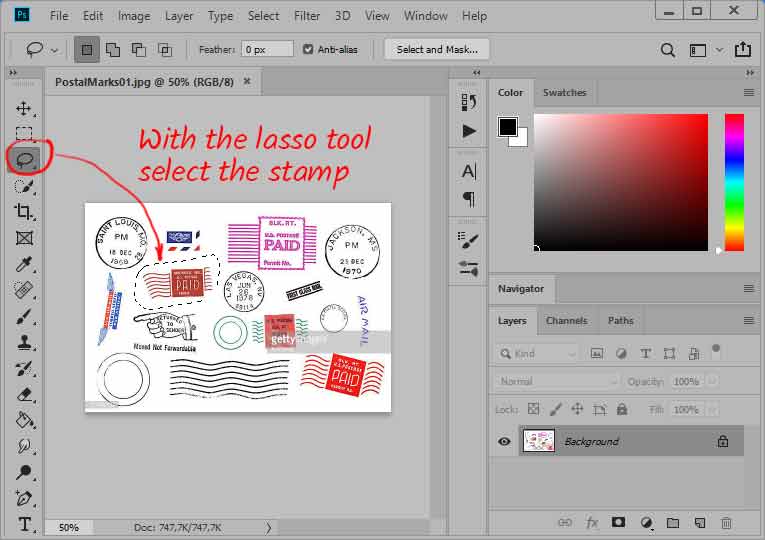
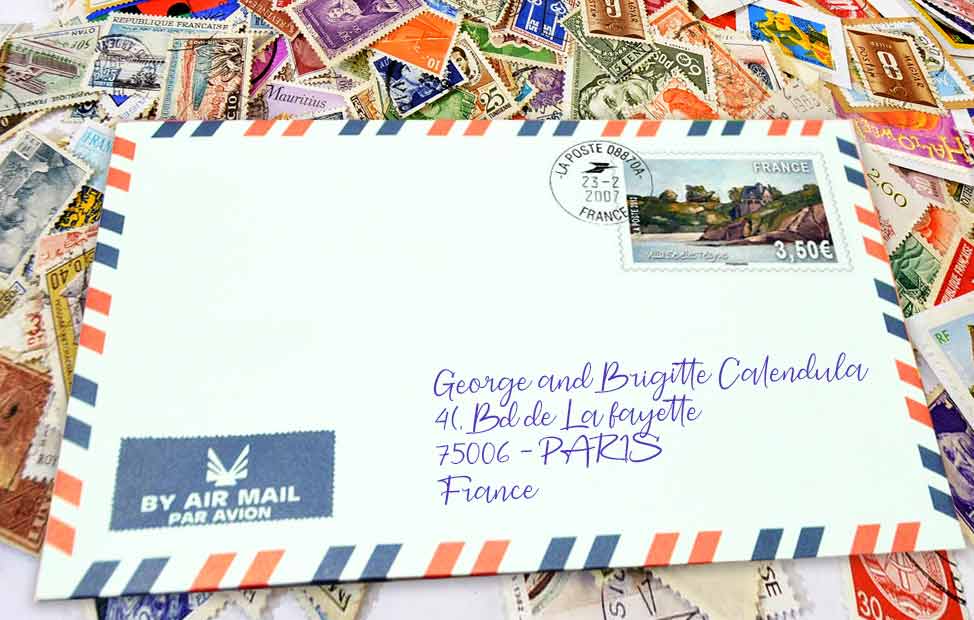
 Obliterate a stamp with a real postmark
You've DIY your false stamp ... (Recall that this is only artist stamp , or artistamps not designed to trick anyone! Especially not the Post Office!).
This work would not be complete if you not cancel your stamps : it gives them accents of truth and bring to your scrapbook pages an added attraction ...
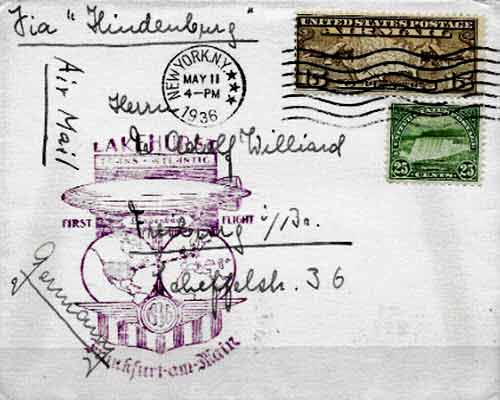
To these false cancellations, you will be spoiled for choice : several options available to you.
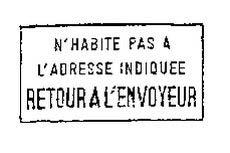
Get and use a real postmark
Run a search on google images for keyword: "cachet de la poste" or "tampon de la poste" ... You immediately get a large choice of real postal markings, flames, stamps ... and even old envelopes that you can reuse in your vintage pages !
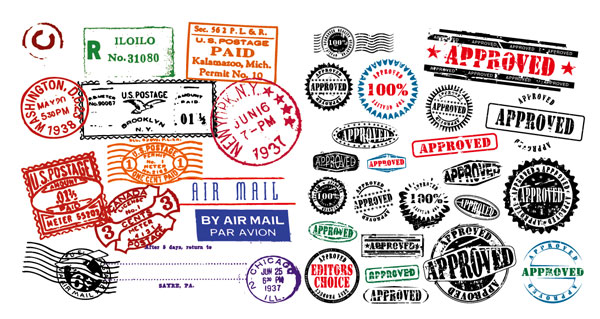
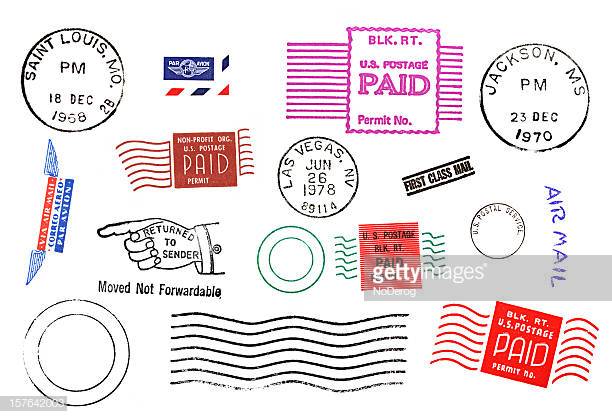
Here some examples...
no need to be precise, just surround the mark you want.
If you are looking for special marks, such as "no longer lives at the address" ... run, again on a google image query with your keywords. You will find all the stamps as you wish!
Have a look on : http://16sparrows.typepad.com/letterwritersalliance/free_downloads/
 Photoshop Brushes and fonts
There are special fonts, usually as a free download, which are made only for stamp cancellations and postal markings ... Unfortunately, these are mostly of foreign postmarks, the United States most of the time (It's a french page translation !!! If you live in US you're lucky !)
First go to ... FFONTS download Gone Postal JL . After unzipping the file, install it by clicking on the file POSTAL.TTF (hold the click) and drag it to C: / windows / fonts. Then explore the policy by typing random letters ...

In the same way, see this postmark Danish police :http://www.fontpark.net ...
And those old stamps ... http://www.fontspace.com
And these postmarks in bulk: http://www.dafont.com ...
. But if you are a Photoshop user, it may be preferable to download postal marks specialized brushes . It is easy to DL ... and even more easy to use. If you do not know how to ... here's a little reminder for those who have forgotten!
In Photoshop CS3, brushes (with the file extension. Abr) are stored in the directory: Adobe Photoshop CS3> Presets> forms.
Download a set of art brushes postal http://visual28.com . Unzip the file postal_brushs.zip and drop visual28_postal.abr on the desktop.
Launch Windows Explorer and open the Adobe Photoshop CS3> Presets> forms. Click (hold down the click) and drag visual28_postal.abr in this directory ... That's all ! Close and restart Photoshop so that it takes in account the new file.
You will find many sets of brushes on google (search or post officewith postage brushes brush) ... Here is an interesting results.
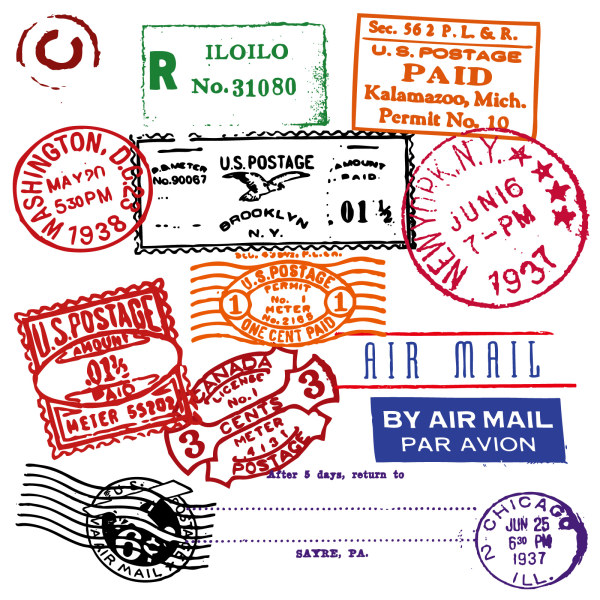
or this:
Good pick!
Choose your brush, choose the good color and apply the brush on your stamp. It's all done !!!
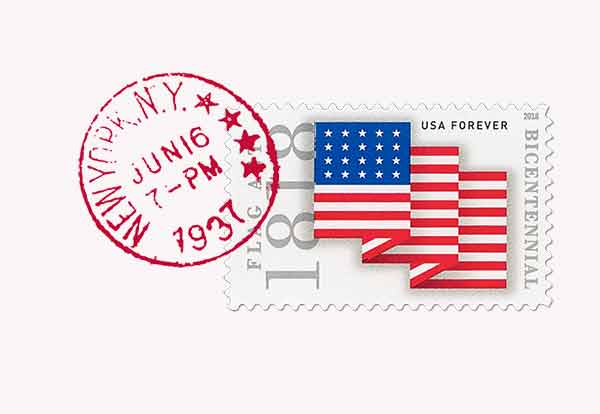
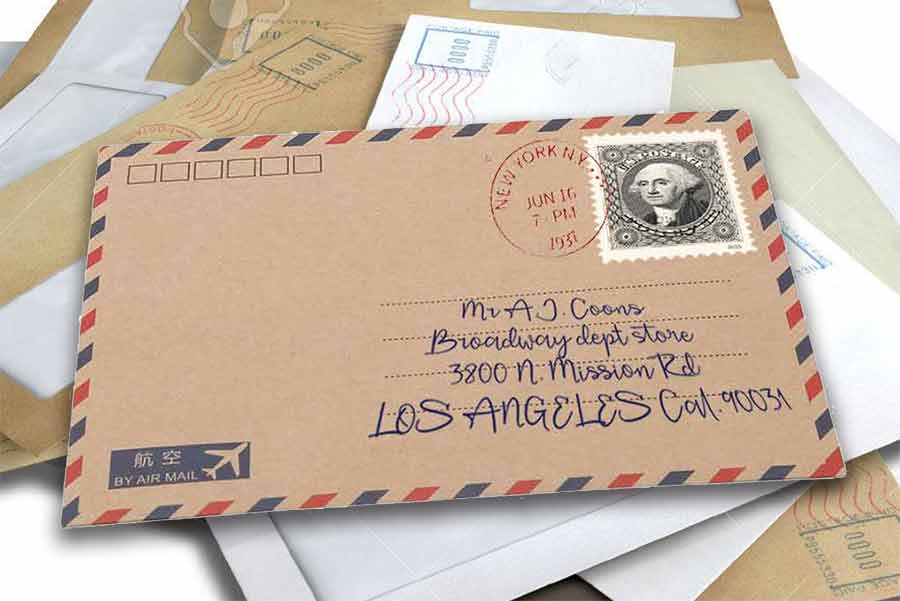
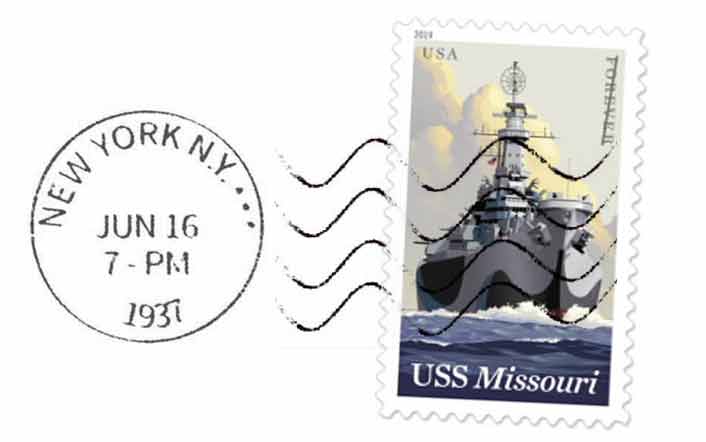
As an example, I pick the brush red postmark from NEWYORK Jun, 16... and apply it on a stamp forever...
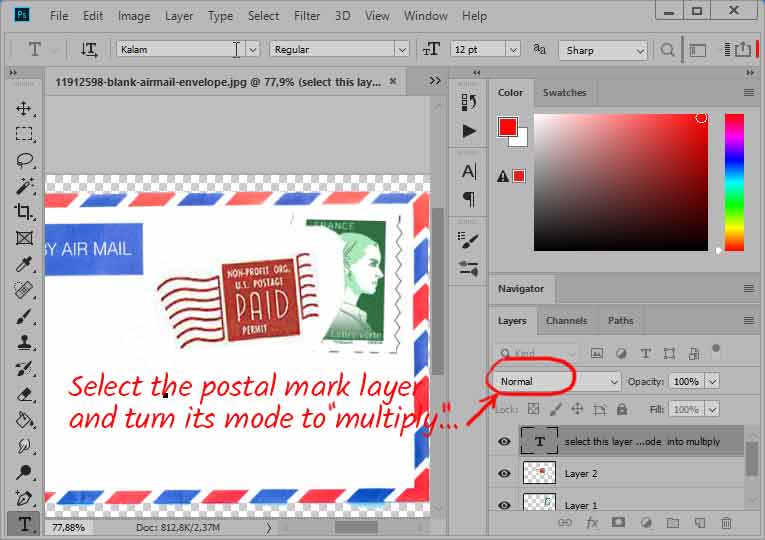
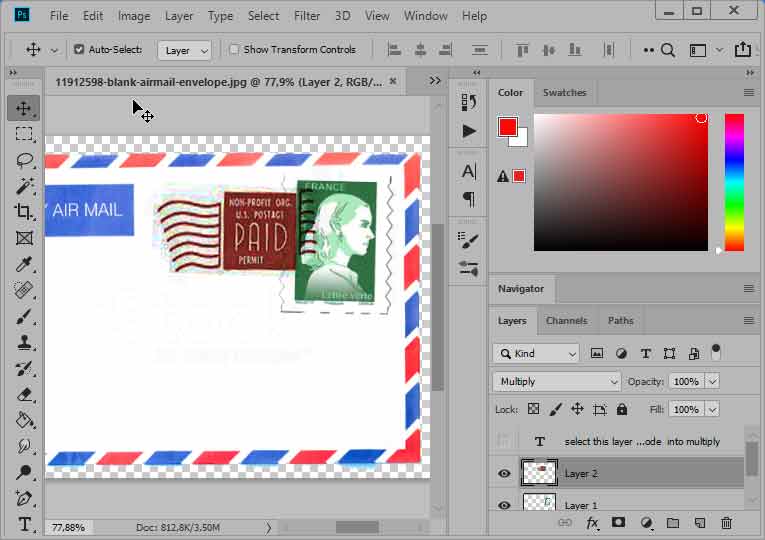
 Make your own false postal marks
It will be tailor-made ! You will get exactly what you want! Here is a tutorial for the date stamp and one on the waves for cancellind the stamp ...
 Step by step "Postmark"
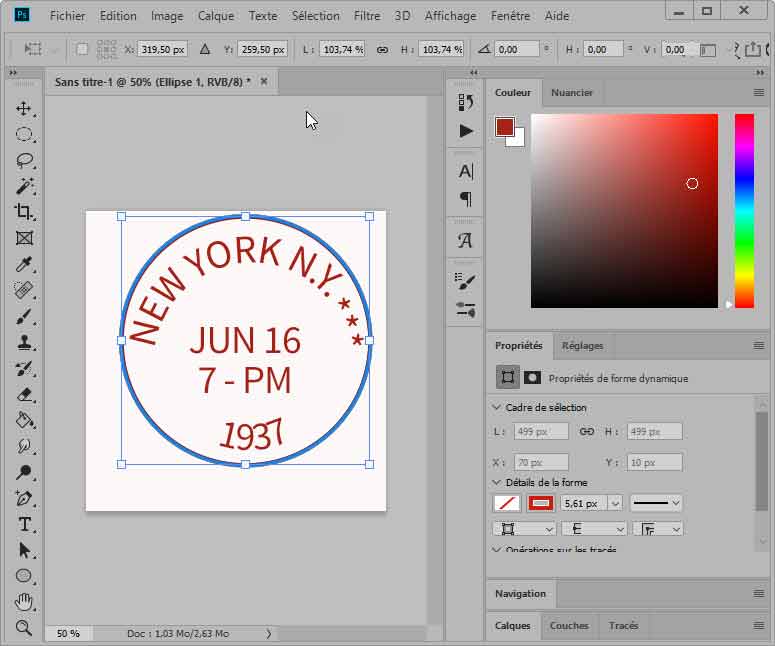
A postal date stamp include, among others, time, day and year... at the center. The name of the city, the department or state may be printed by following the curve of the stamp ... In this step by step, we will emulate the postmark of the city of New York in 1937
In Photoshop, create a new image (Ctrl + N) and give it to 600x600px dimensions just to have a little room to work.
Take the shapes tool, select the ellipse, and check the fill option, and by pressing SHIFT draw a circular shape.
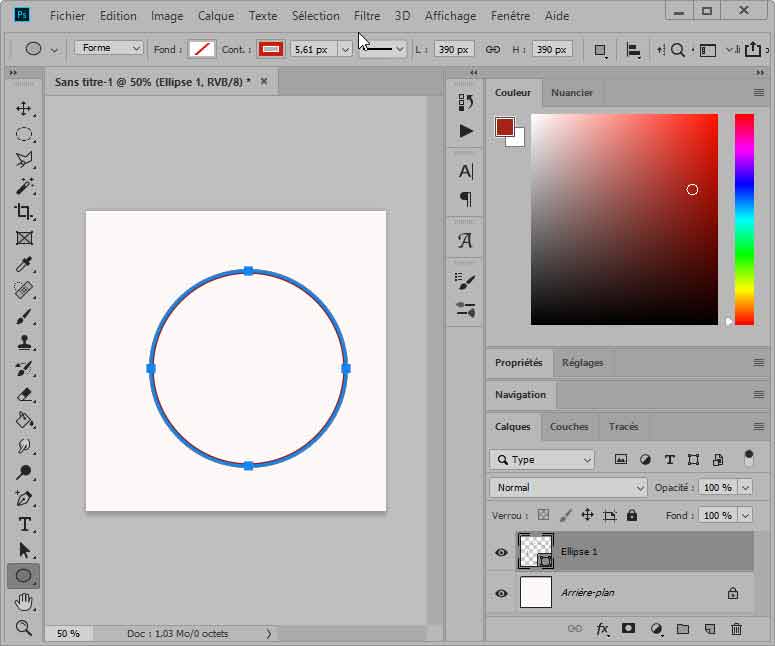
Now take the Text tool and click on the circular shape : Cursor hooks on this circular shape ... and you can now write the name of the city. Do not worry if the cursor does not hook where you want!
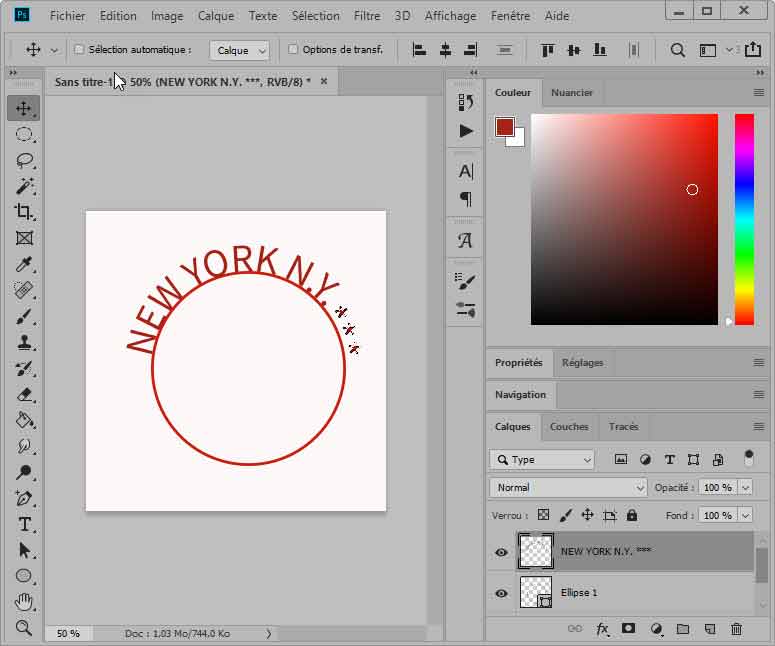
With the text tool click now at the bootom of the round shape and type "1937"... Take the black arrow tool and move the text inside the round shape...
Take again the texte tool, click inside the round shape and type jun 16 and 7 - PM. Move the text to center it.
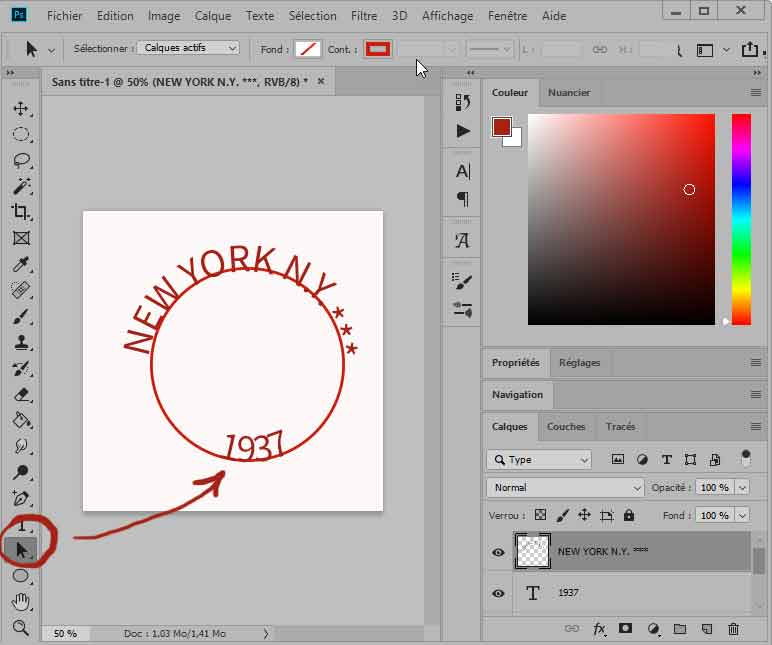
Delete now the first round shape by deleting its layer...
With the shapes tool, draw a new circular shape around the texts.
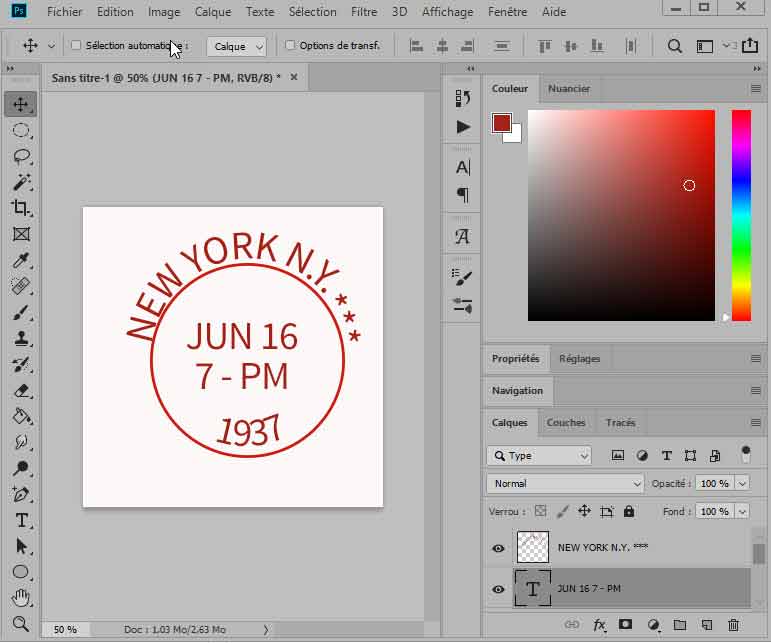
Merge visible layers. You've did it !
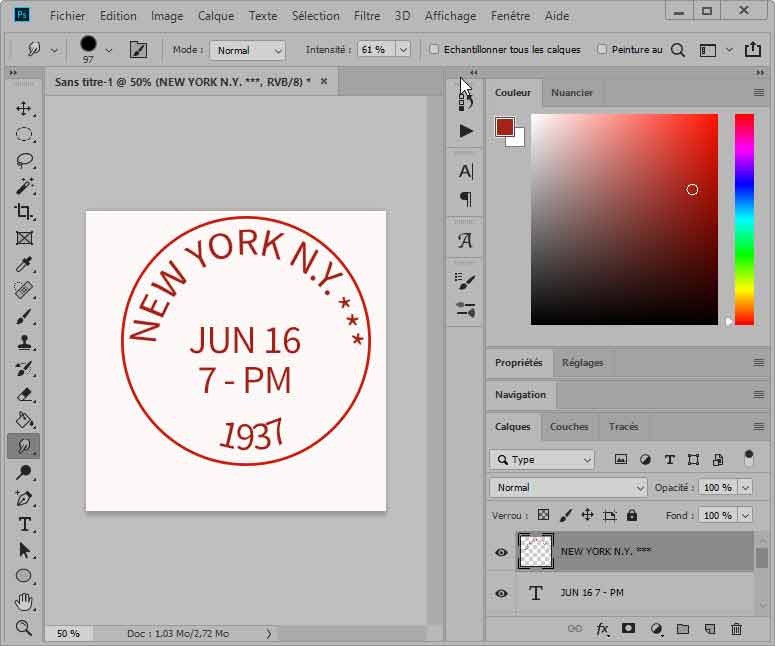
A small detail ... This postmark is a bit too "clean" ... Take the "drooling" slightly by applying a filter torn edges.
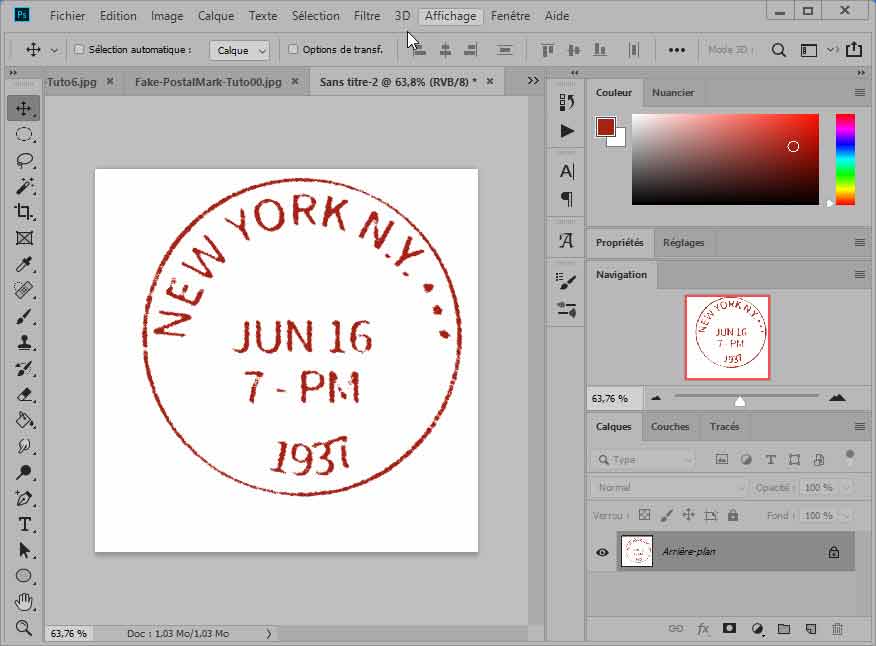
This fake postamark is ready to use in your scrapbooking pages !!!
 Step by step "Cancellation postmarks"
Cancellation postmarks are these wawes printed over the stamp to cancell it at the post office...
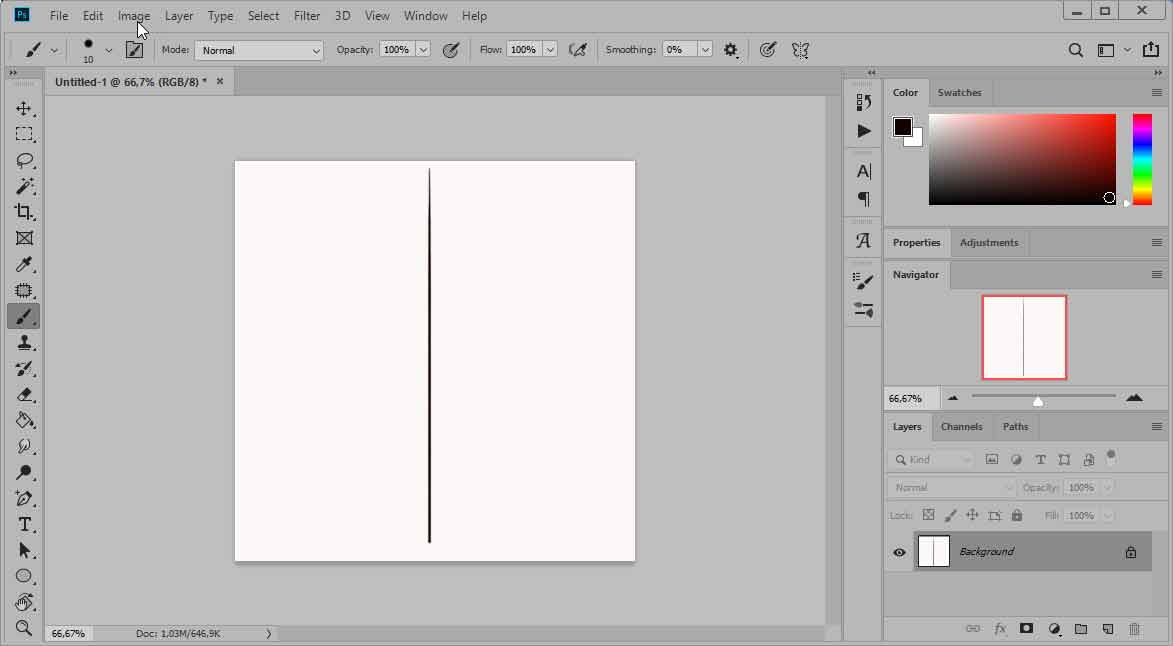
Start by creating a new image in photoshop for example, 500x500 pixels (Ctrl + N).
Now take a brush of 9 or 10 pixels and draw a vertical line: for this, press the SHIFT key and move with the brush tool, your line will be vertical.
You will now deform the vertical shear with the filter. Perform Filter> Distort> Shear.
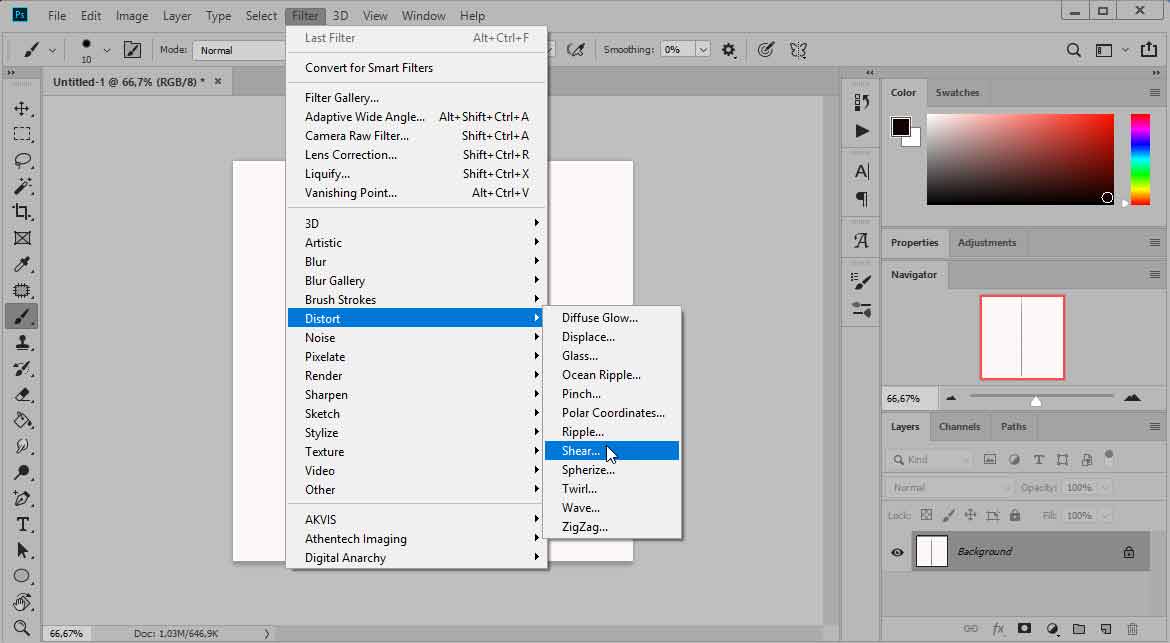
In the top window, click on the vertical line and drag the points that appear ... Repeat 4 times. A picture of the result is shown below.
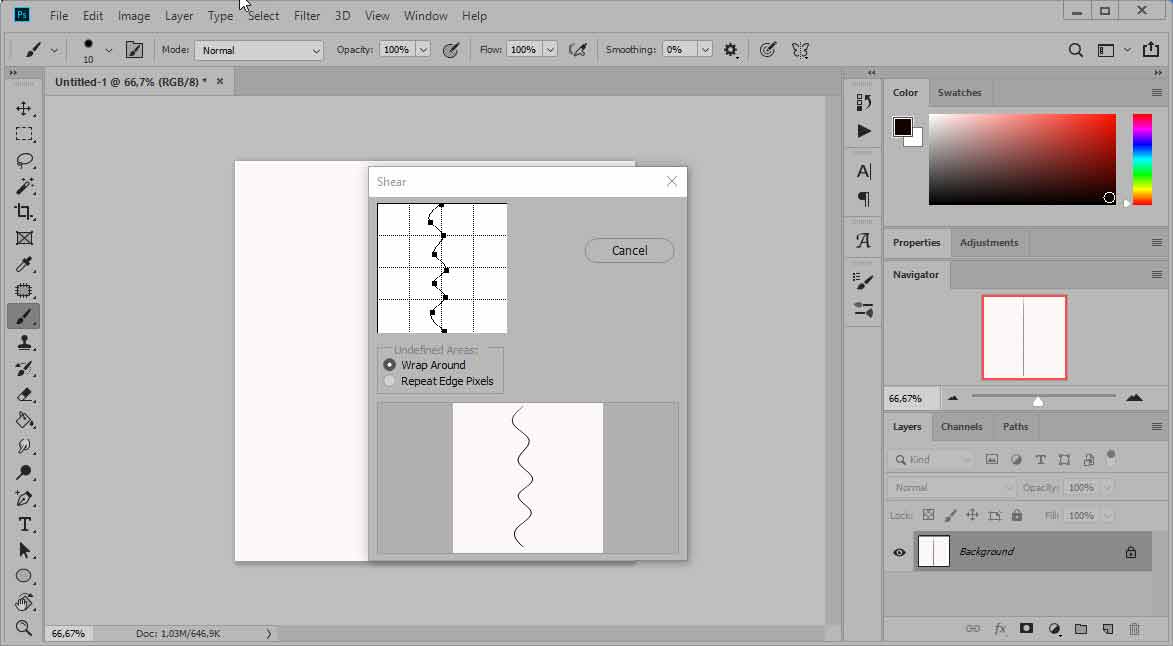
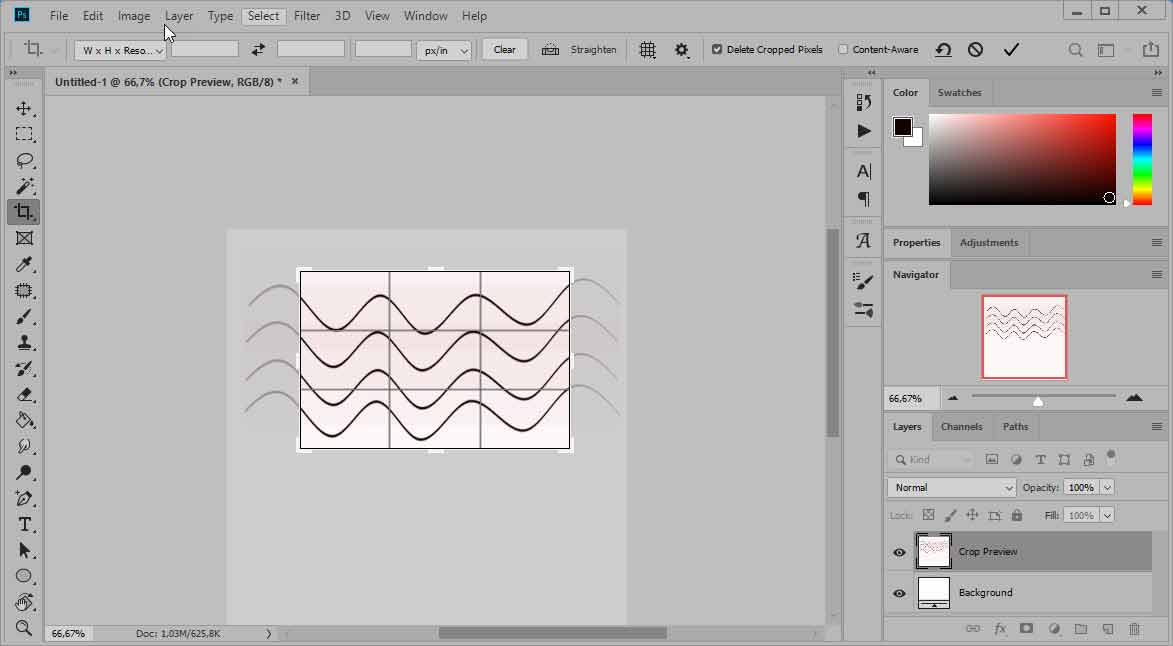
Validate ... Your vertical line now includes undulations. With the rectangular selection tool, select one of these undulations,copy your selection, create a new image and paste in your selection.
Make Ctrl + T and act on the handles to set the horizontal and waving to crush a little. Validate.
With the magic wand, click in a blank area ... then do Select> Inverse.
Copy the selection and make 3 times Ctrl + V. With the move tool, place harmoniously copies of the wave ... Merge the layers.
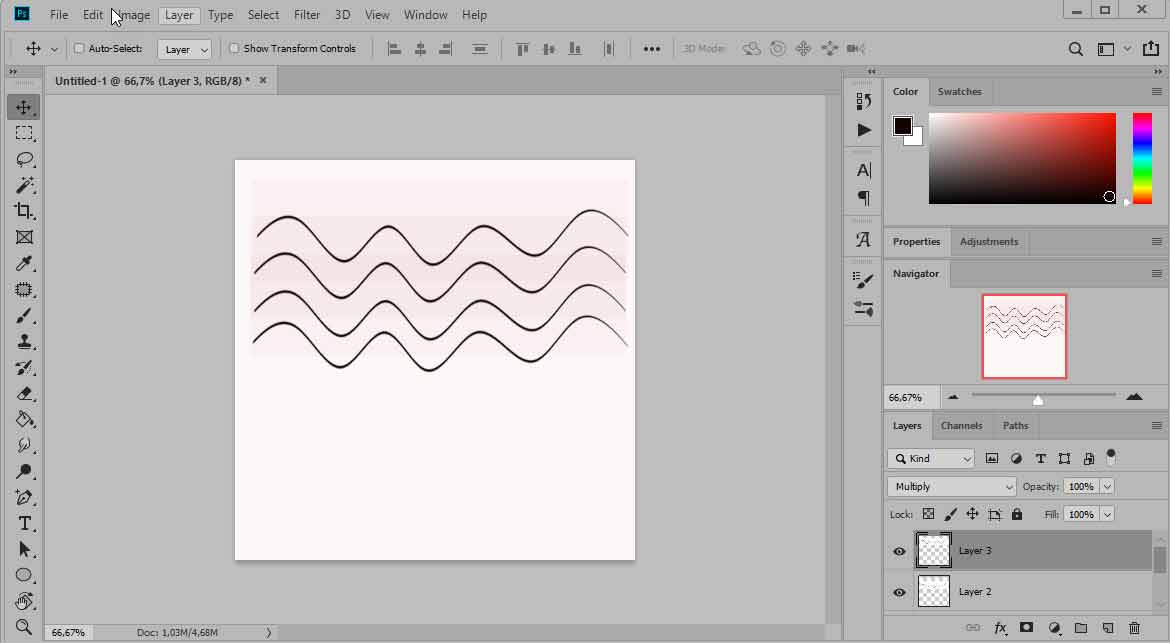
With the crop tool, select only these waves :
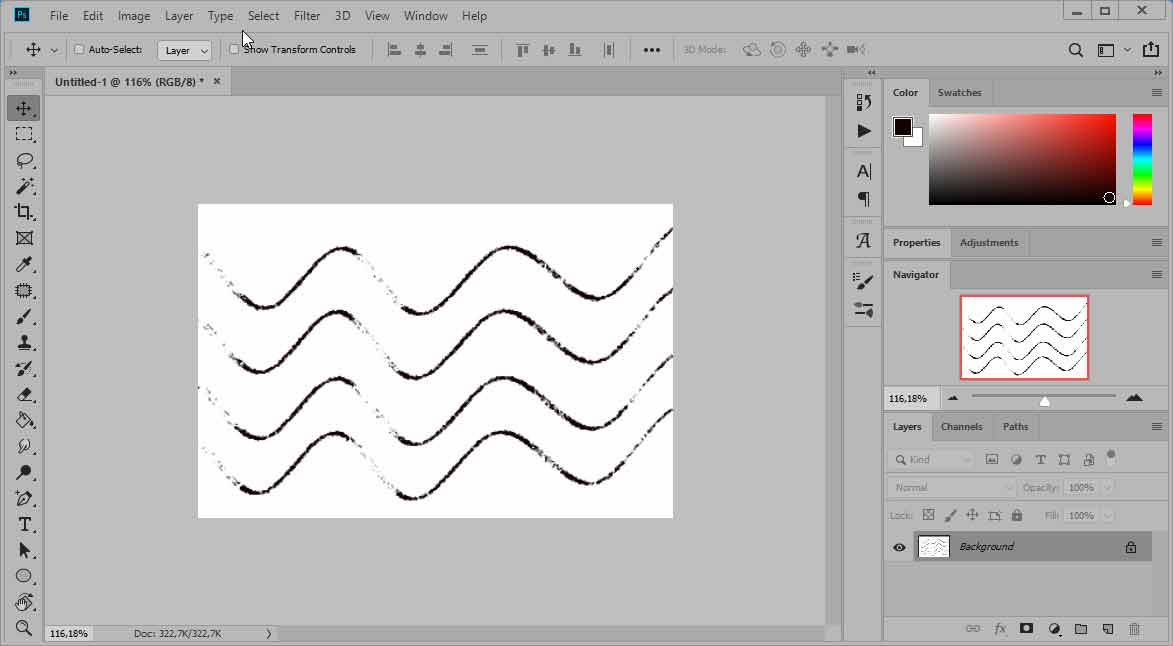
Go through the filter Sketch> Torn Edges to give these ripples a hint of truth!
Hope you enjoy with this tutorial... Apologize for my bad english... the main thing is that you understand the explanations !!!
And why not make your own stamps (not to fool the postal agencies of course!). Have a look at this page: everything is explained!
Thanks You !