IKEA PICTURE FRAMES
HOW TO FRAME A PORTRAIT!
IKEA frames in 24x30 format
Ah, we're not going to get too tired for this page! Since, unlike usual, we are not going to build a frame... but to use a commercial frame, ready made !
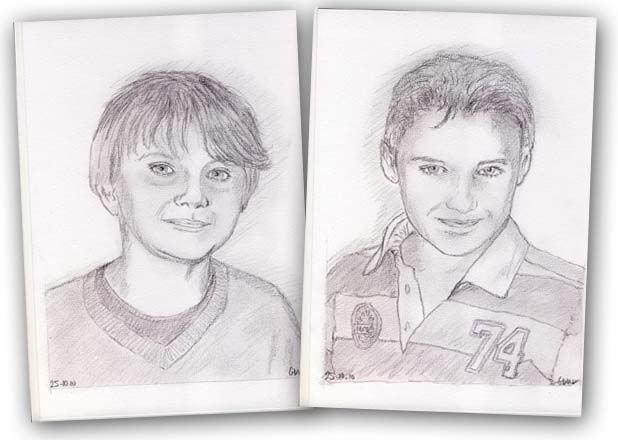
It is a commission of 2 simultaneous portraits and, for once, to deliver framed... with a affordable and beautiful frame... So I decided to use frames found at IKEA, very complete since they are supplied with glass, passepartout, BackingBoard and hanging system... all this for a very soft price less $15 each! Good way to get cheap frames.
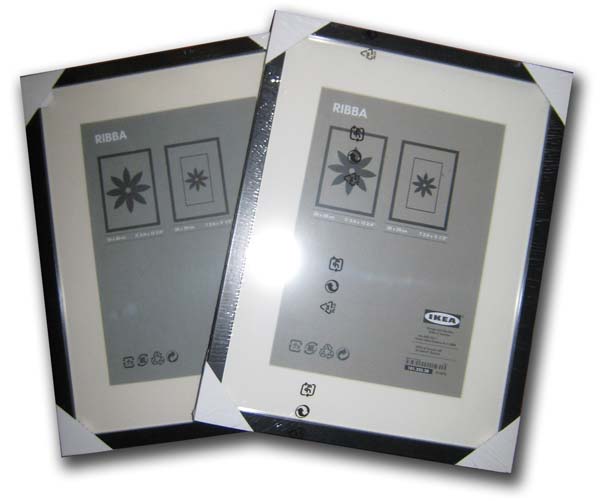
At IKEA, no reference numbers... only proper names, improbable, sometimes impossible to pronounce... For once, the name is not too complicated for these IKEA photo frames: RIBBA. These "RIBBA" are available in several sizes (special photo frames 10x15 and larger frames, square frames) and in several wood tones: white, aluminium, light birch, walnut... largely enough to match your interior.
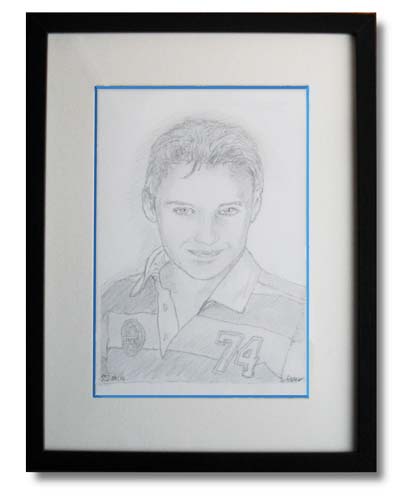
The portraits to be framed are in 21x29.7 format.... so I chose 30x40 frames. The ivory coloured passe-partout provided has an opening of 20x29 and margins of 5cm in all directions... Which is slightly too big for our drawings: this passepartout will therefore be doubled by a 3mm protrusion that will make the opening smaller, that we call "overtakings"... and will bring an additional decorative element by making the pencil portrait more prominent.
 Unpacking the frames: the elements provided.
The frames are originally wrapped in plastic film and protected by cardboard corners. After removing the packaging, fold up the small flat tabs that hold the "package" in the frame (fold them well along the frame... this will facilitate the subsequent placement of the "package").
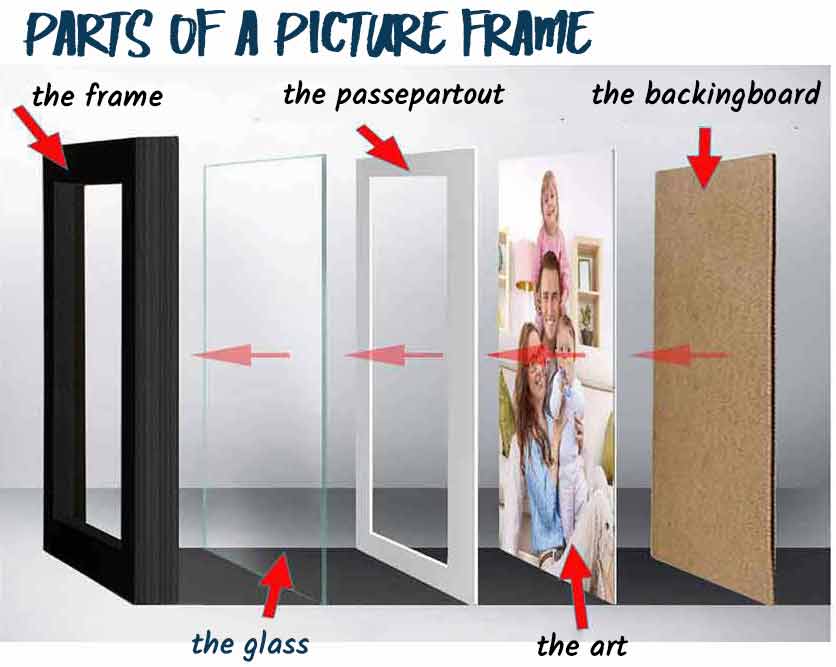
Then we remove the 4 elements: the fibered wooden bottom, a 30x40 notice, the passe-partout and the glass (it's a real one not plastic) and a small plastic bag containing the suspension system...

 Installation of overtakings
We will first install the "overtakings" behind the passepartout.
An "overtaking" is a small strip of fancy or coloured paper, glued from behind the mat and "overtaking" it by a few millimetres. It is an additional decorative element that enhances the design by creating a transition between it and the passepartout.
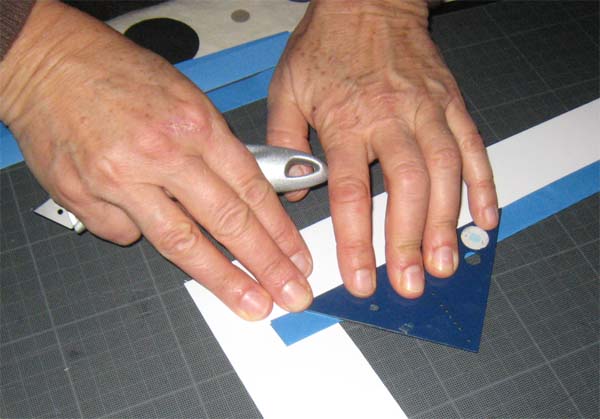
![]() In "binding" paper (or marbled paper or simply coloured canson) it is necessary to cut strips the width of a ruler (3 cm). With the back of the cutter blade and a ruler, a longitudinal fold is marked... and the strip is folded back onto itself.
In "binding" paper (or marbled paper or simply coloured canson) it is necessary to cut strips the width of a ruler (3 cm). With the back of the cutter blade and a ruler, a longitudinal fold is marked... and the strip is folded back onto itself.
![]() The strips are glued from behind the passepartout, protruding slightly from it: from 3 to 5mm, then the ends are cut at 45° (use the 45° angle).
The strips are glued from behind the passepartout, protruding slightly from it: from 3 to 5mm, then the ends are cut at 45° (use the 45° angle).
If these explanations are insufficient, you can refer to the overtaking technique (HERE) (bevel and overtaking) or frame with a coaster with overtaking (LA) or on this new page: How to install overtaking.
By doing so, the opening of the mat is slightly reduced... which was also the goal.
 Mounting the portrait and making the "package"
The easiest way to do this is to attach the portrait directly to the back of the mat. It's not academic at all but it's effective. ! If you want to frame according to the rules, you will have to use a centering card... or even a sub-card... But this time we're going as fast as we can!
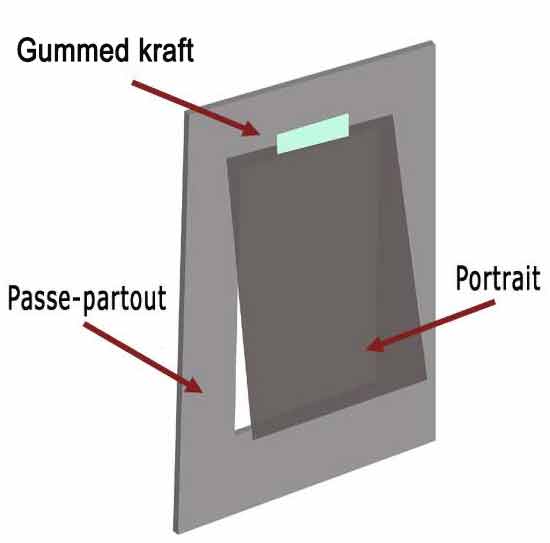
Place the portrait on the table, face up, top of the figure towards you by making it extend a little beyond the table.... Cover with the mat and adjust to center the portrait.
When everything is OK, grab the portrait and the passe-partout together (holding firmly so that there is no off-centreing) and glue a piece of gummed kraft about 6cm to secure them together (prepare it in advance!).
Put only one gummed kraft: some arts, fixed at the top and bottom, end up curling under the glass of the frame!
It is now time to clip on the bottom panel the two special flat fasteners that will be used to fix the wire.
Clean the protective glass with a cloth... at least the part that will be inaccessible when the package is sealed.
Place on the table: the bottom, the portrait-passepartout and the glass. Prepare a strip of gummed kraft and glue it on a length by covering the 5mm glass. Then fold back and glue on the bottom panel.
With the cutter, release the flat clip that has been covered.

Finish closing the package. Install the hanging wire.
Put the package in the frame. Fold the small tabs down.... You're done, your portrait is ready to hang!