A MARINE RUSTIC PICTURE FRAME…
"FISHERMAN'S HUT" STYLE
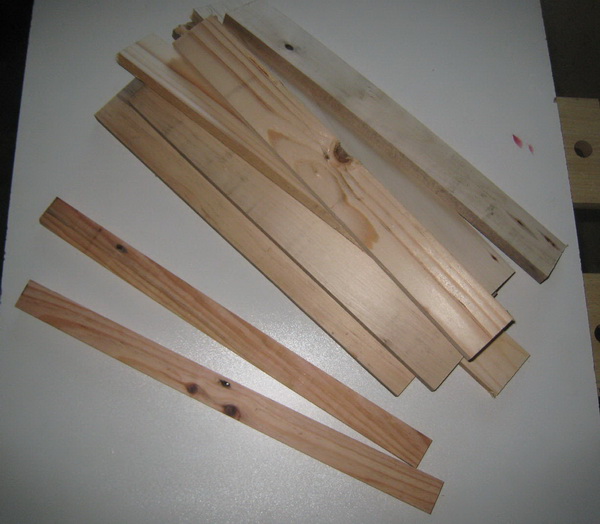
 The material and supplies.
To build this old and rustic “marine” frame, you will need some material and supplies…
- lumber wood in the rough of various widths or boards from pallets…
- lumber of 1.5"x0.5"
- wood strip 0.5"x0.5"
- cardboard (paperboard from cereal box), patterned paper
- a jigsaw for cutting…
- some screw clamps (or small nails)
- a miter box or a picture framer saw (not absolutely necessary)
- small Bullet head nails, fast Pattex adhesive…
- some acrylic painting.
- a cutter, a metal ruler
If you want to frame a watercolor or a sketch, It will be necessary to cut a glass pane with dimensions of your package (you can do some…?)
Obviously, dimensions given are not critical and you will adapt them to your particular case… It will be enough for you to follow the same methods of calculating : the important is to have the principle of making.
 Calculations… not of what complicated !
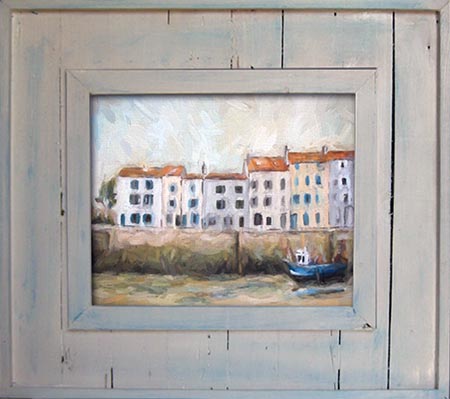
We leave the object to be framed… here, an oil painting with the format 8"x10.8". It's the opening of the frame.
The margins of the wood frame are 3.2" wide… this frame should measure roughly 15.2"x17.2"… But as we build it out of laths of various widths, it is necessary to retain dimensions which approach some more.
 Start making the wood frame !
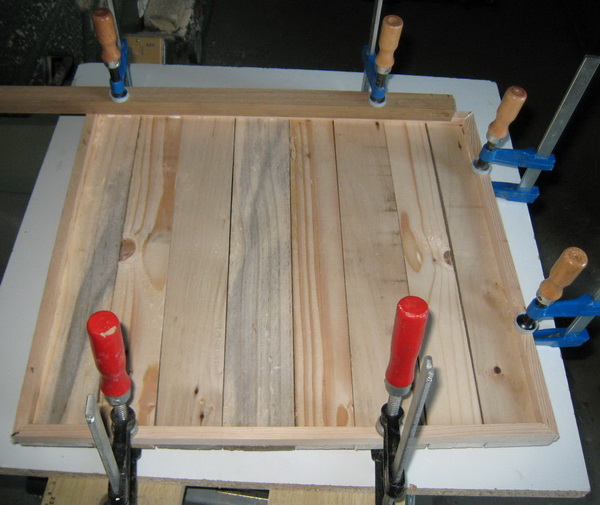
Cut some 15.2" cm lengths in your boards and assemble to check that you exceed 17.2" cm width . Cut also 2 lengths of 16.8" of 0.5"x1.5" strip.
On your desktop, lay out side by side your 1.5"x0.5" lumber. Check carefully their alignment . You can not too tighten them the ones against the others, that will reinforce the “fisher hut” style .
Now paste in Pattex fast glue the two 0.5"x1.5" lumber and pose them on your assembly with 2cm edge (see the photo). Incompletely insert some small nails to tighten during joining.
These are the strips which will solidarize the boards of the marine frame.
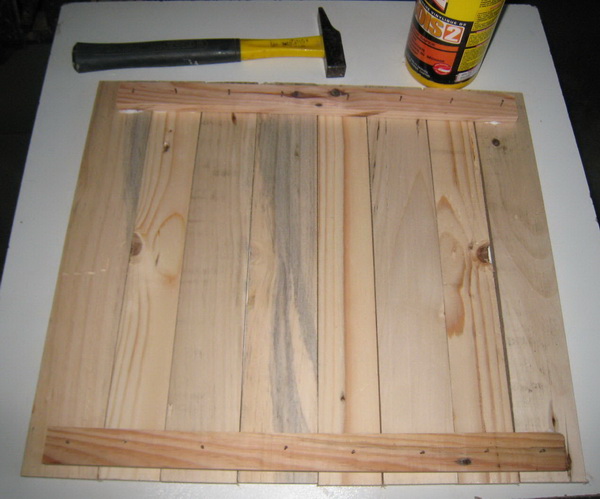
Let dry at least 4:00. You have time, during drying to tweet your friends what you're doing !
 Finishing your frame…
Remove now the nails which maintained the cleats and turn over your framework.
Start by fixing, all around, a cleat of 0.5"x0.5"… it is better if you make miter cuts of at each end… but it is not essential!
Stick these cleats with the fast woodworking glue and maintain with screw clamps or with some incompletely inserted nails.
 Open the window in the frame
With a pencil, draw the opening on the assembled cleats and center it by taking account of the margins envisaged of 8cm…
It is now necessary to open the central window with the jigsaw. Bore a hole in the center to start and cut out while following the line.
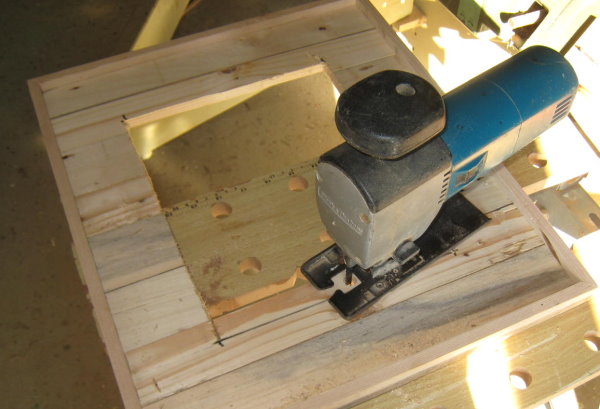
A small grater or sandpaper blow on cutting will eliminate from possible small glares.
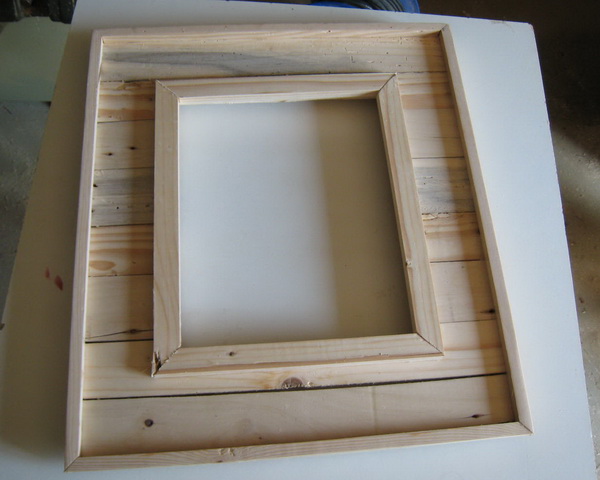
 The intern edges of the frame
The window that you have just opened within the frame is not perfect… You will mask his edge by sticking cleat… slightly smaller than the opening… so as to create like a false rabbet behind.
For that, cut 4 rods in 0.5"x0.5" with the miter box to dimensions of your opening: a bit of glue and one or two nails to maintain in place, let dry. Your frame is finished !
When drying is complete, remove the nails and sand slightly.
 Painting and completions
Start by giving a first acrylic coat of diluted “white broken” paint . Let dry and sandpaper slightly… It is the primer coat.
After drying (it is rather fast with the acrylic resin) give again another coat of paint… let 's dry one hour or two then, with a paper rag soaked with a little light blue painting, make traces, a little everywhere on your framework. Wipe so as to avoid excesses.
The "CHIC" is that anybody can see it's a home made frame !
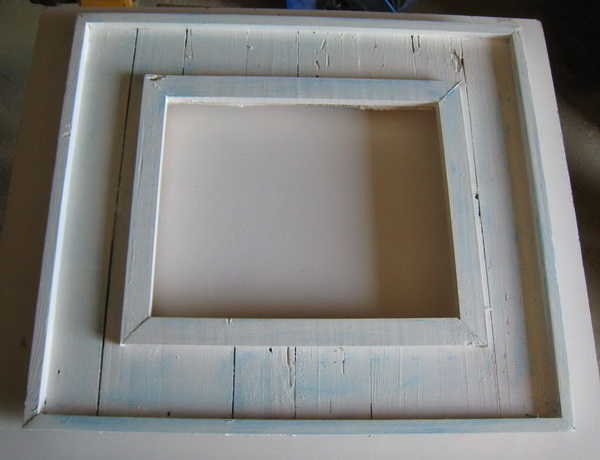
Let dry a little… then, with a brush, spread out one very fine coat of white paint on the frame. This last layer will attenuate your nuances of blue in transparency and will moderate the unit.
Do not too polish the completion : it is a question of keeping to this frame a “rustic” style, very, very “gross” and he must as much as possible preserving his “fisher hut” looking.
Install on the back two eyescrews, tighten a string or a wire between these pitons and… hang your frame on the wall… you did it !!!
GD