
How to Arrange Frames in a Staircase
Advices and techniques
Placing frames on a staircase is not easy... In any case it is always a decoration problem for which the solution is not always obvious.
Inevitably the question of the height of the hanging, the number of frames to be placed, their nature as well as their position in relation to each other inevitably arises...
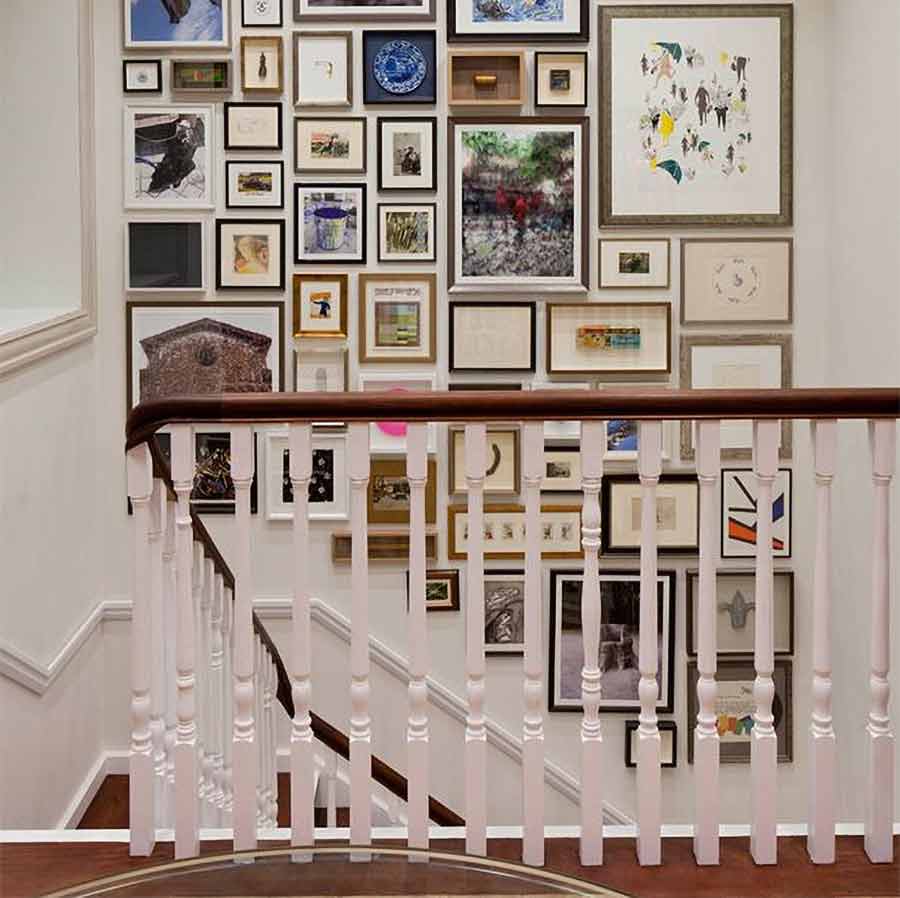
In the example below, not necessarily to be imitated, the accumulation of frames creates the style and incites the one who takes the stairs to a more detailed visit of the exposed engravings or photos.
If you wish to arrange and decorate your staircase, you will find in this page some basic advice that will help you to succeed in your decoration. And don't forget that rules are made to be broken!
 SOME BASIC PRINCIPLES...
The golden rule for a successful hang: unity in diversity!
 Principle 1: Give unity!
If there is one place in your home that you and your family often use... it's the stairs!
It's the ideal place to put family photos, for example, that everyone can enjoy on a daily basis!
It is also ideal for your "collections" whether they are old postcards or old embroidered canvas from the beginning of the last century...
It is better that all the frames you are going to hang have a "common denominator". That there is a certain unity that brings them together, an intention that the viewer can clearly perceive.
This common element that brings them together can be given by the subject (family photos, collection of butterflies, postcards...) or by the colour of the frames (all the frames are red for example) or by the shape of the frames (rectangular, round)...
In the example below, there are at least 2 factors of unity: the rectangular shape of the frames, the nature of the subject (of the embroideries)...
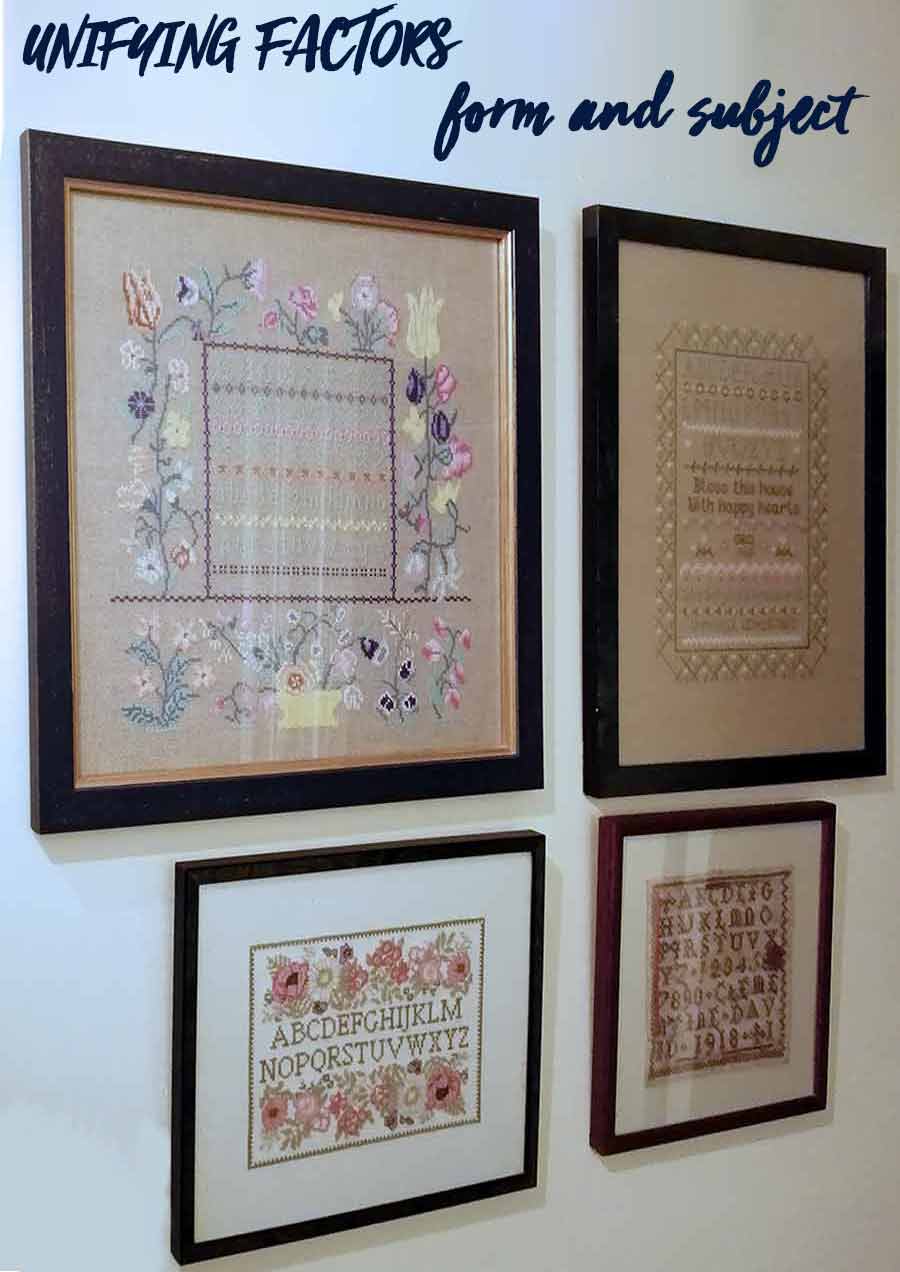
You will ensure this principle of unity when you hang your frames on the stairs!
 Principle 2: Give a little diversity
But if everything looks the same, if your hanging is too unitary, then it becomes monotonous, lacks pep and dynamism... The hanging below is too unitary: shape of the frames, color and subject... it becomes boring!

The second principle will thus bring a little disorder, a little variety to your unit selection.
This is what the Anglo-Saxons call "the odd frame", the strange, bizarre frame, the intruder...
To avoid monotony, it is also a good idea to bring diversity to your exhibition: for example, by varying the size of the frames... for example, in a series of family photos, there will be a mix of small and large frames, black and white photos next to colour photos...
In a series of black frames, there will be a variety of shapes: round or oval frames will be juxtaposed to rectangular frames... or there will be long frames next to more compact frames.
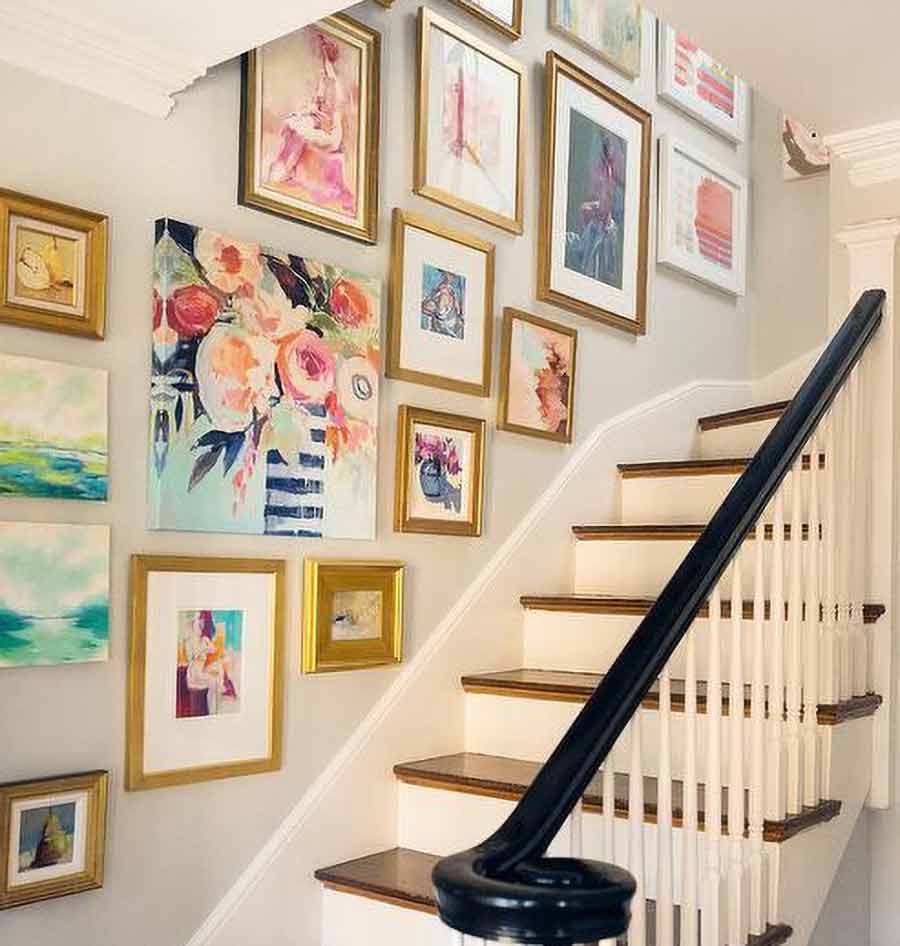
Here is an example that reconciles the two antagonistic principles and shows a successful exhibition... The factors of unity are: the shape of the frames, the gold of the frames, the nature of the framed subjects: watercolour, the almost general pink colour... Fortunately, this beautiful arrangement is broken by intruders... a white frame, different arrangements (length and height), an unframed oil painting, and at the bottom left two paintings in blue-green tones...
In the same way, bring a little fantasy by varying the layout and breaking with traditional alignment patterns.
 HOW HIGH SHOULD YOU HANG YOUR FRAMES ?
Calculate the correct height of the hang nail
In a staircase, your frames will be hung at different heights... some close to the steps, others much higher... It is essential that your "basic" frames are at the right height because there is always a tendency to hang them too high!
The right height is the one that puts the center of the frame just at eye level... i.e. approximately 1.65m ! This is a good average... which corresponds to a spectator of a height of 1,75m.
By proceeding as follows, your basic frames will have all their centers aligned. Here is the calculation formula:
![]() Measure the height of your frame and divide it by 2: here 27cm so (27:2) = 13,5cm
Measure the height of your frame and divide it by 2: here 27cm so (27:2) = 13,5cm
![]() Measure the free part above the hanging point: here 6cm
Measure the free part above the hanging point: here 6cm
![]() Subtract this measurement from the previous one: 13.5-6 = 7.5cm
Subtract this measurement from the previous one: 13.5-6 = 7.5cm
![]() Add this result to 165cm: 165 + 7.5 = 172.5cm... that's how high the nail should be!
Add this result to 165cm: 165 + 7.5 = 172.5cm... that's how high the nail should be!
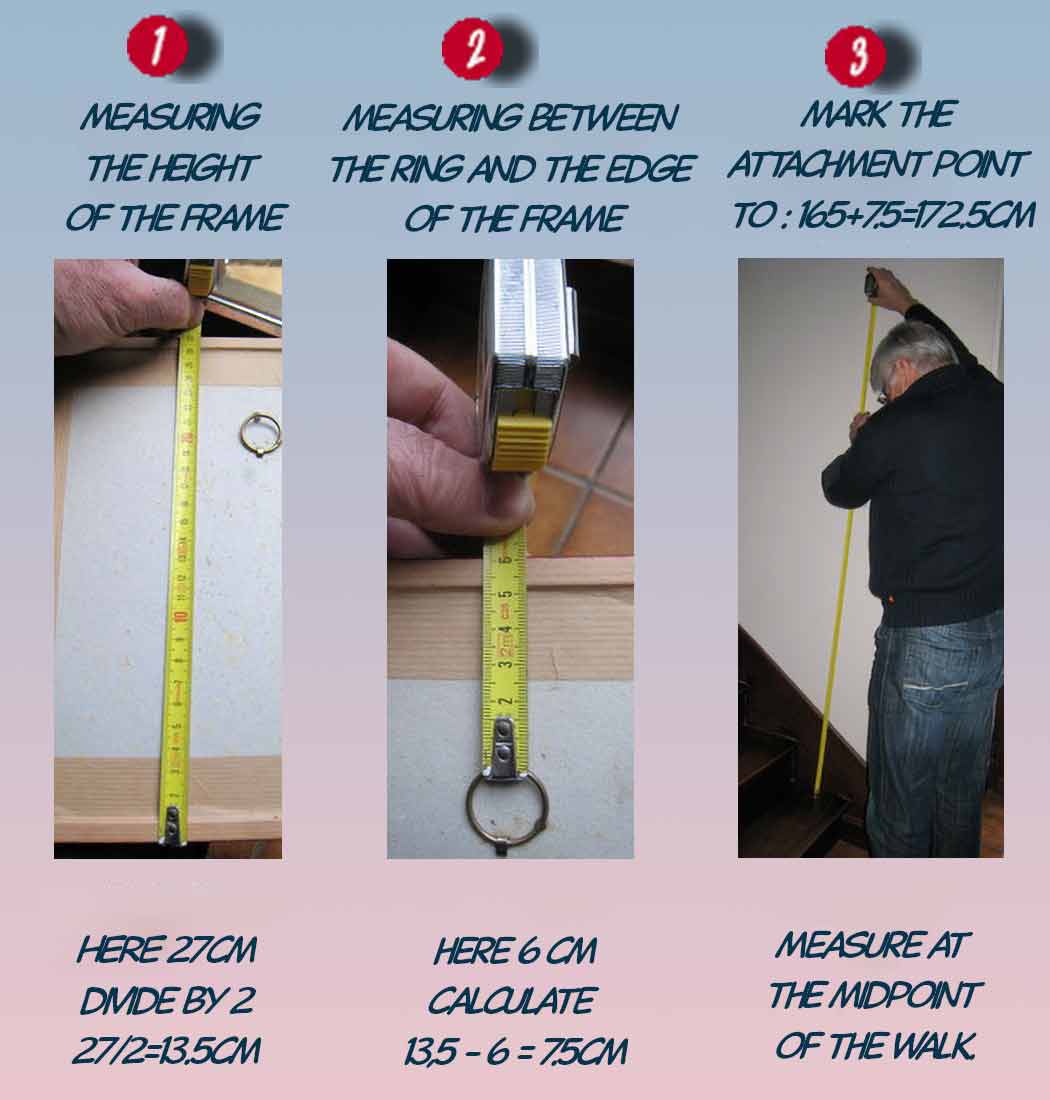
Measure from the ground 165cm + 7.5cm = 172.5cm and make a mark on the wall: this is exactly the point where to put the nail so that the centre of the painting is 165cm from the ground.
Repeat the same calculation for all your base frames and they will be perfectly aligned by their centres!
If you prefer to keep an eye on your frames
Use the small tool described on this page or DIY it to determine their attachment point.
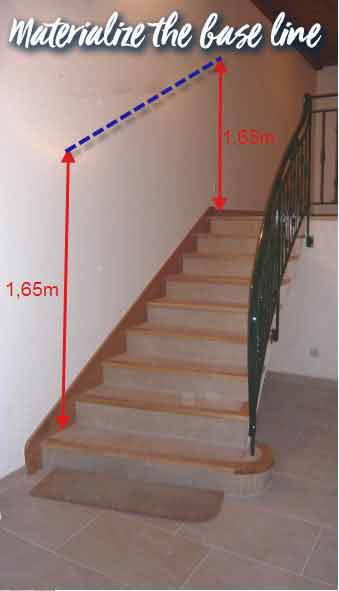
Above the first step, on the wall, draw a marker (small pencil cross) at a height of 1.65m (measure in the middle of the step).
Now go to the last step and repeat the same operation.
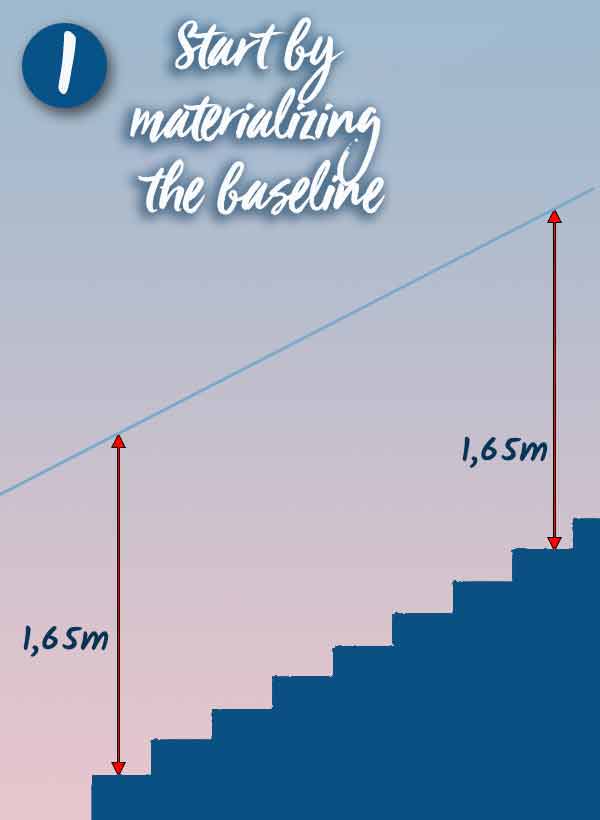
You will now materialize the base line with two pins planted at the two reference points and a sewing thread stretched between these two pins. This line will be used to align the centres of your "key frames".
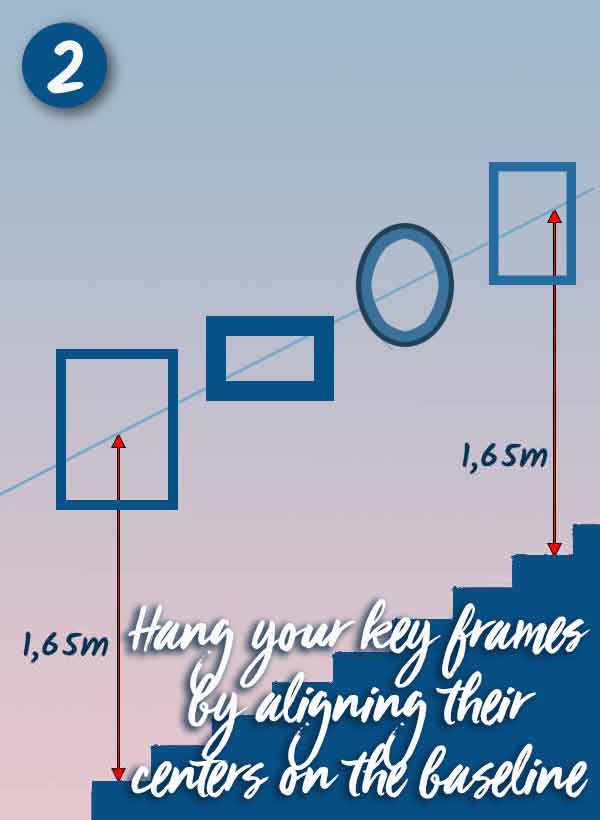
The "key frames" are, in general, your most important frames (in interest), those on whom you wish to focus special attention.
These can be the largest in size or those that are more important to you.
They will occupy a central position and constitute the "background" of your exhibition, signifying to the visitor the general intention of the exhibition.
Around this line of key frames, you will now be able to hang the other frames according to the layout you have chosen.
 How to arrange the frames?
A method for arranging
Start by materializing your baseline...
Then determine which are your key frames and put them in place along the baseline. The key frames are those that are most important to you and form the basis of your layout.
Don't move them too far apart to keep the idea of a set (one hand... between 8 and 12 cm).
This gives you a first alignment parallel to the line of the staircase.
Now lay out the additional frames, trying to find a rhythm that can reconcile unity and diversity...
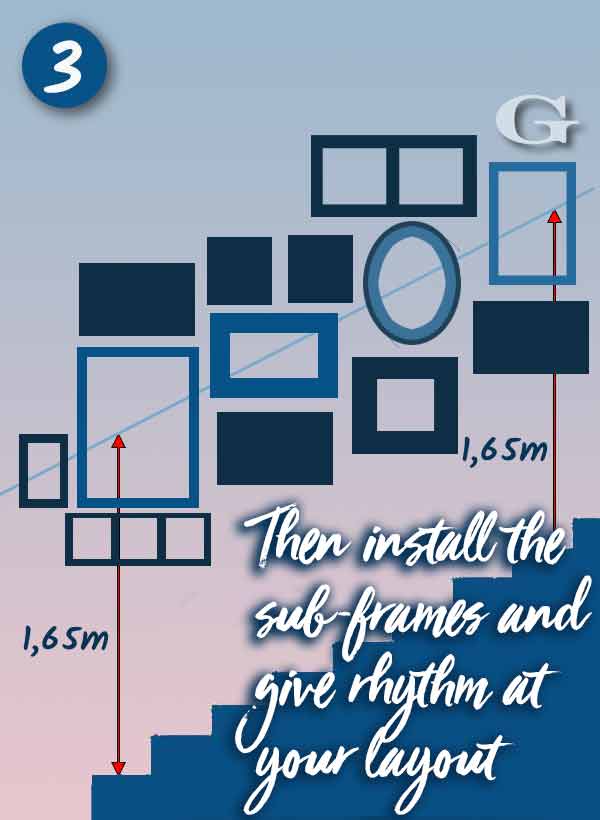
Then complete your arrangement by placing the last frames :
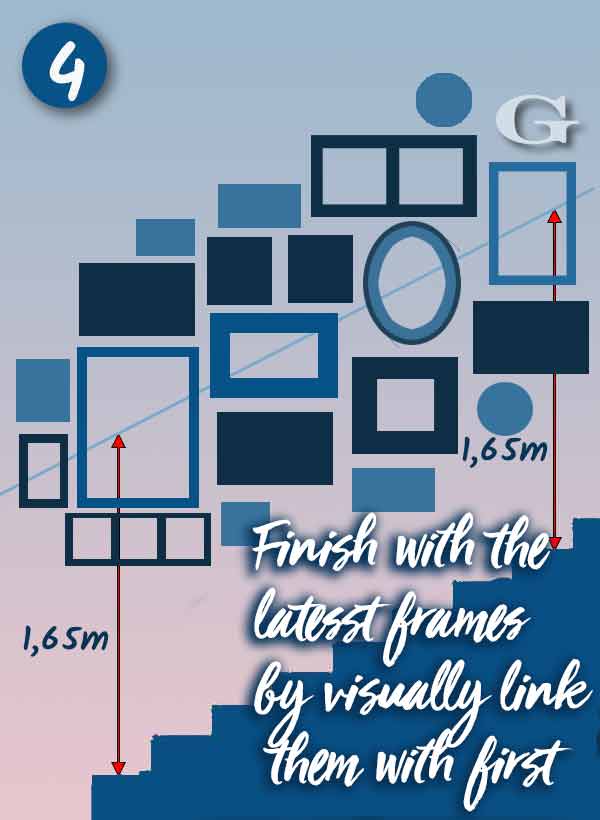
A few things you should know...
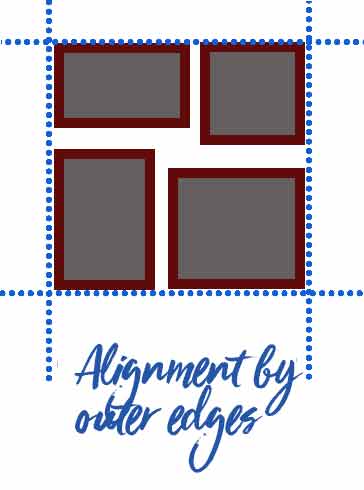
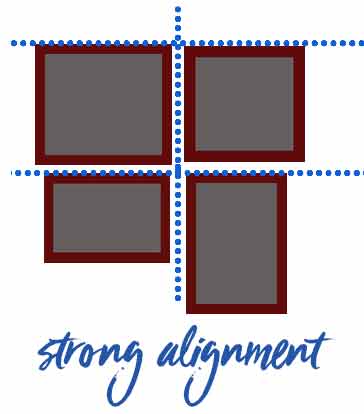
Here are 4 frames, all different to group ... and 4 possible arrangements for all.
Which one is most satisfying?
The layout 1 is not pleasing to the eye because the central vacuum it creates. In addition, the borders of the frames aligned by the outside do not give an impression of unity.
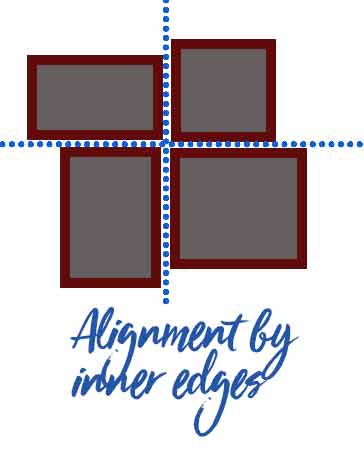
The layout 2 is more tempting ... because rigorous: the alignment intent is clear, almost mathematical. She would seem to agree ... but she is sorely lacking in diversity! She does not "breathe"!
Layout 3 reconciles the principle of diversity in unity. The horizontal (reassuring) are clearly identified and better paced by the central vertical.
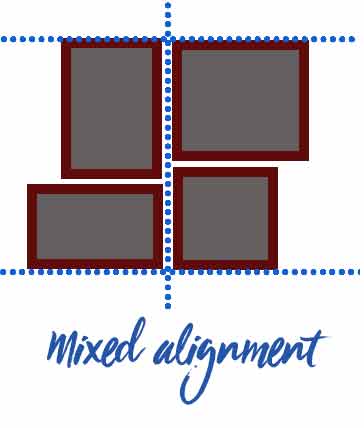
And finally, the layout 4 which is both unitary and diverse ... In theory, it is the best ... but is not always used: the break of balance between the frames 2 and 3 can pose problem to rigorous looks!
One last trick ... avoid placing a frame in portrait format (frame height) above a frame in landscape format (frame width): your composition would be unbalanced.