
Starting out in framing pictures
Create a frame of frames
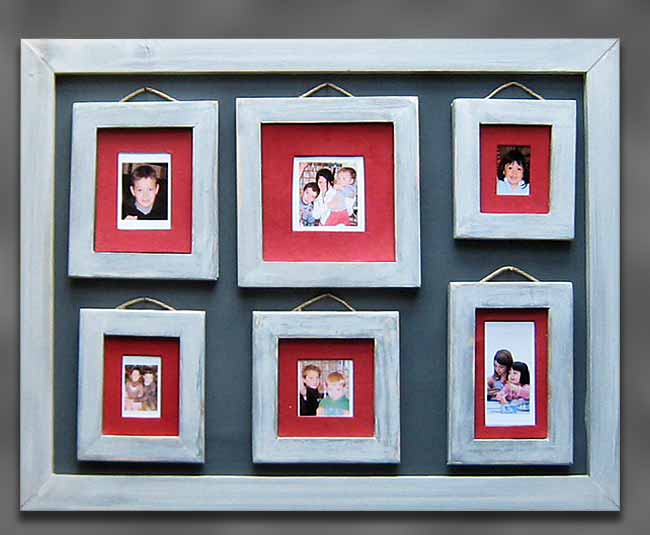
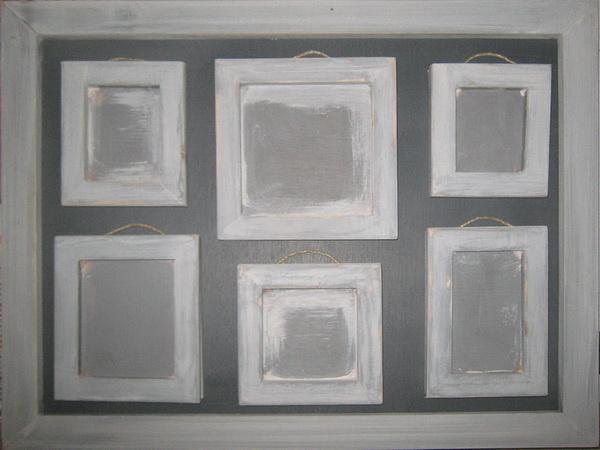
A large rustic-looking frame... and which contains 6 small frames ready to hold your family portraits... Would you like to make it yourself ?
No technical difficulty... No special tools... Just very ordinary: a framing saw with its stop, a few standard cleats, some plywood or isorel scraps, a little glue and paint... that will be more than enough !
 The plan and dimensions.
When it is finished, the large frame measures 50cm x 40cm and it contains 6 smaller frames, hung on hooks with a linen string.
In order to avoid monotony, these small frames are all of different sizes and their locations will eventually be interchangeable:
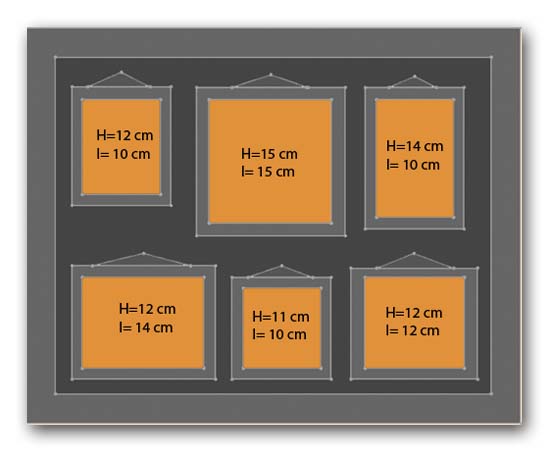
1 rectangular frame of : 10x12cm
1 rectangular frame :12x14cm
1 rectangular frame of : 10x14cm
1 square frame of 15cm side.
1 rectangular frame of : 10x11cm
1 square frame of 12 cm side.
The large frame is composed of a CP 6 or 10mm bottom on which a 30x10 stick is glued.
Of course, all the lengths given here (as well as the finishes) are indicative and totally modifiable: you will adapt them according to your personal case.
 The large frame
Start by cutting the backing which is a 50cm x 40cm rectangle of plywood or medium. All DIY stores have a wood cutting department that can provide you with this plate ...
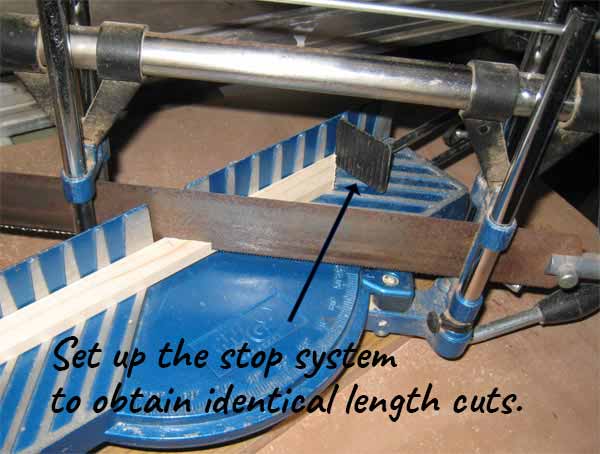
With the framing saw, set the stop at 50cm and cut with mitres at 45° the 2 horizontal uprights of the frame. Then set to 40cm and cut the two other uprights.
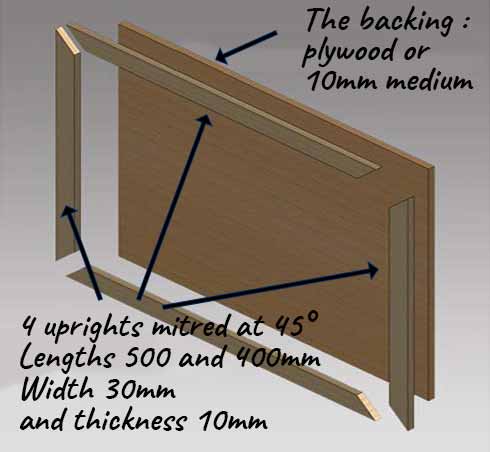
Glue the bevels and the back of the studs, put them in place and tighten while the glue sets.
Finally, give a shot of sandpaper on the edges to even out the whole.
 The small frames
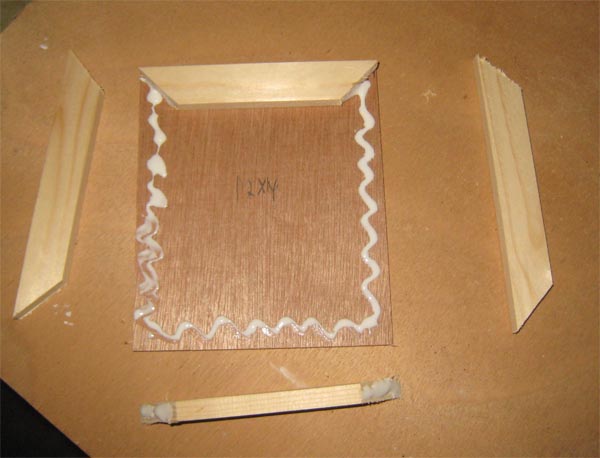
Construction : Each small frame is composed of a plate of hardboard (isorel) or plywood of 6mm on which is glued a frame composed of 20x10 strips.
With the framing saw, cut the 20x10 cleat with 45° mitres to the precise length of the sides of the backgrounds. For more precision, use the stop of the saw.
Then glue the bottom edge and the bevel edges.
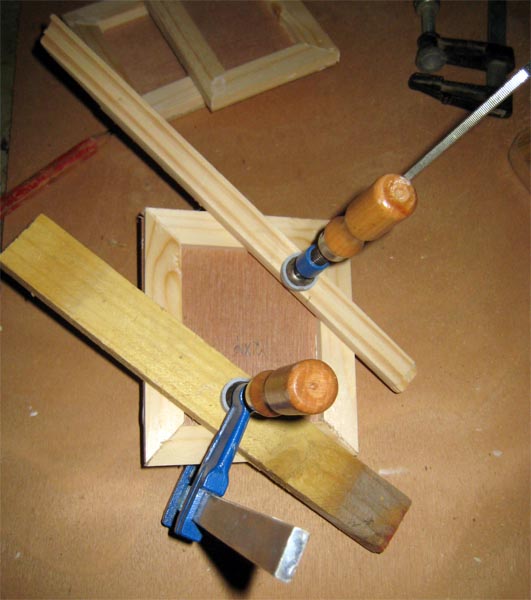
Place them one by one on the bottom of the small frame and arrange as you can to tighten the gluing time... half-dark points, clamps or framer's press.
For my part I used two small clamps ... after checking the squareness.
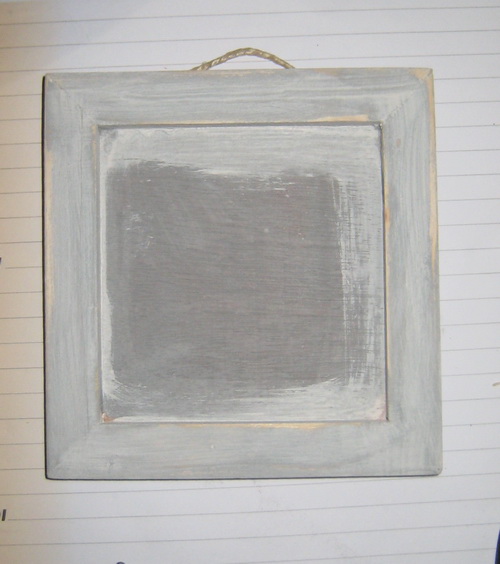
Sand the small frames (top and edges) well before giving them a light coat of paint of your choice. Don't hesitate to thin the paint so that it doesn't hide the wood fibers... it simply has to stain them.
For this example, I have chosen neutral tones of light grey and darker grey. I gave several very thin coats alternating light and dark tones then I sanded finely to reveal shades.
The inside of the frame will be completely masked by the matting... so no need to take care of the painting !
If you prefer a more rustic shade, stain the edges of the small frames with diluted walnut stain, wax after drying (transparent wax) and pass a fine steel wool to give a satin aspect.
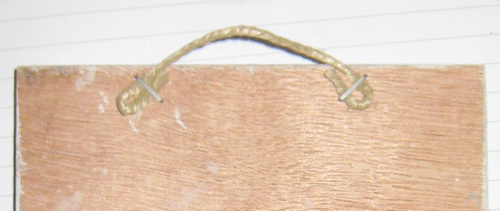
Now you have to fix their suspension string. Using the plan provided, make sure that the tops of the frames are aligned in the upper row and the bottoms of the frames are aligned in the lower row.
This means the same length of string at the top (the hanger hooks are aligned) and offset hooks at the bottom. You can fix the strings at your convenience, the most practical being to staple them to the back of the frame . Form a loop to strengthen the fastening...
 Assembly and finishing of the large frame
To make the small frames stand out well on the background, give a coat of diluted paint of the same tone as the small frames, but darker: a slightly darker gray that will be lightly sanded after drying gives an aged look that you can look for.
Arrange the small frames by looking for an arrangement that you like.
Depending on the arrangement, push small spikes at a slight angle to the frame to hang the small frames. Eventually, with a pair of pliers, reduce their length if necessary...
On the back of the frame, fix two small eye bolts and tighten a suspension string (by the way, it is always preferable to hang a frame on the wall this way: with the suspension string, you can always easily adjust its horizontality!).
 How to place your photos?
If you can print your photos yourself, then it will be "made to measure"... Cut out with a cutter to the dimensions just a little bit bigger than the inside of the small frames... and enter them by forcing them a little bit... The photo will completely fill the frame.
If you have already practiced framing... you can even, for each small frame, build a mat out of cardboard dressed with the paper of your choice. Then fix your photos on the back of the mat... It takes longer, but the result is worth it!