MATTING A PICTURE
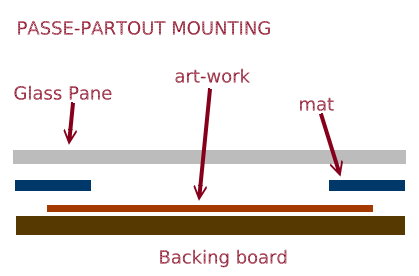
PASSE-PARTOUT MOUNTING
 How to learn framing art... start simple !
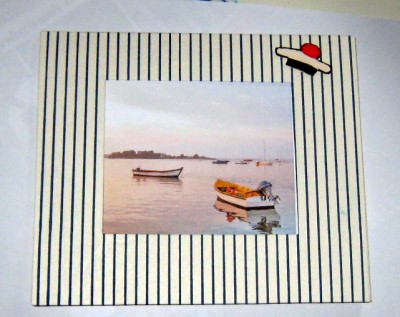
It is this small frame with its window open on the sea I propose you to build now.
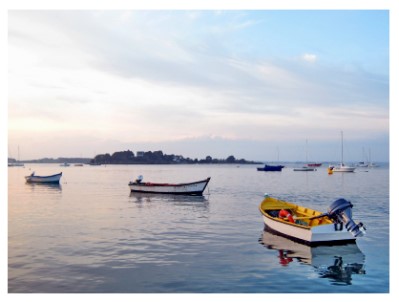
I chose for this example to frame a photograph of a sunset in the Gulf of Morbihan where I live (a marvelous landscape) and which represent ... boats on the sea ... Of course!
 Supplies you need
- Rigid paperboard (you can work for example with old calendars, it is an excellent cardboard or foamboard you can buy it in supply stores or in your framing shops).
- Printed creative paper for the mat cover (I chose a blank paper with navy blue stripes).
- A lighter paperboard for the mat (I never buy ready-made mats !).
- Adhesive tape, scissors, a bented cutter ... in short, the usual material for the cardboard working.
 Calculate size of the mat ...
The frame must present a photograph to the size 3.6"x5.2". This photograph will be seen through a windows opened in the mat and lightly smaller ...
First we have to cut the mat out of light paperboard and, using it like a gauge, we draw and cut out the backing paperboard with the same measurements.
 Opening of the window
Calculations:
You must initially calculate window-opening measurements. Remove 0.5" to each dimension of the photograph ... And you Obtain dimensions of the opening.
For us: 3.6 "-0.5" = 3.1" and 5.2" -0.5 "= 4.7". The window will measure 3.1 "x4.7". Thus it will cover your photograph with 0.25" in all directions.
When you know the opening dimensions, add the margins you wish obtain (between 1" to ... ??").
Here we want margins of 2". Thus the mat will measure :
3.1"+ 2" + 2"= 7.1" and 4.7"+ 2" + 2"= 8.7"
Thus you have to cut mat and backing out of paperboard and cardboard (or foamboard) with the size 7.1 "x8.7".
 Cutting out the window
In the cardboard, trace and cut out a rectangle of 7.1"x8.7": it will be the backing paperboard (When you draw it, be careful with squaring!).
Remember that you should not force during the cut: if not the cutter blade is not controlled! If your cardboard is thick and is cut with difficulty, pass several times in a regular way while supporting moderately, you will see that the cut will be correct.
Now cut out, in the paperboard, a rectangle of 7.1"x8.7". It is the mat. You can use the backing like a gauge.
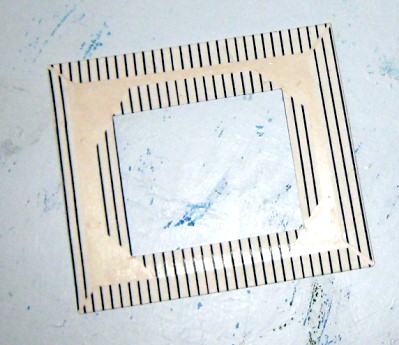
On this mat, draw with a pencil and a ruler the window you will open : take care of the margins of 2" and then cut with a well-sharpened knife.
 Covering the mat
The backing will not be visible when the frame will be finished, because the mat completely covers it : Thus there's no point in equiping it (except the edges of course!).
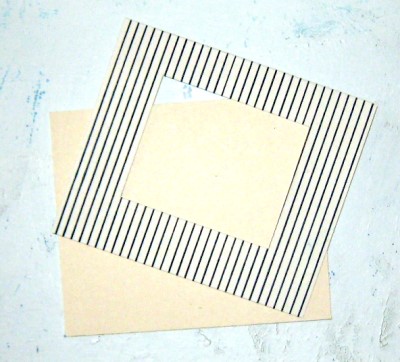
Choose for the mat, a printed paper whose color matches with those of your photograph. It is not always easy. In the event of hesitation, has ivory or beige couloured paper : it practically suits with all pictures. Here, a "marine" paper with navy blue stripes seems well indicated for a "seascape picture".
Put the mat to cover on the paper and cut it out by leaving all around a margin of 1". Paste the mat font face, turn it over and put it on paper. Smooth with a clean rag then let dry.
Now, with your 45 ° angle square, cut 4 the corners inside the opening, you obtain 4 flaps. Paste them and fold back the flaps carefully. To facilitate folding, you can mark the folds with the back of a blade of knife before folding up the flaps.
 Fitting of the frame
At the back of your mat, carefully center the photograph and fix it using small pieces of adhesive tape. To avoid damaging your photograph, use acid-free tape. Paste the edges of the backing board and put the mat on it. Press a few moments to ensure adherence. You obtain the "package"!
If this package is intended to be put in a "mat mounting, you need a pane of same dimensions (7.1" x8.7 ").
Put the the 4 elements of the "package" (bottom, image, and matte glaze) ones on the other. Pose two clips to prevent any unexpected shift and use bands of "brown Gummed tape" to close the package. See on this page for explanations
This package can then be put hin a frame to measures ... See at the simple wood frame page for an easy way to make yourself a wood frame for this package ...
For me, I did not put a pane ... and I built a wood frame to measures for this seascape photo (see making your moldings).

 Embellishments
To give an original personal touch, in thick paperboard, I drew a BACHI (it is the French WAR MARINE sailor hat with a red pompom) ... and I've cut it out then stuck on the mat.
Bachi, blue, white, red, touch the "pompon", that carries happiness! But where has went away the sailor ?
To embellish my frame I could easily have added a small navy gilded anchor , or any other small object having a relationship with my photograph ... while following in that the principles of the scrapbooking. Generally, do not hesitate to decorate your frames with elements in relief Which will you make by yourself or buy ...
If you do not want to build your own wood frame , you can buy one to measures at the picture framer shop or start with a ready made frame buyed in a store... Good framing !
GD
Home Book of Picture
Framing
by Ken Oberreicht
One of the best ! I think ! Over 40,000 copies of the first edition sold : it cannot be an error !
(Click for +)
This home Book of Picture Framing is the most comprehensive guide to mounting, matting, and framing without spending a fortune...
Frame It! (Paperback)
Tonia Davenport
(click for +)
Customers review are the better test for the book!
... The book is an extremely comprehensive guide for standard framing techniques...