|
We would, when started in framing, do not make mistakes and know all the tricks devised to facilitate the work ... So here, in bulk, some tips for beginners: cutting and working square with cardboard, put a ring, dress up an inside corner, dress up an outside corner
Cut the cardboard bent cutter
or the tool 45 °
Both thin cardboard cuts easily, especially when starts, we find difficult to cut thick cardboard (2 to 3mm).
We always tend to want to do too quickly and to press strongly on the cutting tool ... Inevitably, the blade deflects and cutting not only lack of sharpness but also is inaccurate. To get a poor result, it must then sand with sandpaper ... This is just a stopgap that you can avoid!
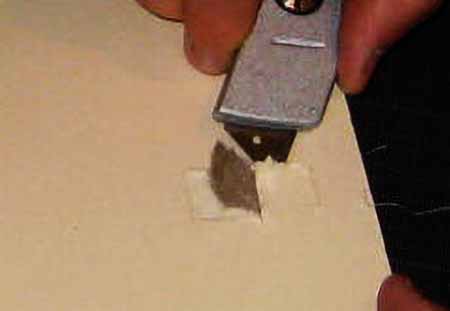
Recall that to properly cut thick cardboard with the bent cutter, you must first position the heavy rule (which should not move during the cut). For certain rules (MAPED) the cutting edge is flat stainless steel which will ensure a good position of the blade.
Then you must press on a regular and moderate on the tool ... Never force! Arrange, whenever possible, to cut pulling the knife toward you, it will be easier to control.Also keep your blade straight; do not lean left or right!
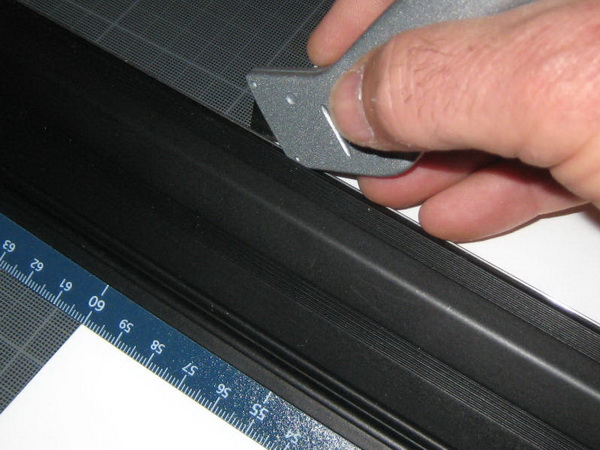
It will be necessary to iron several times to complete the blade to cut the cardboard but your cut will be straight and without unsightly smudges.
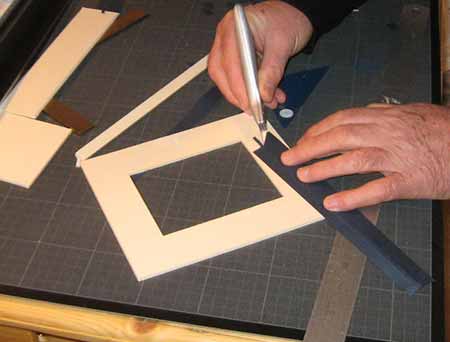
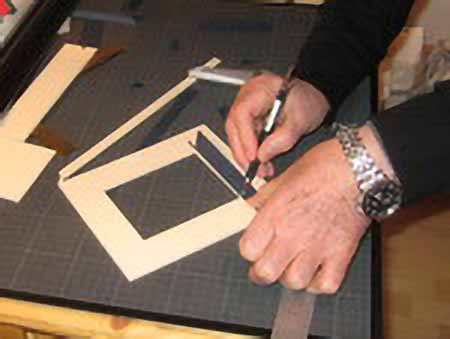
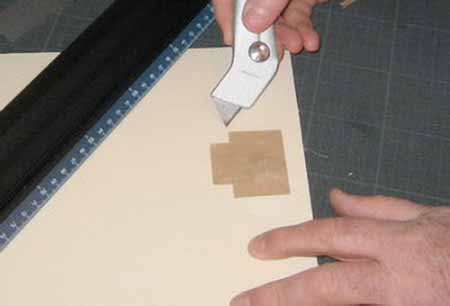
If you work with the MAPED rule and 45 ° cutting tool for example, open a bevel ... English first check the installation of your blade. Unlike simple cutter blades latter does bevel comprises only one side: position it in the tool so that this bevel is apparent!

Place the tool in the slide, put the rule to cut by pulling toward you and make your cut in several times using moderate.
If you cut a bevel in English thick cardboard, please exceed 5mm angles: the cutter marks will then be masked when the bevel cladding.
Dress outside corner
Sometimes we need to dress outside corner ... and if you cut the rembords starting from this corner regardless of the thickness of the cardboard, the following will happen:
The rembords will not be contiguous side face ... this is not usually the worst ... but in addition, part of the angle is not dressed (we see the box) and that, that is shows!
So to avoid this, we must make a special small cut in the corner ... ie leave a small folding leg of the thickness of the cardboard. Once in place, this little paw completely hide the corner ...
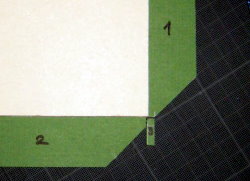
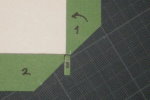
Start by gluing and fold rembord (1) ... Glue the small tab (3) and fold it on the edge of your cardboard.
 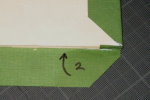
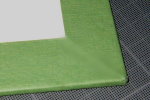
It'll just glue and fold the second rembord the bone folder ... help you ... your angle is impeccable and rembords side face are contiguous.
Dressing the inside corner of a right bevel
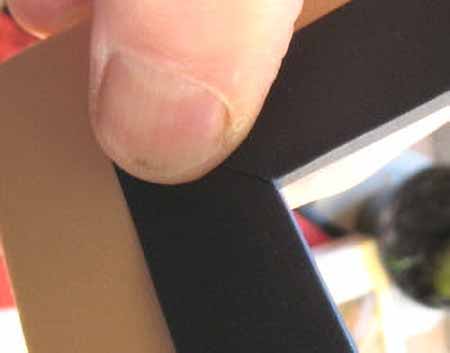
Both the English bevel is easy to cover as much dressing ... right bevel is trickier: it is common that we can see the box at the junction of trim strips ...
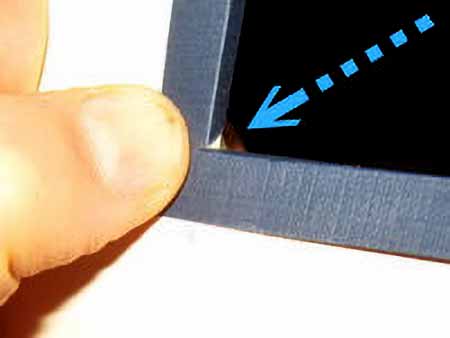
With the following technique, you will never encounter this problem: in the same way as in the recvouvrement an outer corner, the trick lies in creating a small tab will fall back on the angle and thus the mask join gangs.
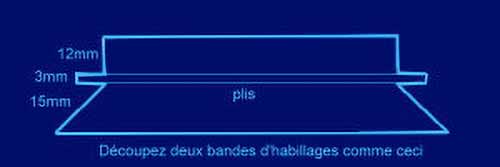
Take the example of a right bevel cut in the 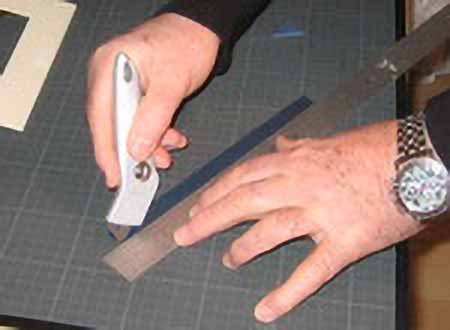 3mm cardboard. Cut the wrapping paper in strips 3cm wide (50cm ruler broad gauge is generally used for cutting). 3mm cardboard. Cut the wrapping paper in strips 3cm wide (50cm ruler broad gauge is generally used for cutting).
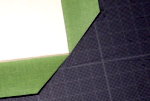
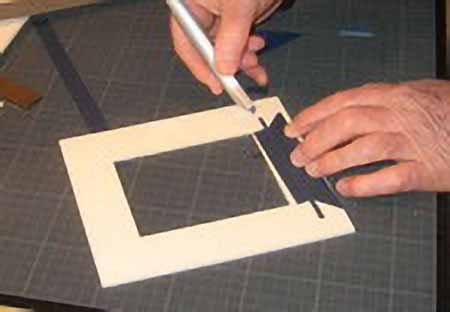
With the back of the cutter blade, mark, and bending, a line 1.5 cm from the edge and a second to 1.8 cm (3mm below). With the cutter, now cut one end as shown in the photo (use the 45 ° angle).
click image
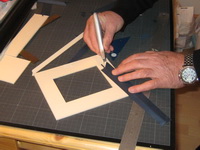
Approach the band bevel and mark in pencil end its width ... repeat the same leg at the end. Paste your band so prepared.
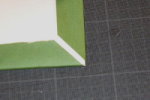
|

Make the same band for the opposite side and place -the.Make now 2 other bands for the last two sides ... but without tab this time. Ask them ... Your corners are perfectly dressed!
How to Cut the cardboard square ...
The plates of thick cardboard that can be bought in framing hardware vendors have the dimensions 120x80 (60x80 or for half-plates ...). They are only approximately "square" and it is your responsibility to cross-check for "real" angles.
Indeed, if you do not work rigorously, your stacks mat and bevels do not assemble correctly and offsets will ensue that will affect the aesthetics of your coaching. We must "squaring" your panels when you use them.
The mathematical principle that we use is: If a carton has 3 right angles, then the last angle is necessarily right.Take for example the angle of cutting a 32cm backing board on 26 ...
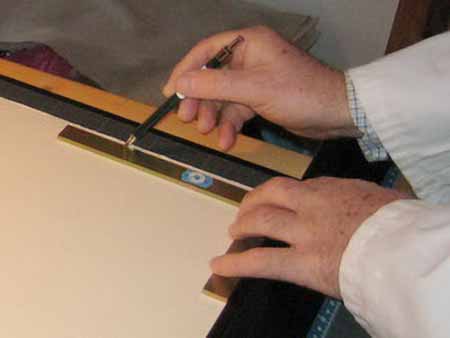
In the cardboard plate 3mm wood, first do the bent cutter and the heavy ruler, a first straight cut.
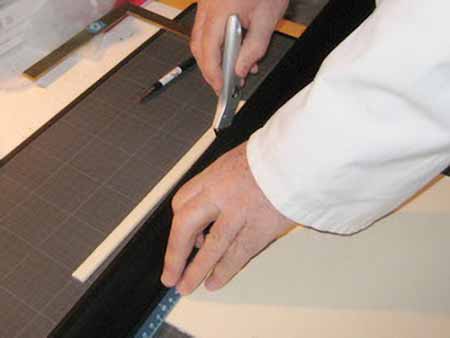
Now apply the heavy rule against this cut, place the bracket against the rule and draw in pencil end the perpendicular side. Cut the cutter and the heavy ruler along that line to get your first right angle.
Along this cup, measure the first dimension of your box ... 32cm and mark the length.
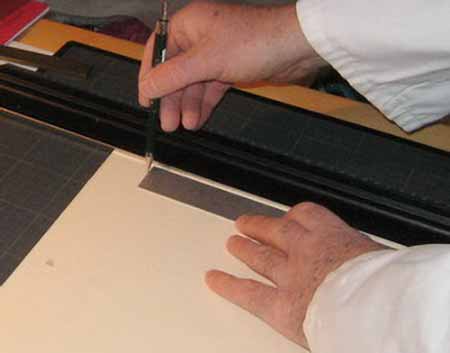
Ask your bracket against this mark ... draw and cut: you have 2 right angles!
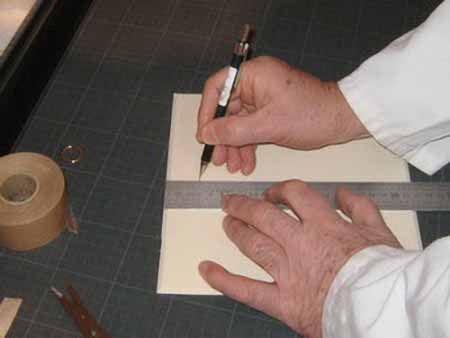
Measure your second dimension 26cm along this last cut, mark, place the square, draw and cut right angle ... Third!Your backing board is now perfectly square ... and rest assured: it takes longer to explain than done !!!
Put a ring to hand art
Of course, there are adhesive rings that perfectly fulfill their role ... is adhered to the back of the bottom board and voila!
But the tradition of the framer is to put himself suspension rings ... which, in use, turn out to be much more resistant. So here's how.
You need a ring and ribbon braid 6cm (there is a special tape but this is not essential). On the bottom board, position yourself at the top edge 4cm, calculate the balance and make a landmark.
Depending on the width of your ribbon to open a cutter slot.Thread the ribbon through the ring and, with the back of the cutter, thread the ribbon through the slot.
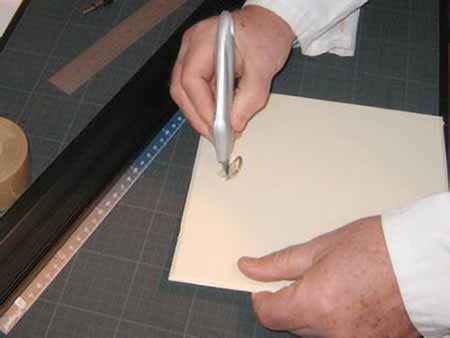
Turn the work and crush the ribbon against the cardboard.With the tip of the knife, mark the location of the tape and then hollow out the site to create a gorge.
Glue the throat, apply the tape and press strongly. Cover with adhesive kraft cross.
Certainly this ring there will not budge!
|