EASY... MAKE A FLAT WOODEN FRAME
Your first frame
It is the making of the rabbet that can make it difficult for a handyman with few tools to make a picture frame. This requires a "toupillage" with the workshop machine or, more simply, with a router equipped with the appropriate router wheel.
We will see later, for those who wish to equip themselves a little, how to get around the difficulty.
But this rabbet is not essential and you can perfectly build a simple frame, without rebate, and which will give you full satisfaction!

Here is your first very simple frame that will serve as a basis for building much more elaborate frames. It is up to you to adapt the technique to your own needs!
The finishing will be done with satin paint, in harmony with the tones of the subject that you will put in this frame ...
 Wood used for this frame
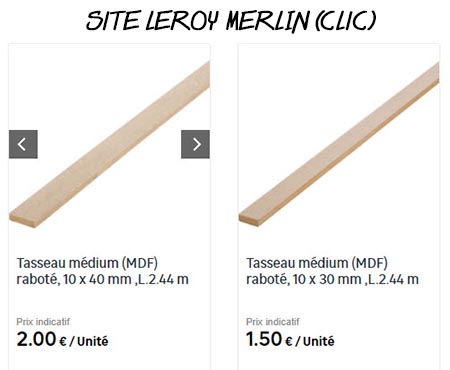
The frame will be made from rectangular section slats. You can find these cleats in DIY stores near your home... LeroyMerlin for example! (free publicity). Look at the excerpt of their site below :
The wood used for this frame
The frame will be made from rectangular section cleats. You can find these cleats in DIY stores... LeroyMerlin for example! (free publicity). Look at the excerpt of their site below:
These cleats are in planed MDF... that is to say ready to use to manufacture our frame. For this first frame, we will use 10x40mm (1cm thick and 5cm wide).
You have a painting on frame to frame... measure it with precision. Mine measures 41x27, it is a standard frame of 6 landscape format...
Remove 1cm at each of your dimensions to obtain the interior dimensions of your frame:

In the example, my frame will have 40 by 26 cm internal opening, slightly smaller than the painting. So I will be able to put it on the frame and fix it from the back without seeing its edges.
 Equipment
2m of 10x40 planed MDF battens.
Acrylic paints to match your painting...
 Cutting the elements
To make the cuts, you need a mitre box (see wood material page). Make a first cut at 45° at the end of your 10x50 strip... measure 40cm from the inside, make a pencil mark on the edge... then cut the first upright.
Turn your cleat over, the bottom becomes the top (this will put the remaining bevel in the right direction and avoid having to cut the batten again). Place the first upright exactly on top and, with a very fine pencil, mark the location of the second saw cut.
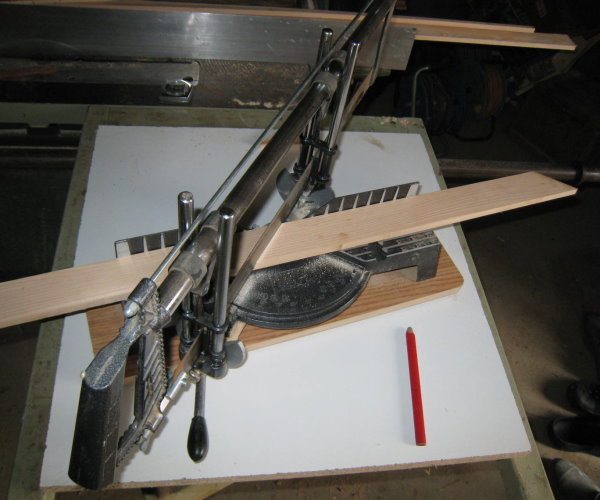
This is the critical moment and you have to be very careful because any delay at this level would be catastrophic during the final assembly! It is important that these two parts have exactly the same length!
When you are ready, saw with the mitre box to get the second stud. For more precision, work on the stop!
Sometimes, to obtain two uprights having exactly the same length, some people saw the two uprights at the same time, one on top of the other... so, no fear of mismatch!
Turn the slat over again, measure 26cm from the inside edge... and start again as shown above. This will give you the 4 uprights of your frame. Check that everything is ok by assembling these 4 uprights "dry".
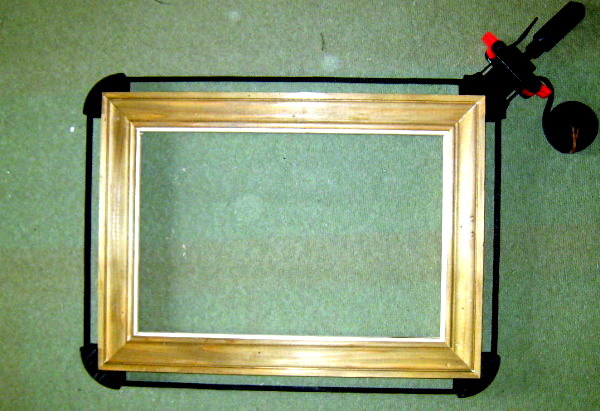
 Gluing the uprights
Glue the inner edges of the studs with wood glue (PATTEX fast wood glue or PATTEX polyurethane glue), and, on a flat surface, approach and assemble the studs.
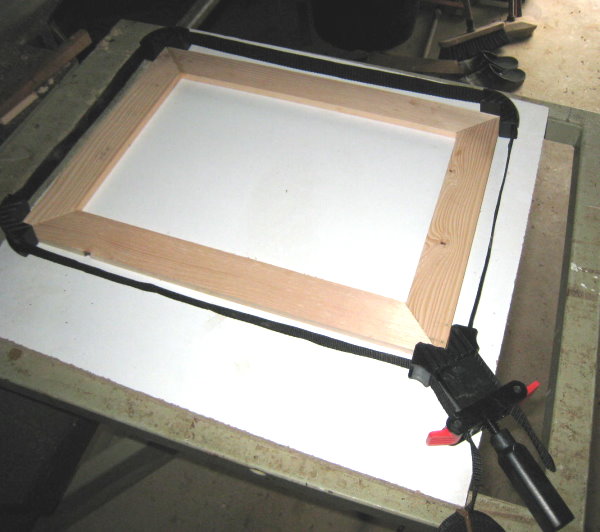
Now you have to tighten the assembly while the glue is setting: you can put big weights on the cleats... or better, use the band clamp ($8 wood material page).
If you have difficulty holding the corners of the press, over-lift your assembly on small wedges before tightening.
At this point, you can place special V-shaped staples (called VNAILS: see the tutorial here) on the junctions.
Leave to dry for 4 or 5 hours... with modern glues, the setting is fast and the hold will be excellent if you have tightened it during drying!
 The finishing touches
Resume your assembly and start by sanding it lightly, to remove traces of glue and mask any small gaps. If necessary, mask any defects in the wood or assembly with plaster. Give it a final sanding.
Apply two coats of ordinary white acrylic paint with light sanding before applying the second coat. To finish, apply a thin coat of the desired colour for this frame.
One generally avoids using exclusively the dominant color of the painting - here blue - so I chose for this painting a very light gray frame with a very light blue-blue border whose "old pink" color will remind the color of the house in the background.
Most of the time, an "off-white" or a matt black is suitable... There are no rules, each one makes according to his taste. As for me, I like it when the last layer of color lets you see the previous layer of white, as if it were a watermark...
 Attach the chassis to the frame
This frame doesn't have a rabbet... it's not very practical to fix the frame... but you can still get away with it! (see fixing a painting in its frame)
Screw 2 small round-eye bolts onto the 2 large sides of the canvas frame. Place the canvas on the back of the frame and screw two small screws through the eyes screws into the frame.
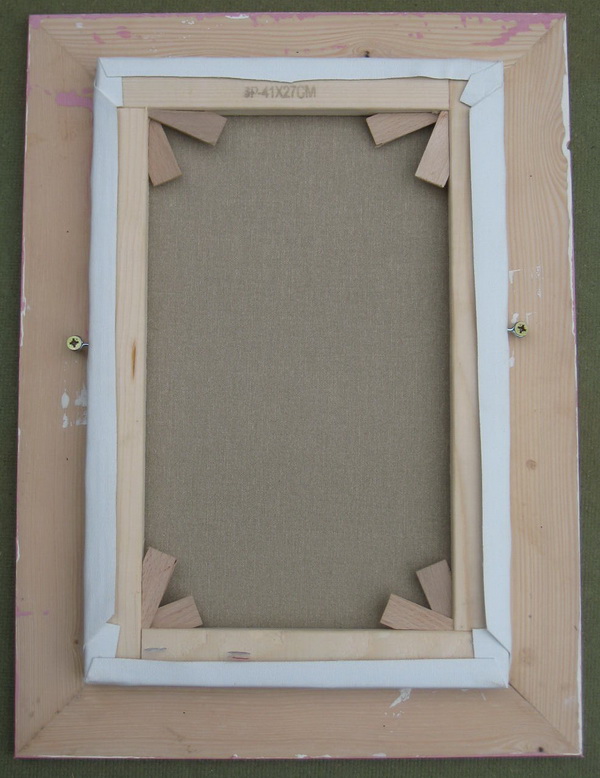
Your chassis is now securely attached to its frame.
For larger chassis, provide 4 bolts and 4 screws, one on each side of the chassis.

All that remains is to hang your painting... reattach two screw studs, tighten a cord between these two studs and hang on the wall !
 Improvements of this frame
You think that this frame is “too simple”… Here some ideas to improve it and vary the forms from them:
 false rabbet…
You will stick, with Pattex wood glue, a small lath 0.4"x0.4" under the strip 0.5"x2". For that, trace with the fine pencil a line with 0.25" of the edge, paste the small laths and fix them with small some small nails half-inserted.
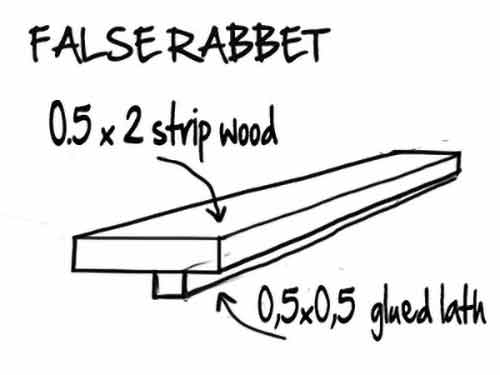
Cut out then your frame members and assemble the frame… you will thus have a rabbet to embed your frame and to thus facilitate its fixing with the framework.
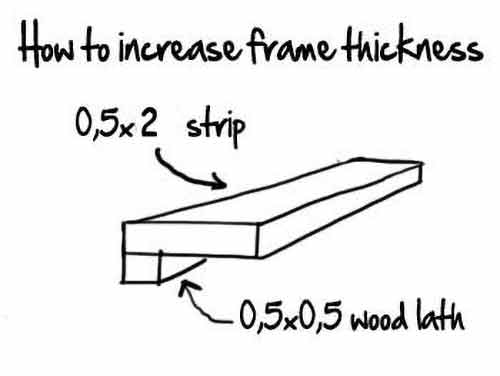
 False edges
If you prefer that the frame has thicker apparent edges… Take again lath 0.4"x0.4" and stick to it this time on the external edge of the lath 0.5"x2"… let's dry, sandpaper and paint…
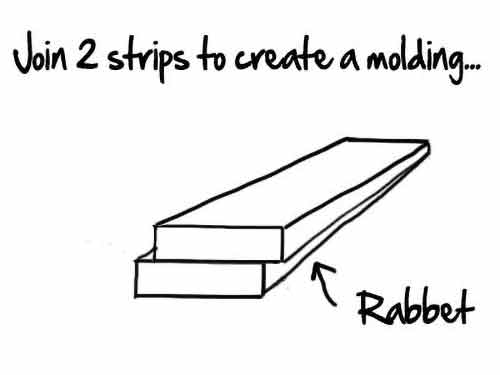
 false moulding…
Always in the same catalog (definitely a gold mine for the handymen) we can find lengths of “traditional” casing and moulding “of framing”…I give you this reference because you will surely find the equivalent in a do-it-yourself store near you.
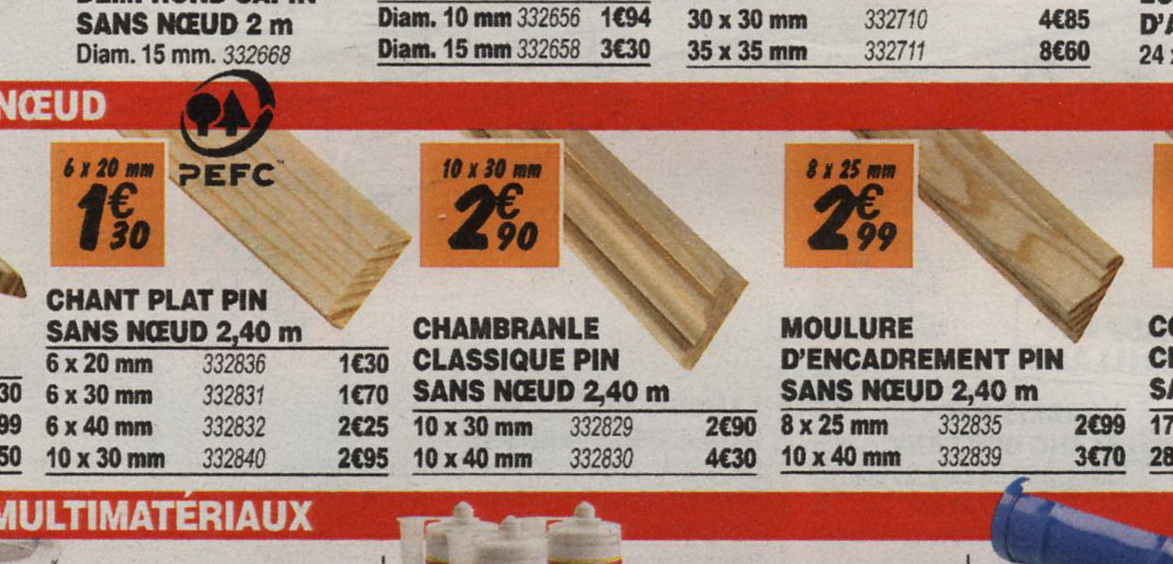
You can perfectly stick a moulding on your strip 0.5"x2" before cutting out the members of your frame. With a little care in cuttings and the completion, you will then obtain for a low coast a frame which can compete with bought in stores frames .
To make the moulding on the picture below, with same dimensions as the precedent (15.9"x10.3" interior), I combined the techniques of false moulding and false rabbet: it is a little more delicate for the cutting of the members but, with some positionning blocks, it's works fine!
Start by sticking a lath 0.4"x0.4" under the strip and glue a moulding on the strip 0.5"x2":

With the picture framer saw , fix your moulding with positionning blocks so that it is quite horizontal. And output then your 4 members (interior dimensions 15.9"x10.3").
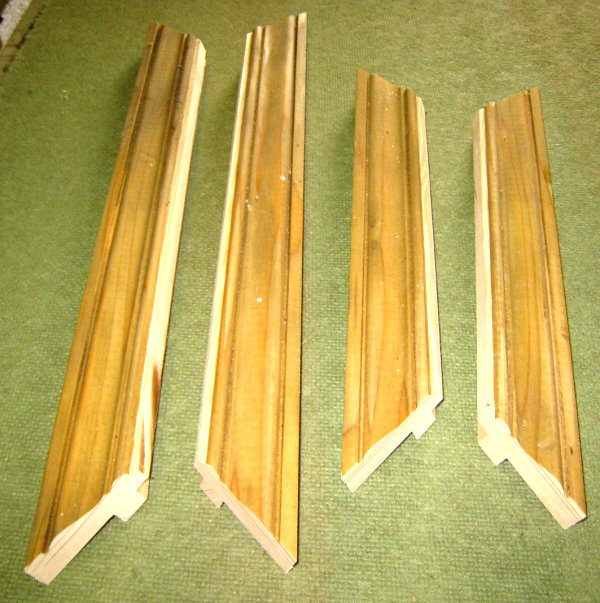
Then paste and assemble!
Don't forget to slightly sandpaper, to paint with a fast drying acrylic painting before to fix your canvasinside.
Other way : It is possible to stain the wood and, after drying pass furniture wax... drying again and shining.
![]() The other shapes for mouldings
The other shapes for mouldings
Visit this page on which you will find new assemblies of strips to build yourself other mouldings for your frames..
With 2 wood strips O,5"x2" you can create a modern moulding by gluing them with a 0,3" shift...