Make your stretched canvas !
How to make this painter's canvas!
Make your own canvas frames?
What a strange idea!
Indeed, the prices of commercial canvas frames have dropped significantly and have become particularly affordable....
So what is the point of complicating your life by assembling woods to stretch fabric ?
Especially if you are looking for small chassis, you will easily find on the net sites on which the canvases are at a very low price... Look here particularly (it's my reference: before any purchase on the net, a look at Amazon to get an idea of the prices...)... it is not worth it to launch into a sometimes delicate construction!
However, if you need a large canvas or special sizes, it may be worth a try! Because the bigger the canvas gets, the higher the price!
 Frame assembly : a delicate operation
Especially since the realization of a chassis from A to Z is not a simple operation: the assemblies of the uprights in particular are not within the reach of the first DIYer to come, the tension of the canvas also requires a lot of care... so much so that it often seems preferable and more reasonable to get them all made in an art supply store.

And yet... I was led to build my own chassis.... as a result of a gift! A friend (who only wanted good things for me) gave me a pile of old (new) linen-cotton sheets from the beginning of the last century....
Their tight weave and marked grain made them the ideal material to paint for if they could not find another use... so I embarked on the adventure... for a result, well, acceptable. Especially since I had the necessary equipment.
Do you want to try it? Then the following lines will tell you the process I followed.... If you have a different experience, it is with pleasure that you can share it here in this page.
For an amateur, it is not possible to make frames with complicated assemblies such as those found on the market... The problem arises when a canvas is stretched over a wooden structure: it is absolutely necessary that the canvas is not in contact with the uprights of the frame!
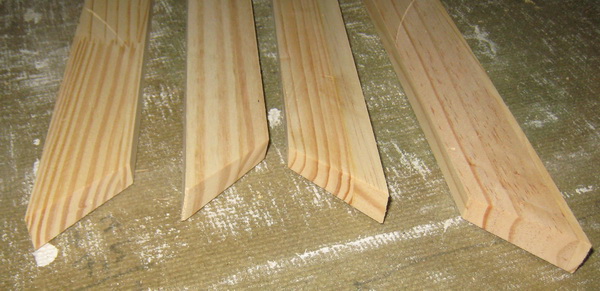
Some solutions have been imagined, the simplest being to fix a small half-round moulding on the outer edges of the frame, another is to cut the uprights cut in the shape of a trapezium, the third is to cut the ends at 45° with a slightly inclined saw blade .
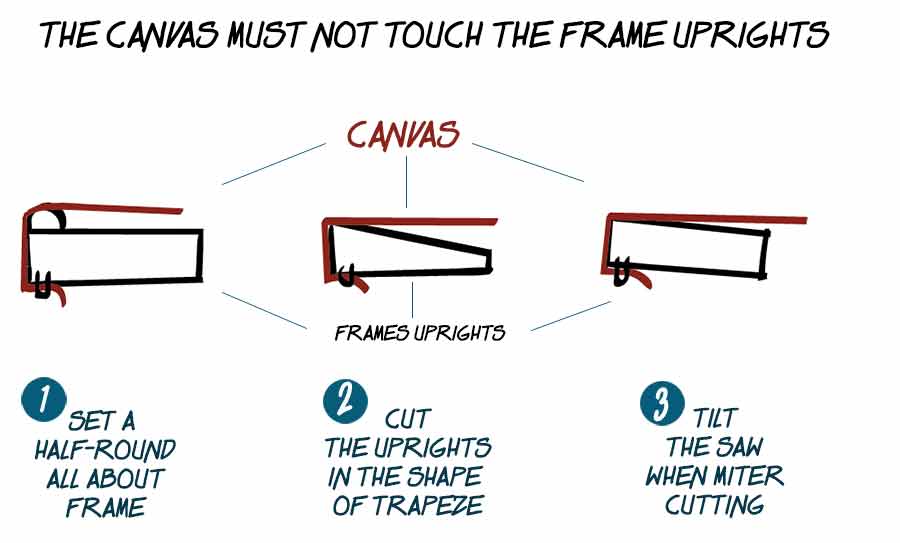
In this page, we explain the second method: the one with bars cut in the shape of a trapezium...
 The necessary equipment
You need some equipment!
. Old cotton sheets (mixed linen and cotton)
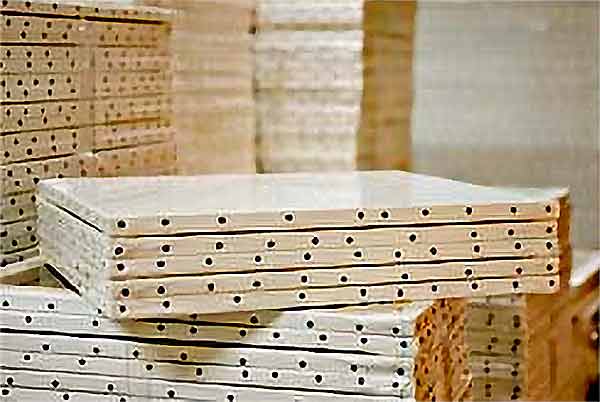
. Pallet boards.... (2cm thick)
. Good quality wood glue
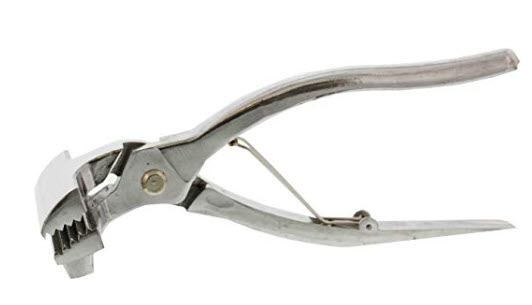
. A canvas plier (less $12)
. A framer's strap clamp (approx $12)
. A stapler.
. A circular saw on table less $110
If you have space at home.... Feel free to invest in a circular saw on a tilting blade table (from $120 depending on the promotions) and which will then be useful on many occasions!
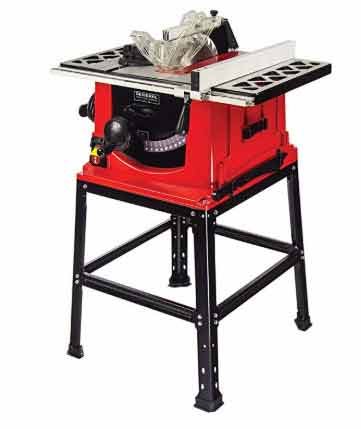
A circular saw on the table is essential here to give the frame uprights their trapezoidal cross-section...
 Construction of the frame
All the following dimensions have been calculated for a 15F (65cmx54cm) frame.
In pallet board* about 2cm thick, cut lengths of 4cm wide with the circular saw. It is not necessary to plane them... because they will be cut later.
Then cut the barss to the desired length (2 of 65cm and two of 54cm) by cutting their ends at 45° with the framer's mitre saw. The 45° mitre cuts of the bars can be made with a circular saw using the angle guide that is mounted with it.
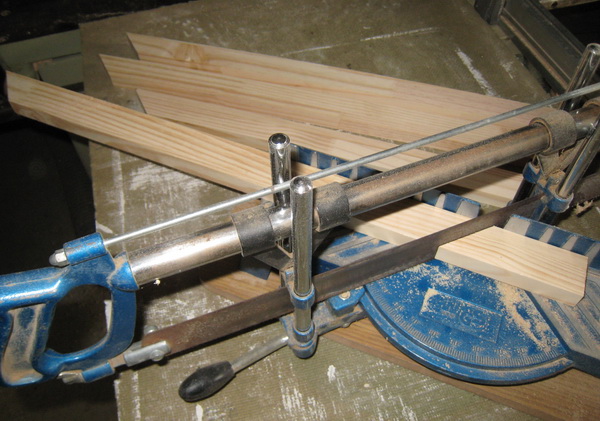
The opposite uprights must be exactly the same length: so, work with the stop of your framing saw for this purpose.
Now comes a delicate operation... give a trapezoidal section to the uprights. This is necessary so that the fabric, once stretched, does not come into contact with these bars (which would cause unwanted marks).
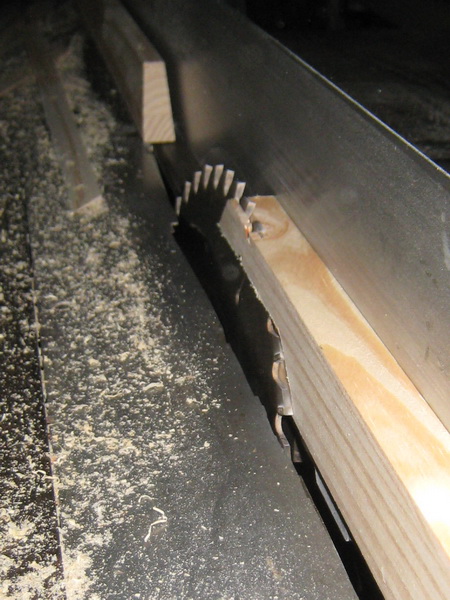
To do this, give the circular saw blade a 10° inclination, adjust the lateral guide to 2cm from the bottom of the blade and then saw the uprights lengthwise to give them the desired shape (be careful!).
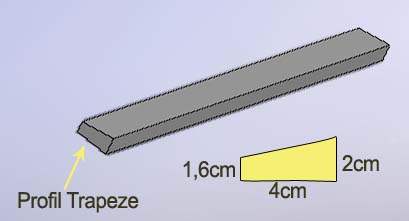
For the intermediate upright, straighten your blade and saw it down to 1.6cm thick (rectangular section).
Approach the various parts dry, check that everything is fine, then glue the corners and proceed with the assembly. Cut the central post to the correct length.
Tighten with the frame press.... Check the squareness (by measuring the diagonals which must be exactly the same length)... Correct if necessary.
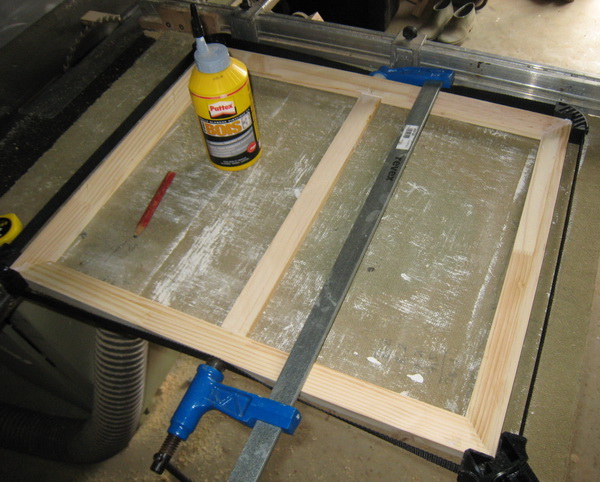
Glue the ends of the central post, place it in place and tighten with a clamp... let it dry overnight. Modern glues are extremely resistant: your assembly will be very solid.
You can, if you wish, reinforce the assemblies with a few staples (put some on top and underneath).
You can also reinforce your angles with V-NAILS (see that page) La mise en place de la toile
Now cut your canvas so that it extends beyond the frame (you can fold it from behind by stretching it out). You will staple it to the frame (or fix it with so-called "upholsterer's seed" spikes but I find stapling more efficient.
Humectez légèrement votre toile avant de travailler : en séchant elle se tendra parfaitement !
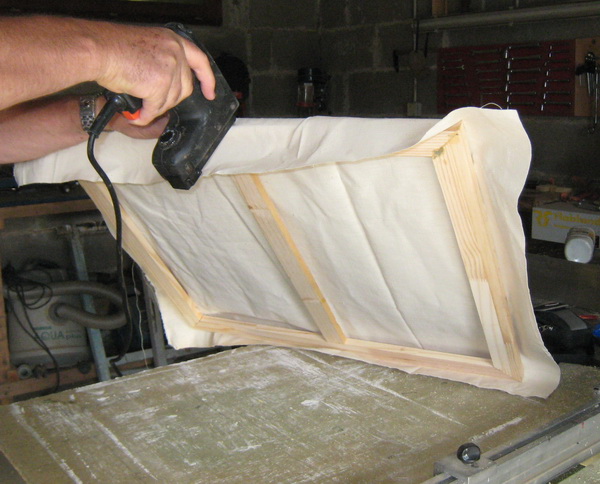
Remember that the first staples must first be placed in the middle of each of the uprights, working alternately on opposite sides.
Here is a correct stapling "plan":
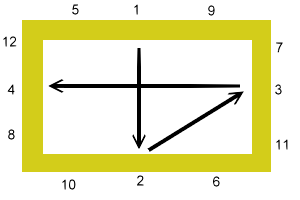
First attach the clip 1.... Stretch the canvas with the special clip and fix the clip 2... Continue by following the diagram.
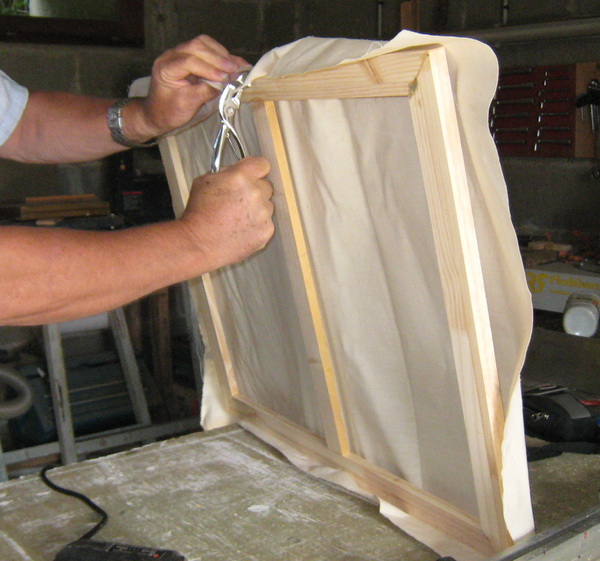
With a staple every 5 or 6 cm, the fabric is correctly stretched... especially if you have taken care to moisten it slightly> before installation: when drying, the fabric will tighten strongly on the frame.
 The preparation of the canvas
Once the canvas is stretched on the frame, it must be given a preparation in order to be able to paint it.
Personally, I start with a coat of white acrylic paint which, as it dries, will create a first flexible film on the canvas.
.
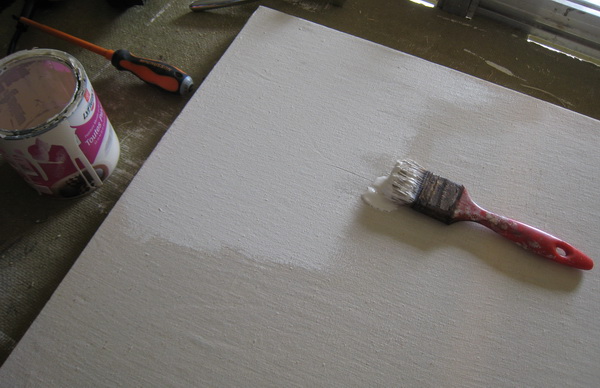
Then I apply two coats of GESSO (which you can find in all paint supply stores or you can make yourself). Let it dry well... and sand it lightly after drying.
After all these treatments, the canvas may need to be tightened... As the frame thus manufactured has no keys... there is no other solution than to spray water on the back of the canvas... and humidify it: by drying it will tighten without problems.
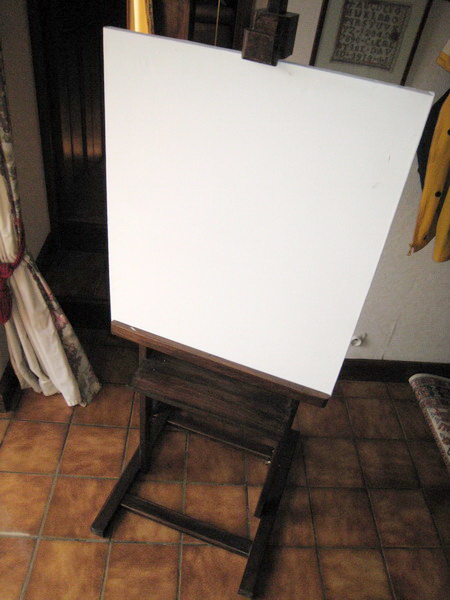
Your canvas frame is now ready to be painted... and to welcome your masterpieces!