MAKING OF PASSEPARTOUT
AND USING A CLIP FRAMES
 Using a clip frame
For a few bucks, you find easily, in your supply stores, ready-made clip frames usable with a passe-partout mounting for hanging up your artworks on a wall.

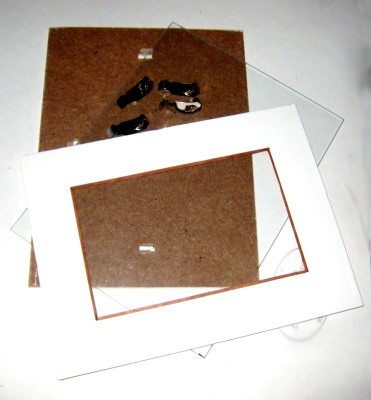
Most of the time, these clip frames are composed of a fiberboard back having function of backing and of some small nickelled grips to set a protective glass.
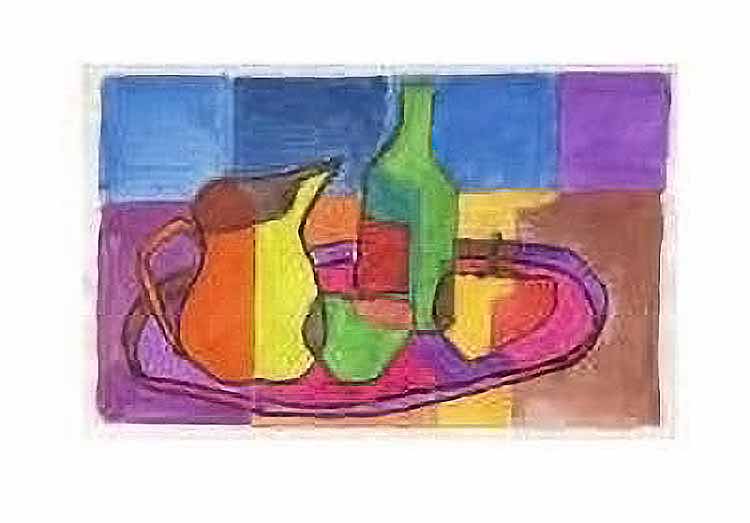
Dimensions are varied 5"x7", 7"x9"… for the smallest… that can even reach 20"x32" according to the arrivals ! I chose to day a 8"x10" clip frame to expose a small gouache treated as watercolour whose luminous colors deserve to be highlighted.
This picture frame is only composed of a pane (8"x10") and a fiberboard bottom (8"x10"). Glaze and fiberboard are maintained together by small stainless clips.
Material : a clip frame from your framing shop (dimensions 8"x10"), a sheet of light paperboard for the mat, some printed paper for the mat and for the exceeding-bands.
Cutter, scissors, square with 45° and adhesive stick as usual.
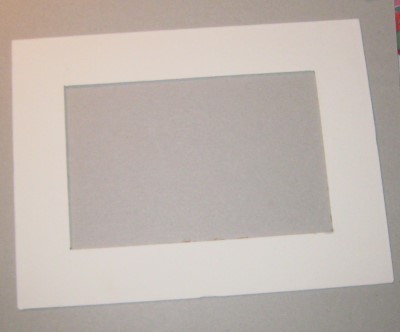
 Dimensions of the window.
I measure the watercolour... The part of the art-work to preserve is 4.3" width on 6.5" Length.
By withdrawing these dimensions of those of the passe-partout mounting we obtain 8" - 4.3" = 3.7" in height and 10" - 6.5" = 3.5" in width… Bad luck, there is a little shift !!
I decides to give margins of 1.8" (3.6/2) in all directions. The window image will thus have as dimensions:
8" - (2x1.8) = 8" - 3.6"= 4.4" (instead of 4.3) and
10"-(2x1.8) = 10" - 3.6" = 6.4" (instead of 6.5).
The mat will thus let exceed slightly the edges of the watercolour .
It is necessary to proceed thus in an empirical way because we must adapt here to dimensions of the ready made frame. It is the opposite of the traditional framing where we start from the art-work to compute the frame measurements !
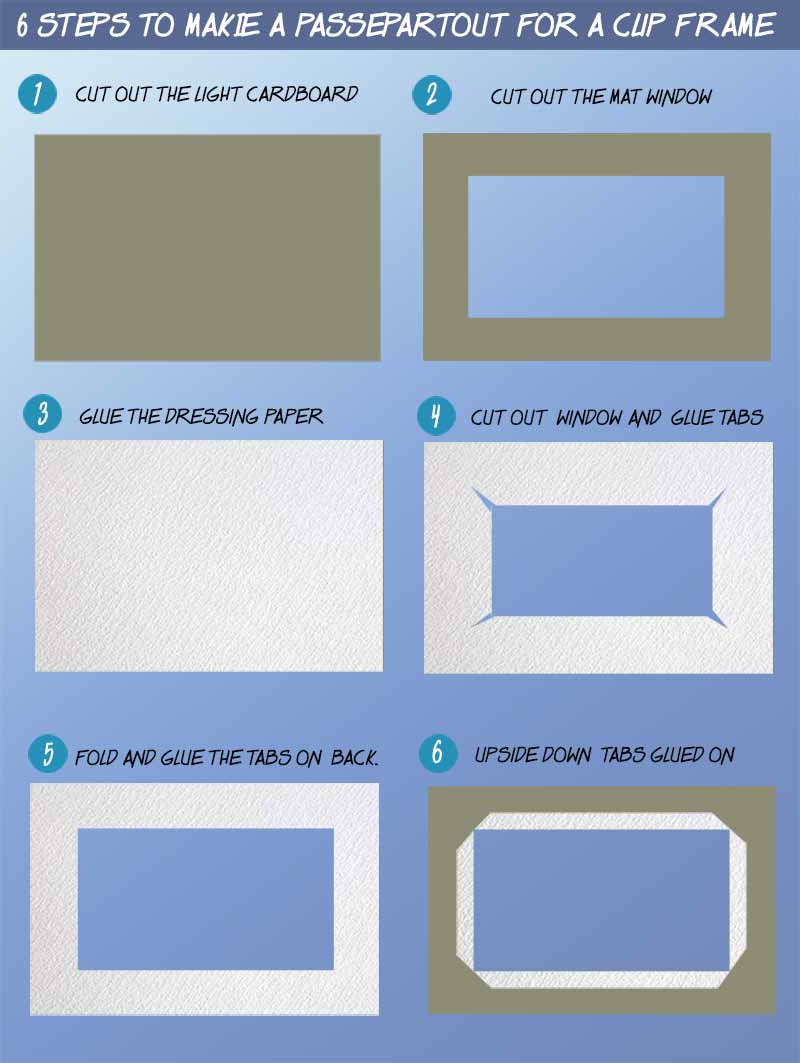
Thus, cut out the mat in the light paperboard : it must measure 8"x10" (you can use the fiber bottom or the glaze like a gauge). Trace then the margins with 1.8" width. Open the mat window with the cutter while following your features reference marks.
 Preparing the passe-partout.
Choose the paper for covering the mat : here, I preferred a very clear cream coloured paper to not interfere with the colors of the watercolour.
As usual, paste the face of the mat everywhere using a brush then apply paper and smooth it with a clean rag (I use only acid free Vinyl glue...).
It is better to proceed so to avoid the inevitable deformations if the paper is directly pasted.
Cut the paper surplus to the short-nap cloth outside the mat everywhere.
Then open the angles with a 45° square inside the opening. Paste the back of the mat now everywhere and fold up the mitered flaps by making them adhere carefully.
Present the mat on the watercolour and check covering.
 Exceedings bands
Here is the explanation of the "overtaking" technique...
On the back of the mat, you will glue strips that will "stick out" a few millimeters from the window of the mat. This will contribute to underline the framed part by creating a kind of transition between the art and the mat...
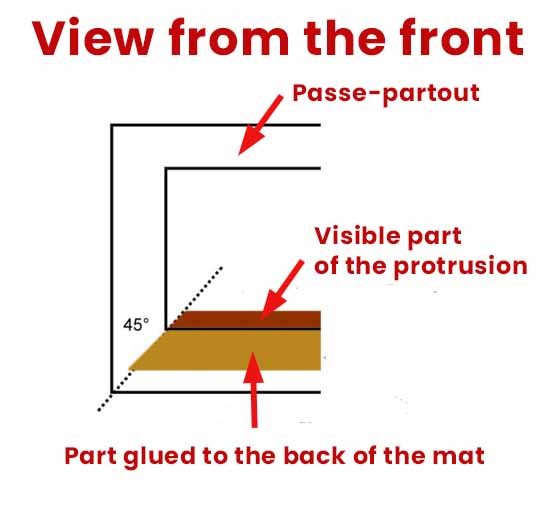
Most of the time, one chooses for the color of the overruns one of the secondary colors of the art...
I chose exceeding strips color “maroon” which will well contrast with the white edges of the mat and which will match with the maroon used in the watercolour.
In the paper you've chosen, cut out several strips of 2" width. Fold these bands in 2 parts in the length direction to give them a certain rigidity.
Cut an end to 45° by using the special square.
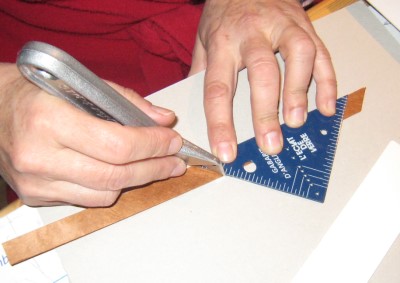
Then present the band behind the mat opening, mark with the pencil the length to be preserved then cut out again with the 45° square.
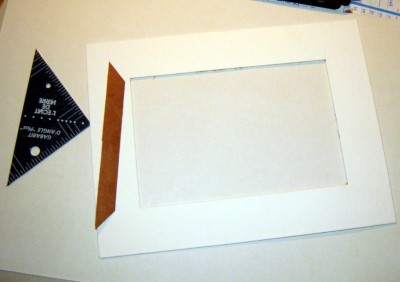
Turn over the mat. Paste the edge then stick the "exceeding band" by the back.
To determine “the right” length of exceeding request a little pratctice… at the beginning it is necessary to proceed by gropings : it must adapt exactly and exceed of 0.06" to 0.08" in the interior of the opening : not too much nor too little!
Repeat for the 3 others exceeding bands.
These exceeding will underline in a discrete way the edges of the mat, bringing depth to your assembly and thus emphasizing the framed watercolour.
 Final assembly.
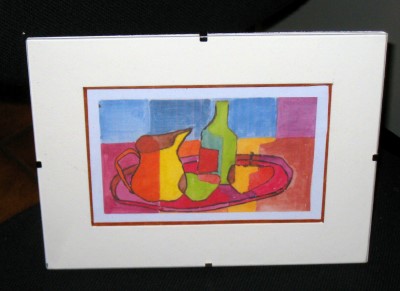
You now have all the elements of the assembly. Fix the watercolour on the mat with 2 small pieces of adhesive tape, be attentive not to put too much of it, it is simply for maintaining it just for the time of the assembly.
Clean glass then fix immediately with the metal clips.
Your framed watercolour is ready to be hung to the wall!!
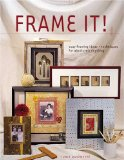
Frame It!
by Tonia Davenport
(click to enlarge)
Framing isn't something one has to leave to the professional.
With Frame It! readers will learn how to use ready-made frames and inexpensive framing materials to create frames perfect for their favorite photo, piece of artwork or souvenir...
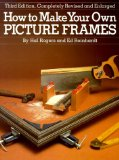
How to Make Your Own
Picture Frames
Ed Reinhardt, Hal Roger
(click to enlarge)
Excellent book for the beginner (we are always beginners !). Clear and concise.
Excellent step-by-step instructions with photos for each and every step.
This book covers all aspects of frame construction, painting, mats, glass-cutting and usage.
A great book to trigger your own ideas to create custom frames.