DIGITAL SCRAP TUTORIAL
HALF WATERCOLOR HALF DRAWING
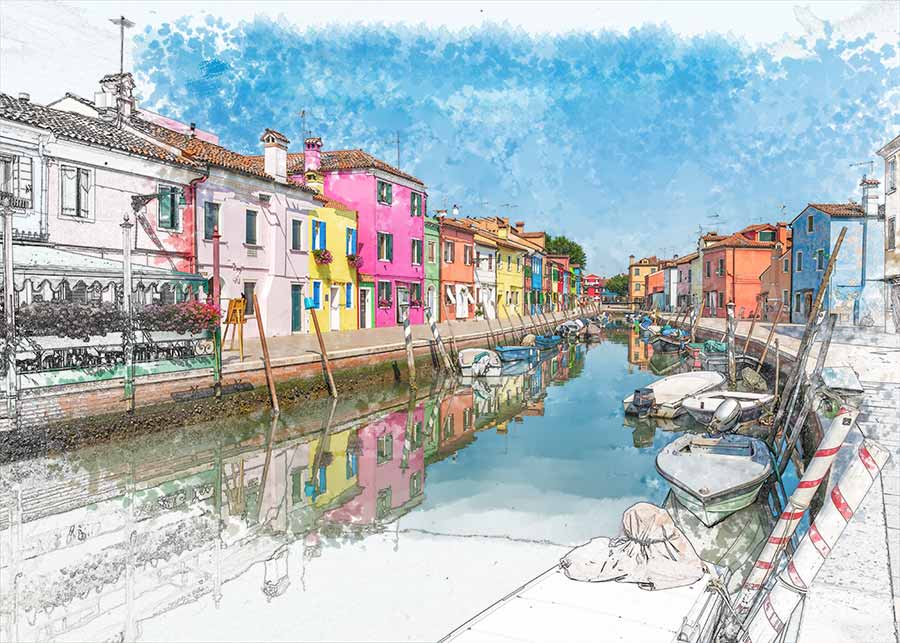
It's a technique that I love... I even tend to abuse it in the vacation albums that I digital-scrap... It works superbly with colorful and high-contrast photos.
Here is an example of what you can easily achieve with photoshop...
The colors have been only partially applied, to give an impression of half-drawing_mi-watercolor...
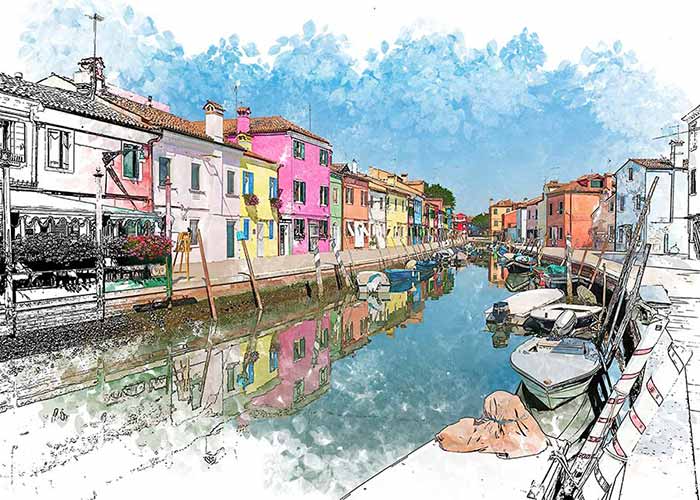
But if you apply the colors completely, you will have an interesting watercolor effect !
Just move your mouse over the image below to judge the effect produced ...
So without delay, if you like it, here is how to easily obtain this half-drawing half-watercolor effect...
I propose you 2 steps : first get the line drawing... then color this drawing with watercolor effects...
You can also view this VIDEO where I explain to you in detail how to operate.
 Turn the photo into a line drawing
Here is a technique to obtain a line drawing... the higher the definition of your image is, the more precise the final drawing will be... It's up to you to choose the right balance between precision and artistic !
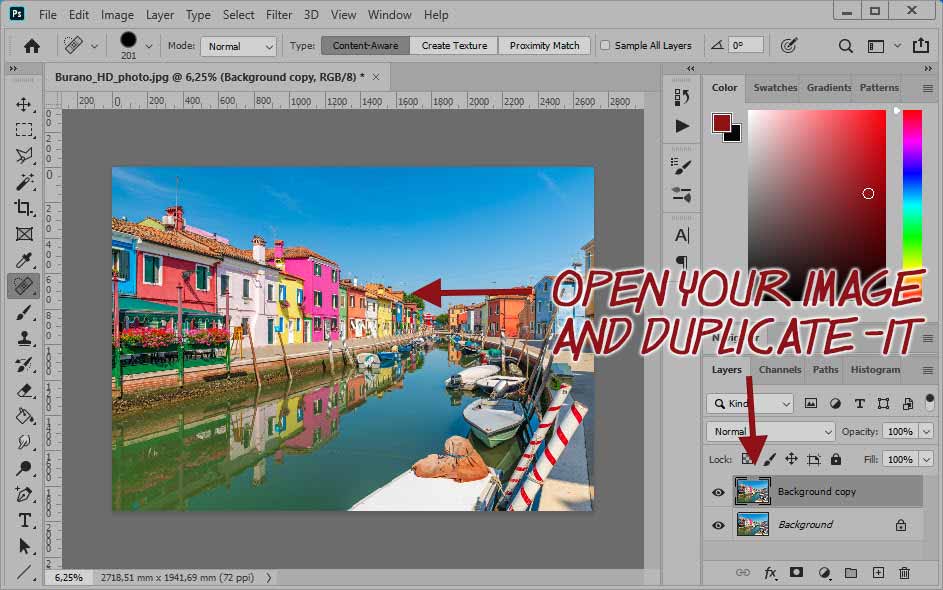
![]() Open your image in photoshop and immediately duplicate it (Ctrl+J)... You now have 2 layers.
Open your image in photoshop and immediately duplicate it (Ctrl+J)... You now have 2 layers.
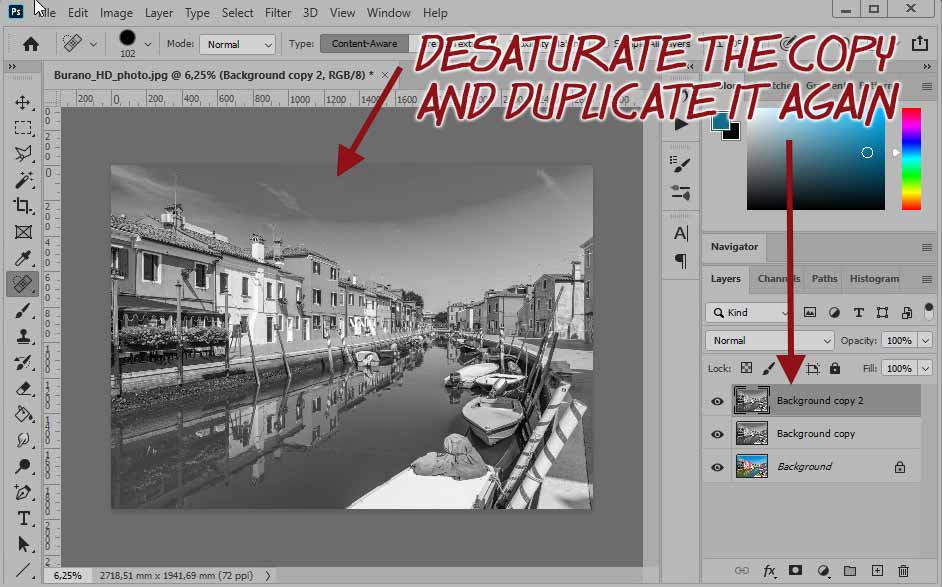
![]() Pass your copy in Black and White (Image>Settings>Desaturation or Shift+Contrl+U) and immediately duplicate this black and white photo.
Pass your copy in Black and White (Image>Settings>Desaturation or Shift+Contrl+U) and immediately duplicate this black and white photo.
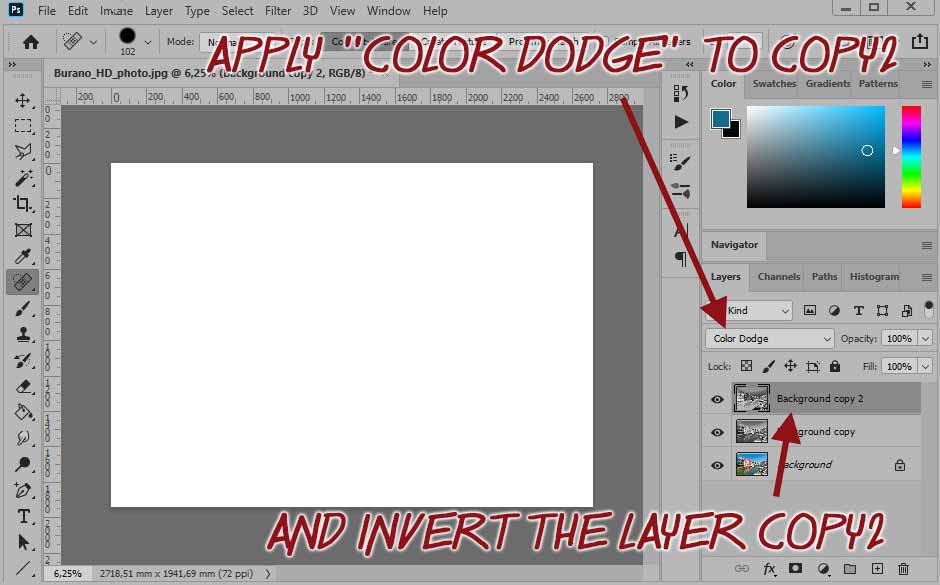
![]() Passez le calque supérieur en "densité couleur -" dans les options de fusion puis inversez le calque (ctrl+I).
Passez le calque supérieur en "densité couleur -" dans les options de fusion puis inversez le calque (ctrl+I).
At the end of this operation, the resulting image becomes white. This is normal, don't worry.
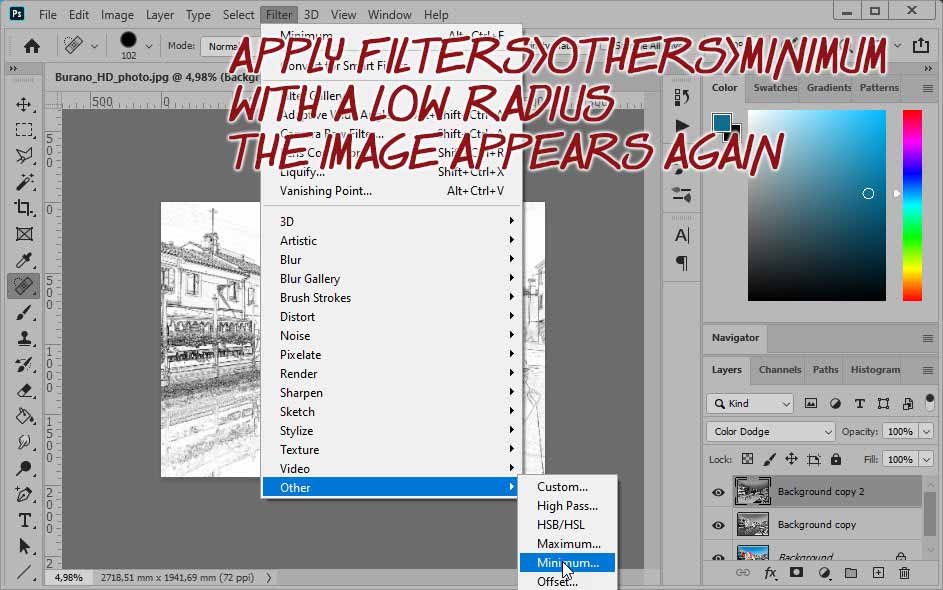
![]() Execute the sequence: filters>other>minimum. The line image appears ... still a little pale ...
Execute the sequence: filters>other>minimum. The line image appears ... still a little pale ...
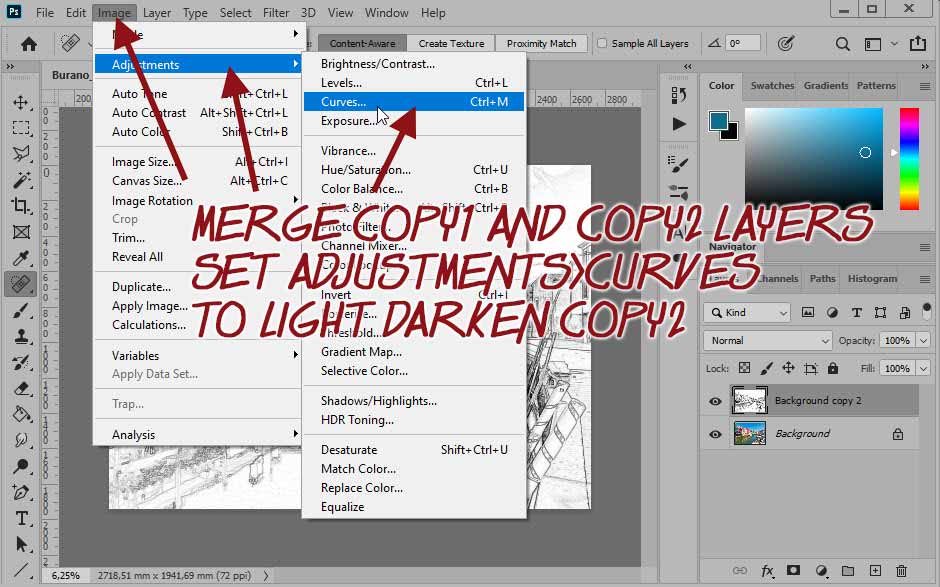
![]() Merge the two upper layers to have only one in black and white ... To do this, select them both and right click on one of the layers... In the menu that appears, click on merge layers.
Merge the two upper layers to have only one in black and white ... To do this, select them both and right click on one of the layers... In the menu that appears, click on merge layers.
Now, set : adjustments>curves and act on the curve to darken the copy2. Click on the curve while maintaining the click and drag the curve to round it . Don't put too much, just a little bit.
This last action completes the creation of the line drawing! All that's left to do is to process the photo to obtain a watercolor imitation...
If you would like more details, Look at this tutorial in video ...
 Etape 2 - Coloring of the drawing
![]() Here is the second step that will allow you to obtain this half-sketch, half-watercolor image. We continue with the image obtained at the end of the first part...
Here is the second step that will allow you to obtain this half-sketch, half-watercolor image. We continue with the image obtained at the end of the first part...

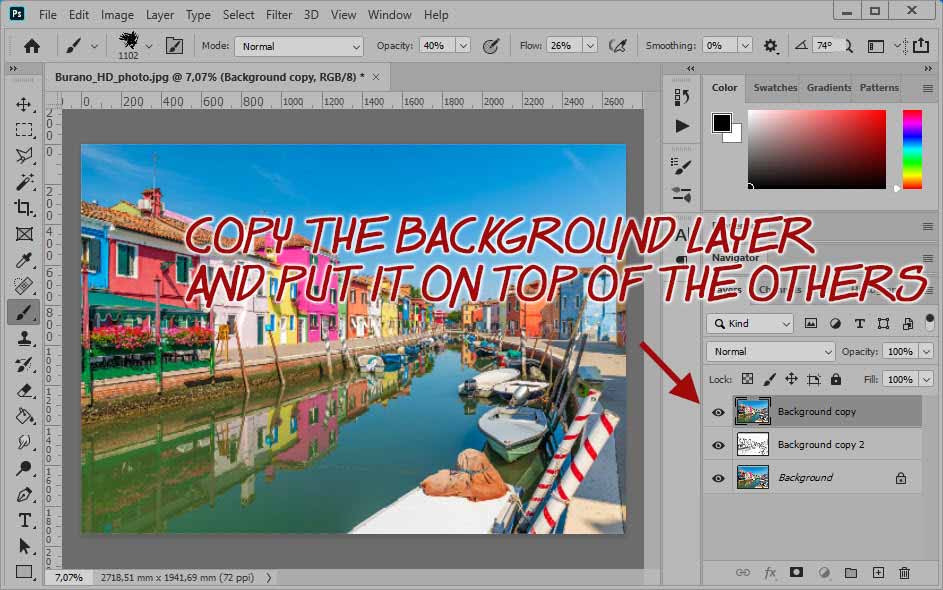
![]() You start by duplicating the color image with Ctrl+J and place this copy at the top of the layers .
You start by duplicating the color image with Ctrl+J and place this copy at the top of the layers .
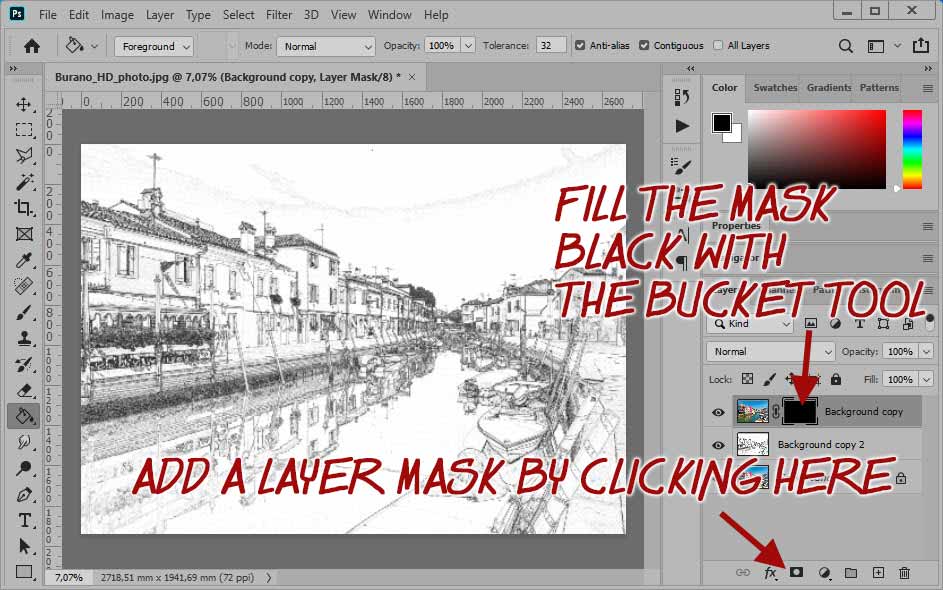
![]() Add a layer mask to this background copy and fill this mask with black with the bucket tool.
Add a layer mask to this background copy and fill this mask with black with the bucket tool.
The color disappears... it's normal. It will only appear on the parts of the mask that you will paint white....
![]() Select the color WHITE (at the bottom of the toolbar). Then choose a "wet sponge" brush in the predefined shapes.
Select the color WHITE (at the bottom of the toolbar). Then choose a "wet sponge" brush in the predefined shapes.
Click inside the layer mask and start painting directly on the image... the color reappears in the painted areas. If it appears too much, paint with black... Set the opacity to 50% and the flux to 50%... Change the size of the brush to get a watercolor effect... Go back to the already treated areas, with white to accentuate and black to lighten
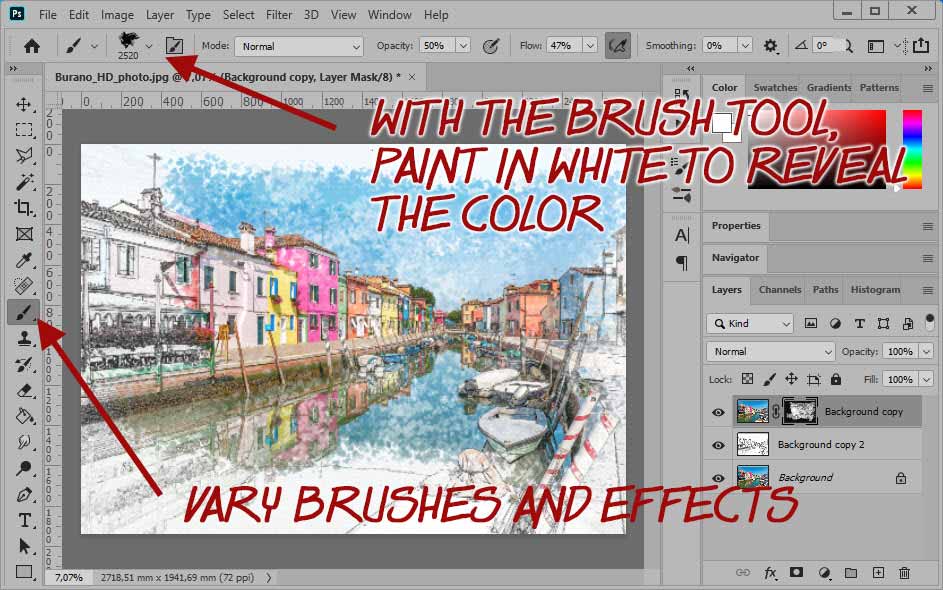
Remember... to soften an effect, or even cancel it, paint with black.
You can download free photoshop watercolor brushes at : brush-photoshop.fr... essayez notamment :
It is often necessary to start again, until you like the effect...
It should come soon enough! Good luck!
Et voilà !