
HOW TO COVER A FRAME WITH FABRIC
The technique explained
It is sometimes necessary to match a frame to elements present in the room: bedspreads, curtains, drapes, sofas... to obtain a more intense decorative effect.
Rather than trying to paint the frame... why not cover it with a piece of cloth: it's simple and quick! Even the mat can be matched to the fabric used.
With a completely ordinary frame and a little care, you will get a sophisticated and refined frame that is perfect for a classic interior.
And there can not be a bad surprise at the end of your work!
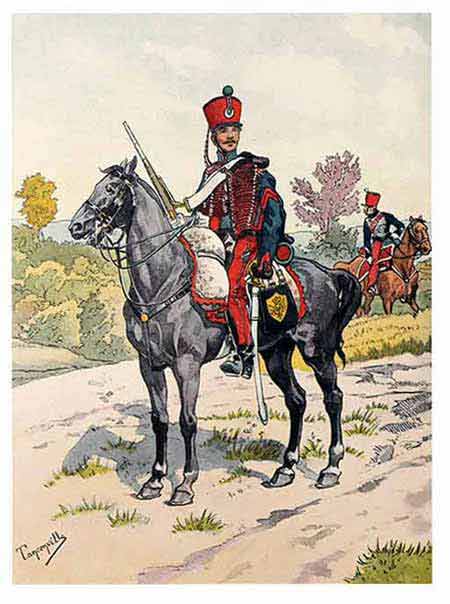
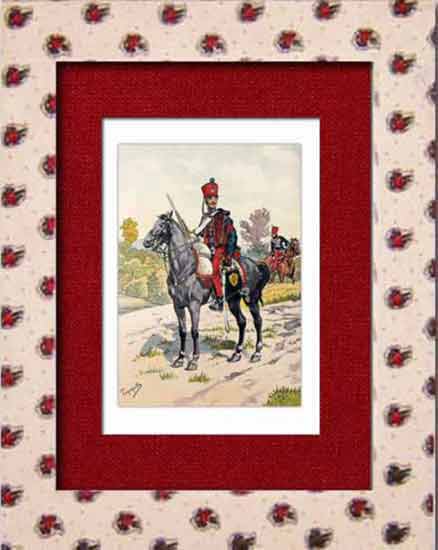
We want to frame this proud hussar and match the frame to the curtains of a room ...
 The necessary equipment
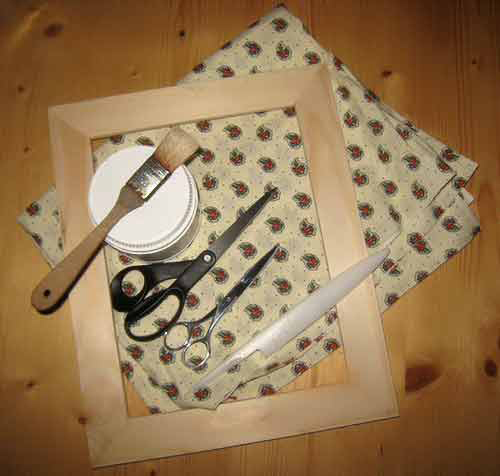
Few materials, nothing that already exists in your country....
A very simple raw wood frame with rabbet, from IKEA, GIFI or others...
So if you are ready for the explanations.... Let's get started!
 Front panel filling....
Cut your fabric chute so that its dimensions exceed those of the frame by 5cm. Place your frame on the chute to make sure everything is fine before you start gluing. Try to center the patterns if there are any....

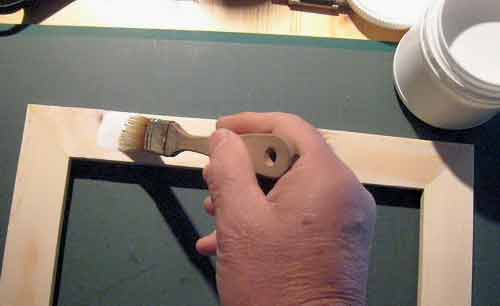
Now glue the front side of only one of the long lengths of the frame by spreading the white vinyl glue with a brush, without thickness. The glue must not soak the fabric: there must be just enough to ensure good adhesion.
Place the fabric on the glued part and stretch it slightly lengthwise: this is not to deform the fabric by exaggerating the tension but to avoid possible folds.
If there are patterns, be careful to align them...
Let the glue take a few moments, then glue the rest of the front face of the frame and apply the fabric, stretching moderately. With the fold and the flat of the hand, smooth well.
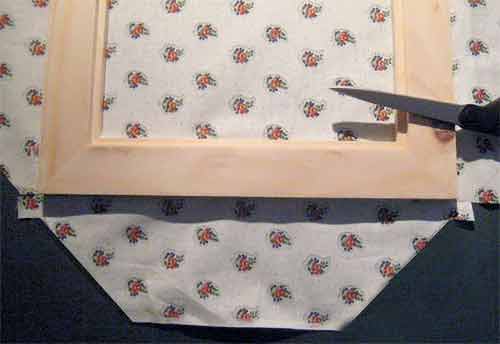
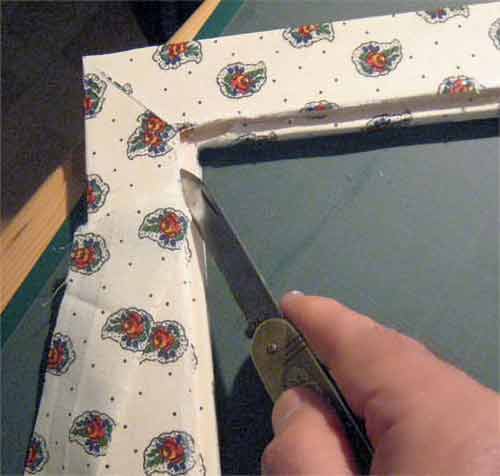
 Cutting the corners and lining the back of the frame
Turn the frame face down against the table. Here is now a rather delicate passage.... Look at the pictures to see how to make your cuts so that your finished corners are perfect!
It's better if you have a 45° square...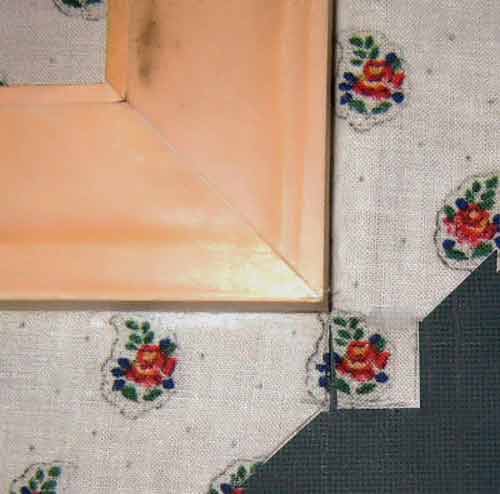
To draw these cuts, use a 45° angle and mark lightly with a pencil. The small folding leg is a square of dimensions equal to the thickness of the frame.

Treat each corner of the frame as such.
You will now glue the edges of the frame, fold the shutters and apply the small folding legs to hide the corners.

When the corners are hidden, fold over the last flaps and finish gluing the fabric to the back of the frame....

Then, with a sharp knife or cutter, cut off the excess fabric flush with the rabbet, stretching slightly.

It's over for the back face.... Turn the frame over on the table.
 Front panel of the frame
Place the square on each corner and draw the cuts to be made.
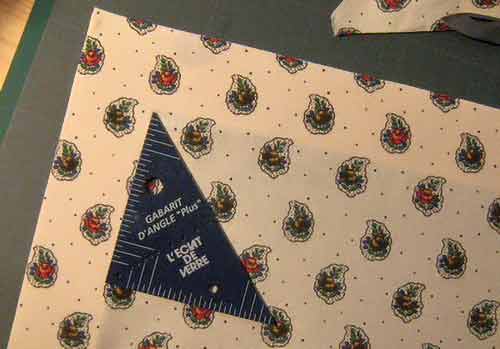
Draw the inner corners of the frame
Then, with your cutter or penknife, cut along your path.
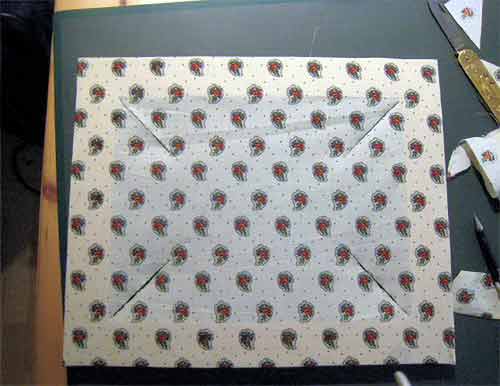
Remove the central part to create 4 legs. These legs will be folded and glued into the rebate to complete the frame.
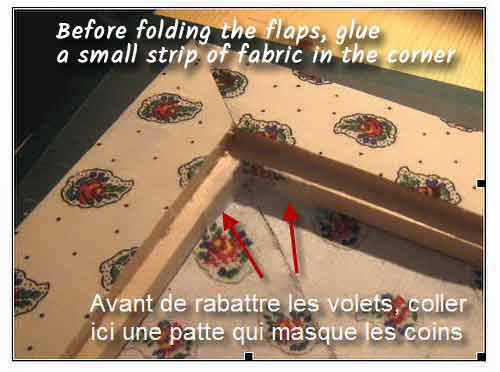
But first, it is necessary to cut 4 small strips from the fabric to glue them in the inner corners before folding the flaps.
You can now glue the inner edges of the frame and the rebates together to apply the flaps. Work with the bone folder to apply the fabric properly in the rabbet and avoid unsightly creases...

Then when you have finished, cut with a cutter, in the rabbet to remove the excess fabric.
Let the whole thing dry... your frame is finished! All you have to do is cut and cover a passe-partout... place your photo... and hang it all on the wall!
 Mounting
It remains to place the portrait in the frame.
We have chosen to glue a fine fabric in red tones matching to the red of picture to "dress" the passepartout...
GD