MAKE YOUR COMIC STRIP
FROM PHOTOS (1)
PART 1 - IMAGE PROCESSING
 This page is a natural continuation of the “Cartoon Idea” page of this site. This "cartoon idea" page have been sawn by number of visitors ... Some of them asked me to go further ... and elaborate on the creation of a full cartoon page ... So there !
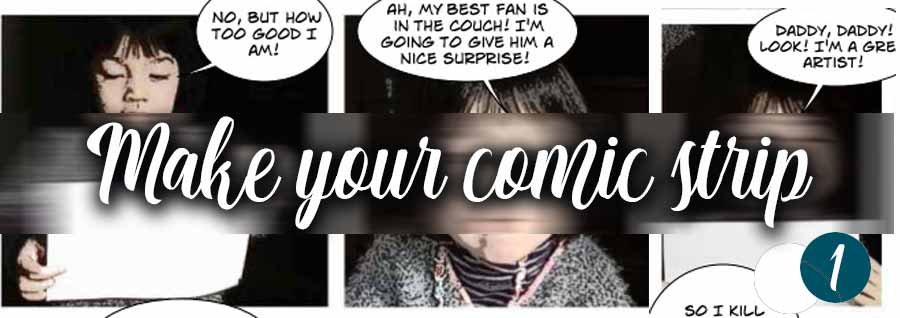
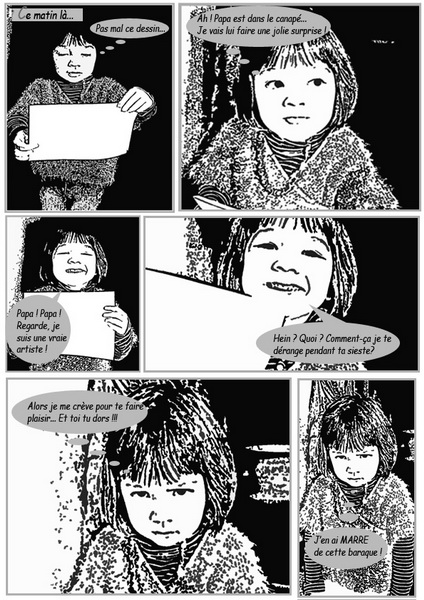
You can click on the thumbnail-cons to get an idea of the final realization ...
The realization of this page is done in 3 phases:
1) Image processing (this page)
2) Page layout of the images
3) Dialogs and Bubbles
All photos were processed with PHOTOSHOP CS3 ... using only "basis filters": namely, the stamp filter and then the cutout filter.They give us this "B & W comic effect" that can decorate a scrapbook page ... giving it a distinctive look!
If you don't like black and white comics, see on this other page, a new method to make comics from obtain a entirely colors cartoon .
Then if you're ready to start on the pages layout and make your first comic strip from photo ... ? Here we go!
Transforming a photo into a comic vignette
Start by running Photoshop. Open a copy of the photo you want to process(submit a sufficient definition 1600x1200 seems a good compromise).
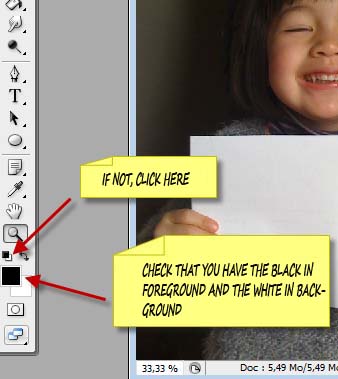
Note, importantly, check the toolbar on the left, you must have a BLACK foreground and a WHITE background.
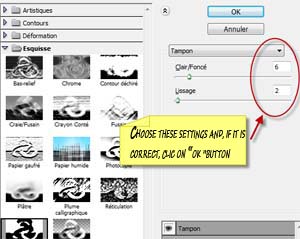
Click to select your photo and then start the first filter (stamp) by running:Filter>Sketch>stamp.
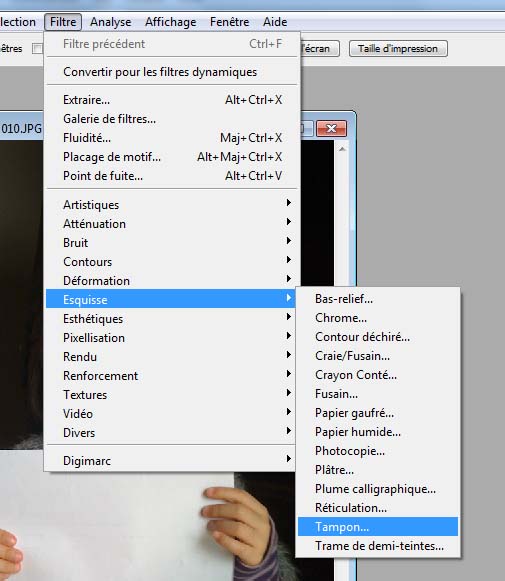
In the window that opens, select the median settings (eg, 6 for light/dark and 2 for Anti-alias) ... it is not critical!
Your image is already converted!
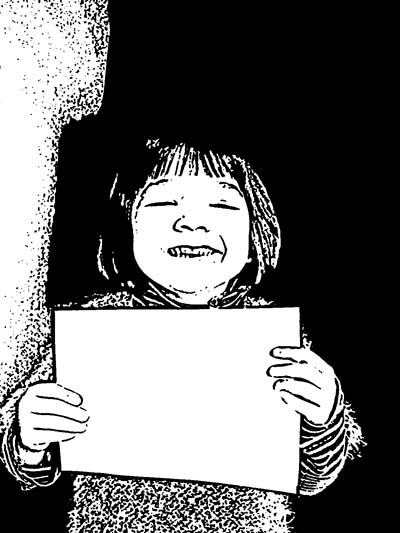
It could be used as such ... but we will pass it through a second filter to improve it a little.
Apply Filter> Artistic> cutout wuth medium settings (128)... This will clear the picture of small useless parasites spots that remain ....

Your photo is now transformed ... Save your work!
How to automate the processing ... by recording a script ...
You have just (yes, it is VERY SIMPLE ...) to save a "script" that will do the job for you ... Do not worry ... this is not complicated at all!
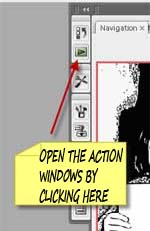
Start Over! Open your photo to transform ... and open the SCRIPT window by pressing Alt+F9 or by clicking on the "little green triangle on the right":
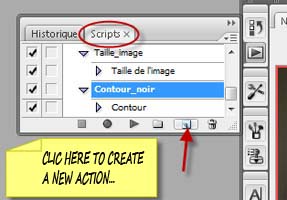
In the new window that opens, enter a name for your script ...
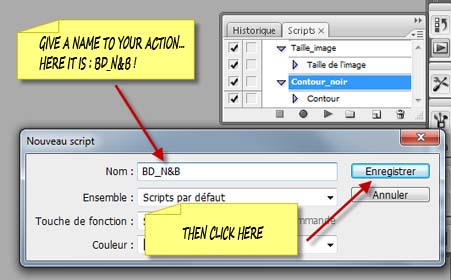
A red dot appears and tells you that from now all transactions you make will be recorded in the script ...
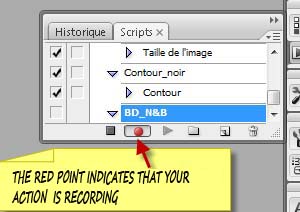
So click on your photo and repeat the steps outlined in "Transforming a photo into a comic vignette"
Start:
Filter> Sketch> stamp,
then continue with:
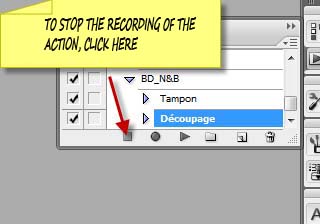
Filter> Artistic> Cutout
Then click the little square on the left of the red dot to stop recording.
It's over ... You'll now be able to process all your images!
How to process multiple images with the script BD_N & B. ..
Open all images to transform into comic vignettes ... Open (if it is not on screen) the script window ( by pressing Alt + F9 ... or clicking on the "green triangle").
Click the first image to select it, then, in the script window, click BD_N & B and then on the small triangle to start the script:
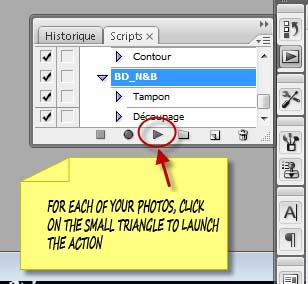
The process takes place automatically.
Select the next photo and restart the script ... until the last picture!

Now save your work ...
It'll just lay out pages and, finally, to write and place the dialogue in your story if you want to put one. If you do not know how, go see this other page !
Learn making comics!
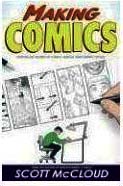
Making Comics:
Storytelling Secrets
of Comics,
Manga and Graphic
Novels
Making Comics, like its predecessors, is also an eye-opening trip behind the scenes of art-making, fascinating for anyone reading comics as well as those making them .
Drawing Words
and Writing Pictures:
Making Comics:
Manga, Graphic Novels,
and Beyond
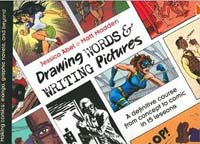
Learn to create your own comics with Drawing Words and Writing Pictures, a richly illustrated collection of 15 in-depth lessons that cover everything from crafting your story to lettering and laying out panels.
Cartoonizing is easy! : From the first pencil stroke to completion [Paperback]
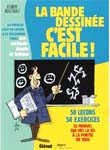
This comprehensive book includes 50 lessons and 50 exercises and put the comic strip making to everyone!
In french language... but easy to understand