
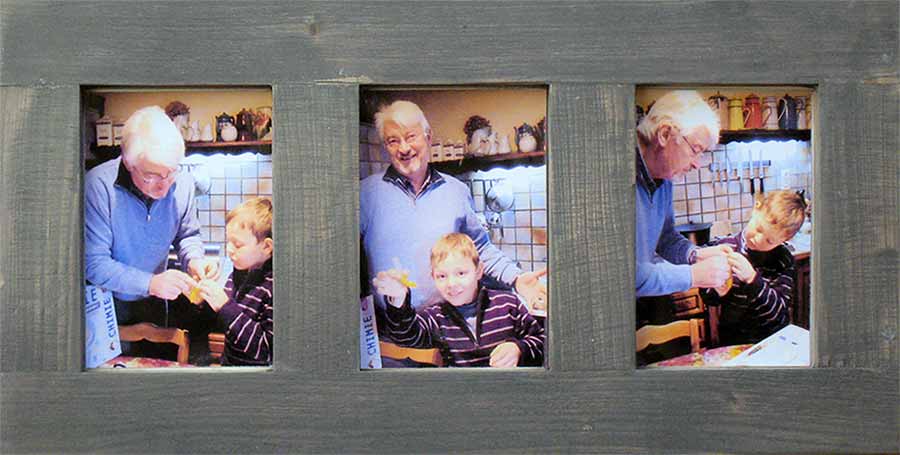
A multi-view frame
to do yourself...
Multi-view frames are very practical and are more and more sought-after... Launch Google with the keyword "multiview frames" and you will be surprised by the variety of the offer... and also by the diversity of the prices!!!
The one that I propose you in this page will not pose you any problem of manufacture nor tooling... and will return to you at less than 5$ for an impeccable result if you work carefully...
 The equipment
A framing saw with its adjustable stop
Two or three clamps
Fast wood glue
Northern fir 40x10 slat
From the tint and wax color Flannel gray color
Wooden cardboard or thick cardboard for the bottom...
Possibly, a protective glass cut to measure.
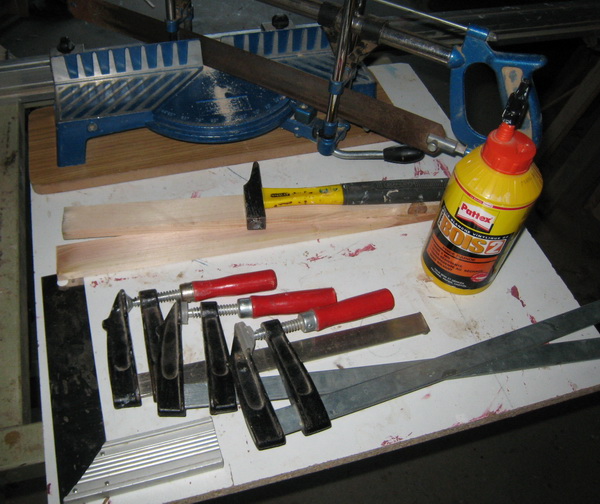
 The cuts
Assembly has been simplified to the extreme... modern adhesives are extremely high-performance and the simple "end-to-end" gluing proves to be very resistant.
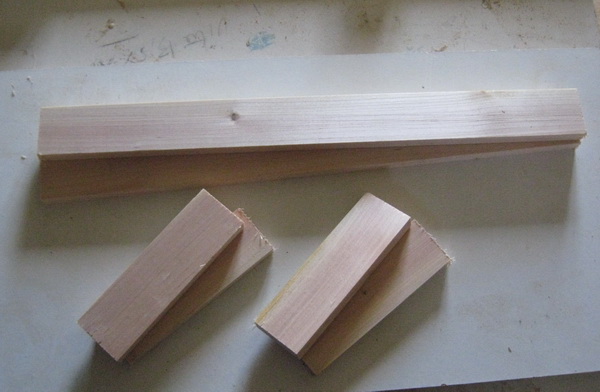
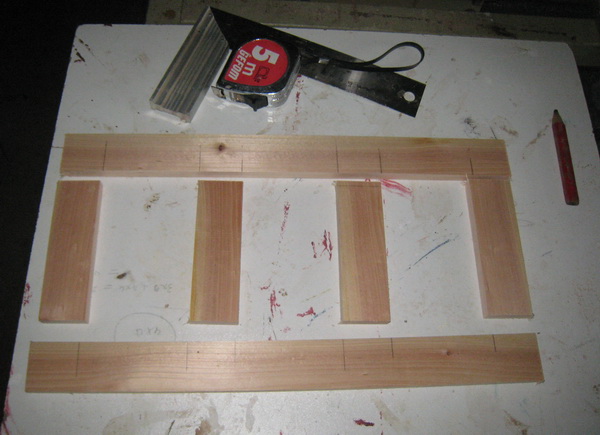
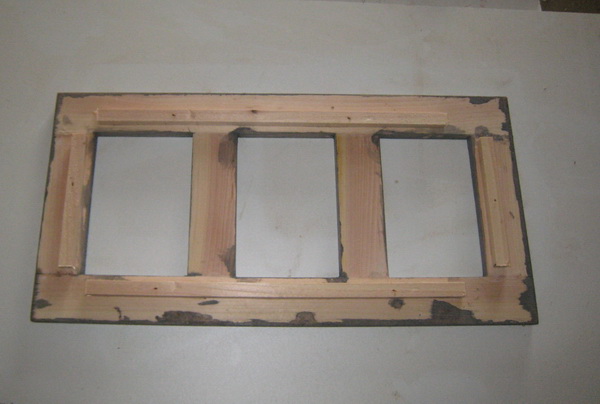
That's why it will be enough to cut in the 40x10 strip (adapt the dimensions according to the strip you find) two lengths of 43cm and 4 lengths of 14cm... so we will have a frame with 3 windows each for a 10x15 picture.

Start by setting the stop of your framing saw to 43cm... and detail the first 2 lengths. Then set to 14cm and cut the 4 spacers (adjustment of the stop see this page).
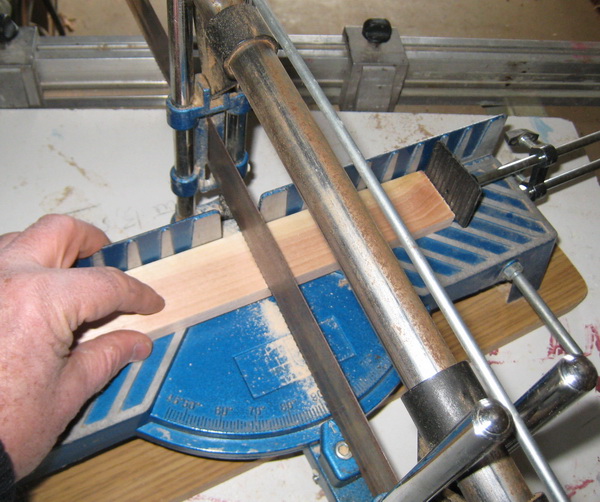
You thus obtain the 6 cuts necessary for the manufacture of the multiview.
It's time to move on to the tracing of the markers for gluing... On one of the 43cm uprights, trace with a pencil at 4cm, 13cm, 17cm, 26cm, 30cm, 39cm...
Bring the two 43cm uprights together and align them correctly. With the square and using the marks you just made, trace the glueing marks.
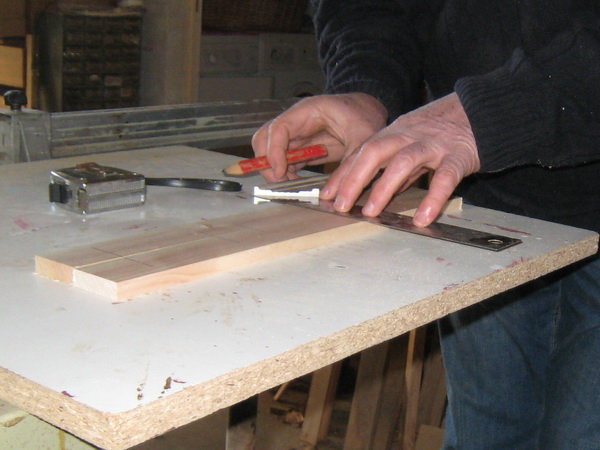
Now place all the parts in front of you and proceed with a "dry assembly" to see if everything is correct.
 Assembly of parts
Coat the ends of the 4 short lengths with quick wood glue... Then proceed to assembly!
A good gluing, in carpentry, is a gluing that has been tightened during the setting of the adhesive (if your assemblies do not hold, it is certainly due to lack of tightness!). It is therefore essential to install clamps: they will be easier to install if you have raised your elements on small wedges before assembly.
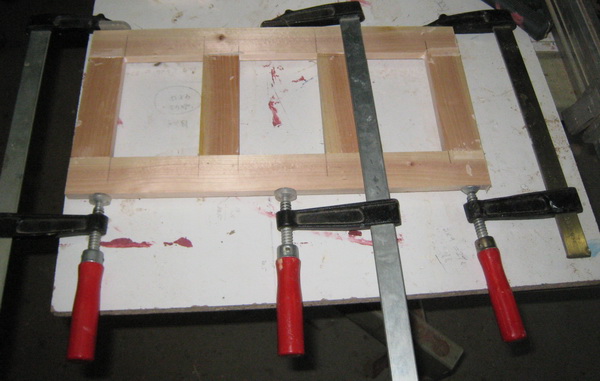
With a quick glue, 3 hours of drying are enough. Otherwise let it dry for about 10 hours.
 The finishes
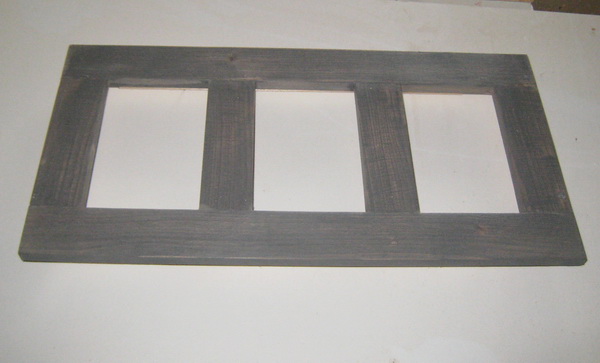
Start by carefully sanding your frame: start with medium paper 80 and finish with fine paper 120. Logically, this step is not the longest if you have been careful during the assembly!
Then proceed to stain the frame. There is a product called "Teinte et Cire Couleurs" (Stain and Wax Colors) which is only available in supermarkets (Geant and Leclerc) under the brand Diamantine. Theoretically monolayer... attractive colors... and the tools can be cleaned with water!
Two successive coats respecting a 2H delay between each coat . Then pass a fine steel wool to remove the excess and satin the surface: you then obtain a very smooth frame with a waxed aspect of the most beautiful effect.
You can also stain your wood with a color appropriate to your interior (prefer stains with alcohol that do not raise the fibers of the wood)... then wax with furniture polish or colourless wax (excellent!) and finish with steel wool.
Another possibility: apply two coats of satin varnish, tinted or not according to your taste... but you have to like it!
 Place your photos
In 10x10 square cut and glue on the back of your frame a false moulding 7mm from the inside edges.
Now cut a thick piece of cardboard to the dimensions of your fake window, which will be the background cardboard... Present it in the frame and, with a pencil, mark the place where you will paste your photos.
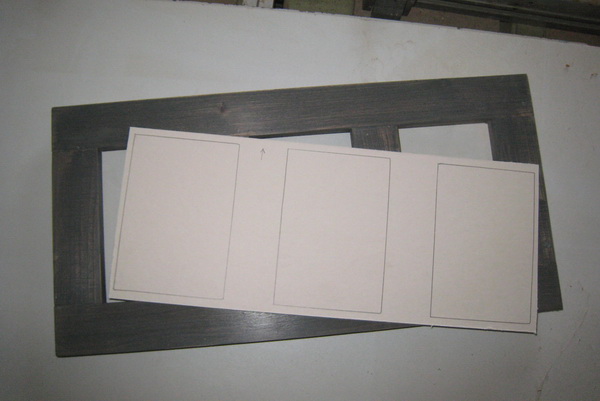
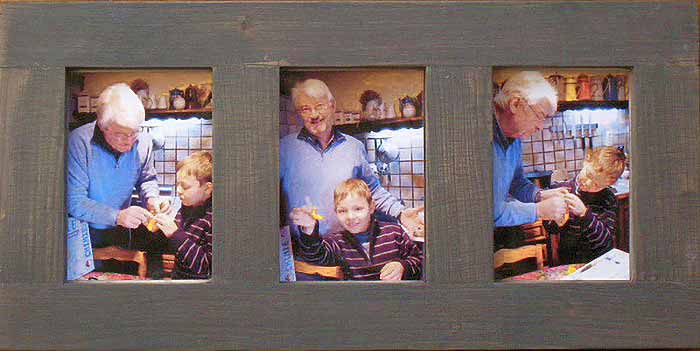
Place the photos at the marked places... eventually put the glass... and fix it with a few fine spikes inserted at an angle... Your frame is finished: fix a pin on the back and hang it !
Making pictures
frames in wood
Manly Bannister
Create all kinds of picture frames from simple wood mouldings to elaborate carved types.
Clear instructions on matting, texturing, finishing....
Wood finishing...
Bob Flexner
I have bought a number of books on woodworking, as well as a few on wood finishing.
This is by far the best book on finishing that I have come across.
The book takes all the mystery out of all the different types of finishing materials and finishing processes...
Home Book of Picture
Framing
by Ken Oberreicht
One of the best ! I think ! Over 40,000 copies of the first edition sold : it cannot be an error !
(Click for +)
This home Book of Picture Framing is the most comprehensive guide to mounting, matting, and framing oil paintings, watercolors, posters, photographs, calendar pages, and greeting cards without spending a fortune...
Great !