MAKING A SIMPLE PHOTO FRAME
As a training to french framing !
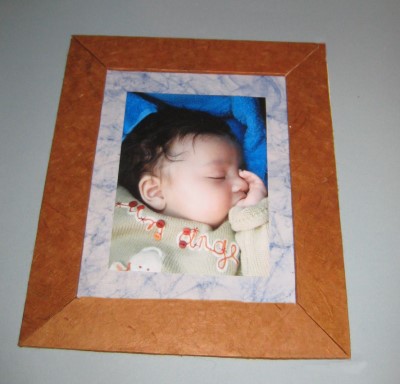
Here's the frame I propose you to do : very basic, simple to make, all cardboard made ... ideal for beginners starting a framing activity!
Of course, you can adapt its shape, dimensions and colors to your liking.
You can also turn it into under glass frame if you prefer.
 Material
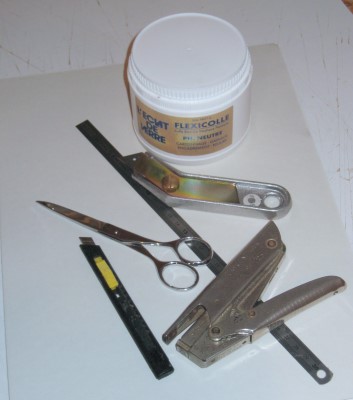
To tinker with this first simple little frame you need :
- Cardboard (2 or 3 mm or old bank calendar)
- Thin paperboard (cardboard from cereal box)
- Printed fancy paper (educational or entertainment store... see also freebie paper)
- Acid free Glue (which will not hurt the picture)
- Scissors, a bented cutter for picture framers, a sticker attached
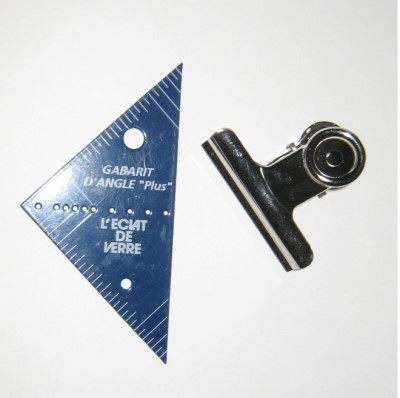
- The heavy ruler, a 45 ° angle square.
... a little patience and care.
Implementation
Your frame will consist of 3 parts:
- A decorated cardboard backing.
- A framing border (the frame...) - Your photo.
 CARDBOARD BACKING
All dimensions are provided only for example, you will determine your own for the picture you have and the frame you want.
The sides will be 3cm wide and I foresee an inner margin of 2cm, which represents more than 5cm in all directions.
First measure your picture to frame! The one I used measures 10 cm x 13 cm. You add to these dimensions the expected margins. Cardboard substantive measure so 10 + 5 + 5 is 20cm wide and 13 + 5 + 5 or 23cm high.
You will then draw a rectangle 20cm 23 in the cardboard. Then you place the heavy ruler and using the bented cutter, cut the cardboard.
Remember that over the cardboard is thick, the lower the force on the blade. Spend several times the cutter for straight cutting of the backing cardboard (cutting cardboard is not easy for a beginner).
 SIDES OF FRAME
Then cut, in the cardboard sheet, strips 3cm wide using the heavy rule and the bented cutter.
This will be the sides of our frame. Don't try to cut the cardboard in a single pass : move the cutter several times along the ruler, pressing evenly. So you'll have a clean and regular cut .
You need 4 strips: two 25cm and two 30cm.
We must now cut their ends to form the beveled edges of the frame ...
For this you use a square to 45 ° (better : a metal one if you start in learning framing). You'll use it to cut at 45 ° the ends of the 4 sides.
Place the long side of the square on the edge of the cardboard strip and cut directly the first bevel. Take care to maintain the cutter pressed on the edge of the square metal ..
Your side should measure 23cm. Measure 23cm from the starting point of the first bevel: Apply the square and cut the second bevel.
Put this first side on the second strip, mark with a fine pencil, cut with a cutter. Verify that these first two sides have exactly the same size: it is important for a perfect assembly.
Repeat for the other two sides.
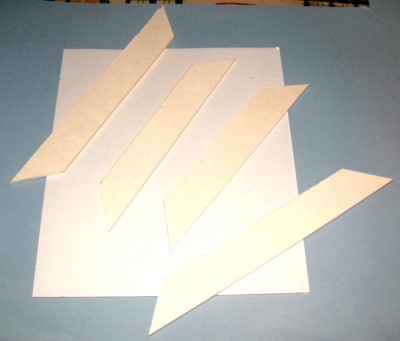
On the photo, you see the cardboard backing and 4 beveled sides .
 COVERING THE BACKING
Cut your decorative paper to dimensions slightly smaller than the cardboard backing. Generally, it is better to put the glue on the cardboard and then place the paper rather than the reverse, this prevents bubbles and "buckling" of your printed paper .
On paper decor, look with small pencil marks at the end, where you paste your photo.
Here, the decor paper is mottled blue and fits well with the general tone of the photo to frame.
 COVERING THE SIDES
Glue one side, place the decorative paper that you have chosen.
Turn the side and trim flaps. If you're equipped, use your steel rule as a template for cutting the rolled-edges.
Pay attention to the folding flaps : they have to hide the angles edges of the cardboard . We should no longer see the cardboard! Do not cut your flap with the short-nap cloth of corners!
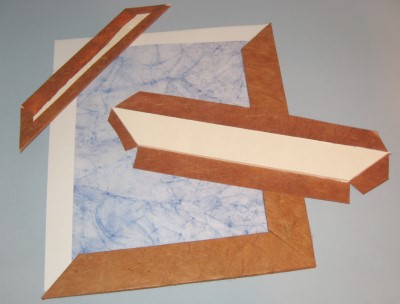
The picture shows two completed and assembled sides, a finished one side upside down and one in progress.
For the frame sides, I chose an old imitation parchment paper slightly brown satin colored .
 MOUNTING THE FRAME AND FINISHING
On the cardboard bottom fitted with its decor, paste your picture at the place that you previously identified.
Then glue each side of the frame, paying attention to a good joining of the angles.
On the back of your artwork, paste the adhesive attache: a small nail into the wall, he'll just enjoy!