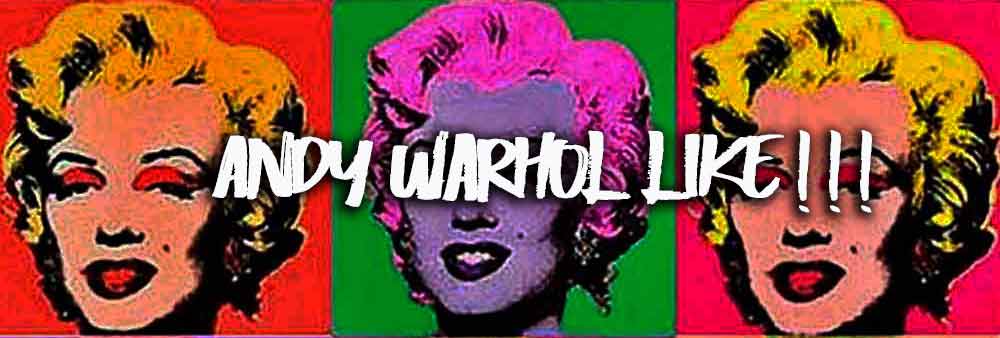
WARHOL POP ART TUTORIAL
with BRITNEY SPEARS!
Imitate Andy Warhol!
Do you want to work as ANDY WARHOL?
So why not practice with a picture of the too beautiful Britney Spears? And make this very pop-art painting in 4 parts!
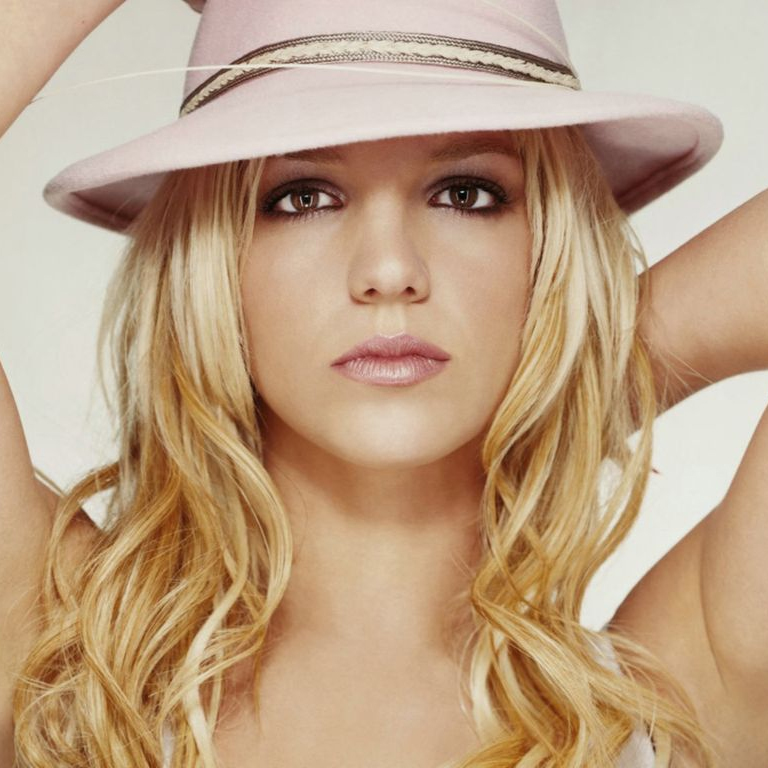
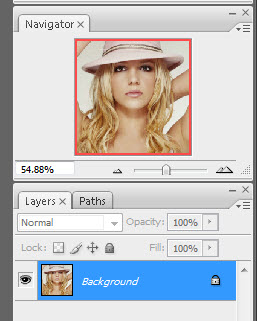
Download the Britney Spears image... and open it in your PHOTOSHOP (or equivalent: Photofilter, Paint Shop pro, the GIMP...)
 The method used here....
Duplicate the image by performing: Layer>Duplicate layer.
Then hide the original in the background by clicking on the eye... It is always better to work on a copy!
Hiding the background
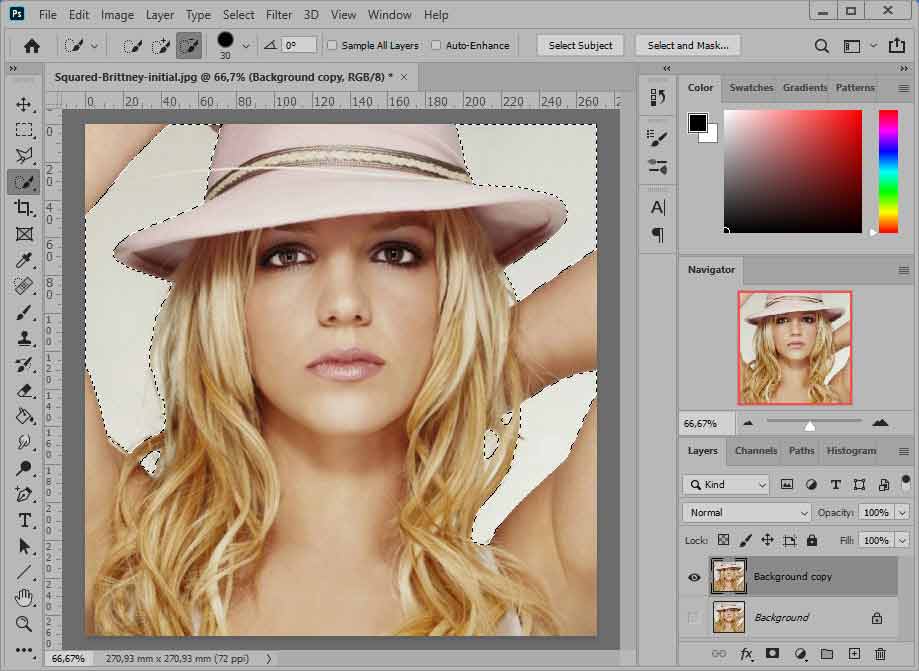
First of all, we must get rid of the "white" areas of the photo....
To do this, I suggest you use Photoshop's quick selection tool to easily isolate them... (But if you master the pen tool... it is better to use it!).
Select the white areas :
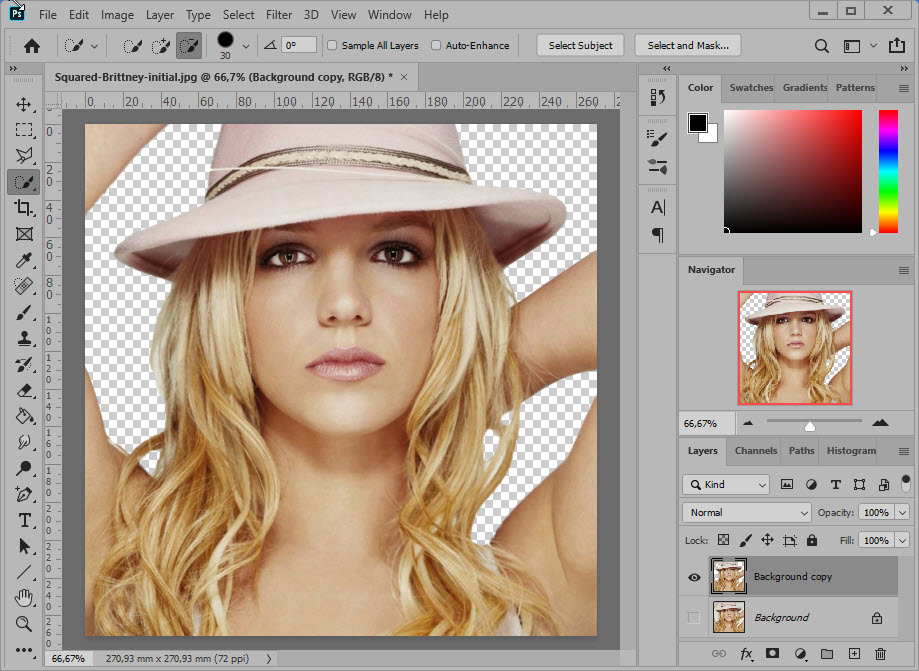
Then delete them!
Threshold command
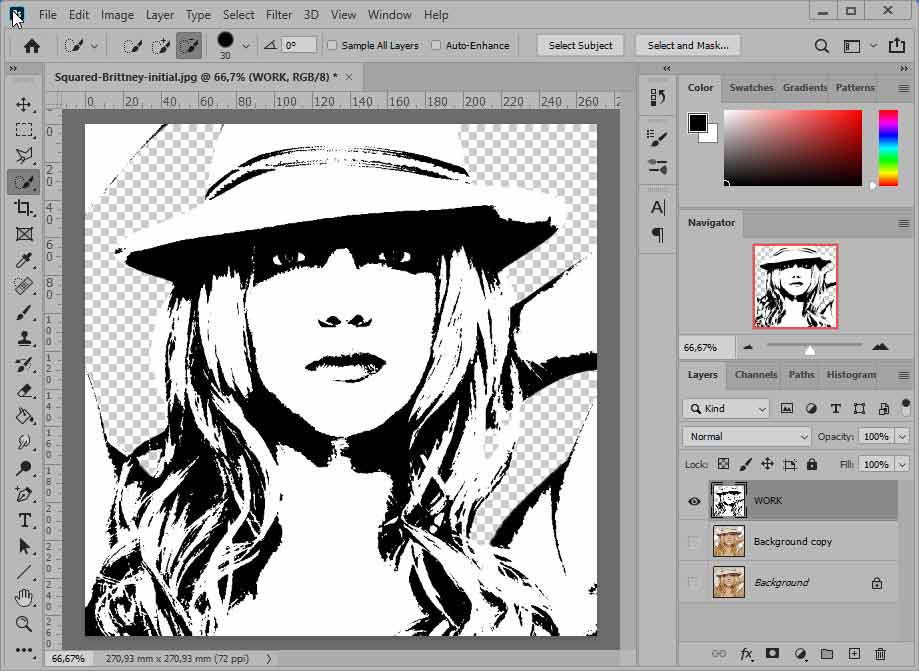
Duplicate the layer you obtained previously.... by doing Layer>Duplicate layer and name the new layer: WORK.
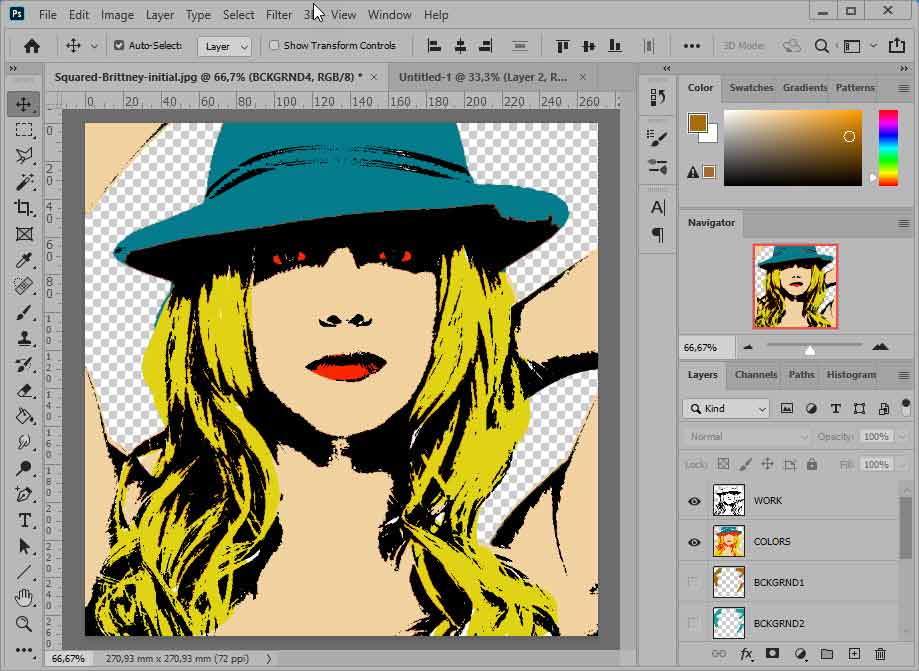
You will now apply the threshold command Image>Adjustments>Threshold. Thus the image will only be composed with black and white without intermediate tones.
I chose the value 140 which is a good compromise but it can change depending on your image.... Confirm with OK.
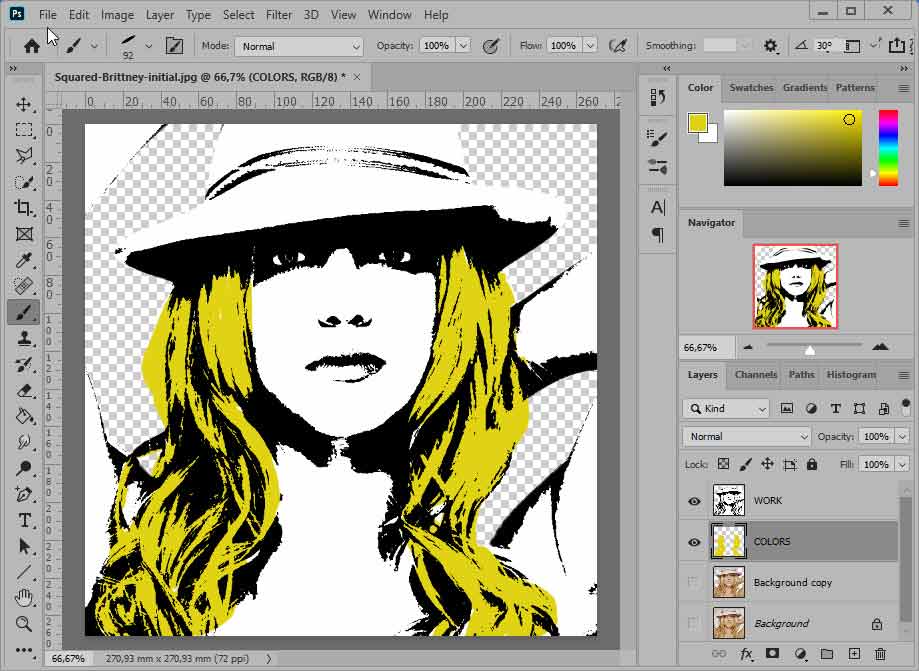
Calque des couleurs
Switch the WORK layer to product mode....
Then create a new layer: COLORS that you will place under the WORK layer ..
Start painting Britney's blond hair using the brush (size 30).... (In fact, because of the product mode, the colors only appear on the white areas of the upper layer)
For the other colors... it should go faster since you will use the Bucket tool on the toolbar. Set the tool options.... Check: contiguous pixels and All layers.
Choose a flesh color and, pour the color onto Britney's arms and face... In the same way, colour Britney's hat....
Finally, paint the lips with a brush and, why not, the whites of the eyes in bright orange...
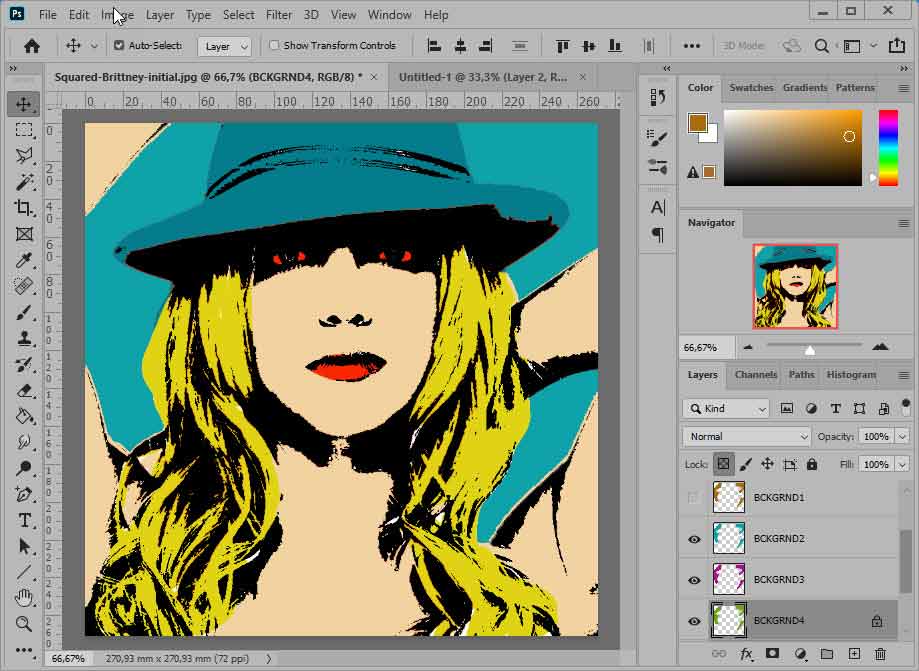
The backgrounds
Create a new BCKGRND1 layer and place it under the COLOR layer. Use the paint can tool again, uncheck the All layers option. Choose a marroon color that suits you and pour it onto the BOTTOM1.
Create and color successively BCKGRND2, BCKGRND3 and BCKGRND4....
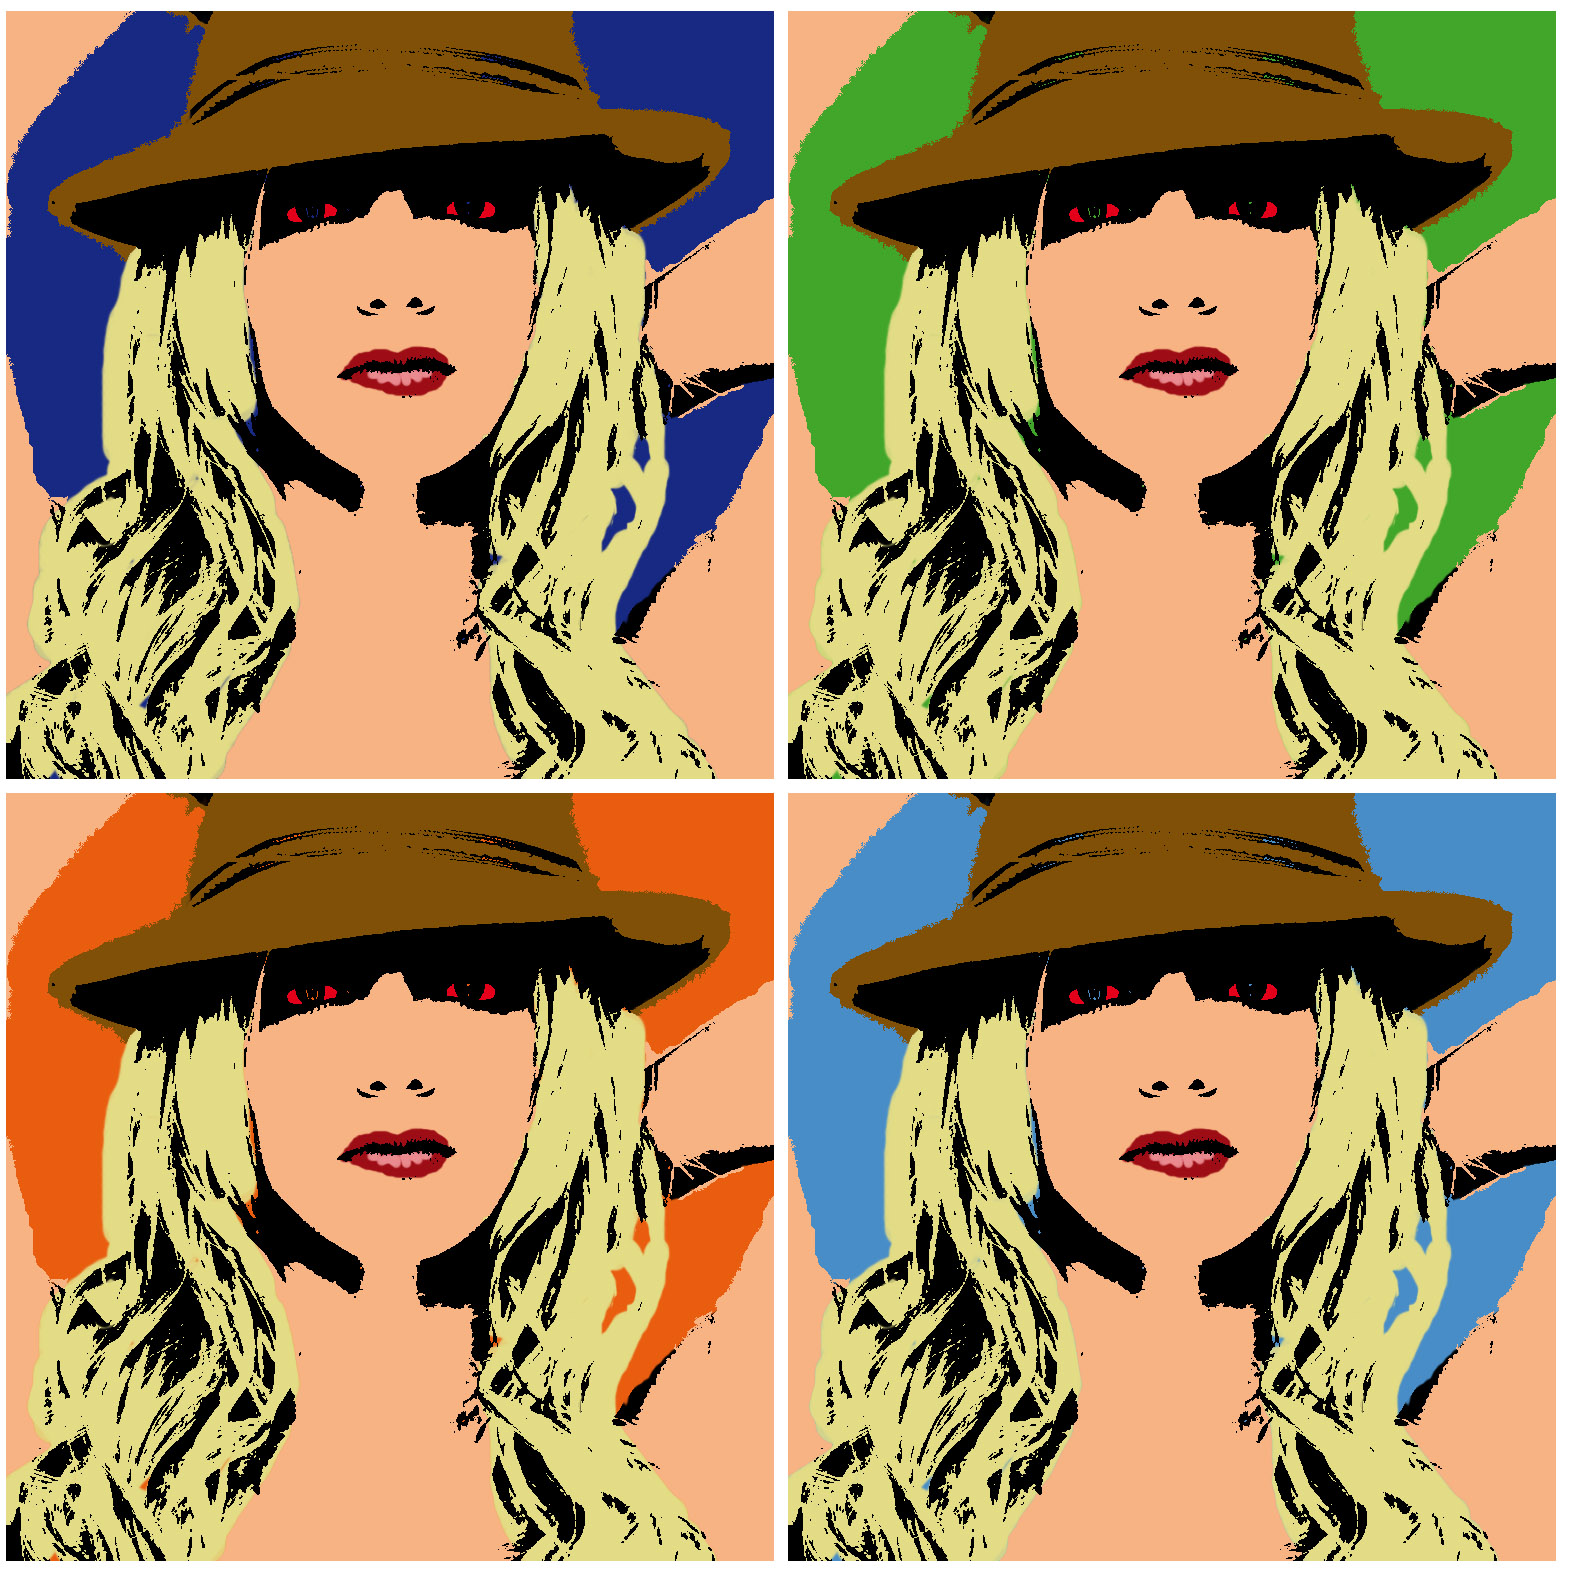
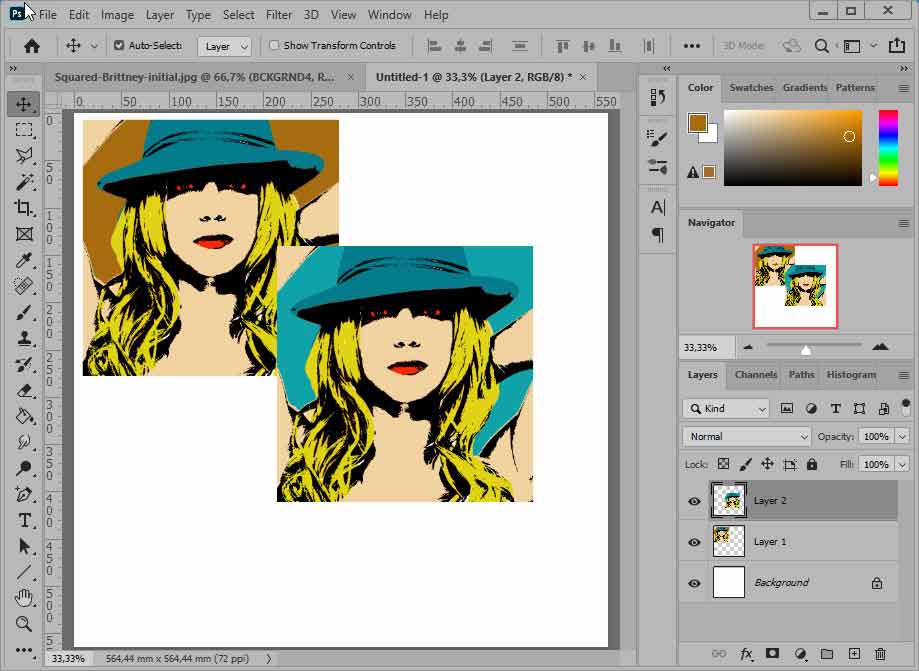
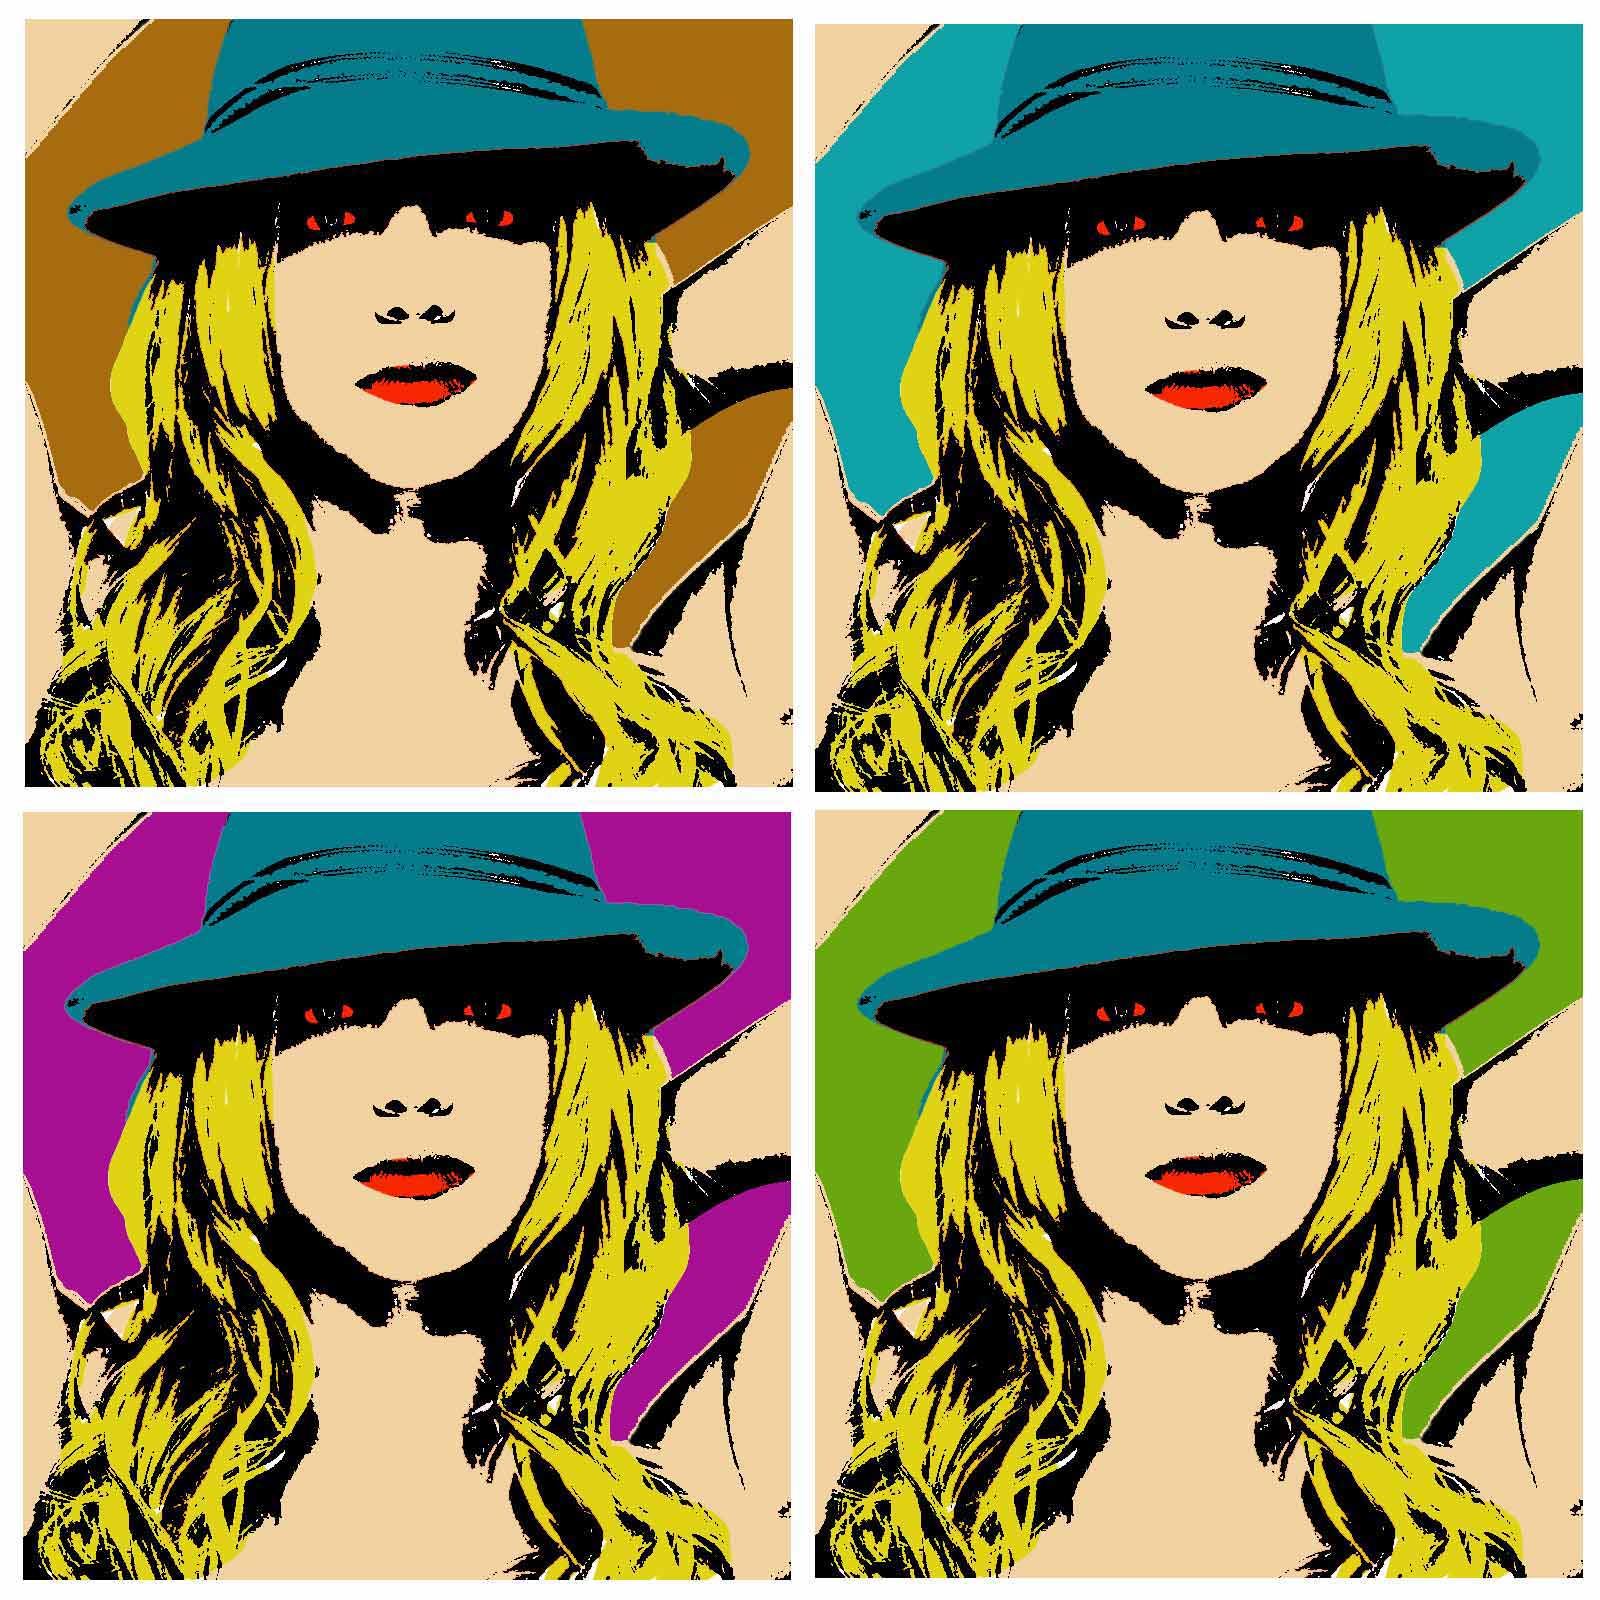
5- Construction of the final image
Click on the eye of "BCKGRND1" to select it... Select the entire image Ctrl+A or Select>All>Select All then Edit>Copy with Merge (or simply Shift+Ctrl+C).
Create a new 1600x1600x1600 image and paste your selection into it... Go back to your previous image, this time show the BCKGRND2... select all and Copy with merge...
Come back and paste the selection into the new image....
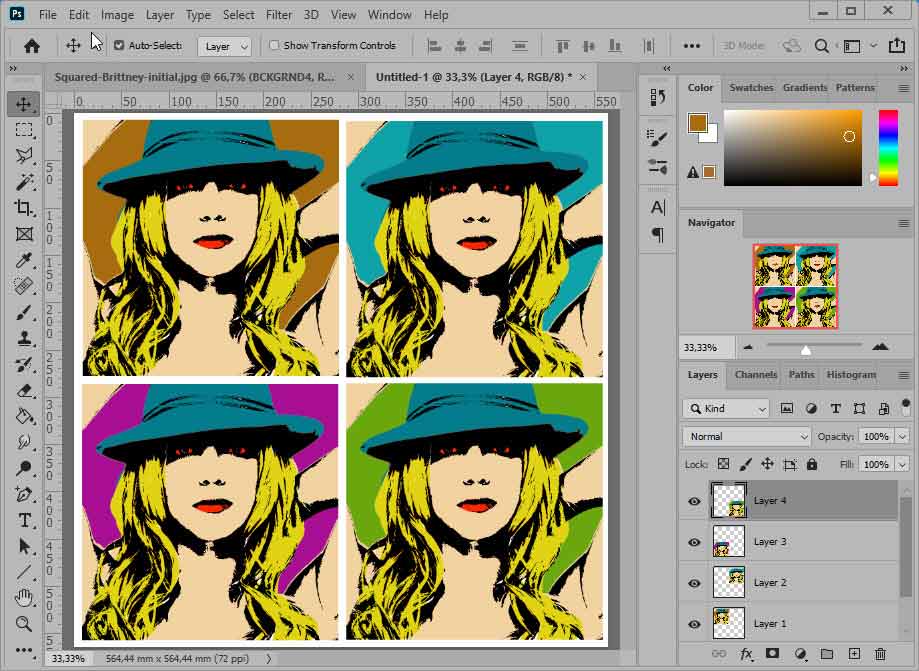
When you have pasted the 4 images.... Use the cropping tool to, if necessary, trim white margins that would be uneven...
Et vous obtenez votre warhol-like photo !!!
 More tutorials
You have another tutorial, more complete, on this page of Scrapnframe's website with an original method to assign colors to your creation....
And don't forget that your work deserves to be printed on a canvas stretched on a frame, like a real work of art!