
A double photo- frame : the DIPTYCH
A diptych (pronounced "dip-tick" IPA: [ dip'tik] from the Greek δίπτυχον is any object with two flat plates attached by a hinge. Devices of this form were quite popular in the ancient world especially in churches where icons on 2 panels may fold together for protection when travelling.
Today, I invite you to make a diptych, i.e. a double photo-frame which is closed with the manner of a wallet and can be posed open upright on a plane surface.

Accustomed framers like to build diptychs of various sizes which enable them to run out their offcuts and scraps of paperboard and printed papers!
 Material and cuttings
You need only some thin cardboard sheets for this simple model (cardstock), some printed papers for decorating, Vinyl paper glue… and all the usual material!
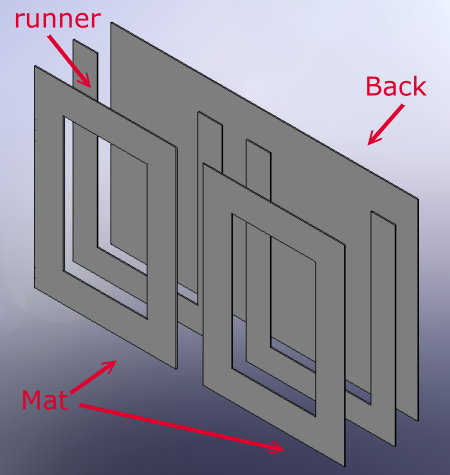
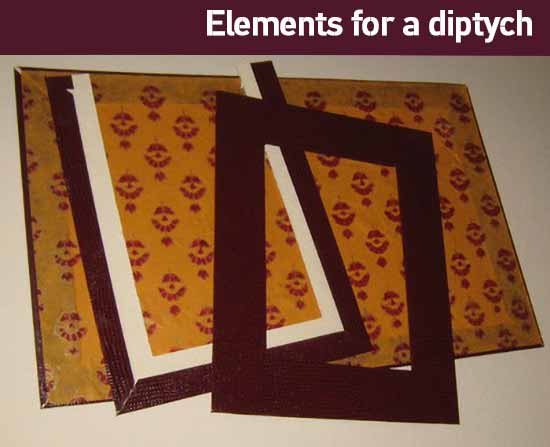
The simple diptych is composed of 5 parts: a back, two spacers (we call runners) and two mats. In this example, I chose to build it for 2 photographs on 4"x6" format , the size of the photographs determining measurements of the 5 pieces.
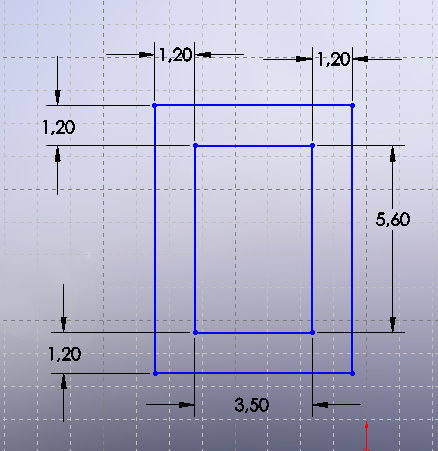
mats : 2 rectangles of 8x5.9 (they have same external dimensions as the spacers).
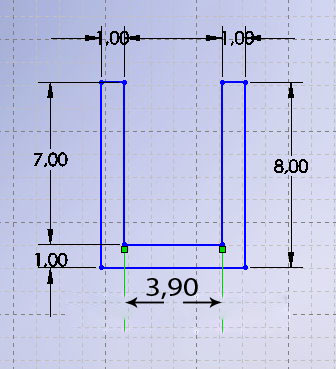
Spacers: 2 “U” width : 1" and external size 5.90"x8"
Be careful with measurements when you cut the pieces, the end result depends on it!
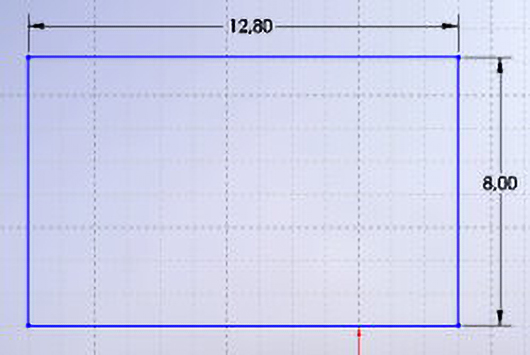
Back: a rectangle of 12.8"x8"
If your photos have a different size, you will recompute measurements consequently : particularly, with photos from digital devices which canmeasure 4"x5.2". In that case, modify the height of the pieces... 7.2" in place of 8".
 Preparing of of the diptych parts
Here, we chose a like-leather paper Bordeaux wine colored. It gives a certain elegance to the framework. For the back, I choose a Provence saffron paper which match with leather paper. You can find easily all these papers in scrapbooking supplies stores for some bucks.
![]() BACKING BOARD : In leather paper cut out a rectangle slightly larger than the backing : 14.5"x9.5" for example and start by covering the back of the backingboard, then flap on the front.
BACKING BOARD : In leather paper cut out a rectangle slightly larger than the backing : 14.5"x9.5" for example and start by covering the back of the backingboard, then flap on the front.
Paste initially the back, apply paper, smooth with a cleaning paper or a clean rag. Turn over, cut the exceeding angles to 45°, paste the edges of the front and fold up the paper flaps.
Be careful to look particularly at the covering of the corners.
Now cut out a rectangle in the "Provence paper" with 12.6"x7.8" (0.2" less than backing measurements). Paste the front of the backing and apply Provence paper.
Backing will be visible and will be used as a hinge... between the two small frames.
![]() SPACERS : Stick bands of 1" to mask the interior and external edges of the spacers. Indeed, during the final assembly, only the sections will be visible: it's useless entirely cover them.
SPACERS : Stick bands of 1" to mask the interior and external edges of the spacers. Indeed, during the final assembly, only the sections will be visible: it's useless entirely cover them.
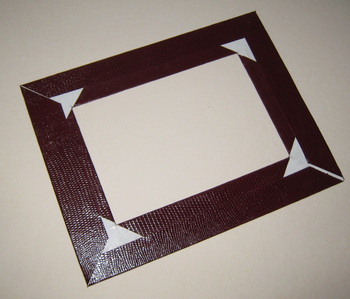
![]() MATS : it is necessary to cover the mat front by leaving sufficient paper to fold up and stick behind, as well for the interior edges as external.
MATS : it is necessary to cover the mat front by leaving sufficient paper to fold up and stick behind, as well for the interior edges as external.
 The final assembly
Paste the backs of the spacers and apply them to the place of the bottom. There is a space of 0.4" between these 2 “U”.
Paste now the face of the spacers and pose the mats above. Press the whole and wait 1 hour for drying.

And here is your finished diptych!
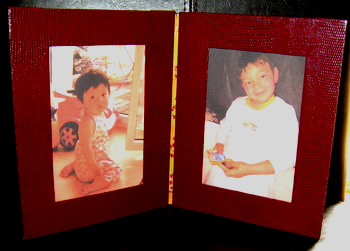
Slip a photograph into each frame and admire your work!
You've did it !
Mat, Mount and Frame It Yourself
David Logan

(click for +)
Now it’s easier than ever to save time and money doing your own framing at home.
Frame It! (Paperback)
Tonia Davenport
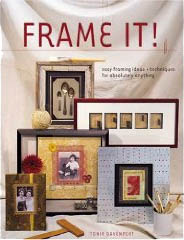
(click for +)
Customers review are the better test for this book !
... This book is an extremely comprehensive guide for standard framing techniques... (by Corey)