
Framing technique: "overtakings"
How to set them up
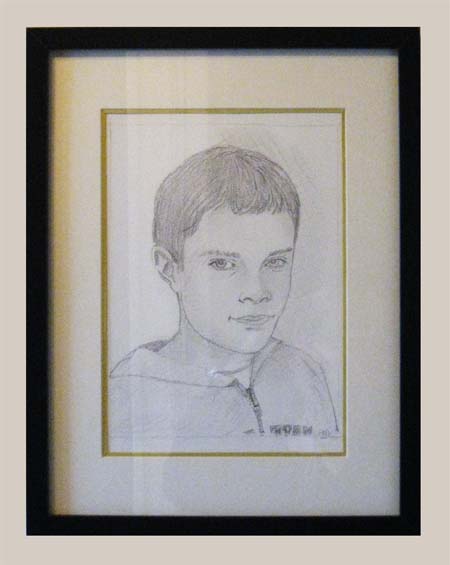
IKEA RIBBA frame with passe-partout
During a simple framing, i.e. composed only of a passe-partout, it is sometimes necessary, for reasons of aesthetics and decoration, to bring a transition between the work and the passe-partout... It is one of the functions of the overhang.
They are strips of fancy paper (Canson most of the time) which are stuck under the passe-partout or the bevel and protrude a few millimeters under the opening of the passe-partout.
These colored strips have of course a decorative role... but also a catch function when you have cut, in the passe-partout, a window a little too big!
 The work to be done
It is to frame a pencil portrait in an IKEA frame (RIBBA 30x40) that we are going to create a passe-partout with overhangs.
The wooden frame has a dark color, the passe-partout (supplied with the frame) is ivory. For the overhangs, we have chosen a saffron yellow color matching the colors of the room in which the frame will be placed.
The necessary material is very reduced... You will need :
- Cutting equipment: cutter, ruler, compass, 45° square...
- white vinyl glue, a brush, a folder ...
- Canson paper (or other fancy paper) of the color you have chosen.
 Cutting of the strips and preparation
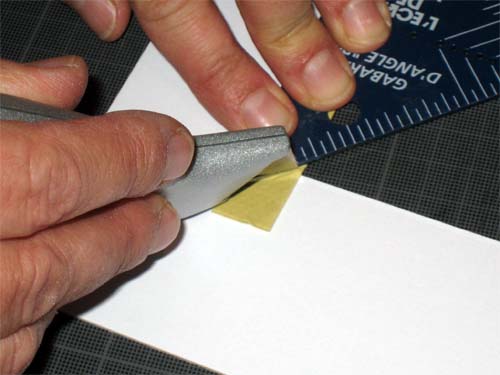
In the Canson, cut 3cm wide strips. Their lengths correspond to the inside measurements of the passe-partout window. You can use the ruler as a template.
Fold these strips carefully lengthwise.
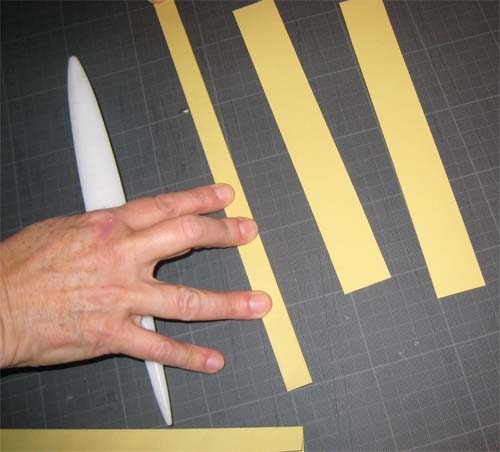
Now measure 3mm from the folded edge, mark with a pencil (imperceptibly) and, with a dry point, slightly groove along the entire length: this will serve to adjust the overhang of the strip.
Repeat the operation on the other strips. You are now ready to place your overhangs.
 Placing the "overhangs"
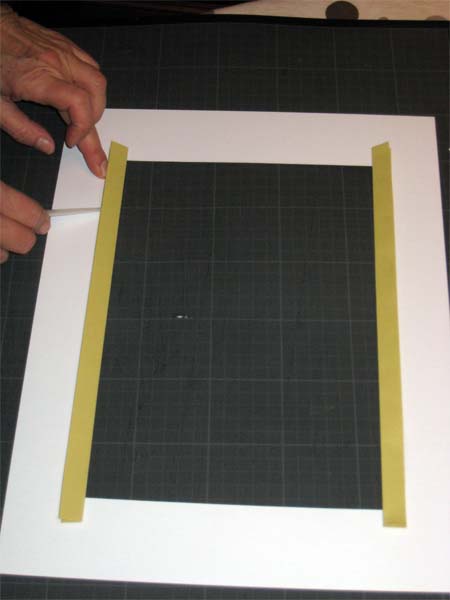
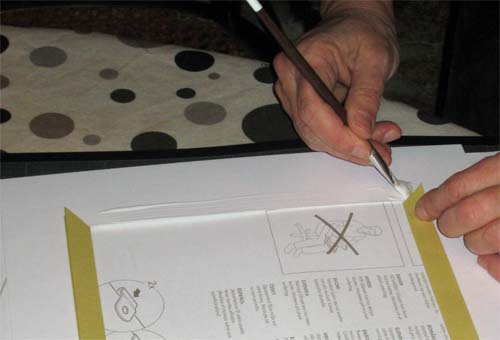
Flip the mat over, upside down and facing you. With the brush glue a length near the window. Be careful, stop gluing at about 1cm from the corners (you will have to cut at 45°).
Place your strip, turn the mat over and adjust the overhang by sliding the strip on the fresh glue: use the small groove drawn earlier.
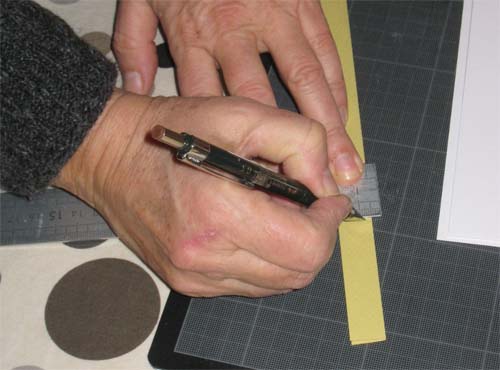
So make the first two strips... You will now miter the ends... Place the square, aligning it well on the edge of the strip... and cut with a cutter the 4 ends at 45°...
Now glue along a small side of the window...
Then place your overhang which must fit exactly into the 45° angles.
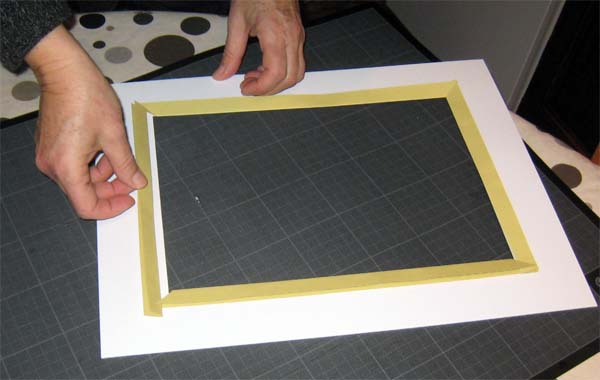
Once the overhangs have been installed, this is what your work looks like:
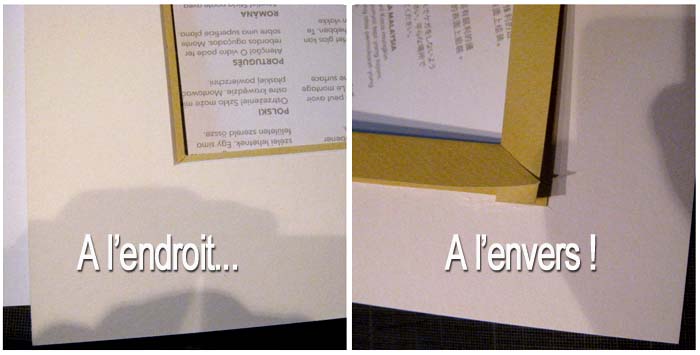
Completed overhang installation, front and back view
 Finish framing
In the American way which, as far as framing is concerned, does not bother with classicism... We are going to fix directly the portrait with a passe partout with overhanging... simply with a white gummed paper... (For the purists... it is a crime !).
Place the drawing on the edge of the table, making it protrude slightly. Put the mat on it: adjust the margins... Grasp the set firmly and return to the table ... Place your adhesive... Only at the top !

You're done! Clean the glass, place it in the frame, place the mat + drawing and finish with the bottom... Fold back the small soft fasteners. Hang it up!