MAKE YOUR OWN MOULDINGS
If you're a bit of a do-it-yourselfer and want to build your own frames, you buy ready-made mouldings and mouldings that you then cut to size.
But it is perfectly possible to make them yourself from simple elements available at low cost in DIY stores by combining several elements. DIY your frame mouldings... it's so much more fun and so easy!
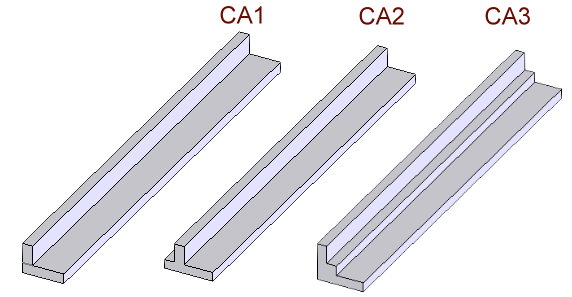
Here are a few examples of mouldings with a particularly low cost price. I buy all my wood at "Bricodepot"... but there is the equivalent in all DIY stores (see catalogue excerpt).
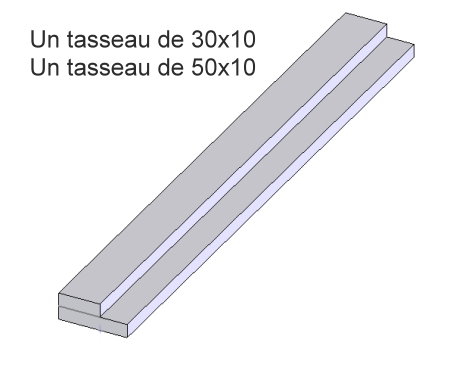
 With 2 rectangular cleats
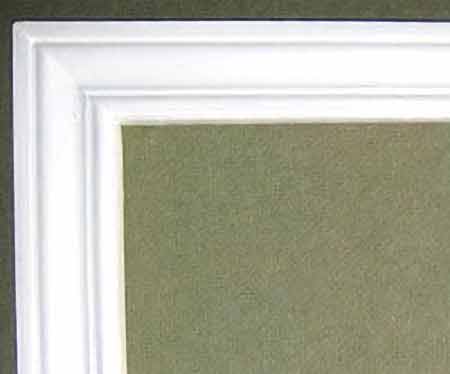
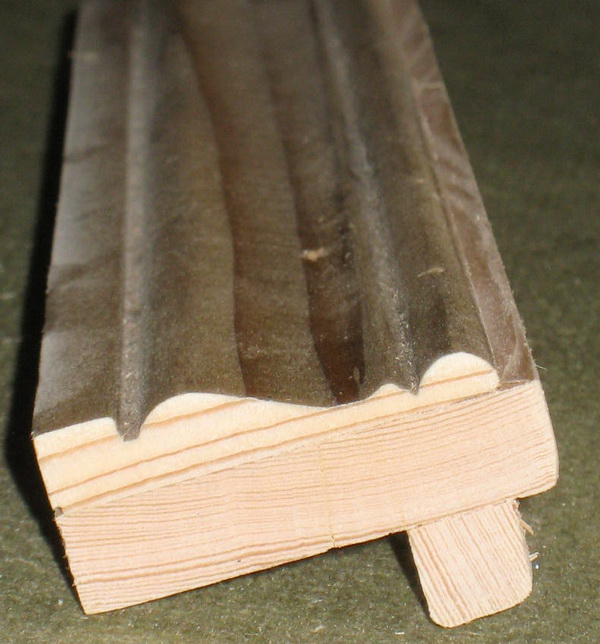
Assemble by gluing (see simple frame) a 10x50 section strip and a 10x30 section strip. You will obtain a nice moulding to which you can give an aged finish:
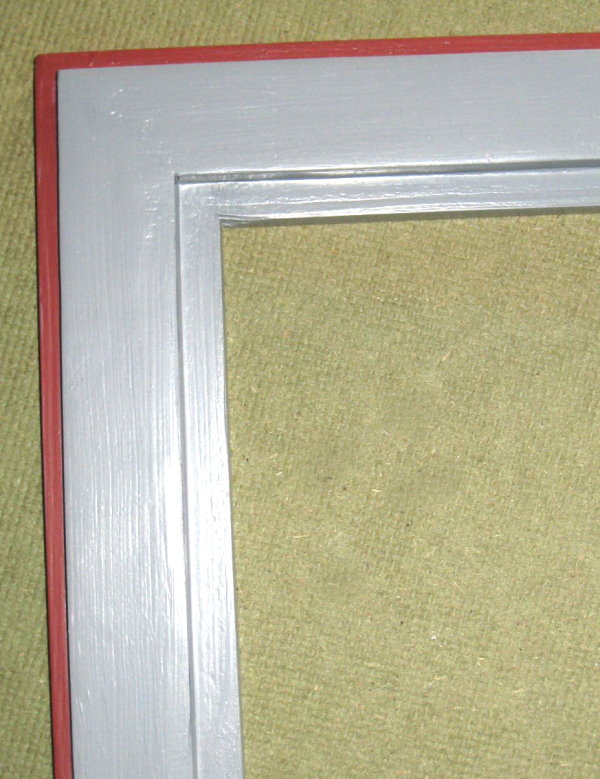
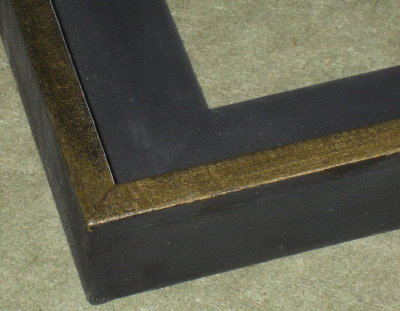
Which, painted "Lindin" red, can give this ...

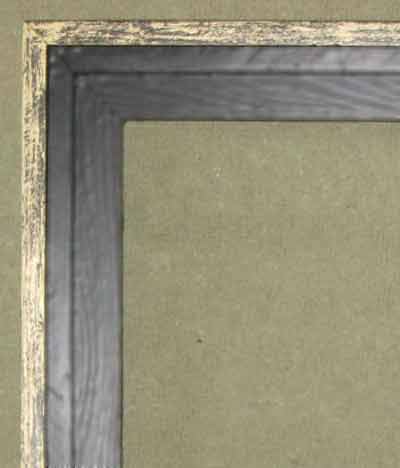
By shifting the strip 20x10 mm on gluing, the shape changes:
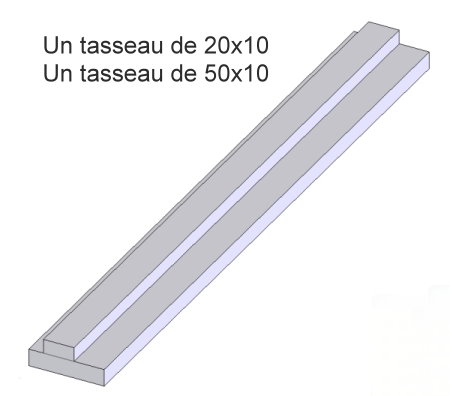
and once it's painted gray and red...
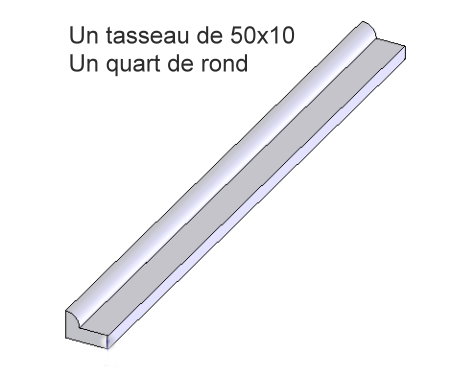
 With a rectangular and quarter-round slat
Assemble a "quarter round" moulding with a 10x30 or 10x50 rectangular batten...
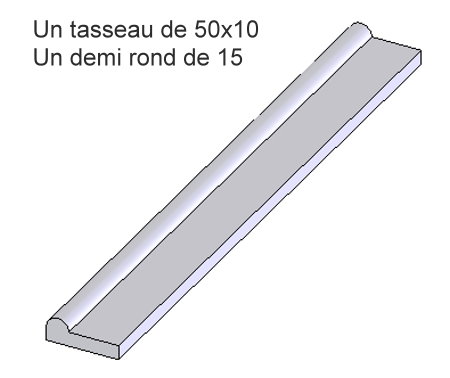
 With a cleat and a half-round
Deux moulures du meilleur effet avec ce tasseau 10x50 associé à un demi rond de 15mm. Pour la première, le demi-rond est collé sur le bord du tasseau 10x50 :
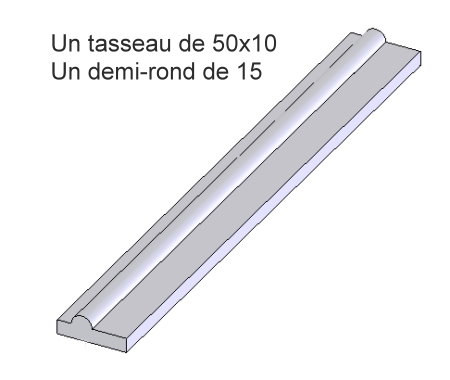
Pour la seconde, un décalage de 10mm qui allège l'ensemble :
 Combination of 3 lengths
At the risk of sounding a bit "loaded", you can try this combination of 3 pitches :

You can also try the combination of a 50 bar, a 30 bar and a quarter round end...
For all these mouldings, you can add a false rebate (see Flat-Frame) in order to facilitate the fixing of the frame on this frame (but this is not essential).
 Two more rectangular cleats.
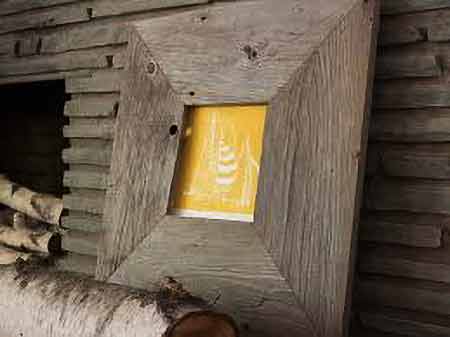
Just as a reminder of the pages Floater Frames 1,2, 3 here are examples of frames obtained :
A strip of 50, another strip of 30... just enough to make a moulding for a Floater Frame !
Which will result in...
 With doorframe molding
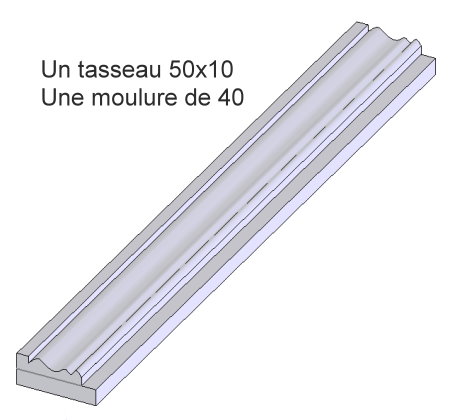
In the simple frame page you have already seen how to make a frame with a 10x50 strip and a doorframe molding of 40, so this diagram is there for the record:
To the 10x50 batten + doorframe moulding assembly we have added a 10x10 batten which serves as a false rabbet:
You can see this finished and painted frame just below.
 Finishing the mouldings
Start by sanding your mouldings once the glue is completely dry (4 or 5H for a fast wood glue, 24H for others).
Next, apply a thin coat of acrylic paint and, after drying, seal the holes and any defects in the wood with a coating before painting.
Now give the wood a fine sanding, you should no longer see any defects.
If you do not wish to age your frame, give it two coats of the paint of your choice. That's it!
If you wish to give an aged look to your moulding, apply a coat of dark red paint all over your moulding.
Let dry and then apply two coats of off-white (ivory, light shell, vanilla...) or light grey paint.
With very fine sandpaper, start these last two layers to reveal, in places, the underlying red paint... a little black wax to create dirt in the grooves... nothing like it to give almost 100 years to this freshly made moulding!
Good construction!