
How to put up a canvas within its frame
You've bought a painting on canvas and built a picture frame for it… and you do not know how to put up the canvas within its frame.
It is very simple, but there are several ways to proceed according the type of picture frame you've chosen or built…
 The Floater frame
The FLOATER FRAME gives your frames a very sober professional look. It doesn't cover the edge of the painting but instead appears to 'float' around the edge. Really, the painting is anchored to the back of the frame. Easy to make yourself without special tools with wooden slats 15x40...
It is the type of frame chosen by most galleries and painting studios.
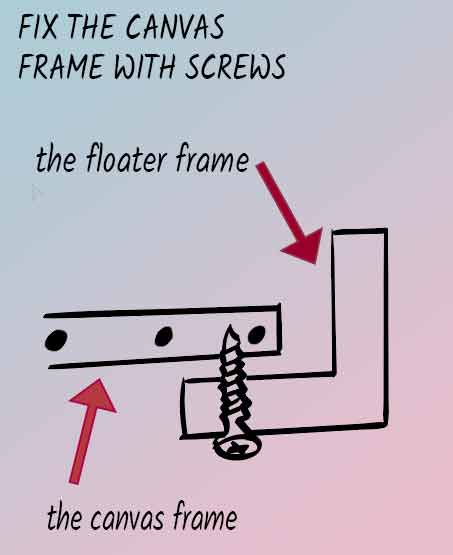
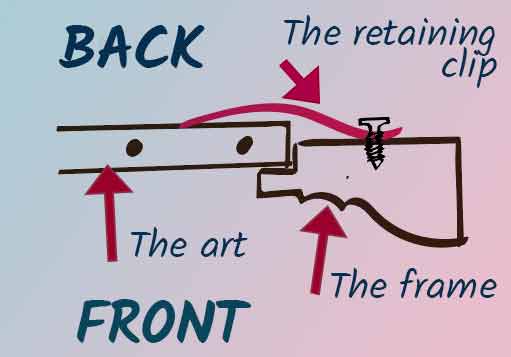
It is characterized by its absence of rabbet... the painting (canvas frame) is thus "put" from the front into the body and fixed to it from the rear in different ways....

 The simplest way
You will simply use 2 wood screws! Seen from behind, cross the edge of the floater frame and screw into the uprights of the canvas frame.
Put the canvas in the floater frame, turn both at the same time and screw from behind!
Small difficulty: once the screws are installed this fixing method is not adjustable and it's not always easy to aim right the first time!
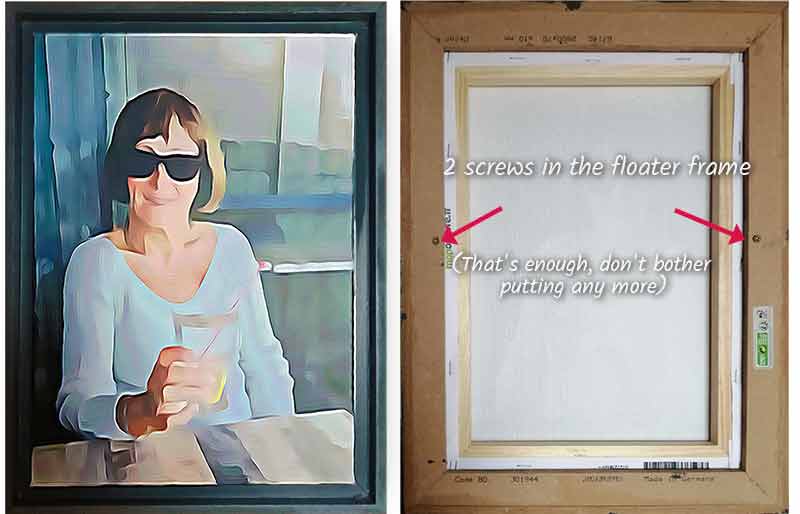
As an example, this painting of a woman with glass, fixed by just 2 small screws to the floater frame...
 A better way... Using picture frame retaining clips -
Not always easy to find... You have some here "Retaining picture frame clips", sold in packs of 100, with their screws for less than $15. There's no point in depriving ourselves of them. There are 2 models: short and long.
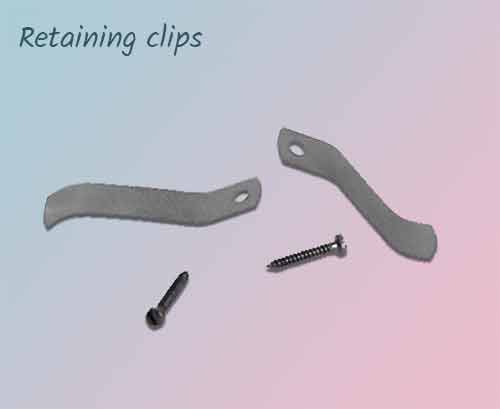
Retaining clips are small hardened steel springs that are screwed into the frame uprights and supported on the sides of the frame.

This assembly has the advantage of being adjustable at any time! Note that it is preferable to fix the canvas with 4 retaining clips...
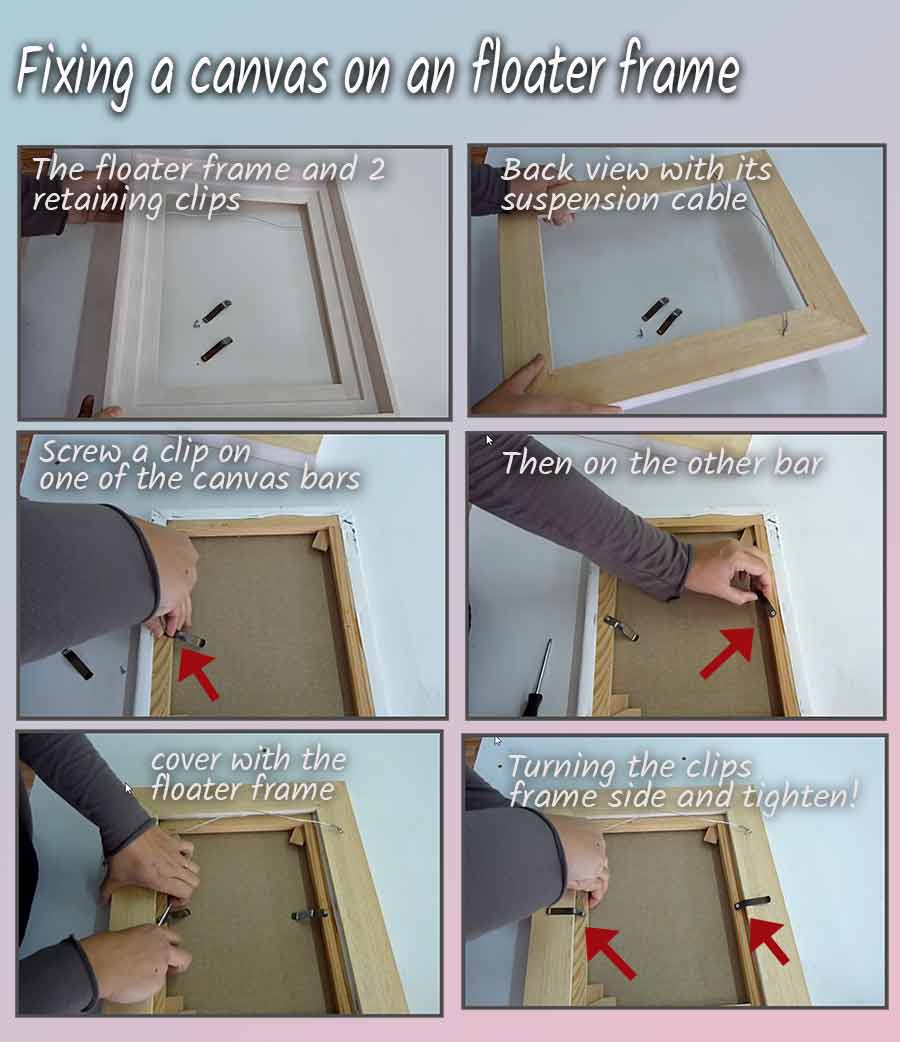
It is quite easy to place the canvas on the floater frame and to turn over the unit. The spring is fixed very easily on the stretcher bars of the canvas, in the middle of each side.
Small “trick”: for a good fixing, think of curving your spring a maximum before screwing it on the frame. so you obtain an excellent fixing !
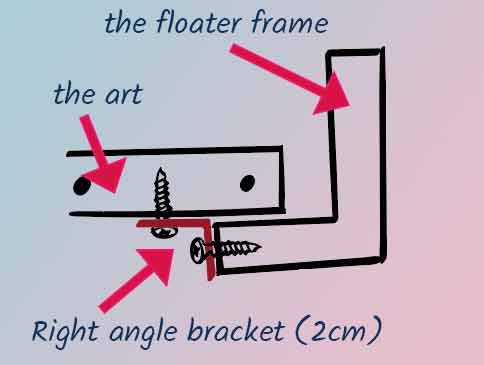
 Using right angle brackets
These small flat brackets are perfect to fix a canvas frame on a floater frame... Here is a pack of 16 pieces with their screws for less than $8 !!!
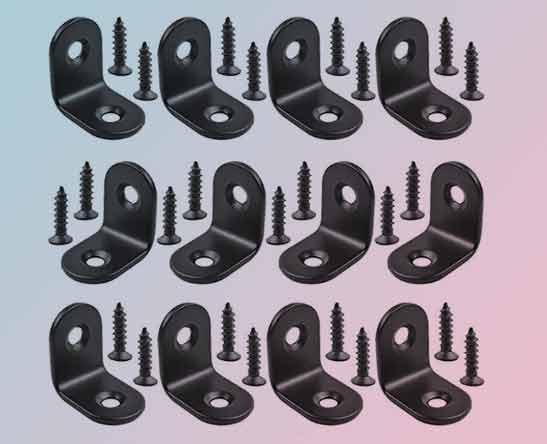
Very easy to install with 2 screws: just follow the installation diagram, you can't go wrong! The bindings are invisible of course, because they are completely hidden by the canvas frame!
 Paintings on canvas panel boards
To fix in a floater frame a painting made on a wooden panel or a canvas stretched on a cardboard panel, no more question of using screws!
The only possibility is to use double-sided adhesive! Use strong and durable adhesive! 4 pieces of 5cm are more than enough: one per side and your canvas will be well fixed to its frame!
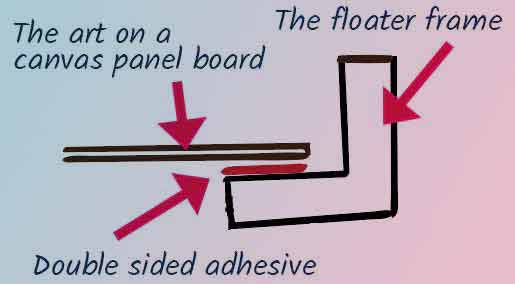
Place the adhesives along the sides, one by side, present the art work, press and it's done!

 The picture frame with rabbet
A moulding is said to have a "rabbet" when it has a detachment in which the artwork or the package is attached...
Using retaing clips
With this type of moulding, you present the canvas by the back and it is retained by the small clips which overflows of the window. Note that this time the clips are screwed on the frame barss and not on the canvas frame as in the floater frame!
It's better to place 4 clips... one on each side of the frame. Thus the canvas is well maintained and won't move in its frame!
For a canvas frame as for a canvas stretched on paperboard, you fix the artwork as you can do. Esthetics has less of importance since the fixing is masked bacause you see only the picture in it frame.
If you don't have retaining clips, you can improvise some with small strips of wood screwed on the uprights of the frame... like this :

Framing a "package"
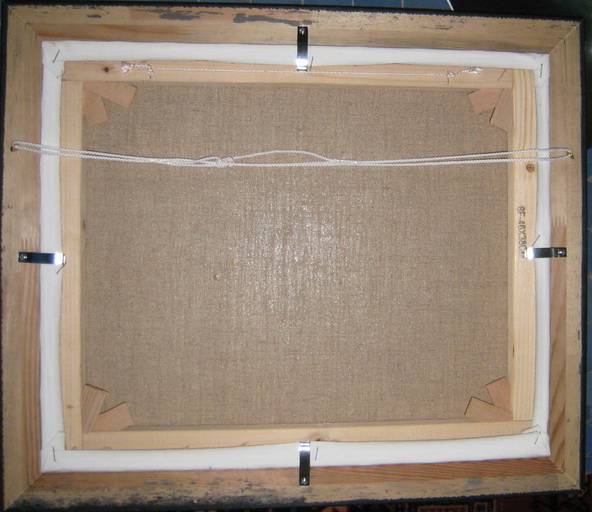
In framing art we call “package” the unit formed by: backing board, art-work, bevel, the mat and the protection glass.
The whole is closed with a backing tape (gummed brown paper tape) isolating the artwork from dust and bugs and used to maintain the elements against glass.
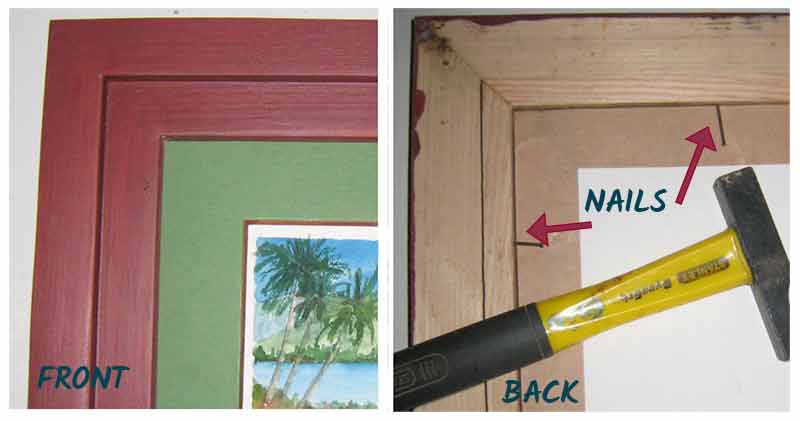
To frame a “package”, pose it at the bottom of the turned over frame. Distribute the possible gaps for a good centering, then, with horizontally inserted small nails fix it at the framework.
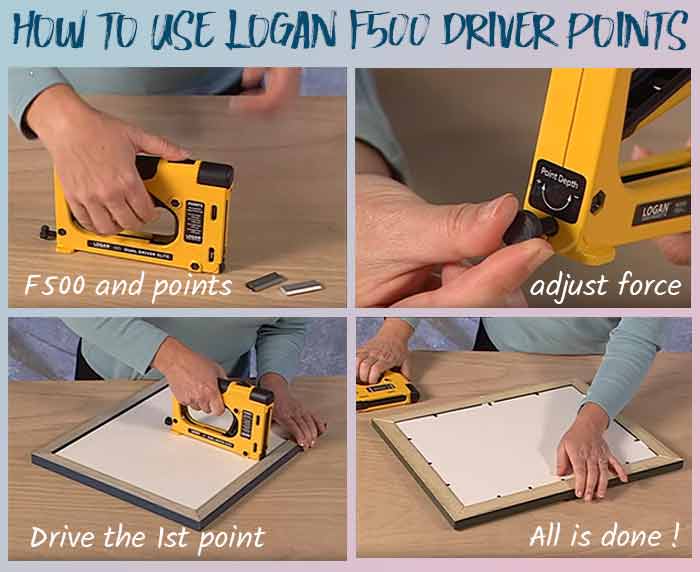
Instead of driving in staples, it is more interesting to use a special stapler: you will find several models here... The well-known LOGAN frame brand is a reference that has been imitated many times: here is the original model sold with its spikes (flexible or not).

This tool works horizontally: it is placed on the back of the package, against the moulding, and the nails placed with a hammer are replaced by the points.
Count a point for each 5". When you finished, tape the whole back with gummed brown tape in order to ensure a correct protection.
There are other manual tools to fix the package in its frame, I let you discover them HERE
 Frames without rabbet…
When you build by yourself a frame, it is not always easy to make a rabbet… Of course, you can always put a false rabbet on the back by sticking a square wood cleat near the inner edge (0.5") of the frame.
But there is a simple method to fix on a frame without rabbet.
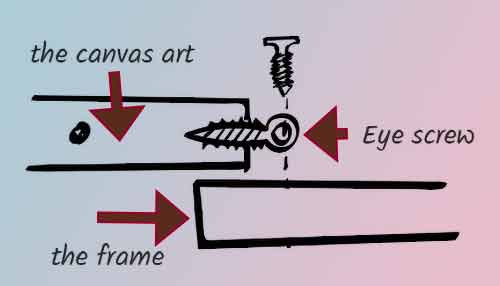
Screw two small eye-screw on the stretcher bars of the canvas. Approach your canvas by the back of the frame and, through pitons, screw two wood screws directly within the frame.

Mat, mount and frame it yourself
David Logan

An attractive, well-designed frame not only enhances a picture but preserves and protects it.
Logan, a contributing editor at Artists' Magazine who has taught framing and matting across the United States, shows readers how to present their artwork skillfully and economically.
My opinion... One of the best !
How to Make Your Own
Picture Frames
Ed Reinhardt, Hal Roger
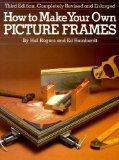
Here is the most complete, practical handbook available on making and finishing over 60 frame styles...
The best book for the beginner. Clear and concise. Step-by-step instructions with photos for each and every step.
Covers all aspects of frame construction, painting, mats, glass-cutting and usage. A great book to trigger your own ideas to create custom frames.