FRAMING SMALL PAINTINGS
2 CARDBOARD FRAMES
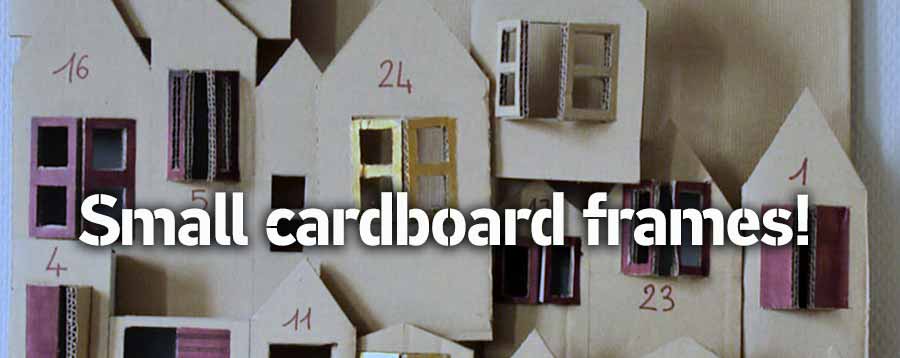
![]() First frame
First frame
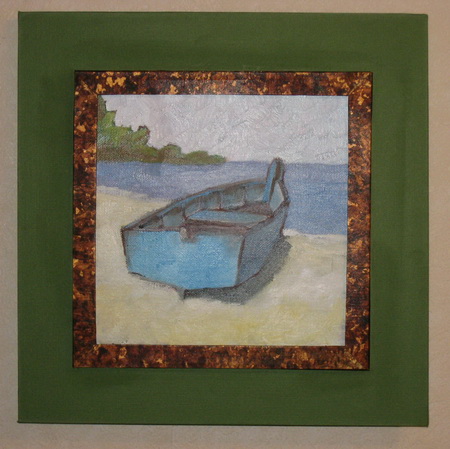
It is to frame this “minimalist seascape” that I propose to you to build a frame entirely out of paperboard which should not pose any problem.
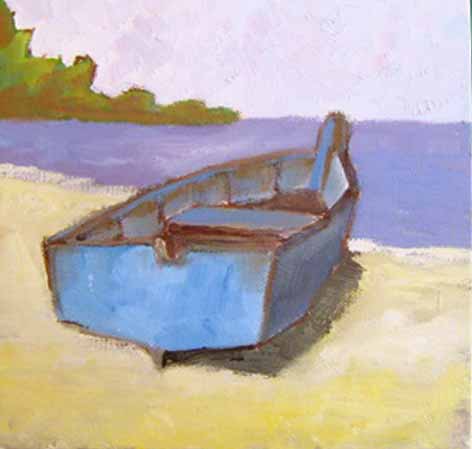
It is a very small square frame of 20x20 painted with acrylic resin. The colors, very soft, should easily enter in harmony with greens (which will match the vegetation of the background) and yellows, in agreement with the sand of the beach in the foreground.
We thus choose a fabric imitation green paper to equip the bottom and, for better emphasizing the painting, as a edge, a patterned paper with very hot tons , maroon and gold…
 Material
We will produce this frame only out of paperboard… We will need:
- Thick cardboard of 0.12" (preferably of the basic pulp board or paperboard). You can work with foamboard... it's easier to cut it !!!
- a ring, a little ribbon-braid or even an adhesive ring.
- a can of vinyl adhesive, a brush, adhesive kraft.
- A ruler for cutting, a bent cutter, a pencil, a graduated reglet, a square with 45°angle.
- fabric paper (or imitation fabric) green coloured and maroon and gold paper.
 Calculations…
The canvas to be framed is square : its side measures only 8"… to say as much that it is not quite large ! Then we will give him a broad edge of 2.5" which will give him more importance when it will be fixed on the wall.
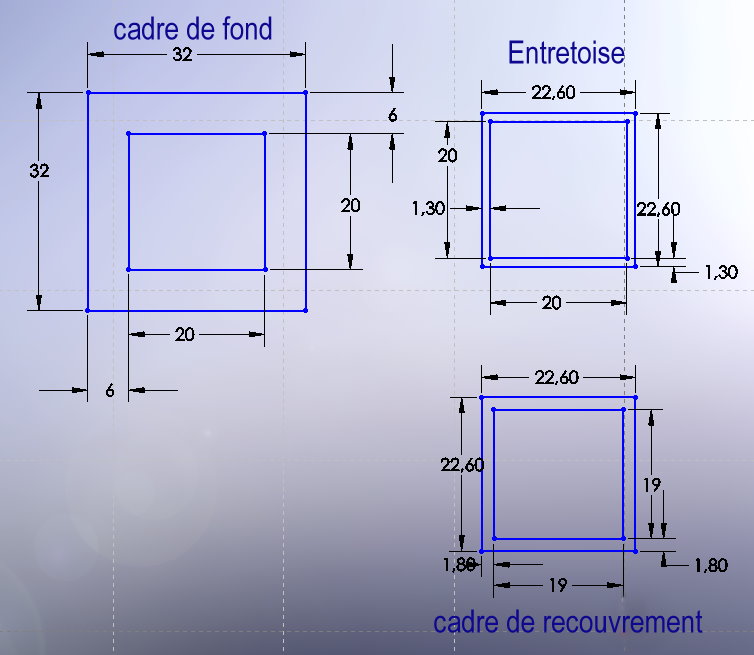
What gives us: 8" + 2.5" + 2.5" = 13"" for the side. And as we work with paperboard, we will make a kind of moulding which will be composed of a spacer and a paperboard for covering.
The parts will be fitted by joining after being covered with paper
The art-work will be presented by the back and will be retained by the edges of the covering of the spacer…
To give of a little “thickness”, there will be 2 backboards frames on which we'll pose then a spacer frame then a covering frame.
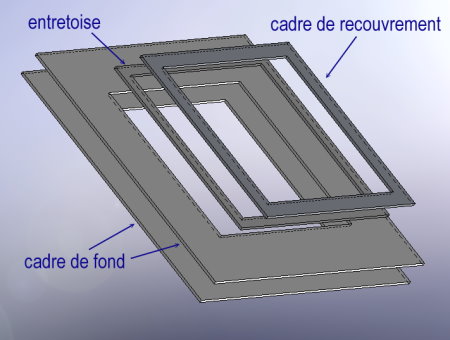
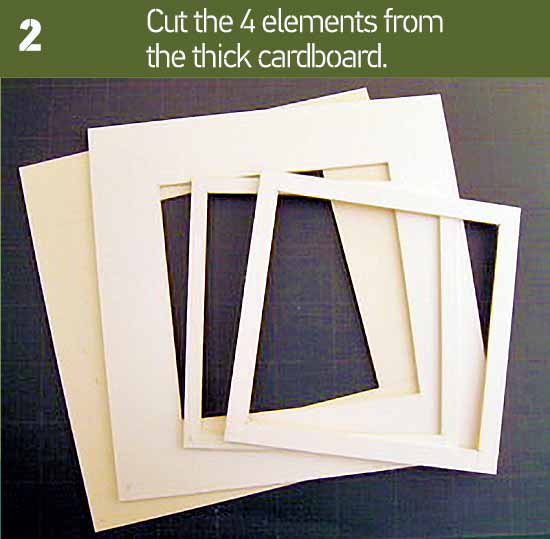
There are thus 4 parts to cut out… and assemble.
 Cuttings
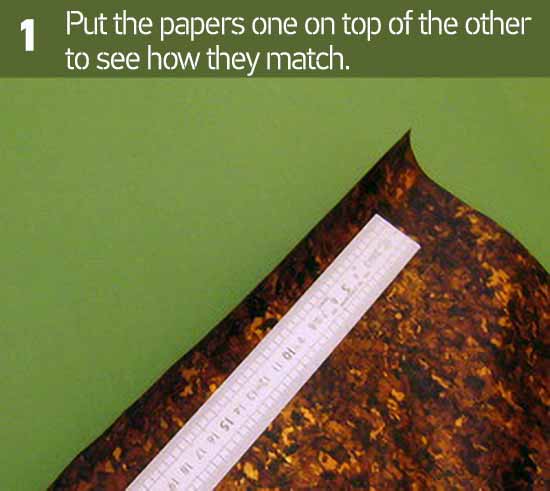
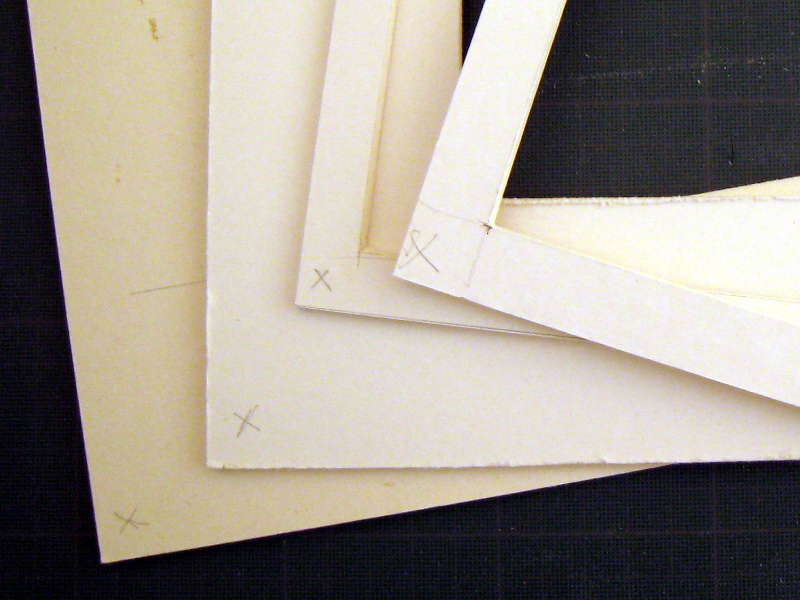
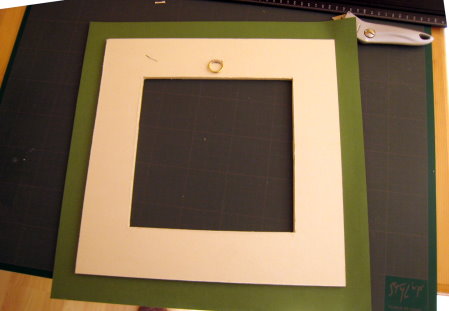
In the paperboard of 0.12", cut out initially a square of 13" on side. It is important to have quite right angles and thus to carefully trace your cutting lines with a square before the cutting.
Make a reference mark on one of the right angles of this paperboard… Then, use it as gauge to trace then cut out a second identical square. Make the same reference mark at the same place on this new paperboard. Thus, when you assemble these paperboards, you will make coincide these reference marks for a better adjustment.
Trace the window now to be opened in these paperboards. It measures 8" out of 8" and thus leaves you margins of 2.5" in all directions. Open this window with the bent cutter.
Again, use this element as a gauge to trace the same window on the second paperboard (make coincide your two reference marks before tracing!).
Check that the frame of the painting is well embedded in these openings…
Cut out now the spacer of 9"x9" (external side) which has an opening of 8"x8". To trace the opening, you can always use the first paperboard like a gauge and draw a reference mark at the same place.
You have to trace then and cut out the covering frame… it measures 9"x9" of side and its opening is of 7.6". To trace it, use the spacer frame which has same external dimensions.
 Putting on the ring of suspension
Take the basic frame and cut a slit of 2cm with the cutter in the middle of the high side. Fold the braid in two parts and pass the ring in the center. By helping you with the bone folder, pass the ribbon in the slit.
Turn over the frame and, with the cutter, hollow out the site (3) where the ribbon will be stuck. For that, pass the circumference with the cutter so as to cut the paperboard then, with the point, raise then remove small thicknesses of paperboard.
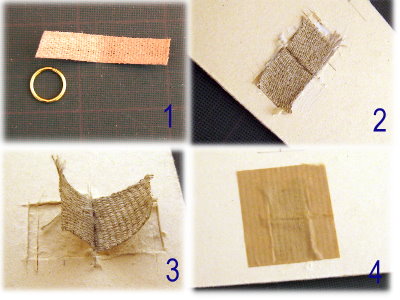
Largely paste your cavity and stick the braid there. Recover with a piece of gummed tape.
 Assembly and preparing of the elements
![]() Start by sticking the two backing frames one on the other. Think of well making coincide your reference marks for a better adjustment…
Start by sticking the two backing frames one on the other. Think of well making coincide your reference marks for a better adjustment…
On this subject, there are always “small errors”… which you can correct by sandpapering your paperboards with an medium sandpaper. Thus, adjust the interior of the framework so that the canvas can enter while rubbing just a little…
Cut out a piece of green fabric paper, paste before framework and pose it on paper. Smooth well with a rag to avoid the bubbles. Leave around a margin of 4cm then cut out the interior of the opening with the short-nap cloth .
Now you need “flap on” the surplus behind the framework… Prepare the angles while cutting the surplus with 45° angle … Attention however to leave sufficient margin so that the corners are entirely masked… (see councils and Techniques)
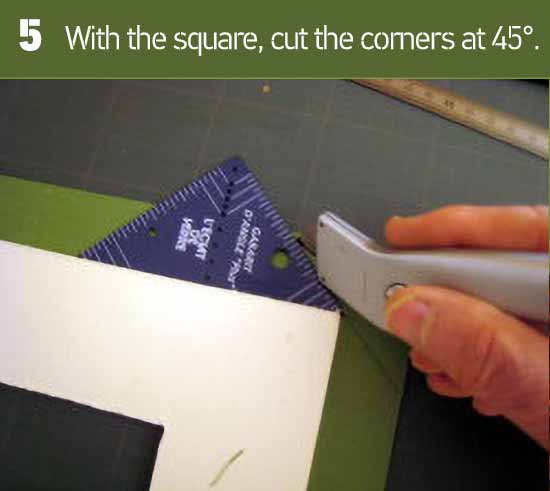
Fold up the flaps then Paste them behind the framework.
![]() In maroon and gold paper, cut out strips of 1" and stick them to mask the sections of the spacer.
In maroon and gold paper, cut out strips of 1" and stick them to mask the sections of the spacer.
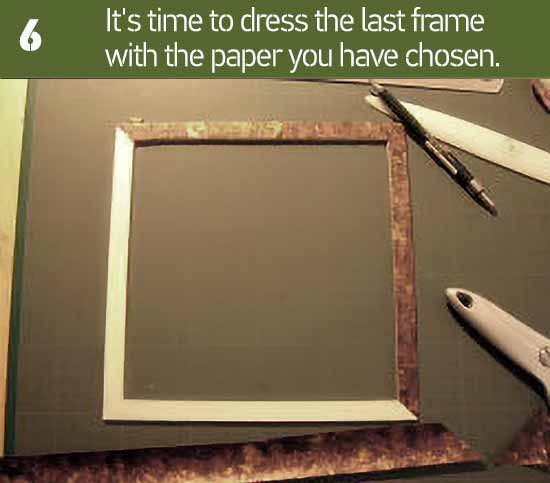
![]() Cut out broader bands to equip the tops and the sections with the covering framework… For a good completion, adjust the bands with cut of miter (45°).
Cut out broader bands to equip the tops and the sections with the covering framework… For a good completion, adjust the bands with cut of miter (45°).
![]() You have now to finish the fitting : paste the back of the spacer and pose it on the back framework by paying attention to well making coincide the openings. Continue by pasting the face of the spacer now and while posing over the framework of covering. Put the whole under press a few minutes.
You have now to finish the fitting : paste the back of the spacer and pose it on the back framework by paying attention to well making coincide the openings. Continue by pasting the face of the spacer now and while posing over the framework of covering. Put the whole under press a few minutes.
Present your painting… and hang to the wall!
![]() Second frame
Second frame
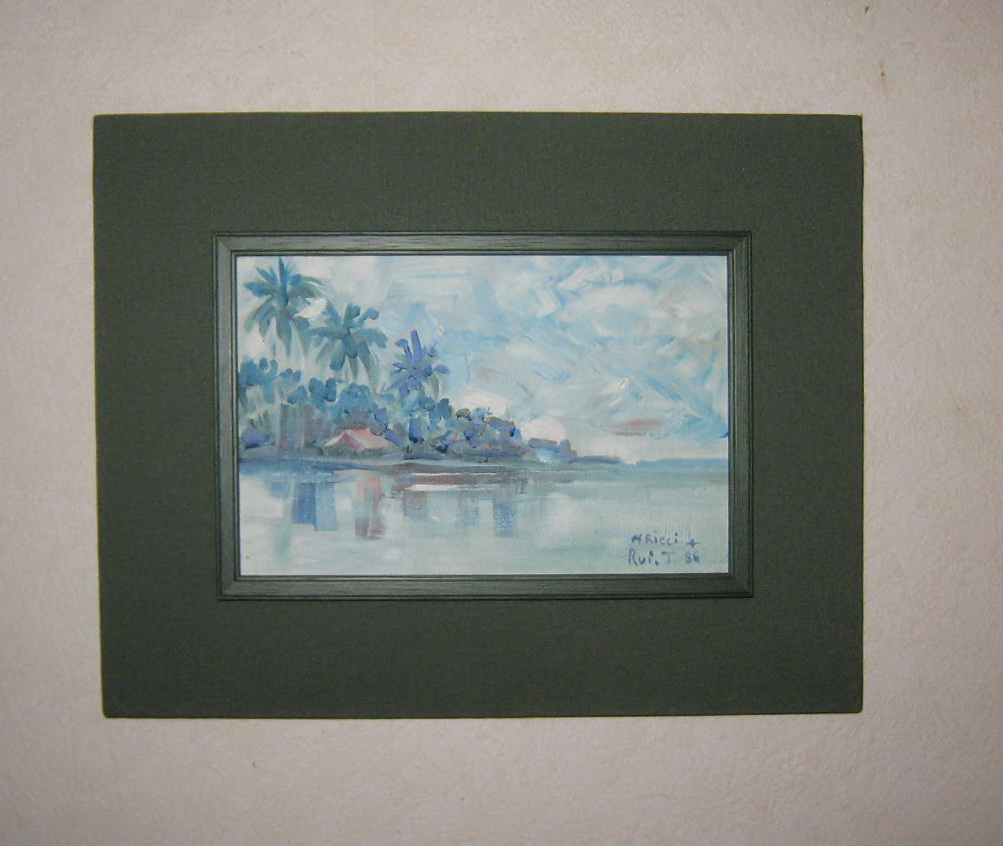
Here an adorable oil-base painting of Mrs. Ricci who précisely represents a marine landscape of the southern Pacific… of Tahiti. It is painted on a small canvas with the format 1-landscape (22x14) and, to frame it, the same technique was used:
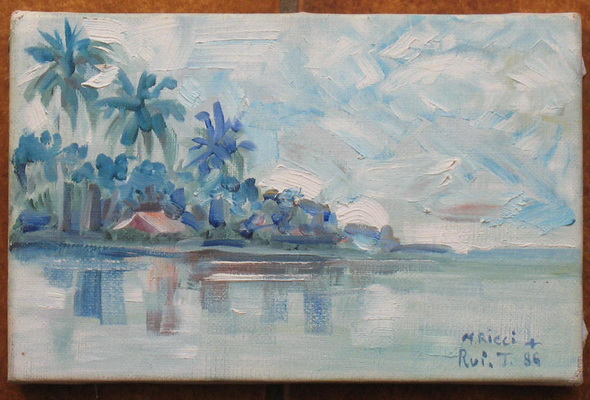
The painting declines different tons of green and blue: pale green of water, bluish green of the trees and the coconuts, and the sky which mixes the blue greens. Colors and tones which evoke the calm and the quite relative freshness of a tropical early morning…
And it is to preserve this freshness that one decided on a dark “green” framing… and to adopt an imitation fabric paper of the color chosen to cover it. With the same method one simply replaced the framework of covering by a fine moulding painted in dark green.
Frame It!
by Tonia Davenport
Framing isn't something one has to leave to the professional.
With Frame It! readers will learn how to use ready-made frames and inexpensive framing materials to create frames perfect for their favorite photo, piece of artwork or souvenir...
How to Make Your Own
Picture Frames
Ed Reinhardt, Hal Roger
Excellent book for the beginner (we are always beginners !). Clear and concise.
Excellent step-by-step instructions with photos for each and every step.
This book covers all aspects of frame construction, painting, mats, glass-cutting and usage.
A great book to trigger your own ideas to create custom frames.