
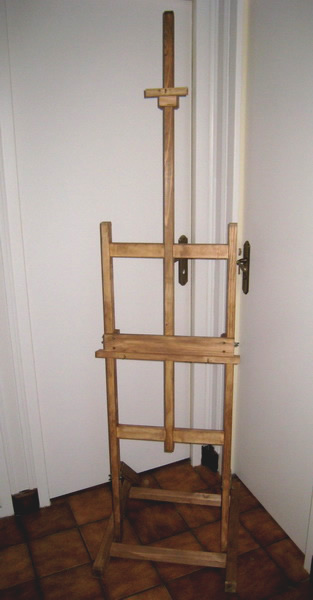
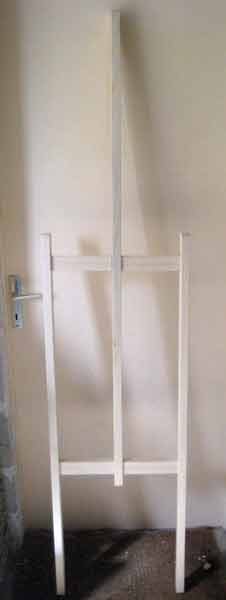
STEP BY STEP : HOW TO DIY AN "H" EASEL
EASY TO DO WITH FEW TOOLS
Here's an easel for painters also known as studio easel (or H-Frame easel). If you buy it in a shop, it will cost between $75 and $250 : do it yourself for less then $25 and about a dozen hours of work !
If you've never do DIY ... perhaps it is better not to embark on the adventure! Because some parts - front legs and rails - require the use of a router (not always easy to handle). Unless you know a handyman friend who could help you to make tenons and mortises ? It is also an excellent opportunity to learn !
If necessary, have a look at this small video very useful to learn how to use a router and cut a tenon with an hand saw !
None of the dimensions given in this page are critical and you can perfectly fit them to your personal situation : the only calculation you need to do is the size of the spacers so that the upper frame returns exactly in the base!
So, Attempts experience?
 Material and supplies
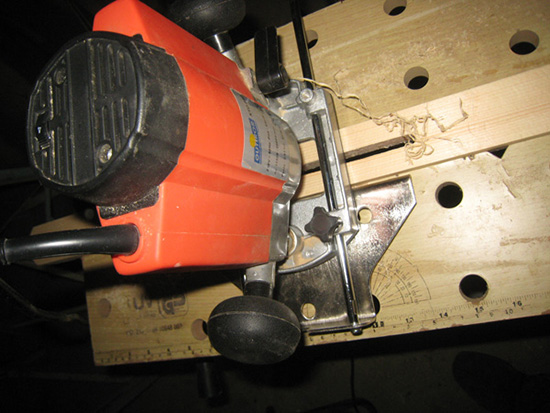
Tools : a Hand saw, a router and 8mm and 12mm bits , square, pencil
Providing wood (as it's a test... is used fir...) : Fir cleat 45x45mm square in 2.4 m, battens 2 x 40x25mm in 2.4 m (or similar dimensions ), some scrap wood ...
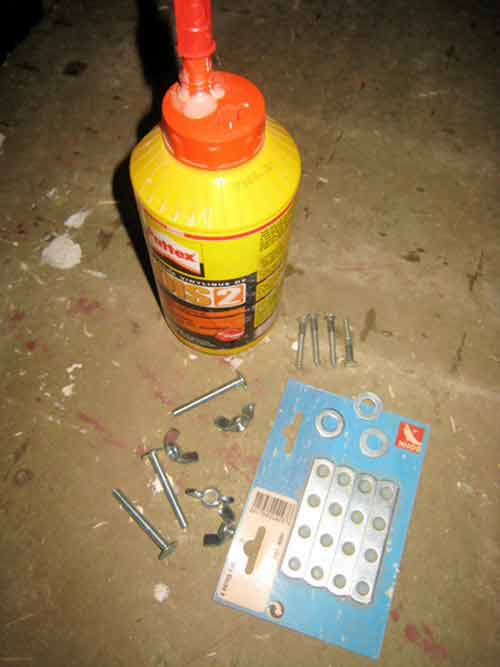
Annexes Supplies : wood glue, wood screws, mushroom head bolts and wing nuts, 4 fixation lugs, washers ...
Step by step
Construction of the base of the easel
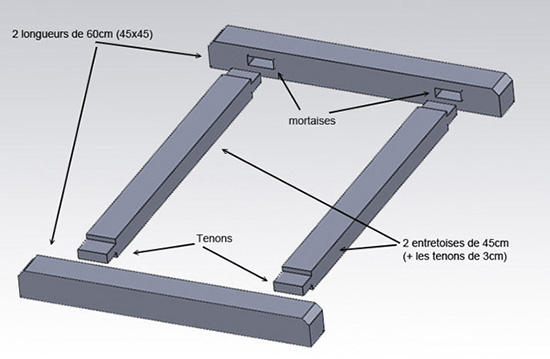
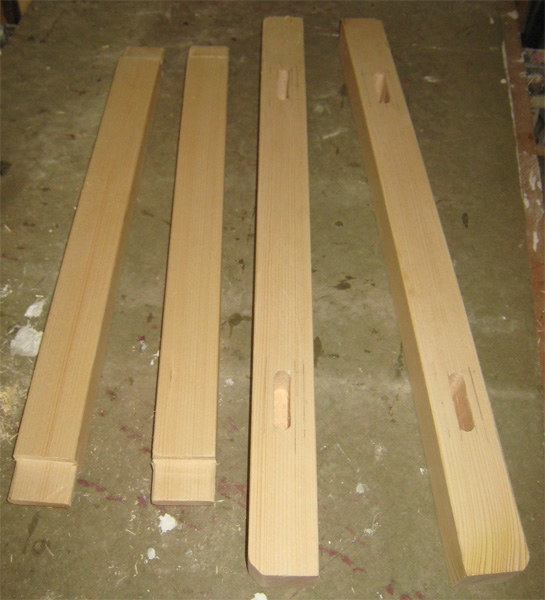
Start with cutting two lengths of 60cm out of the 45x45 lumber. With the handsaw, form the bevel edges to soften the ends (see figure).
In 40x25 batten, cut two lengths of 51cm (45 + 3 + 3 : 3cm is the measure of a tenon). Draw the tenons at each end (like 1.2 cm thick) and cut them out with the hand saw.
Now draw the the mortises on the 45x45 lumber and, with the router fitted with a 12mm bit, dig these mortises.
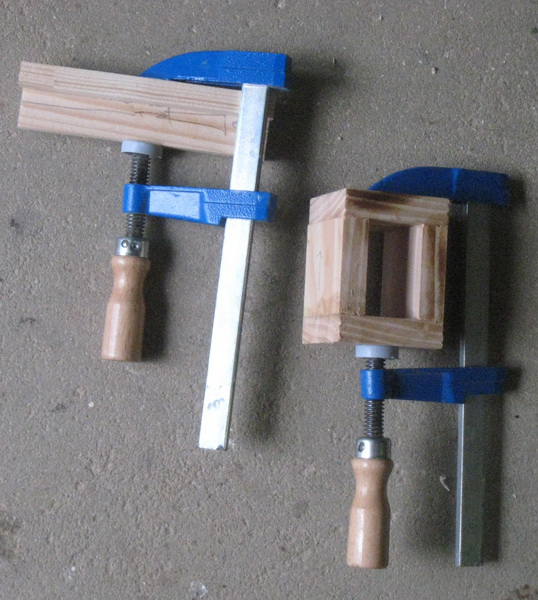
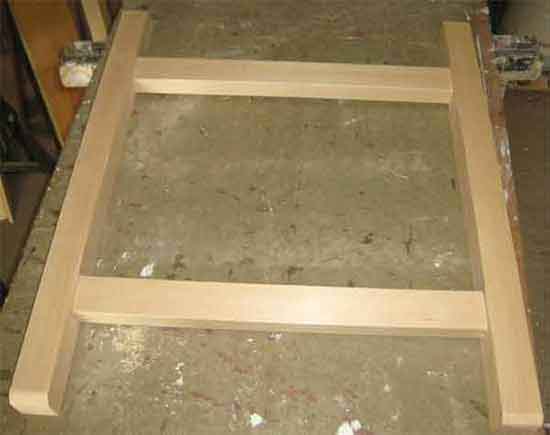
"Dry" assemble the pieces to check that everything is okay, then glue the pieces, make sure the squareness and tighten with one or two clamps. Let dry overnight.
Your base frame is finished!
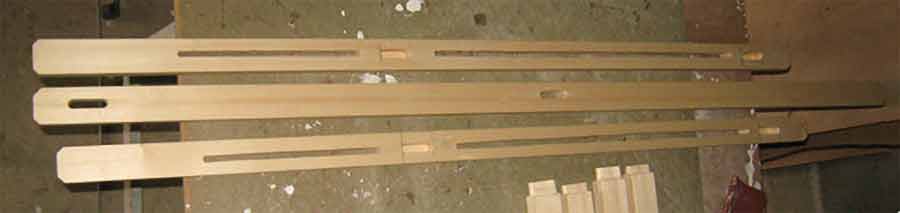
Construction of the vertical frame
The frame consists of two side bars and a center bar assembled by 4 spacers (figure).
On the side bars will slide the down support (canvas frame support) and on the central bar will slide the top bracket. The vertical frame will then be articulated with the basis of the easel.
Once completed, the assembly must have a width of 45cm to fit perfectly into the basic frame of the easel.
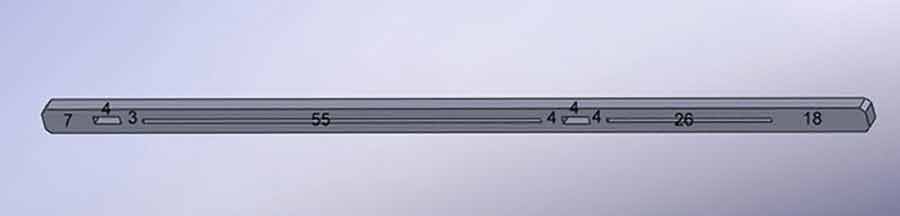
First, in 40x25 lumber, cut two side bars measuring 125cm. According to the plan below, mark the locations of mortises and grooves to be opened. For obvious reasons of accuracy, trace together on the two bars .
With the router and a bit of 12mm, open the two mortises (length : 4cm) then, with a 6mm bit, the two grooves.
The mortises are "blind" and 2cm deep. The grooves, they, emerge (while crossing the bar completely)..
IMPORTANT : to work with the router, set your piece along, adjust the side guide of the tool and then, facing the bar, work from left to right (there is a way to use the router!)
For grooves, proceed by steps by progressively lowering the bit to each passage to go completely through the piece.
The center barmeasure 150cm. It has two mortises 4cm wide (to align with those of the side bars). Warning, these slots are emergent (see below the photo !
There remain now to cut the four spacers in the 40x25 batten. They have a length of 18.7 cm and have a tenon of 1.1 cm and one another 2cm (must therefore cut : 18.7 + 1.1 + 2 = 20.8cm). The 1.1 cm tenons will go to in the mortises of the central bar... those of 2cm in the side bars.
Dry assemble the parts. If everything is OK, give a light sanding and then glue the spacers. Assemble and tighten using clamps. Leave to dry thoroughly before loosening.
Warning: If you have changed some dimensions, you must recalculate the length of these spacers for the vertical frame upon completion returned "fair" in the frame base.
The vertical frame is finished!
Assembling the base and the vertical frame
The vertical frame will been screwed onto the base so that it can rotate forward and backward.
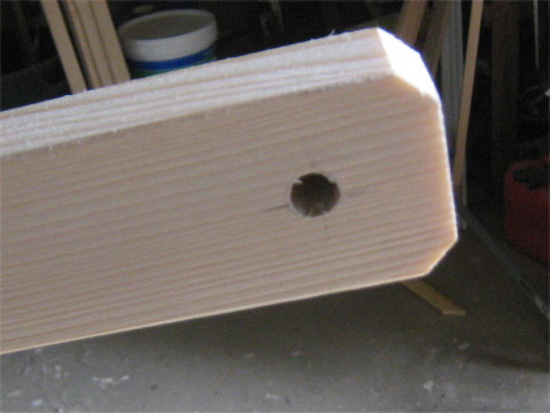
To do this, drill two blind holes 8mm at the ends of the side bars. Change for a 4mm bit and finish the hole emerging to the other side.
So when you will screw onto the base, the screw head will be completely hidden and screw used as a pivot for the vertical frame.
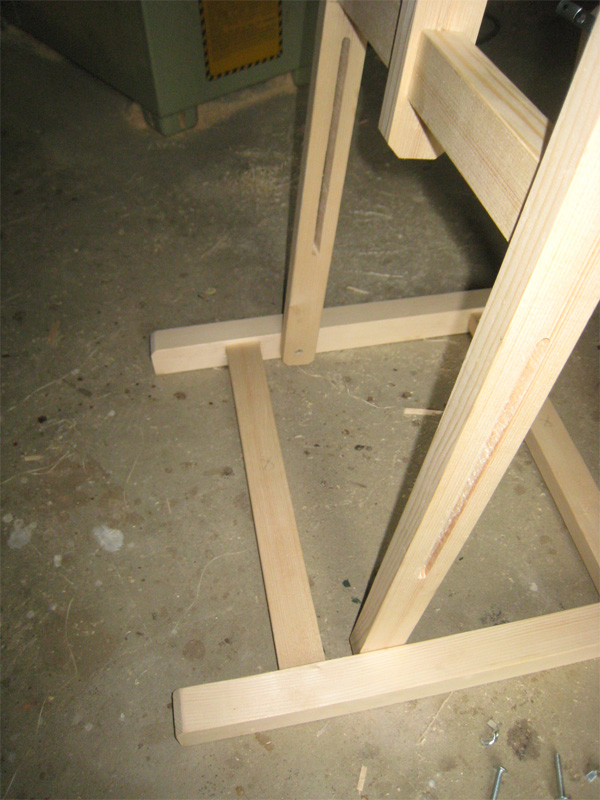
Now screw the vertical frame to the base (wood screws 5cm) to about 4cm from the first cross.
Do not overtighten the screws!
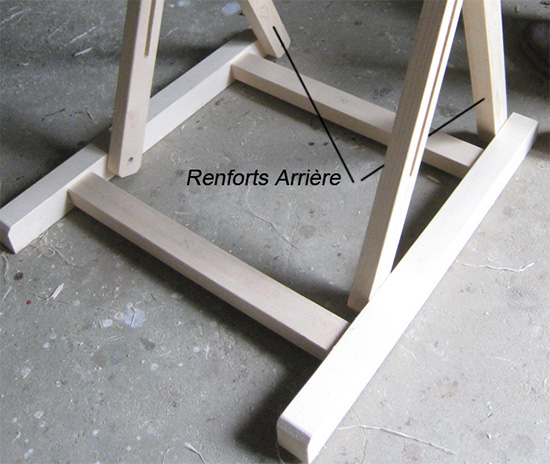
Rear-keeping reinforcements.
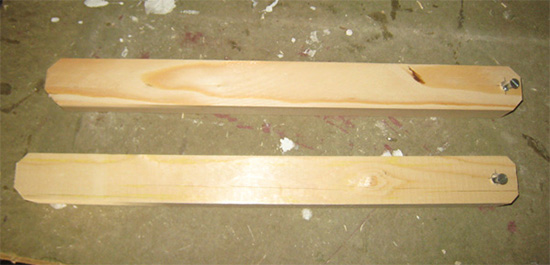
In the batten 40x25, cut two lengths of 45 cm. Chamfer the ends and drill on each of them a blind hole 8mm complemented by leading a 4mm hole.
With two wood screws, attach these rear reinforcements on the base frame, behind the spacer to get this :
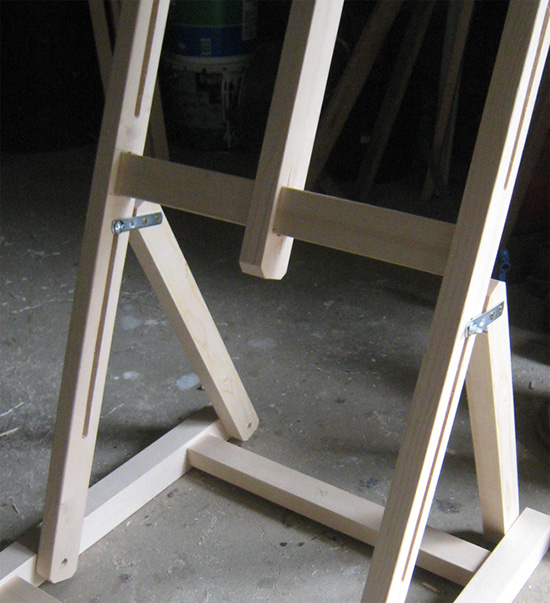
Still to be screwed, on the other end of reinforcements, on each side, the lugs that will hold the bolts and wing nuts to adjust the tilt forward or backward, of the easel.
Note the horizontal position of the lugs that provide a correct sliding of the bolt in the grooves.
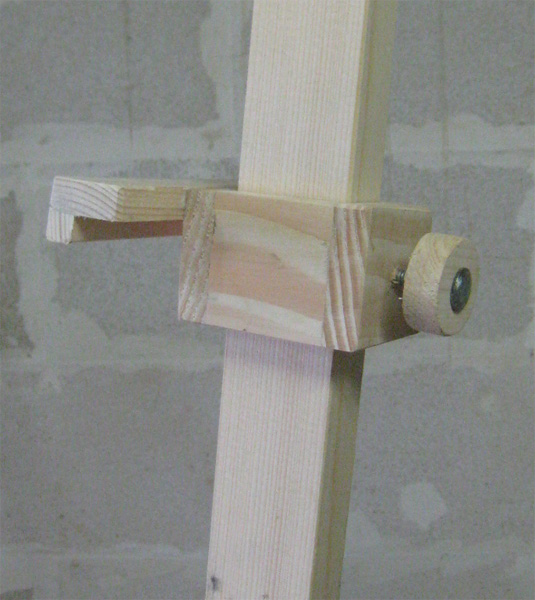
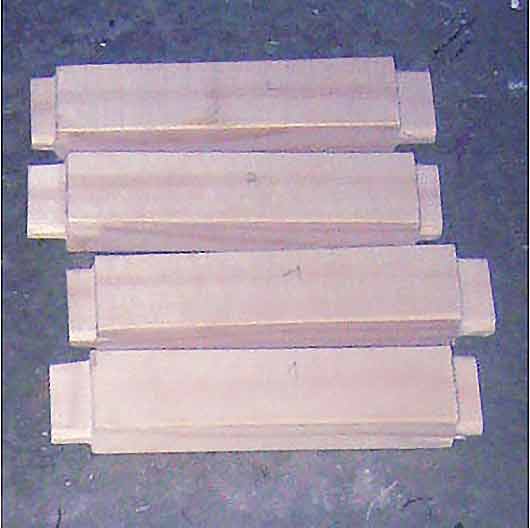
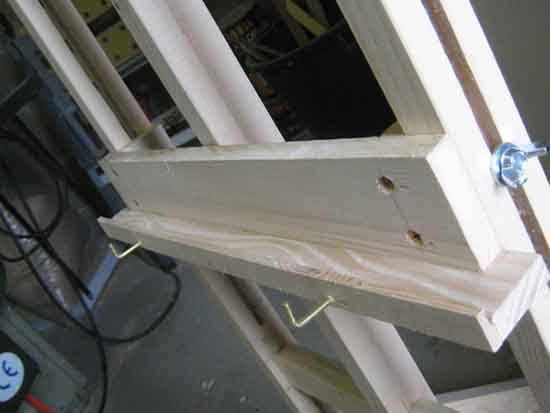
Upper canvas Support : top clamp
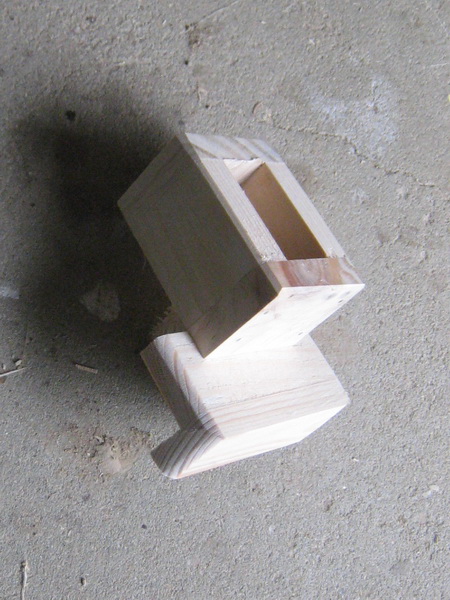
On the central bar slides the device used to hold the canvas frame on the easel : the top clamp. It consists of a slide and an a L-bracket fixed to each other by gluing and nailing.
The slide is a glued 4 pieces of wood, the support consists of two parts L. Here is a photo-process. Always tighten to obtain a good gluing. Then another high support ended.
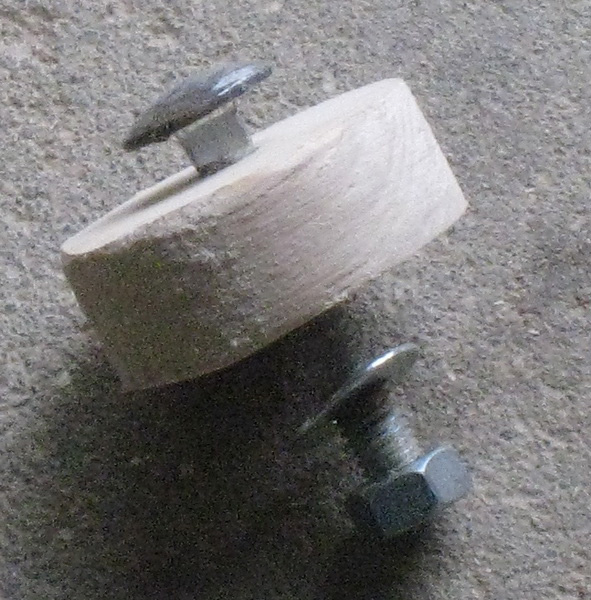
The lock button consists of a disk of wood, cutted using a hole saw and traversed by a mushroom head bolt 6mm. The nut is then tightened and the bolt becomes attached to the wooden disk.
Finally, drill a hole (diameter of 6.5 mm) in the slide and screw the lock button. Set up on the center bar : screw slightly ... it is good! You can also put a brass L screw on the center support.
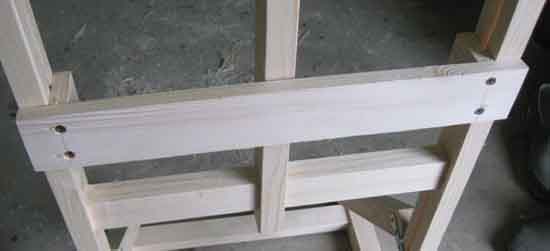
The horizontal bottom canvas frame support
It consists of two side plates of 4 x 6x 1,5 and drilled in the center in order to pass a mushroom head bolt 7mm equipped with a washer and a wingnut.
On these two plates is screwed and glued the faceplate of 45cm long and 6cm in height (scrap wood).
The horizontal shelf 50 x 4 X 1,5, provided with an edge is glued and screwed from below: it is on this tablet than stay the canvas to be paint.
And for those who prefer use them, it has two brass L-screws screwed on the shelf (and one screwed on the top clamp), very handy for "install" the canvas frame without masking its lower part.
Finishing tips. Complete tutorial Full tutorial
After a general sanding, the easel has been stained with a light color. The choice is to retain its vintage appearance, then I've applied a "rustic wax" from INTERIORS brand.
After the wax drying , the easel is rubbed with steel wool : it gives an early sheen. A second coat of wax ... this time followed by a "000" extra-fine steel wool rubbing finishes "to satin" the easel !


Want a ready made
french easel ?
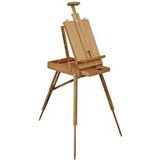
from 60 US$...
This easel is awesome! Purchased this for our teenage daughter who loves to paint and didn't want to spend a small fortune...
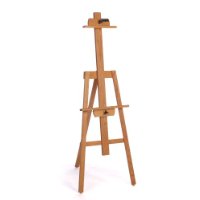
From 40$
I sit and paint with this easel. The bars slide up and down very easily, so it is easy to adjust height.
Wood Finishing 101:
The Step-by-Step Guide
Bob Flexner (Author)
Best selling finishing book for woodworkers for the past 10 years...
A pictorial step-by-step presentation to make finishing comfortable for any level of woodworker
The Joint Book:
The Complete Guide
to Wood Joinery
Terrie Noll

Every page is filled with diagrams and color drawings illustrating every joint that's used in American woodworking.
Noll shows exactly how to set up various tools... Great !