HOW TO CREATE A PHOTO WITH 3D EFFECT
Curved photo effect with shadow....
If you do not have an "old photo", you can download the photo example here
 How to curve the photo
![]() In Photoshop, open a new image in 30cmx30cm 72dpi format (to get an idea of the final dimensions)... it will be your digiscrap page!
In Photoshop, open a new image in 30cmx30cm 72dpi format (to get an idea of the final dimensions)... it will be your digiscrap page!
Give it a plain, preferably dark background... the color doesn't matter since you will remove this background at the end...
Also open the aged photo.
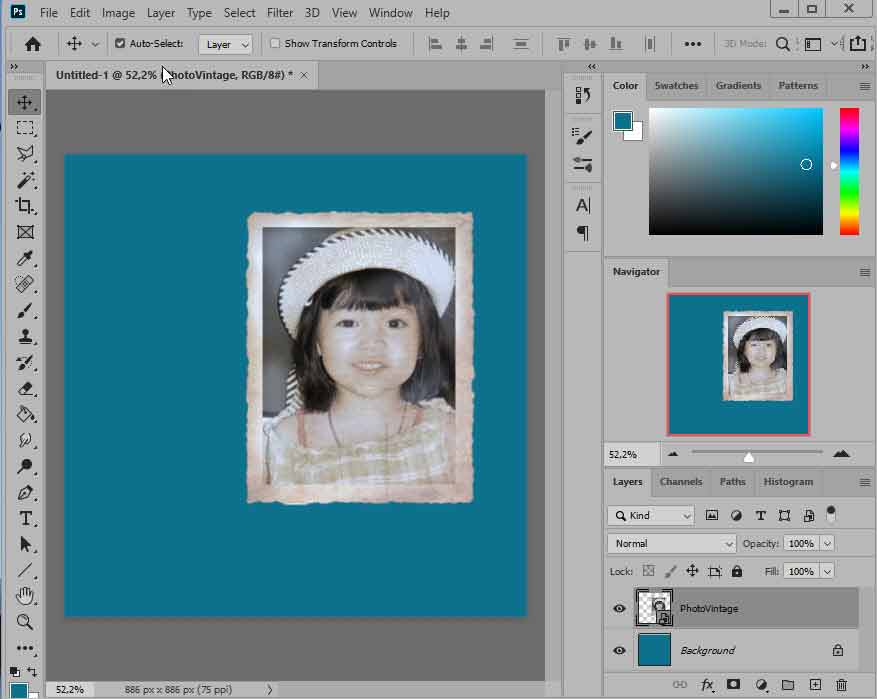
Look at the layer window: the background in color and above, Photo-vintage
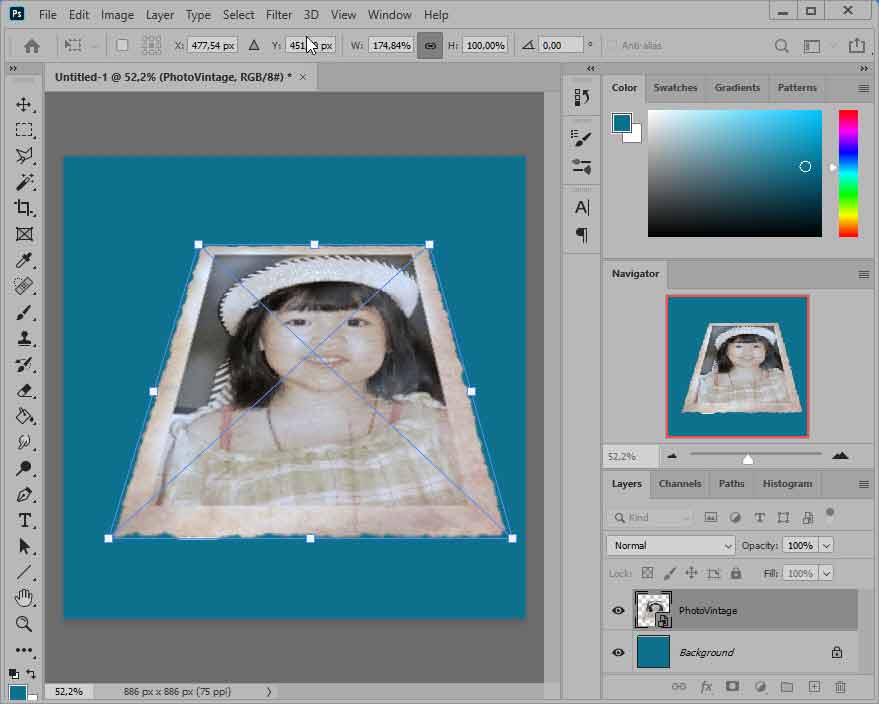
![]() To distort the photo and give an impression of 3D perspective, type Ctrl+T, "handles" appear at the corners of the photo. Hold down the Ctrl key and, with the mouse, act on the handles individually to "lay" the photo on the background.
To distort the photo and give an impression of 3D perspective, type Ctrl+T, "handles" appear at the corners of the photo. Hold down the Ctrl key and, with the mouse, act on the handles individually to "lay" the photo on the background.
When the result suits you, don't forget to validate!
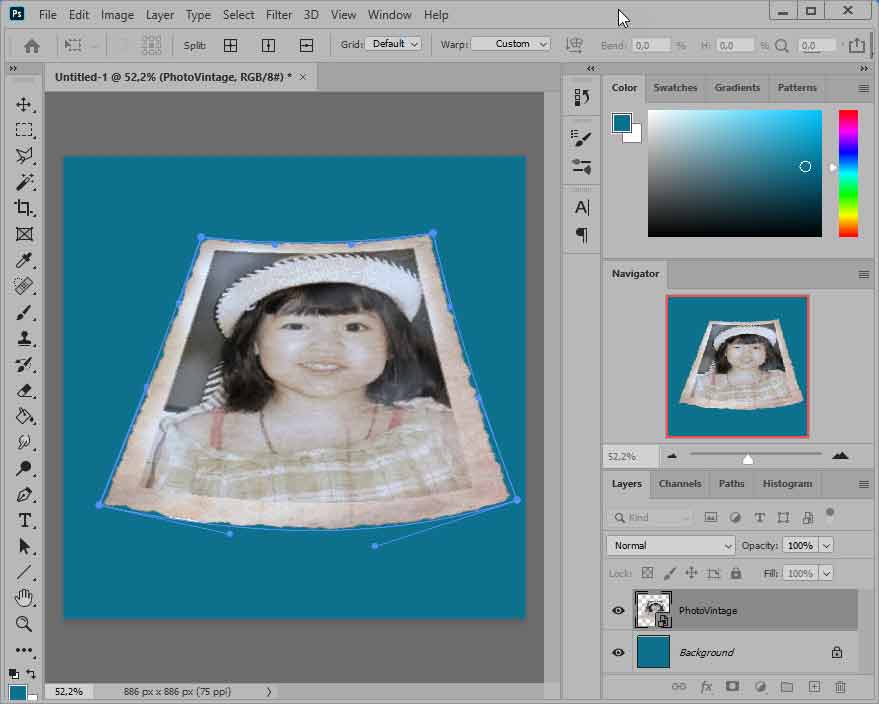
![]() You will now give the illusion of a picture a little distorted by time....
You will now give the illusion of a picture a little distorted by time....
To do this, choose Edit>Transform>Warp. A grid with "handles" appears on the picture.
With the mouse, point to the lower edge of the photo and pull down : the photo curves.
Make a slight asymmetry appear by playing on the inclination of the tangents. In the same way, point to the top edge of the photo and pull down (slightly less sharply than the previous one... perspective required!).
When you are satisfied with the result, validate.
![]() You will now switch to the drop shadow... which requires a small manipulation (the drop shadow of the merge options does not give a realistic result).
You will now switch to the drop shadow... which requires a small manipulation (the drop shadow of the merge options does not give a realistic result).
With the magic wand, click outside the photo and then do Select>Inverse to select only the shape of the photo.
Keep this selection.
Then create a new layer that you call "drop shadow" and place it under the photo layer.
With the bucket tool, fill the saved selection with black. For the moment, this black area is hidden by the photo in the foreground....
With the move tool, click on the image and drag this black shadow down to make it appear.
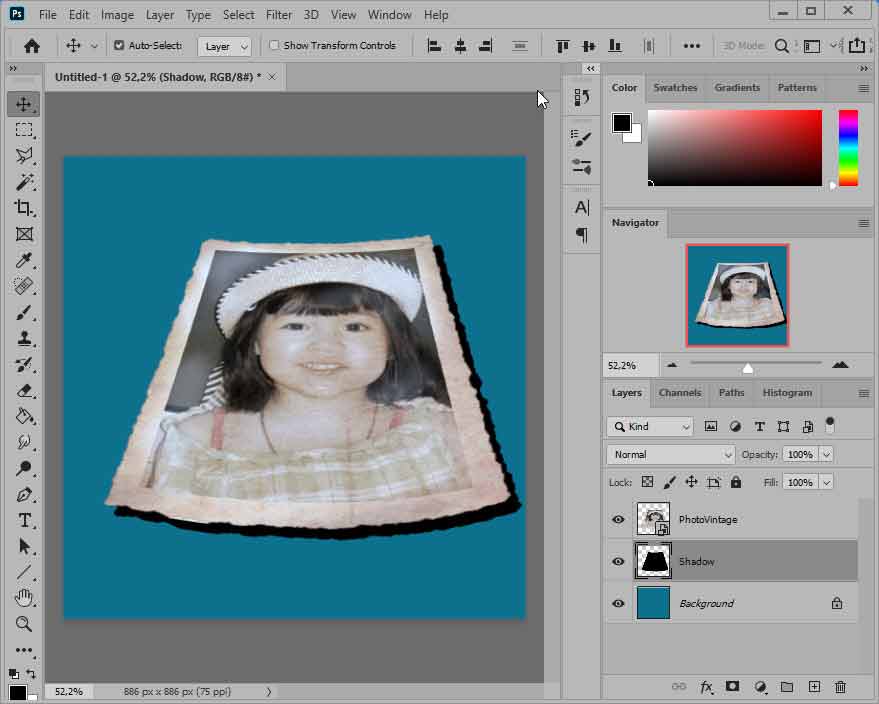
![]() The shape of this shadow is not very realistic... you will work on it again! Still in the layer named drop shadow, choose Edit>Transformn>warp. The grid and handles reappear, this time in the shade.
The shape of this shadow is not very realistic... you will work on it again! Still in the layer named drop shadow, choose Edit>Transformn>warp. The grid and handles reappear, this time in the shade.
You now have to deform the shadow by reversing its curvature with the mouse... as in the following image :
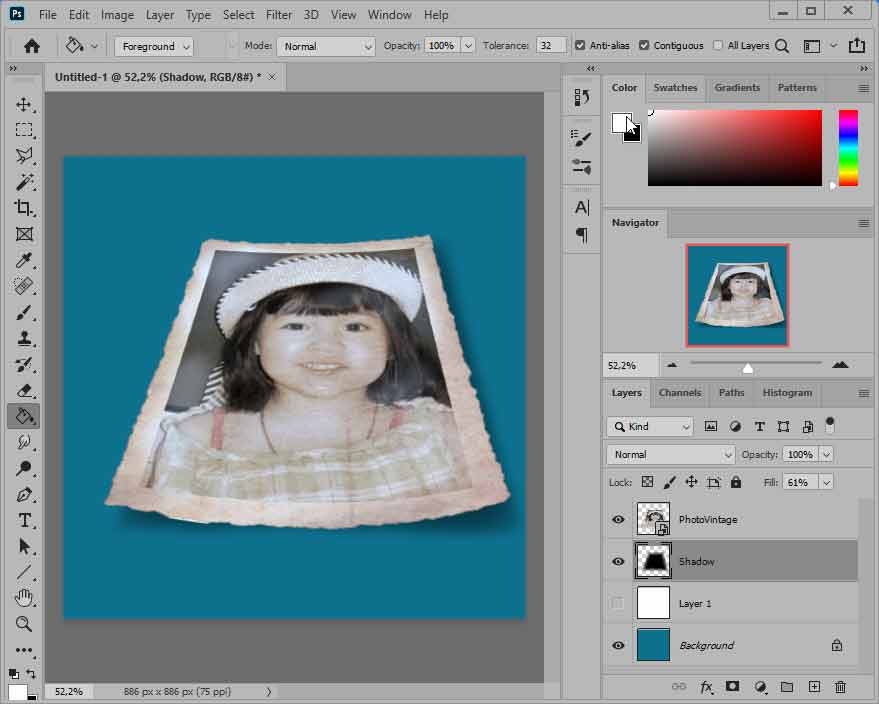
The opacity of the shadow still needs to be adjusted.... Adjust it to around 60%.
Choose Select>Deselect.
Then apply a 10-pixel Gaussian blur to the shade.
To do this, run Filter>Blur>Gaussian Blur and set 10 pixels as the radius.
 To the next step: final assembly
The work on the photo is finished.... Delete the background layer and save the photo first in .PSP (photoshop) format for possible further editing and then in .PNG format for use in the final editing.
