A PICTURE IN THE PICTURE
How to put an image in the image
This image-in-picture technique is ideal for drawing attention to a part of a photo.
And not too complicated to implement (even the horny corner of the second part is easy to establish if you follow the explanations correctly).
 PHOTOSHOP Tutorial: picture in picture....
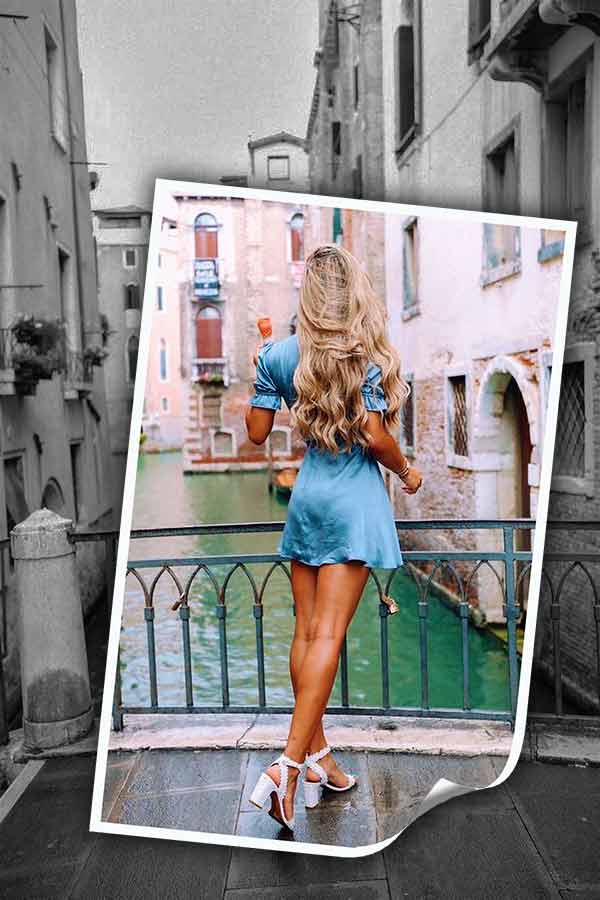
Here is the effect as you will get it at the end of this step by step....
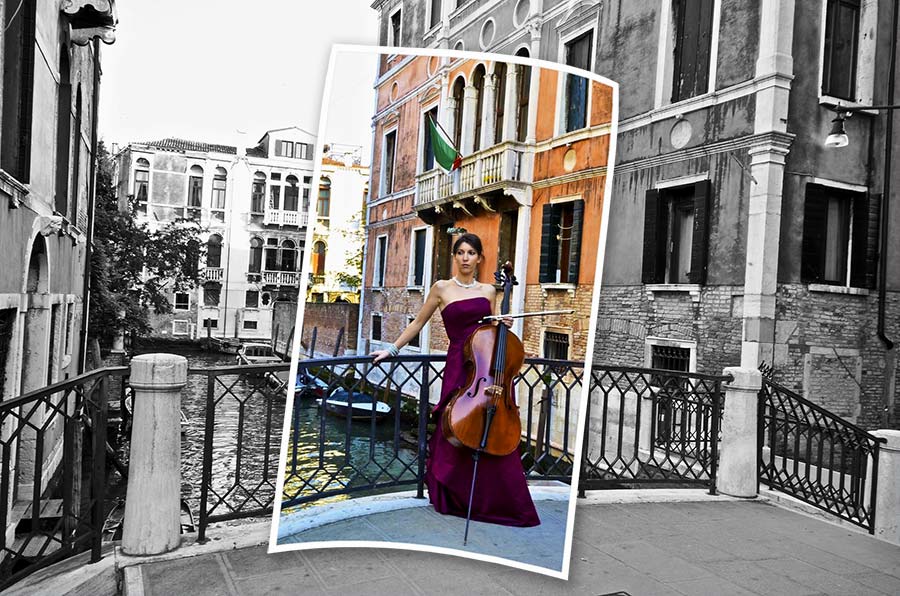
The example was worked with PHOTOSHOP.... using its standard functions... It should be easy to transpose it into Photofilter or Paint Shop Pro, which have the same standard functions, if these softwares are your favorite image processors.
The working document is available HERE if you need it.
 Select the part of the image to keep.
Open the image in photoshop
With the rectangular marquee tool select the part of the image to highlight
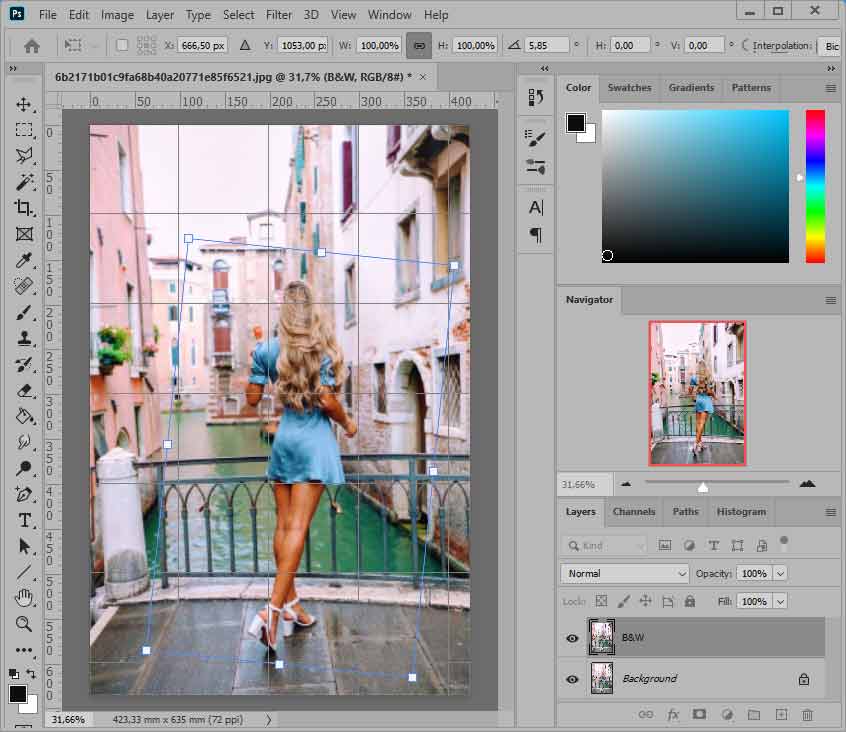
Make : Selection > Transform the selection and rotate the selection frame slightly to get an oblique image....
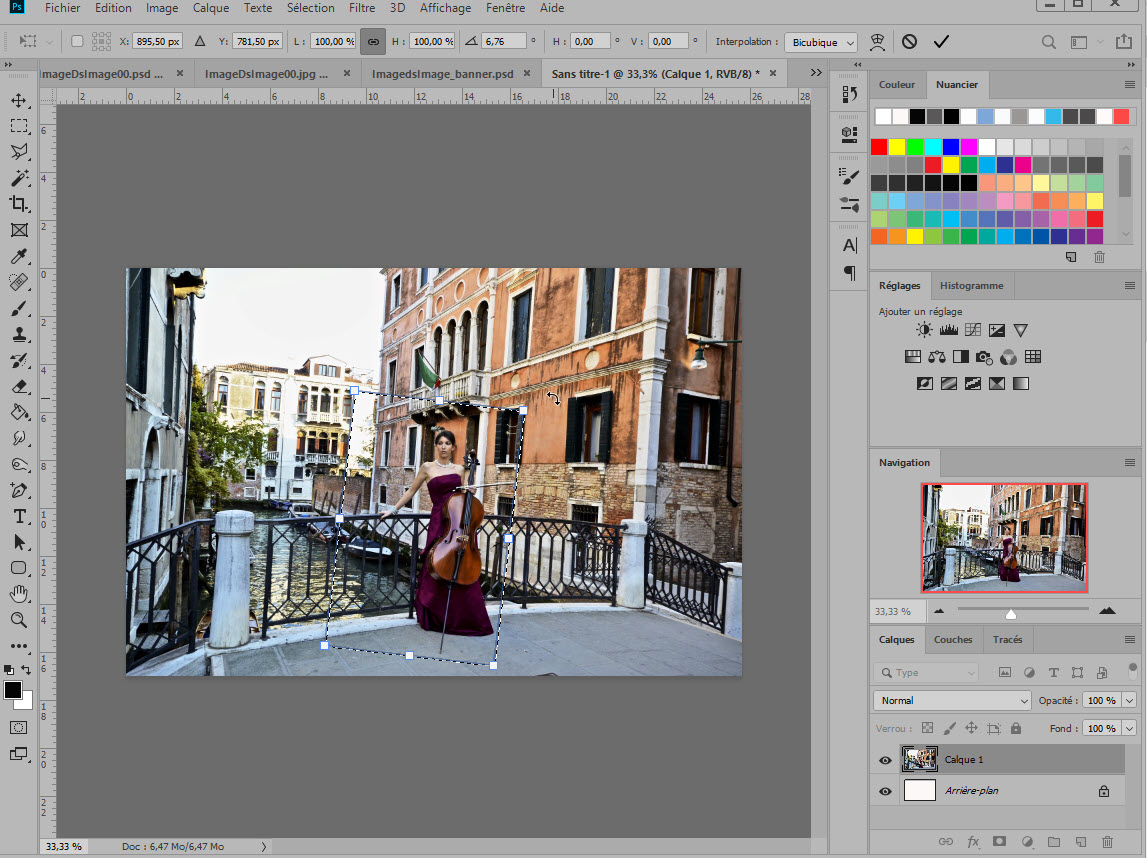
When the position of the frame suits you, perform CTRL+C (or Edit > Copy), then, immediately, do CTRL+V to paste your selection: a new layer appears. It's your image!
You don't see anything changed on the screen, it's normal since the two images, background and selection are superimposed!
 Start transforming your image
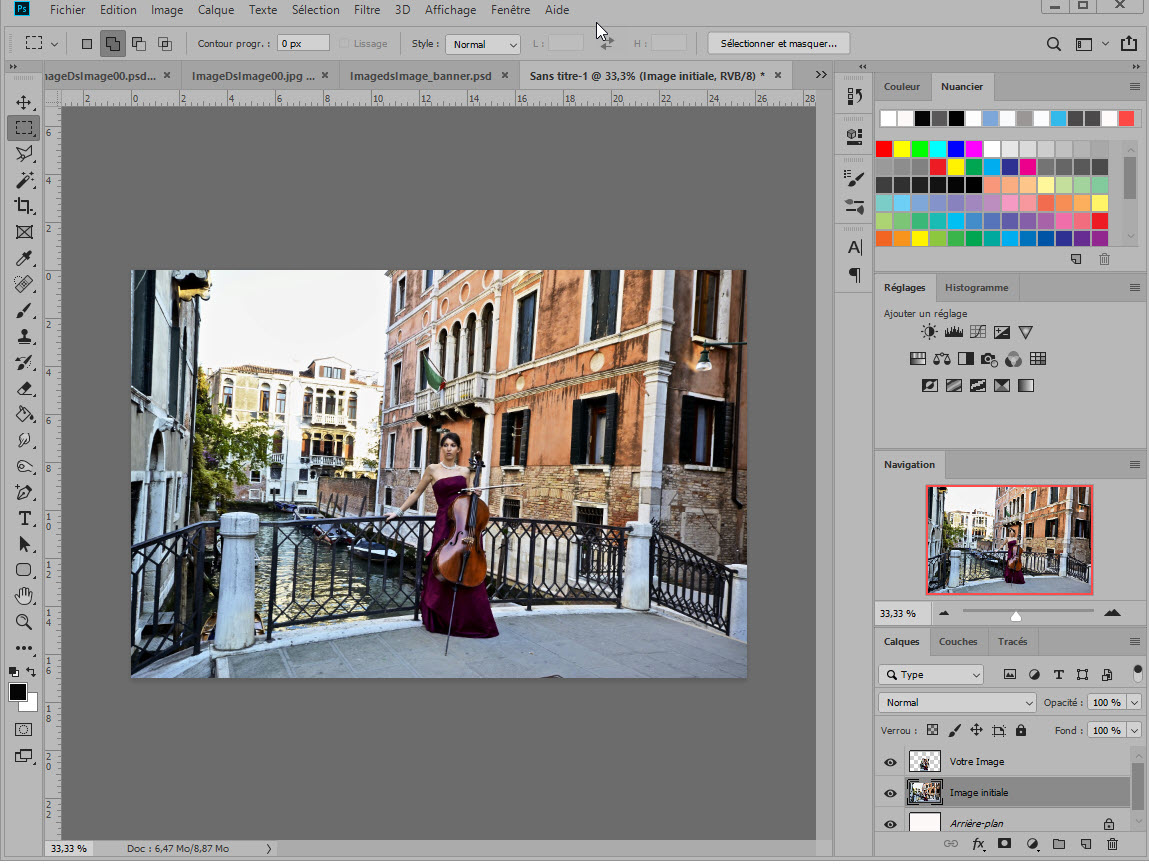
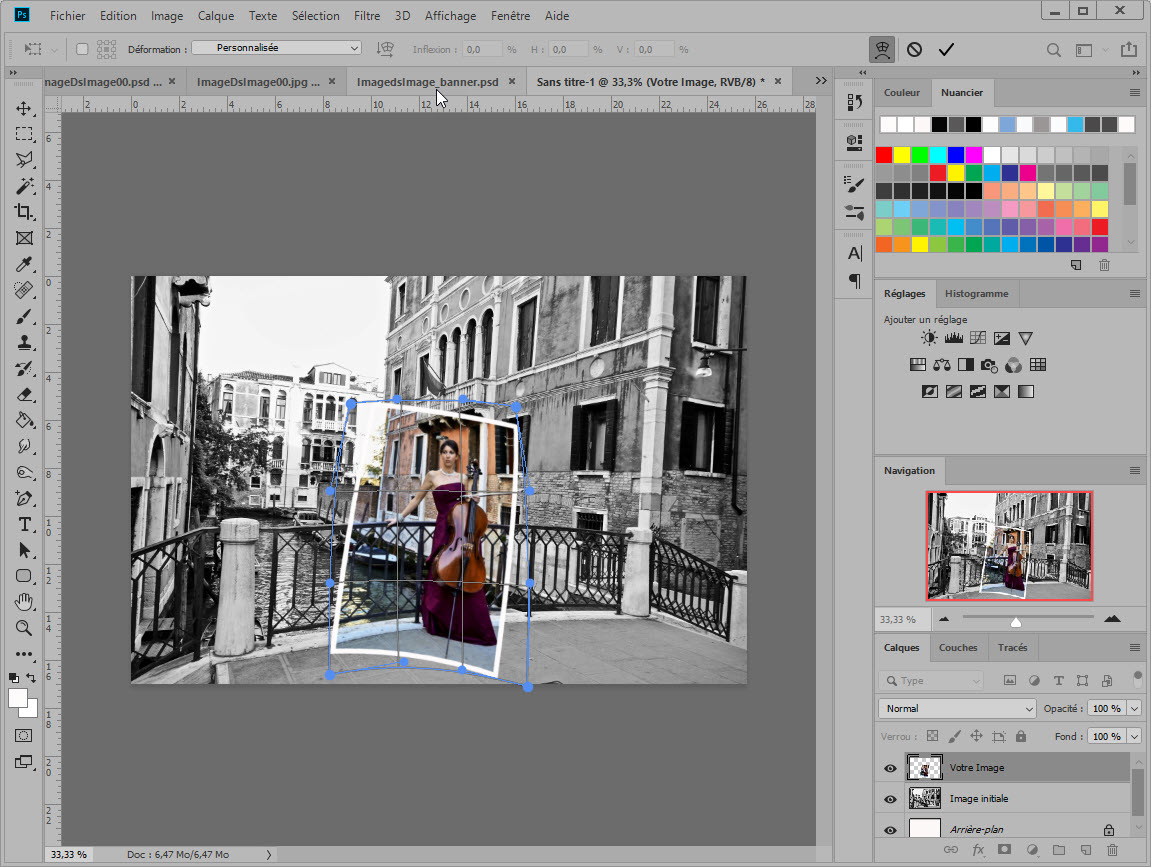
Click on "Initial Image" in the layer palette, then do Image >Settings >Desaturation what changes the initial image to Black and White.
Now click on the "Your Image" layer and do Edit > Contour to add a white outline to it at your convenience.
 Change the geometry of the image
Still in the "Your Image" layer, do Edit > Transform > Warp. A blue frame with handles appears.
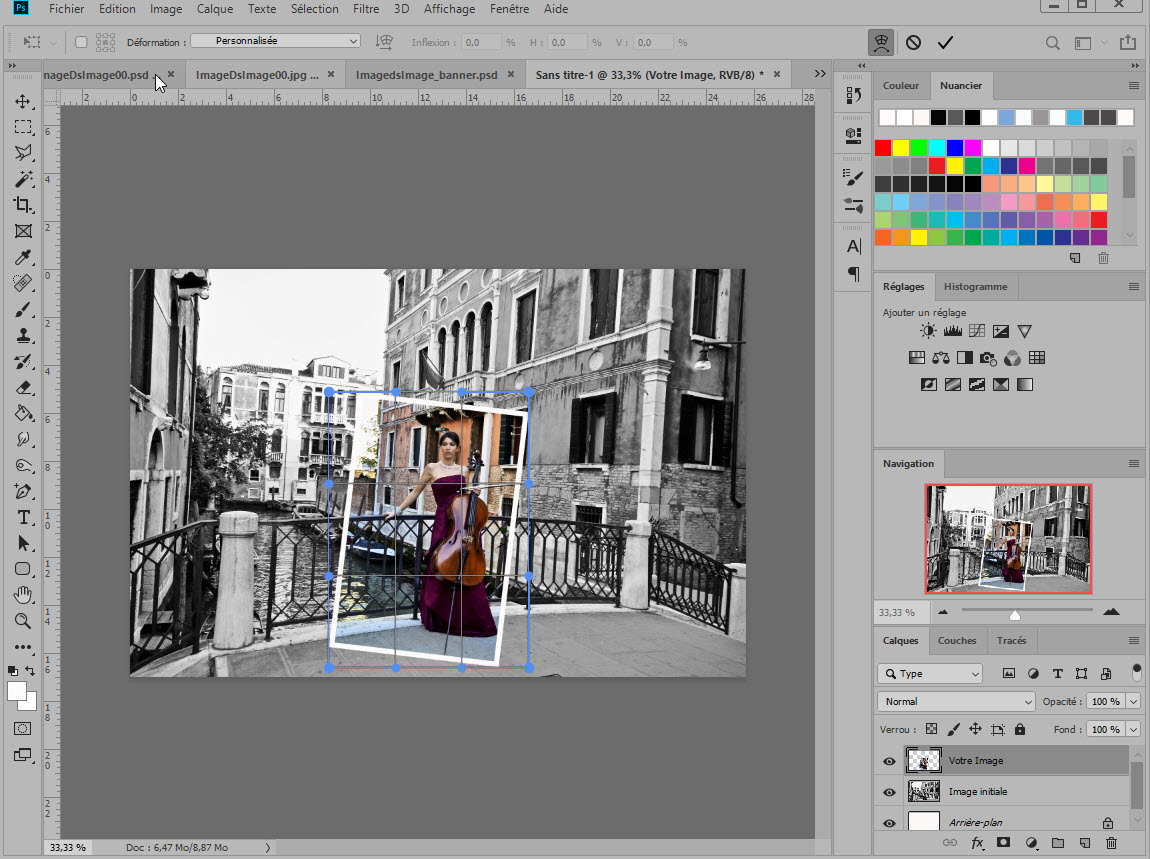
Use these handles to slightly distort your image.... to imitate a slightly curved photo...
When you are satisfied, validate your deformation.
Add a drop shadow to "Your Image" to make it stand out better... you're done!!! For purists, this shadow is not "exact"... it will be the subject of another tutorial!

 The Corneal Corner Technique
In this second tutorial, you will learn how to turn down the corner of a photo... which gives a scrapbooking page a little relief... It can lead to something like that:
 Select the part of the image to keep....
![]() So choose a photo... if you prefer to work with the one from this step by step, you can DOWNLOAD it HERE.. Come on, it's starting!
So choose a photo... if you prefer to work with the one from this step by step, you can DOWNLOAD it HERE.. Come on, it's starting!
![]() Open the photo in photoshop, duplicate it in a new layer... and, with the rectangular selection tool, draw the selection.
Open the photo in photoshop, duplicate it in a new layer... and, with the rectangular selection tool, draw the selection.
To tilt this selection, do: Select>Transform selection. You can then rotate this selection.
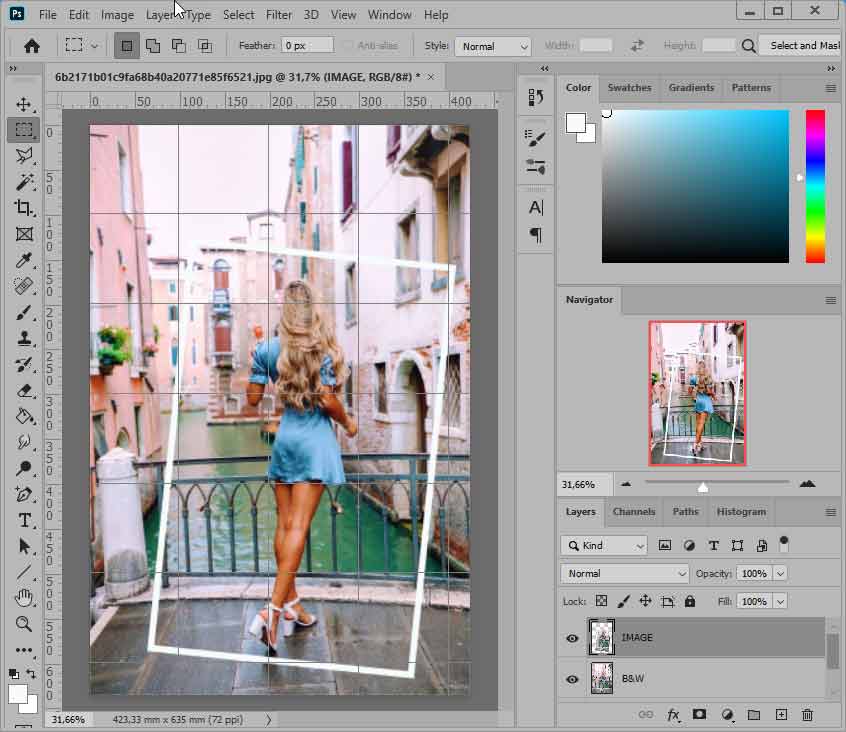
![]() Copy it and paste it immediately into a new layer. Call this layer "IMAGE".
Copy it and paste it immediately into a new layer. Call this layer "IMAGE".
Select the "IMAGE" layer and now perform: Edit>Stroke; choose width=13 color : white ti add a white border around your color image. Here is what you need to have on the screen :
![]() Turn the layer Background copy in Black&White (command Image>adjustments>desaturate). Then do Image>Adjustments>Brightness and set brightness to -60 to darken the black and white photo.
Turn the layer Background copy in Black&White (command Image>adjustments>desaturate). Then do Image>Adjustments>Brightness and set brightness to -60 to darken the black and white photo.
 How to turn down the corner of the photo
![]() With the polygonal-lasso tool, select the lower right corner of the image.
With the polygonal-lasso tool, select the lower right corner of the image.

![]() Then perform Edit>Transform>Warp and pull the corner to bring it back inside the image...
Then perform Edit>Transform>Warp and pull the corner to bring it back inside the image...

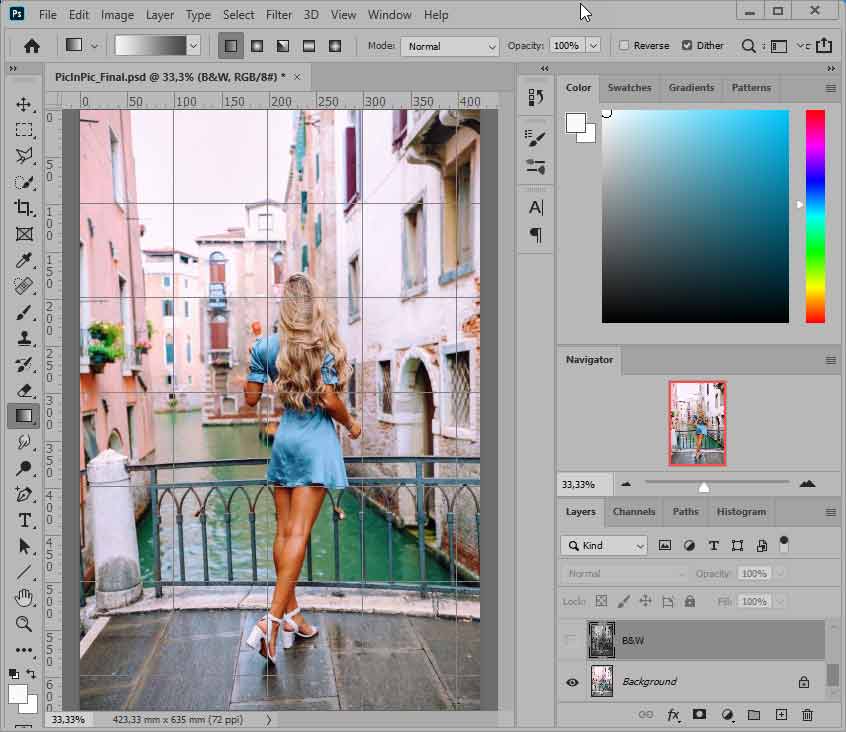
With the brush tool, paint in white color the inverted corner of the image.
Give a drop shadow to the image.... If we really wanted to refine, we could also think of giving a shadow to the turned down corner.... This will be the subject of another tutorial....
So here is our final image:
