A slide film for your photos
Complete Photoshop tutorial
We are all looking to vary the way we present our images in scrapbooking pages... Here is an original way to highlight them: a slide film !
It is an effect easy to do if you know a little PHOTOSHOP (or other similar image software)...
If you are a beginner or simply if you are in a hurry, you can download the ready to use empty film HERE...
In this step by step tutorial, you will first build the frame of the film strip and place your images in a second time. You will finish by adding the 3D film effect that wraps.
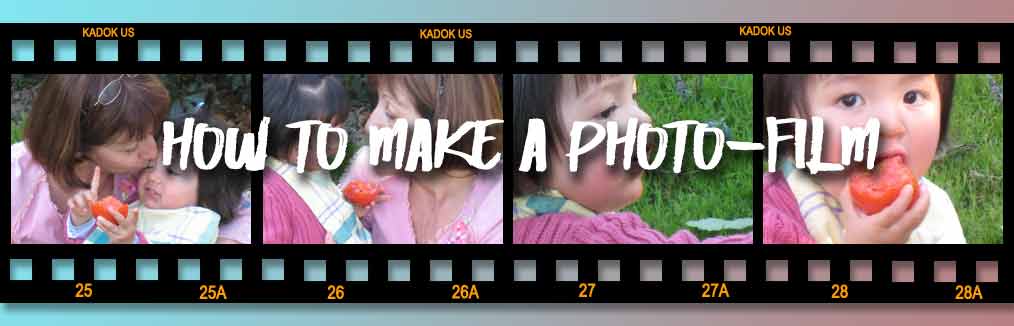
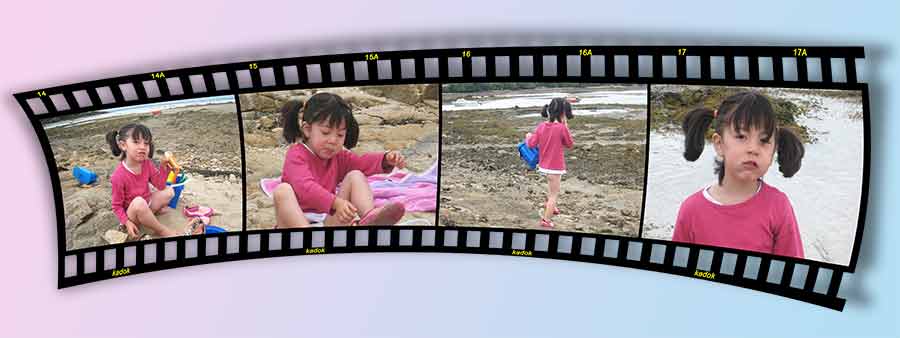
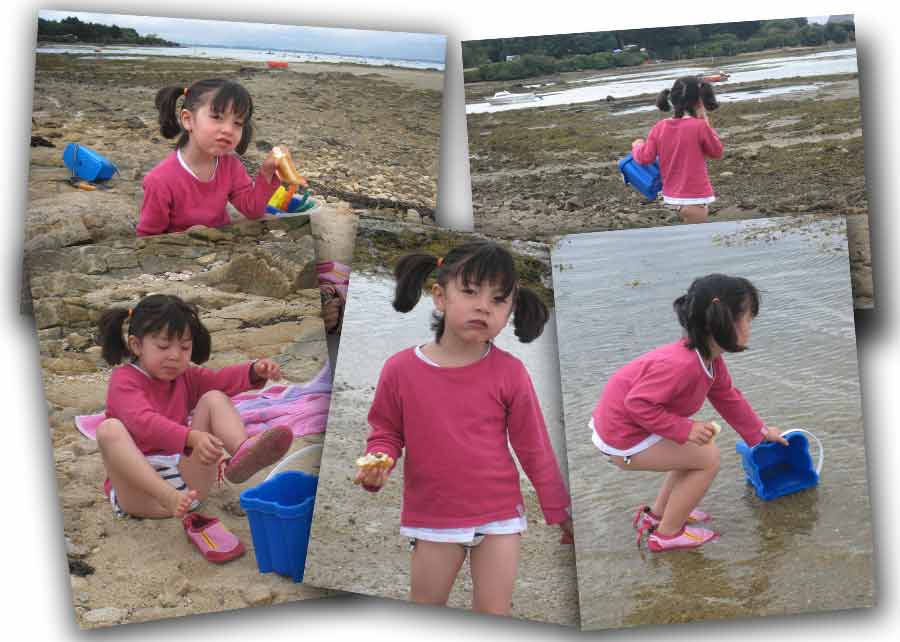
Here is an example of what you could get...
So? It begins?
 Making of the slide film
The slide film is 35mm perforated film... each view measures 24x36mm... This is what will guide us inm king of the perforated film.
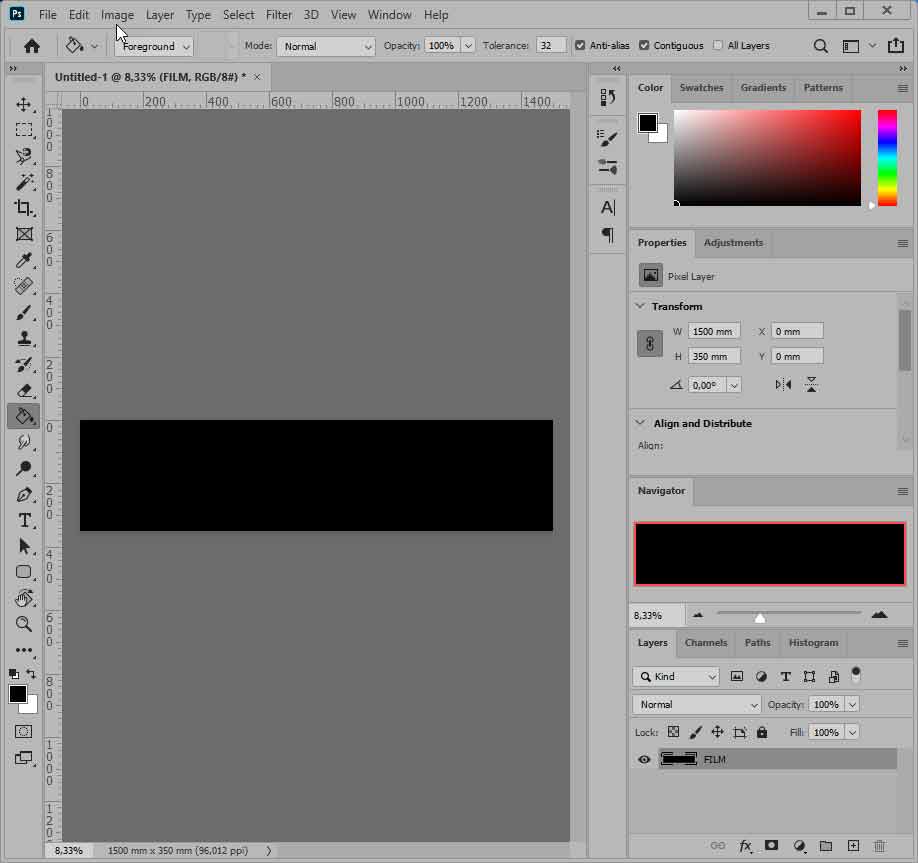
![]() So let's start by creating a 1500mm x 350mm image that we fill with black color.
So let's start by creating a 1500mm x 350mm image that we fill with black color.
Cliquez sur le cadenas du layer "Background" puis nommez le "film"
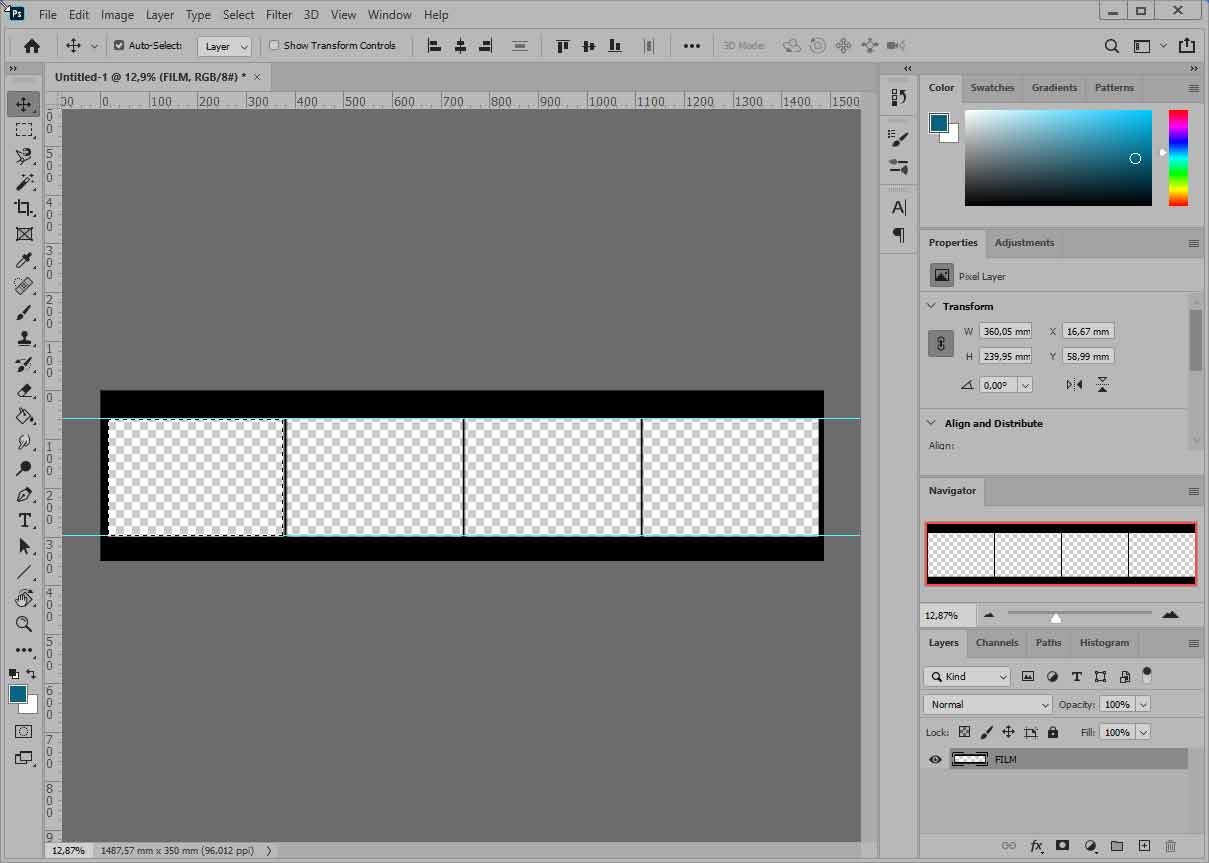
We will now "hollow out" this film to create the locations for the images.... In the options of the rectangular marquee tool, give a fixed dimension of 360mmx240mm... Select a rectangle 5.5mm from the edge (I drew a guide...in blue on the picture)
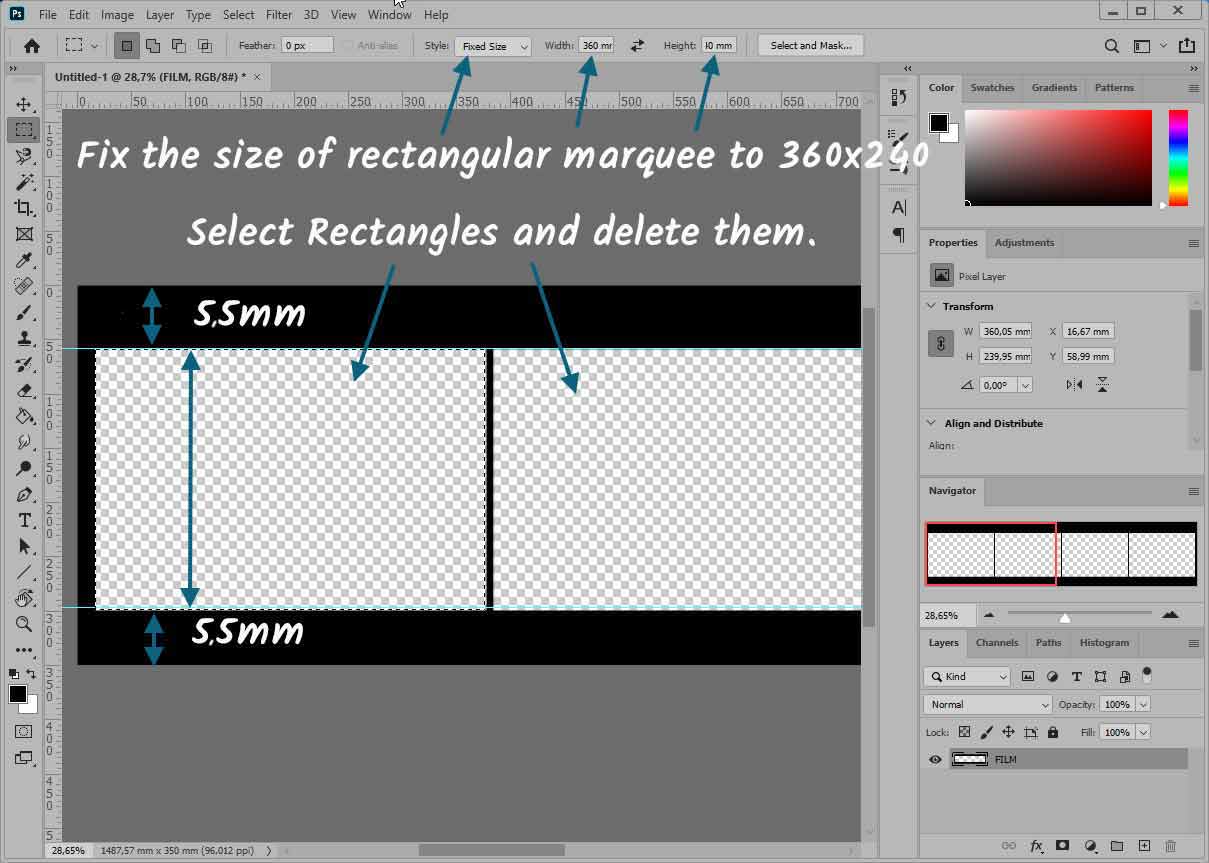
Continue to select rectangles, stand on the guide and hollow out the film.... There's just room for four views!
![]() We will now start simulating the perforations of the film....
We will now start simulating the perforations of the film....
Start by enlarging the top-left corner of your image (navigation).
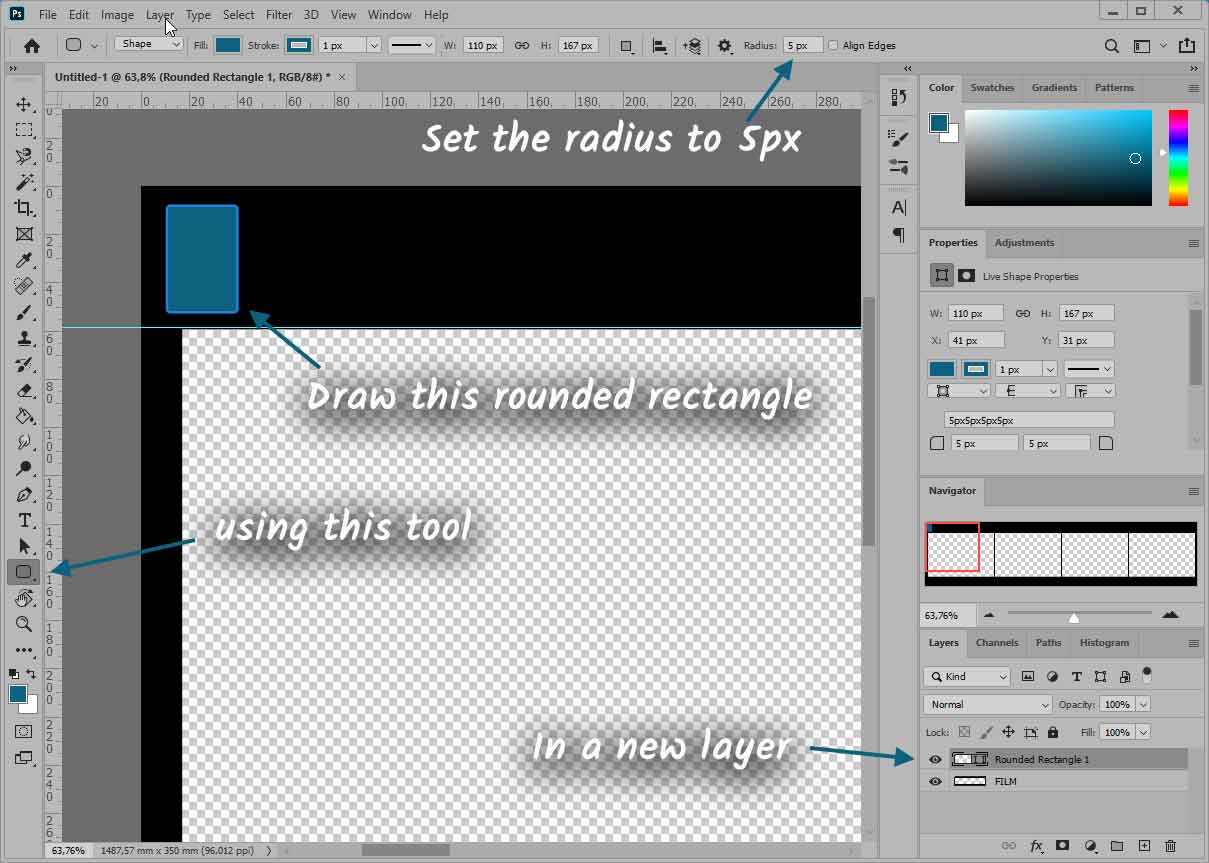
We will "manufacture" a brush to the size and shape of these perforations. Each of these perforations is a rectangle with rounded corners....
Create a new layer that you call "brush" et use the "rounded rectangle tool", set the radius to 5px and draw a rectangle, regardless of its color in a new layer.
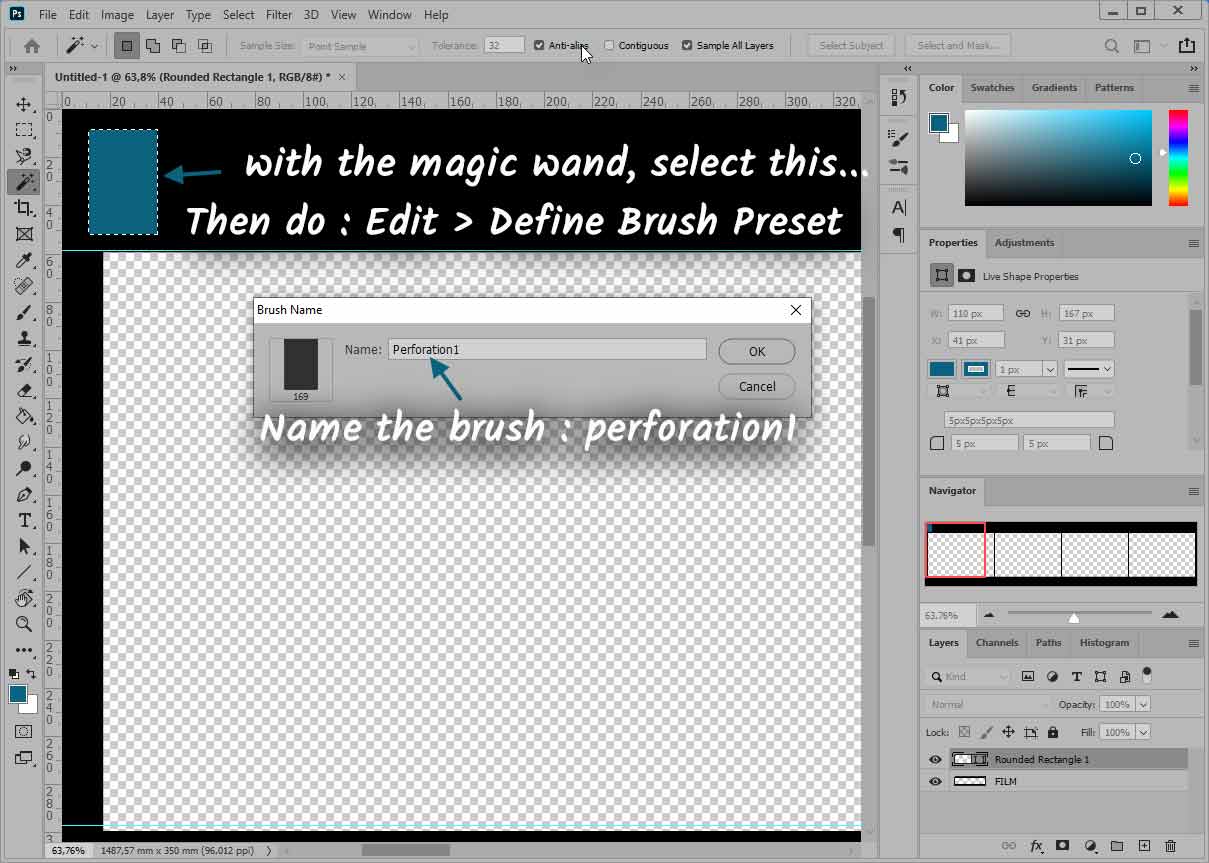
Select the small rectangle with the magic wand... then do: Edit > Define Brush Preset.
Name the brush "perforation1" and validate!
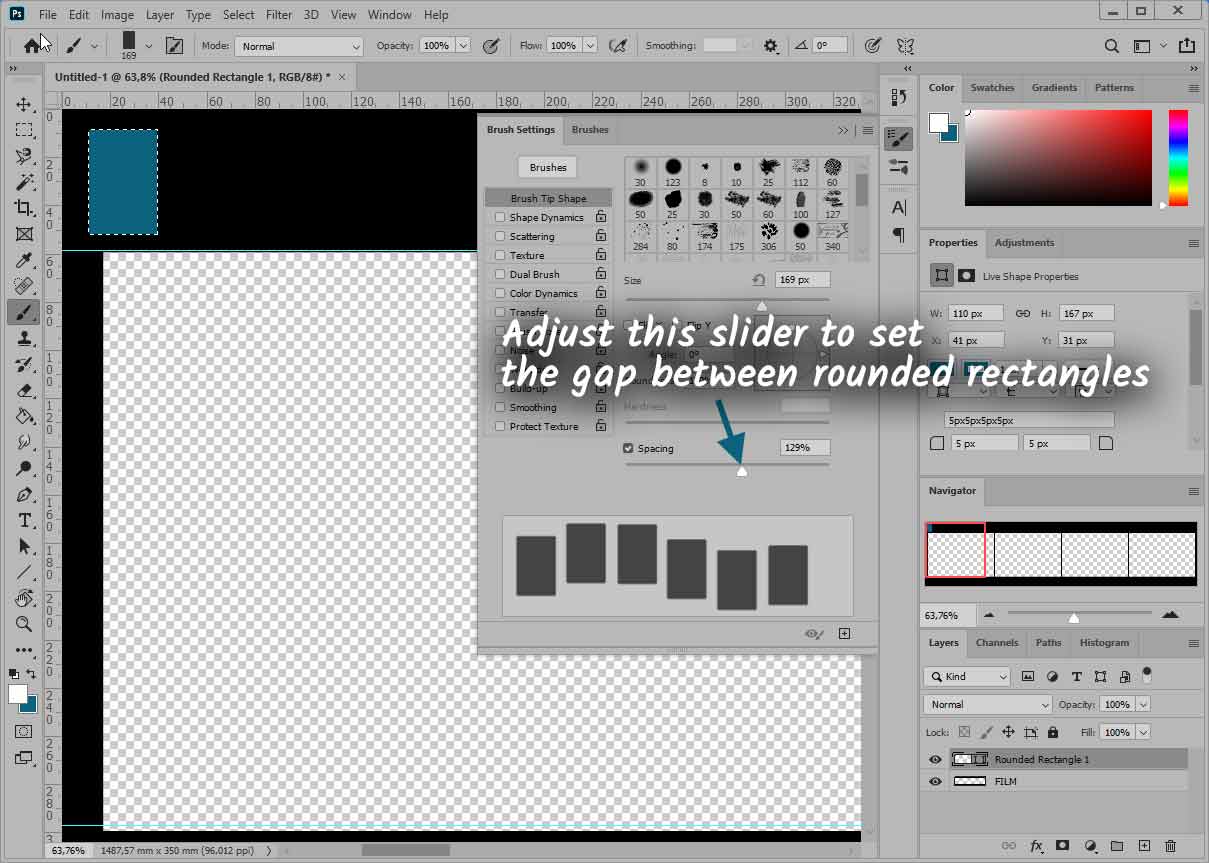
![]() Before switching to the perforation drawing, the "perforation1" brush must still be adjusted.
Before switching to the perforation drawing, the "perforation1" brush must still be adjusted.
Click on the brushes... select the brush "perforation1" and click on Brush settings...
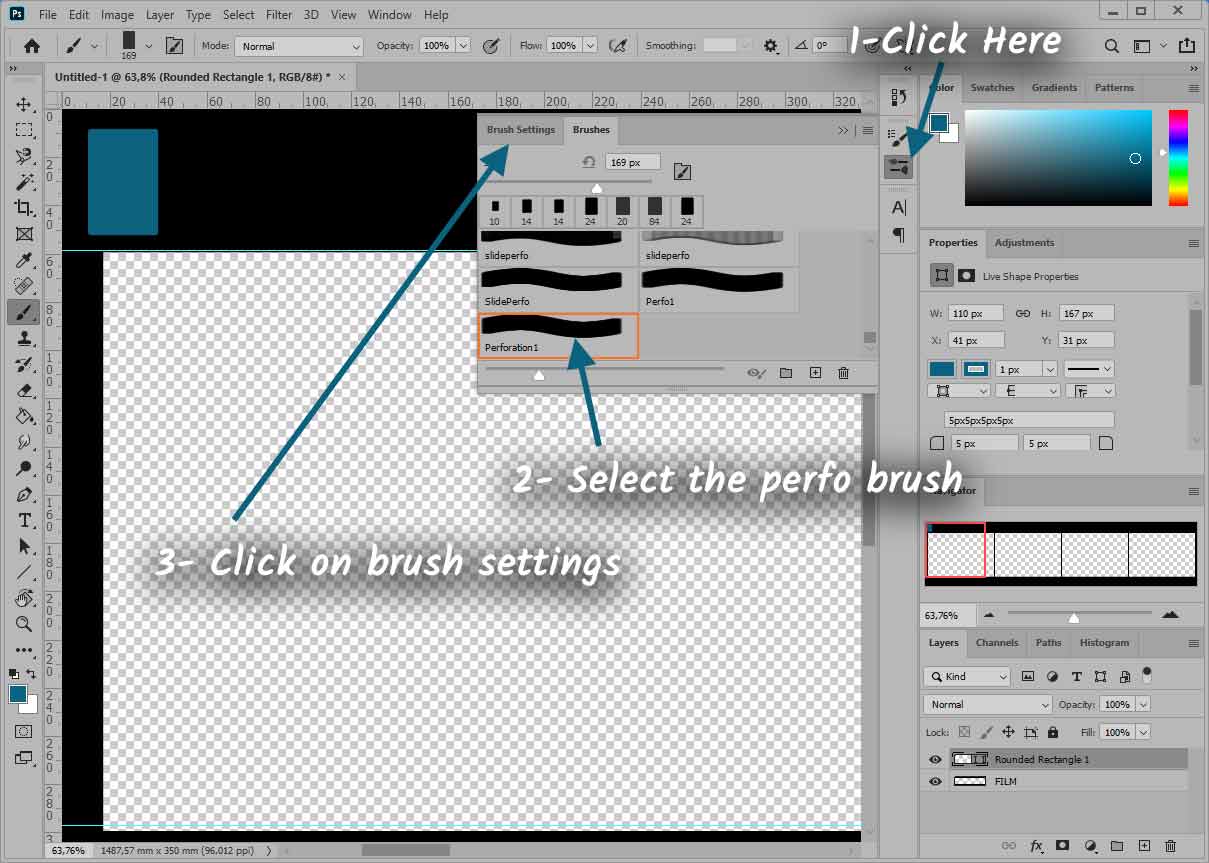
In the brush settings window, use the cursor to adjust the gap, i.e. the interval between the rectangles that will be drawn... For me 175% is a good choice...
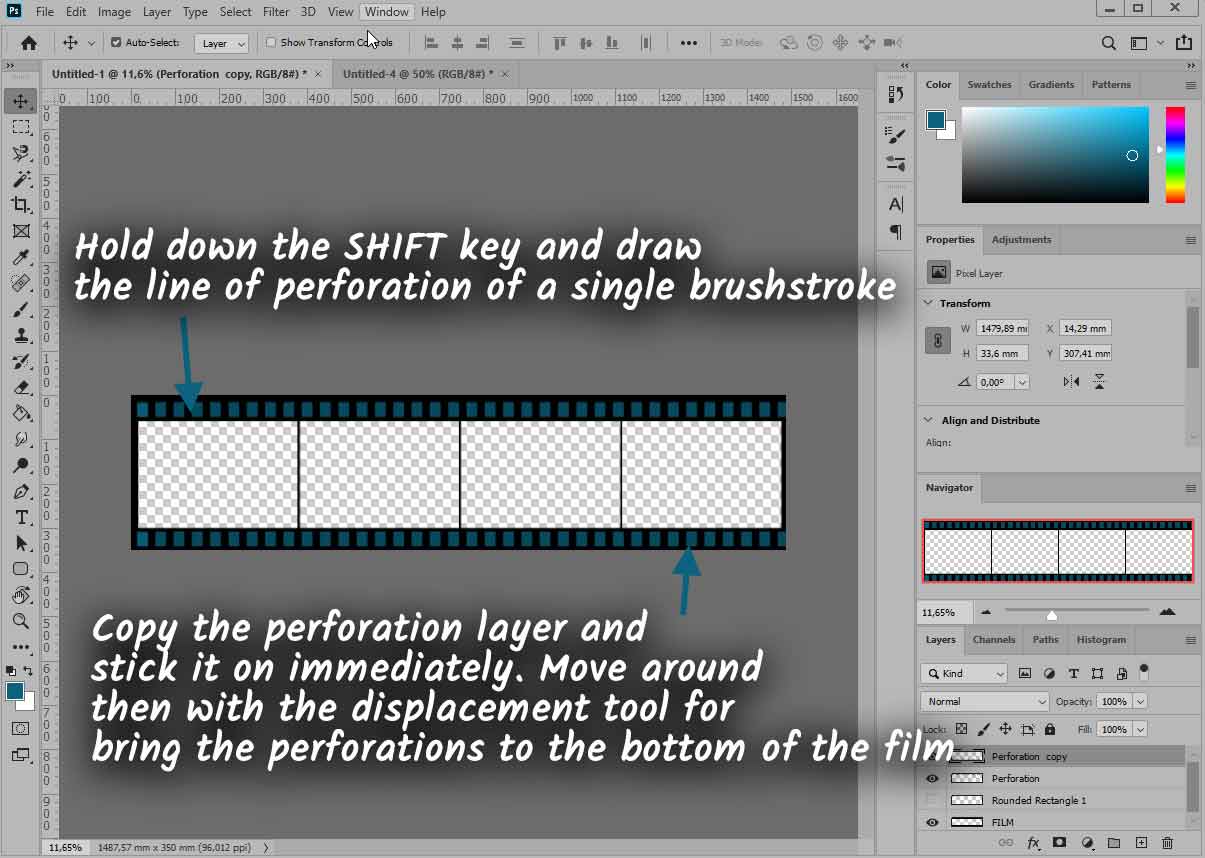
![]() Let's now move on to the drawing of the perforations.... Create a new layer, above all the others. Put your "perforation1" brush at the beginning of the film and, while holding down the shift key (to go straight), draw a continuous line until the end of the film...
Let's now move on to the drawing of the perforations.... Create a new layer, above all the others. Put your "perforation1" brush at the beginning of the film and, while holding down the shift key (to go straight), draw a continuous line until the end of the film...
Copy the layer containing the top perforations and paste it. With the displacement tool, bring the perforations down.
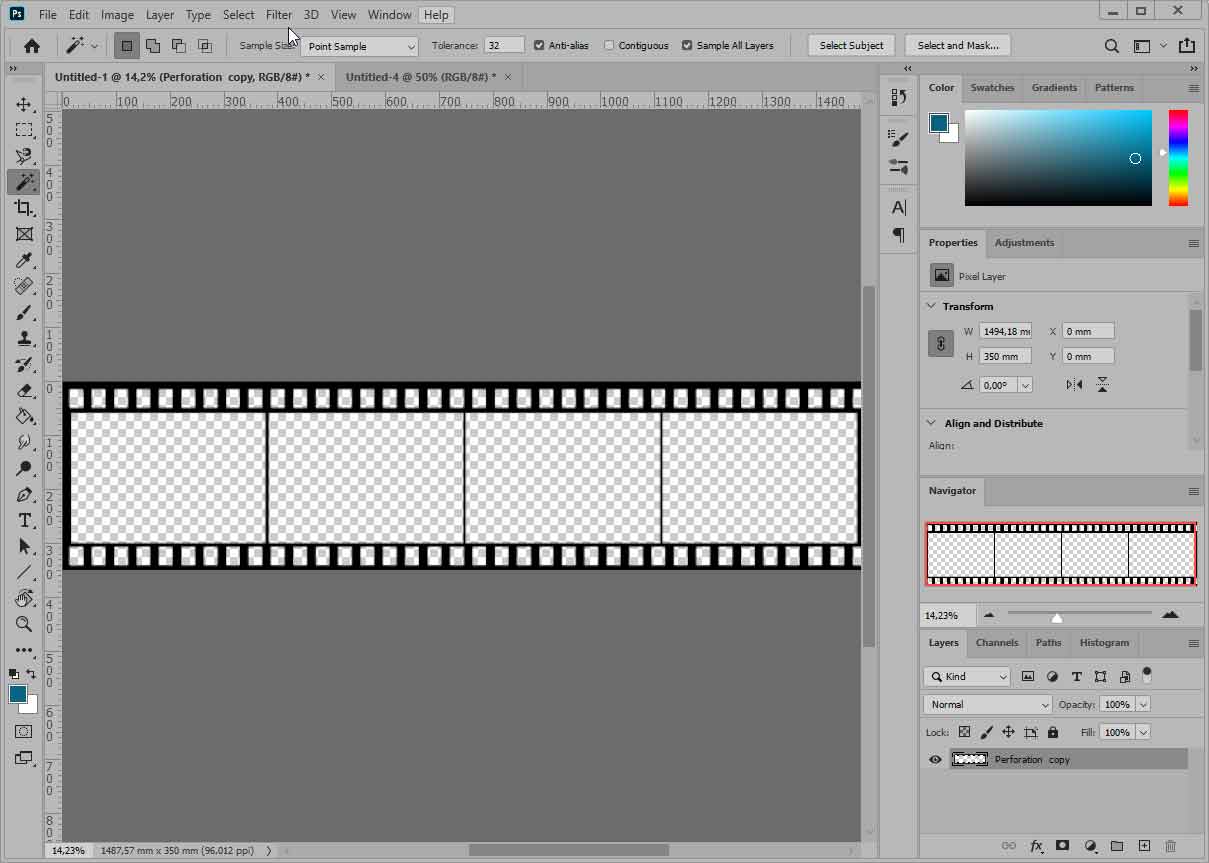
![]() Il ne reste plus qu'à "creuser" les perforations...
Il ne reste plus qu'à "creuser" les perforations...
Start by merging the layers
With the magic wand, select the color of your perforations (here, it's blue) and delete them all!
Your film is ready to place photos
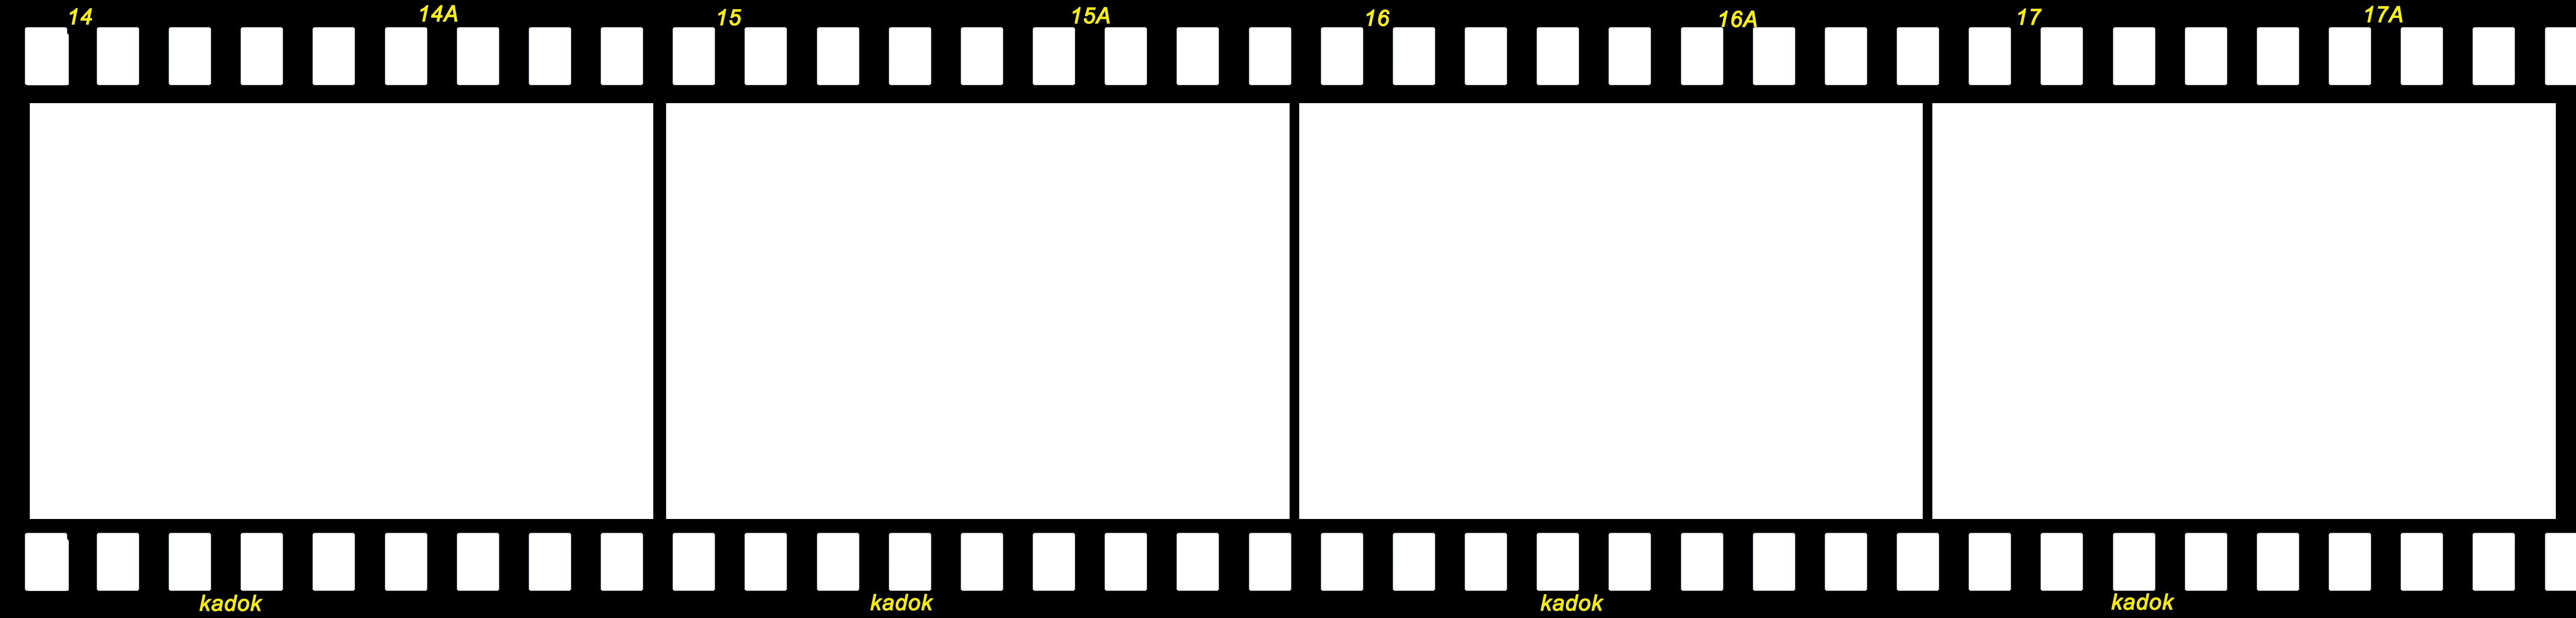
Here is the file that we finally get....
If you do not wish to do it yourself you can download it HERE
 Installing the photos
![]() First, collect the photos you want to use....
First, collect the photos you want to use....
Some are in landscape mode, others in portrait mode... It will be necessary to reframe those that are in portrait mode to adapt them to the film. In reality, the photos are not cropped and the portrait photos are "lying" on the film....
![]() In Photoshop, open the image of the 35mm film you obtained above....
In Photoshop, open the image of the 35mm film you obtained above....
On this image, drag your first photo. Un nouveau calque se crée : nommez le "PHOTO". Act on the handles to completely cover the first box.
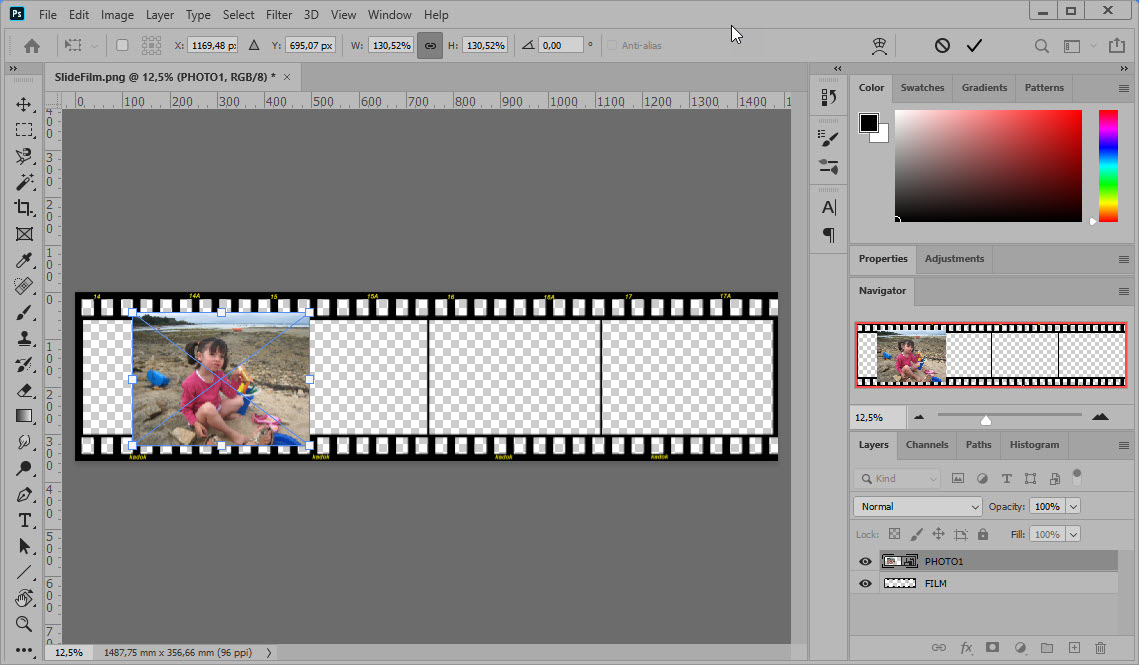
![]() Go to the "FILM" layer and, with the magic wand, click in the first box: it is then selected.
Go to the "FILM" layer and, with the magic wand, click in the first box: it is then selected.
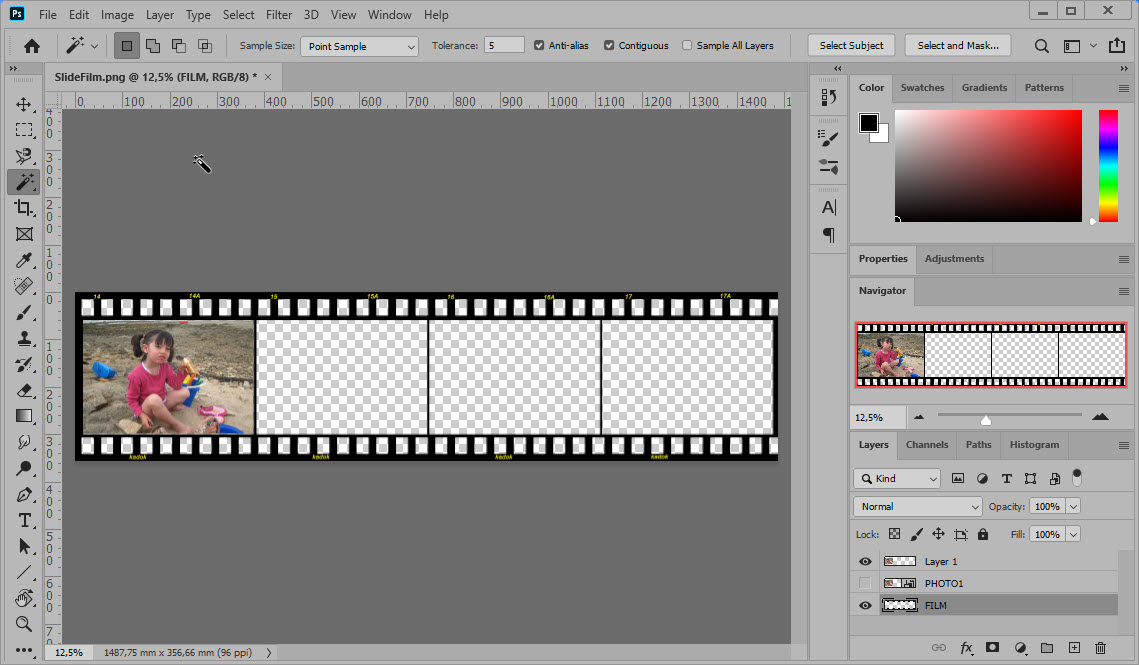
Return to the "PHOTO" layer and perform EDIT > COPY then EDIT >PASTE or (Ctrl+C then Ctrl+V).
Disable the PHOTO layer by clicking on the eye in the layer window.
Repeat the operation 3 times with the other photos to complete the boxes....
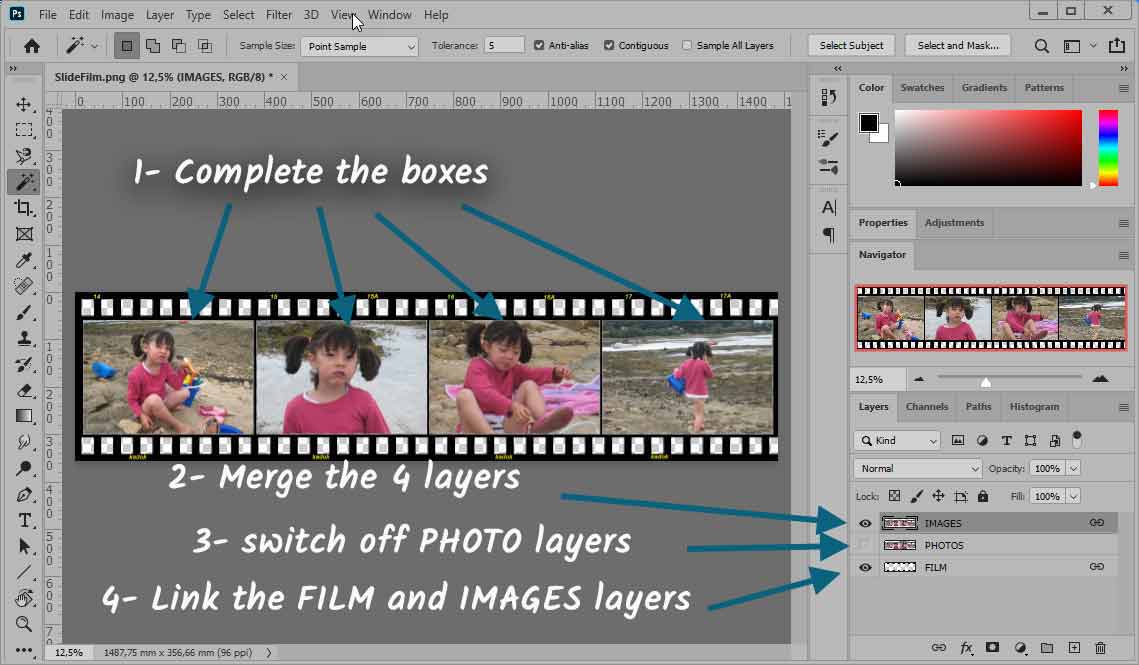
Notice that I merged the 4 images and, to avoid shifting the film and images, I linked these layers.
Lorsque tout est OK, sauvegardez votre travail au format Photoshop.
Curve, wrap and give shadow to the film...
Open a new image, larger than the 35mm film with a white background (any color)....
Paste in this image, the photo of the film obtained in step 2.
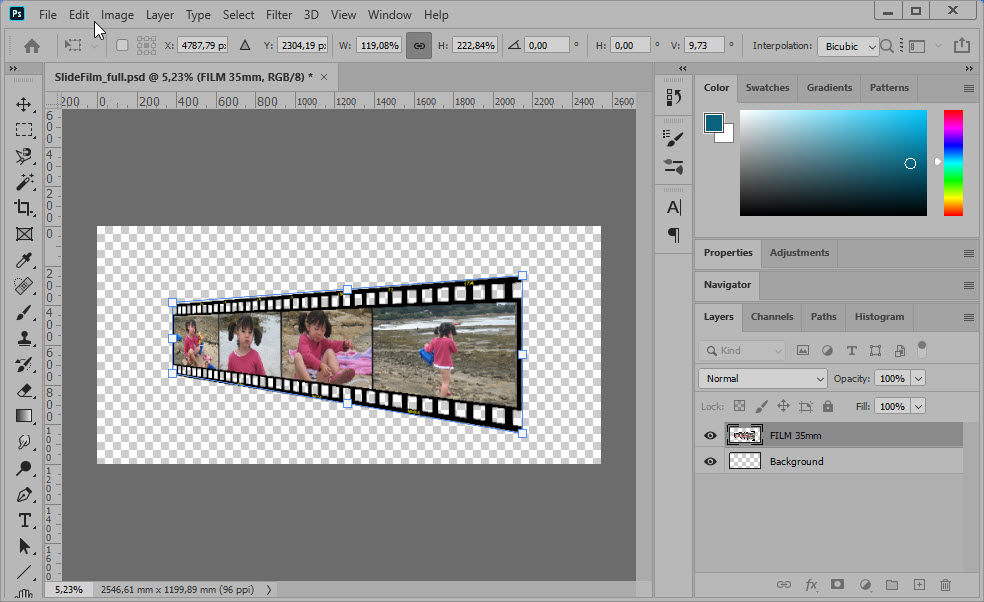
![]() Perform CTRL+T to make the handles appear and, by holding down the CTRL key, acts on these handles to give an impression of perspective...
Perform CTRL+T to make the handles appear and, by holding down the CTRL key, acts on these handles to give an impression of perspective...
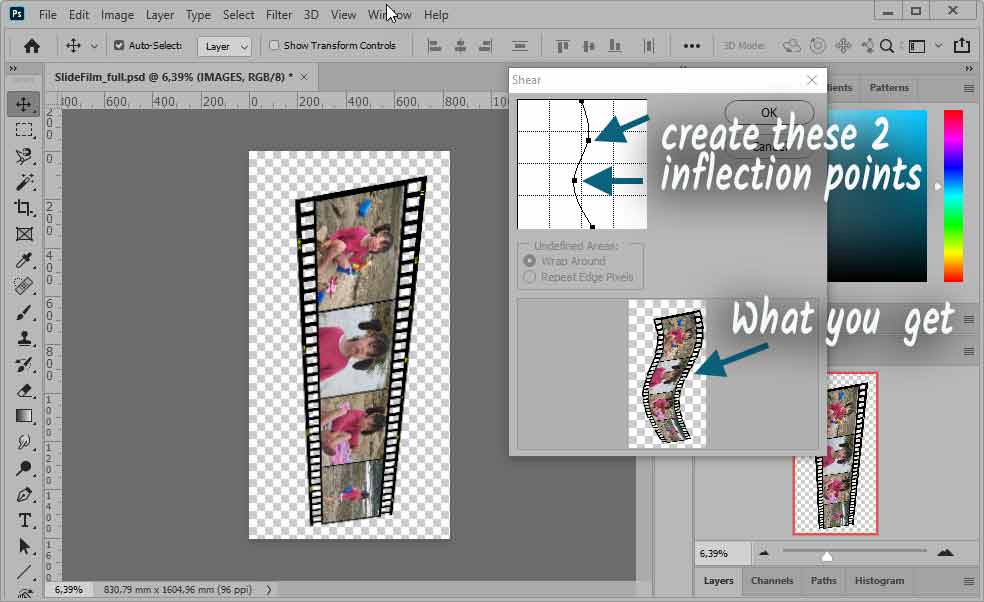
![]() Now move your image to the vertical position (Image > Image Rotation > 90° Clockwise). Then apply the deformation > shear filter. Do not multiply the number of bending points: It is just a question of giving a movement to the image...
Now move your image to the vertical position (Image > Image Rotation > 90° Clockwise). Then apply the deformation > shear filter. Do not multiply the number of bending points: It is just a question of giving a movement to the image...
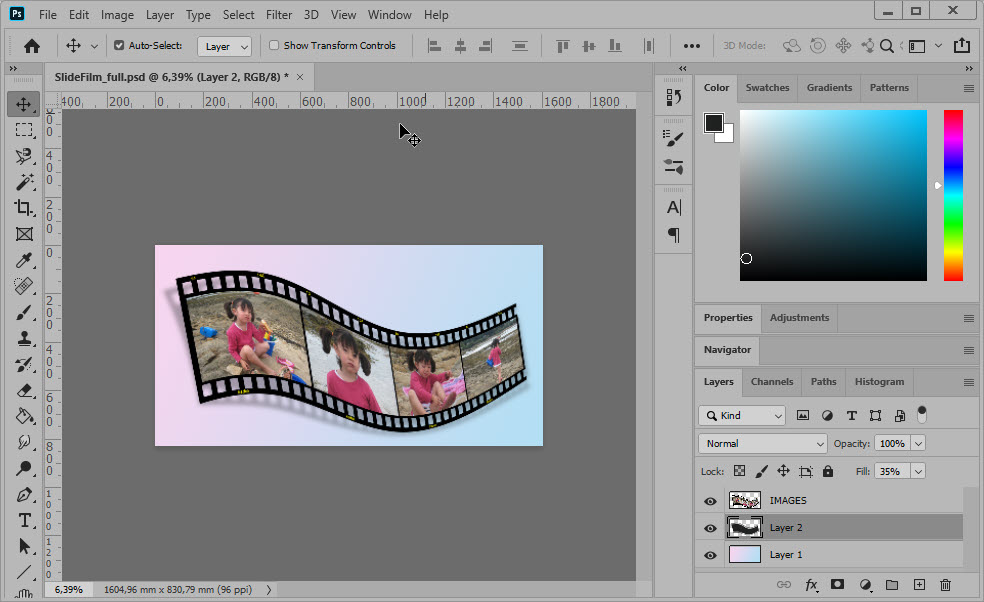
Straighten your image by giving it a reverse rotation of the first one.
Normally it's over... I went a little further by adding a background with the gradient-tool... I also added a drop shadow to make it more realistic...
This is an original way to present your photos on a slide film...
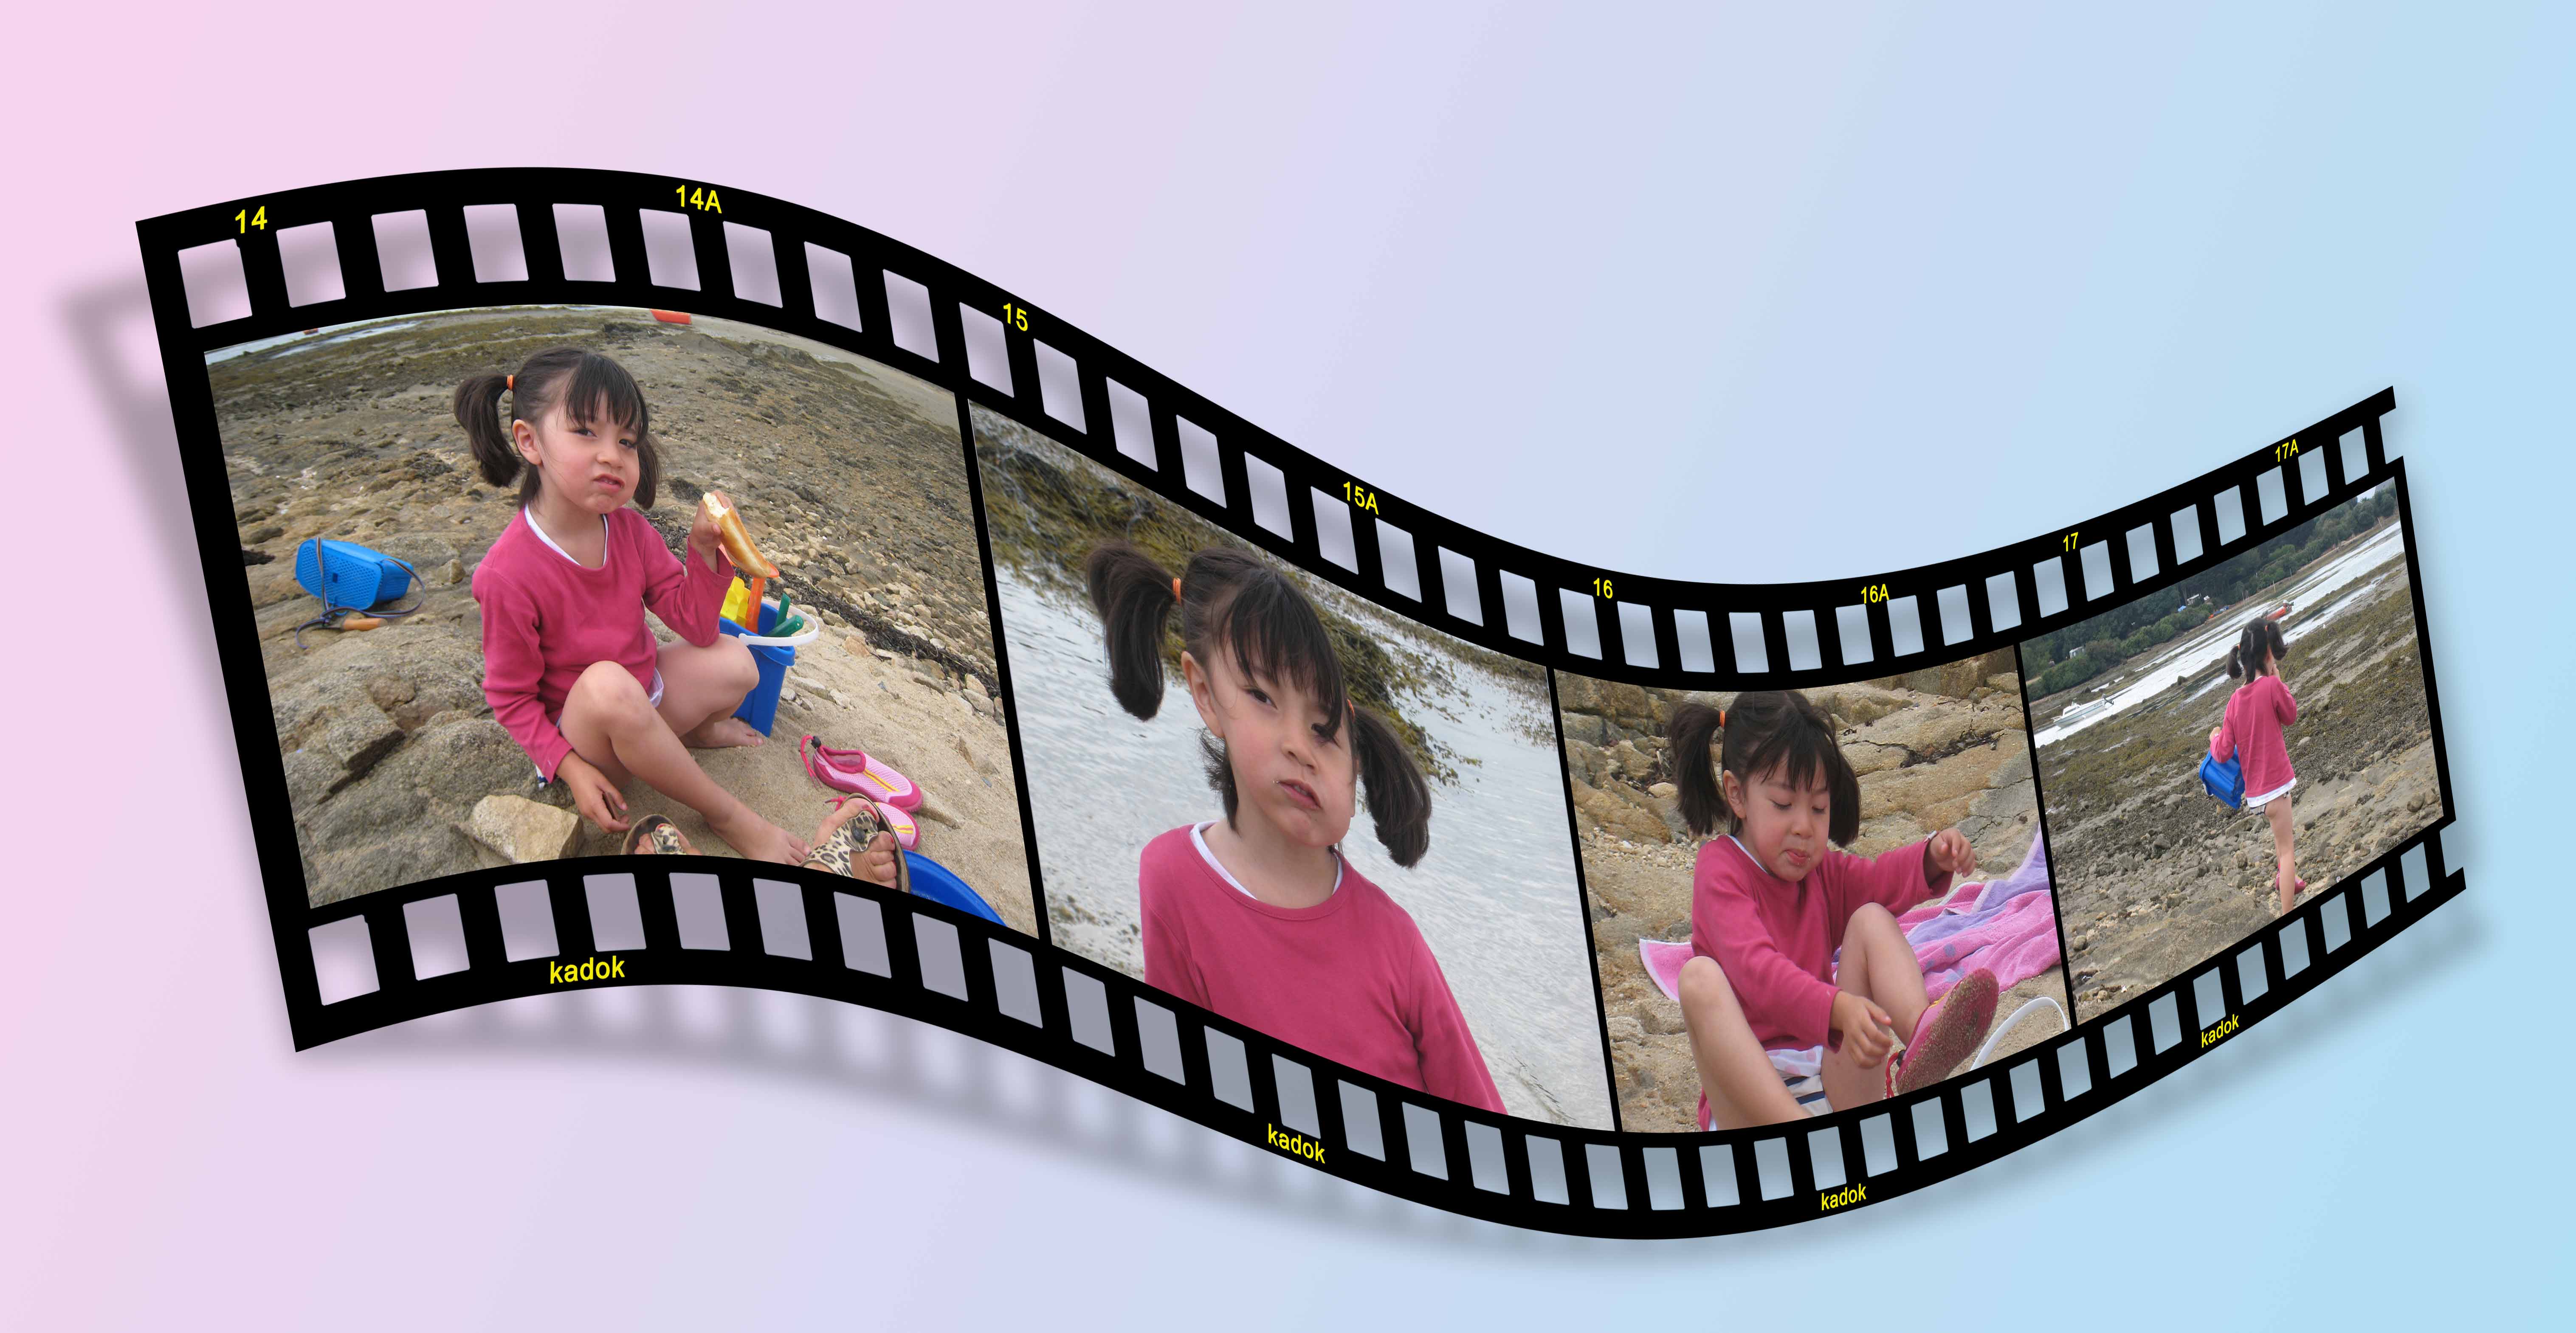
It's your turn to transform your photos! See you soon!