SCRAPBOOKING WITH IGGYDODIE
A PAGE STEP BY STEP (2)
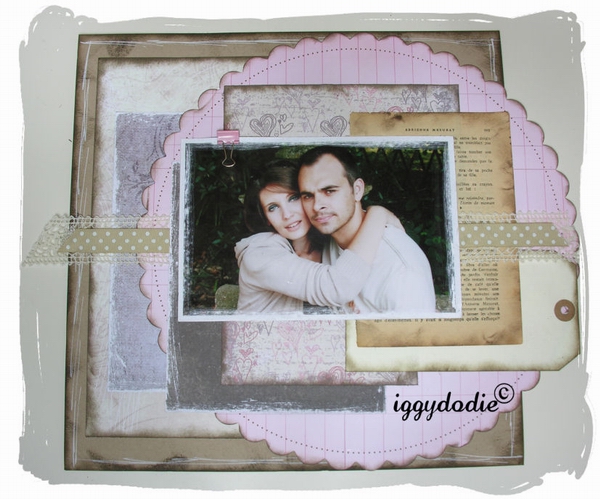
 Place your embellishments!
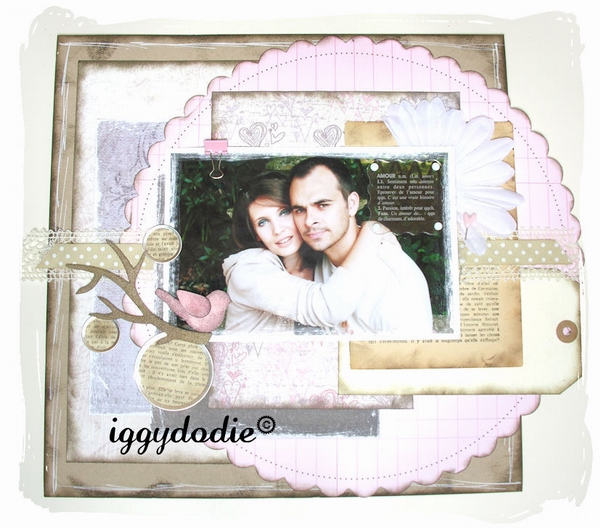
Place a decorative grip on the left higher side of the photograph (or with any other place not obstructing the image) in a space not pasted.
To remain in the spirit “Out of this page”, fix a broad ribbon on both sides photograph, while making exceed the left side apart from the sheet of cardstock.
It is not worthwhile to make it pass under the photograph, stick it using double coated adhesive (invisible here because I used lace) with the strong current of the photograph. Stick over another finer ribbon.
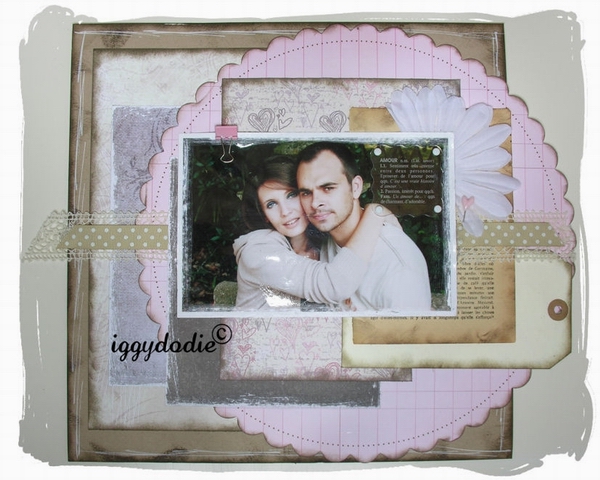
Fix embellishments in the angle higher right of the photograph: with a glue gun (or an adhesive with fabrics, to stick the large flower into 2, then slip under the photograph.
Prick a pin of dressmaker in the ribbons. And stick a déco (here a plexiglass plate engraved coming from to www.embelliscrap.com).
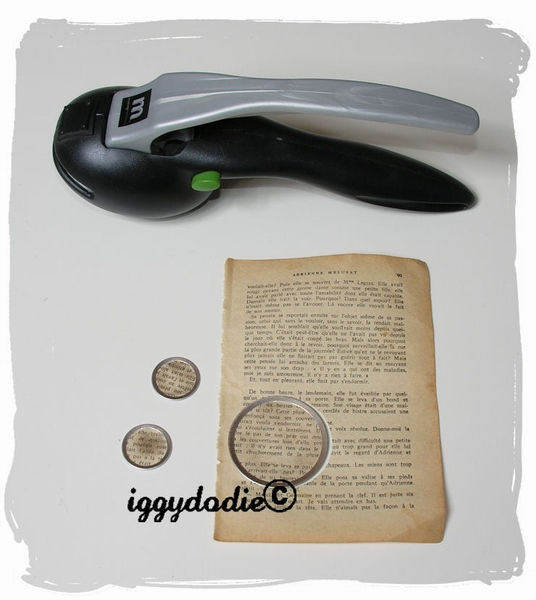
Prepare round embellishments in book-paper of with a tag maker.
If you do not have a tag maker, simple circles of various diameters cut out in the 2nd page of book will be good.
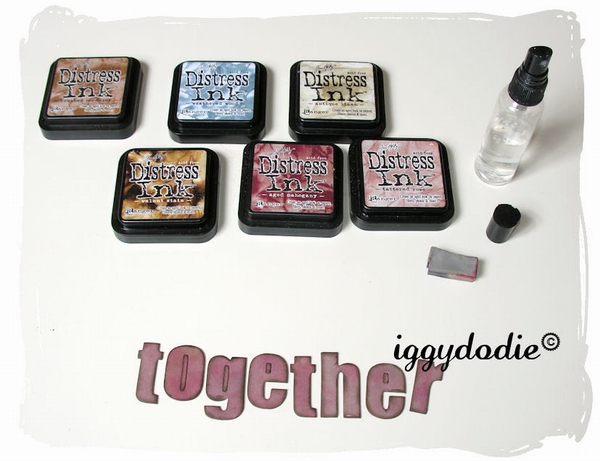
Think of inking.
Reserve to them side.
 Prepare your title and your patterns !
Prepare your chipboards “patterns” (here a branch and a bird). Download the patterns here.
With foam and distress ink matched with your papers, or adapted like here to the patterns, will entirely enclose them.
Then before ink is not dry, pour emboss-powder on it (preferably of the powder distress, if you hane not UTEE).
the effect produced by the powder distress and powders with utee will not be the same one, with 1st you will have an effect of texture chechmate, a granulous effect under the fingers comparable with sandpaper, whereas the utee gives volume and brightness.
Once the powder applied, heat the whole with the heat gun, care not to heat too much, and nor too close them chipboards to avoid burning them.
Reserve to them side.

Prepare your chipboards title. Choose your words which will be in chipoards, take again your inks, and with foam and various colors of inks distress matched with your papers, ink them entirely by mixing the colors. Then vaporize slightly water so that inks mix.
Dry your letters with the heat gun to solidify the colors once the desired effect obtained. When they are dry, ink in the edges with an dark chestnut ink so that is dissociated.
Pay attention with the length of your title, it will come to position in lower part of the photograph (I think that 9 letters is a maximum not to unbalance the page layout)
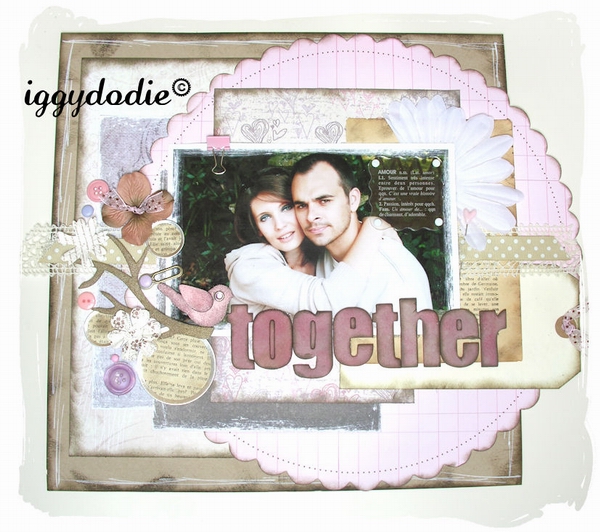
Start to stick your embellishments. Personally I advise the hot glue gun, that sticks quickly, firmly and properly much of materials on much of surfaces.
Here I started with the embellishments which will come in cluster or bunch on the left side, cluster which will compensate for the unbalanced page layout because the round which exceeds on the right.
Continue to stick your embellishments (buttons, flowers, brads…) and stick your title straddleing under the photograph. The chipboards letters can be also stuck with the glue gun.
Made nodes in one 3rd ribbon and stick them on the centers of flower and the eyelet of the tag.
 Complete your page !
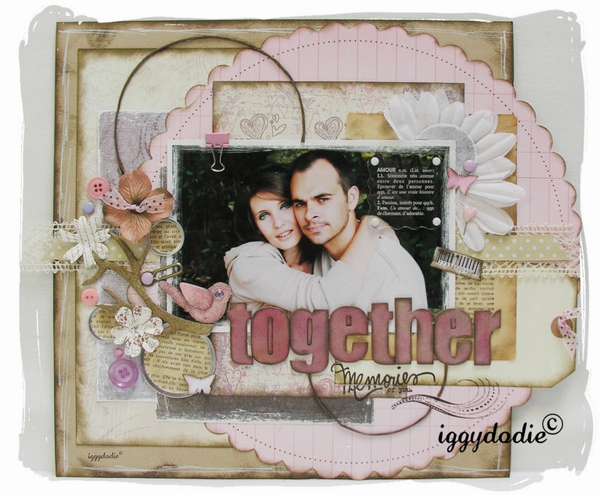
Finish the decoration of your page, by adding decorative stamps.
Then with a compass and a pencil, trace 2 circles diametrically opposite, one in the left higher angle, and the other in the angle lower right. On these 2 circles stick cordeline (paper yarn with a wire inside, which is practical to give him a round form before sticking it).
If you do not have cordeline, no problem, you can reproduce the same effect with cord or string. Paste gradually and progressively your circle ties up some on the trace made with the pencil and the compass, and stick your circle in this manner with glue or a glue gun.
Add a circle paper of 4,5cm of diameter under the photograph on the flower, and finish to stick your photograph. Add some punch if needed to be decorative.
If you wish to hang your page on a wall, take a large metal grip, and decorate it with ribbons.
For that to pass a fine ribbon in the grip and tie the other ribbons it.
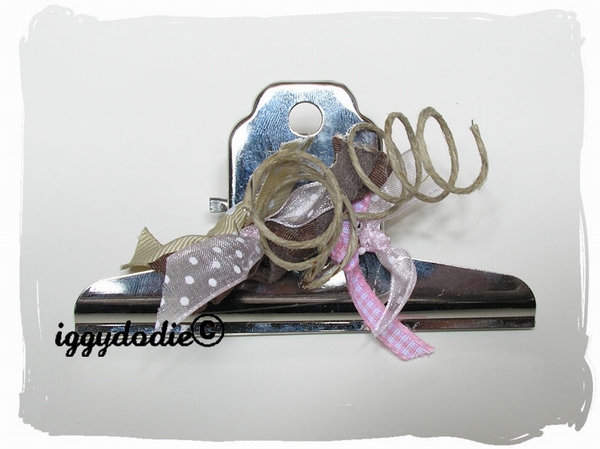
Grip the page in its center, and hook your page on the wall using a nail through the hole of the grip.
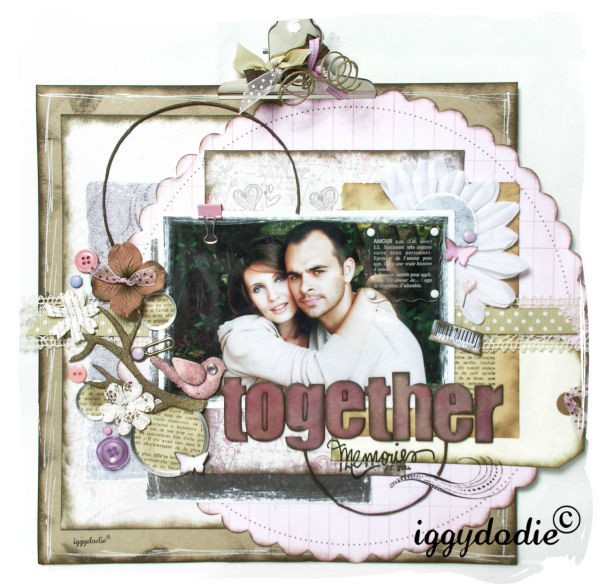
Your project is finished!
![]()
Outstanding Mini Albums:(Paperback)
Jessica Acs (Author)
Mini albums have become a popular medium for scrapbookers - they are small enough to complete in a timely manner but big enough to tell a story.
Features 50 albums with step-by-step instructions for over 30 projects - perfect for scrapbookers of all levels...
Make It in Minutes
Roxi Phillips (Author)
these mini-books are perfect for celebrating everything from holiday memories to childhood events

So many styles, so many reasons to make them! Whether they’re accordion folded, stitched together, ribbon-tied, or paper-punched and bound with binder rings...