Recycle old chairs to diy an artist easel !
 Christel wanted to make itself its own artist easel ! While recovering at most hardware that was already home! Christel wanted to make itself its own artist easel ! While recovering at most hardware that was already home!
With common tools, a good dose of imagination and a lot of sense, She has succeeded in transforming four old chairs in an original and fully functional easel for her workshop !
Christel was kind to detail for us the steps for DIYing the easel ... It's simple ... But it was necessary to think hard before !
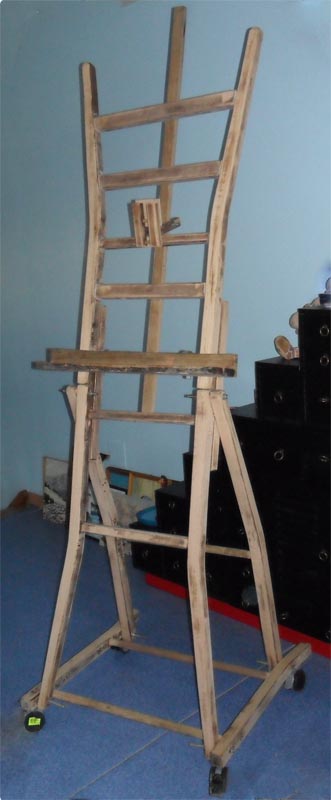
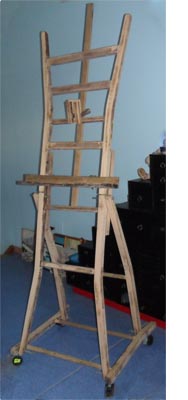
The easel measures about 192x64 (cm).
To make it I recycled some objects founded at home...
4 chairs removed,
1 board,
4 hooks,
some threaded rod, nuts and screws,
Broom handle,
4 wheels with locking ...
The only thing I bought is a stick of wooden dowel pins (1m) for tenons, the rest was either at home or recovered elsewhere ...
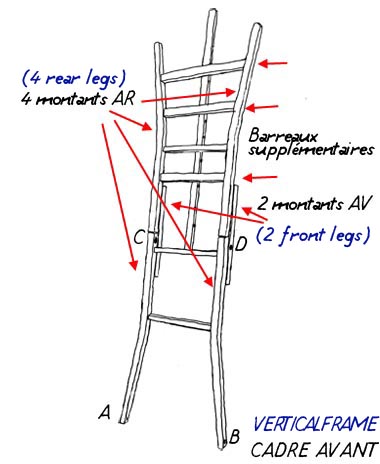
It must first completely dismantle the chairs, keeping only the rear and front legs, front and rear and all the spindle bars.

At the end of your removal, you will have 8 REAR legs (named "montants AR" on the sketch), 8 front legs and many spindle ...
Here is a sketch of the easel with all its elements:

Making of the vertical frame
You need 4 rear legs.
I made sure to keep the mortise holes and used four longest bars for the spacers. Then I screwed a front leg on the back of two rear legs to fix one to the other and I repeated for the other rear legs..
To have more bars (depending on the canvas sizes I had) I added three spacers glued (wood glue) with wooden pin by adapting them to the width of the easel.
Not having a router I have set the centralbar with screws behind the spacer bars. The central bar measure 119x3cm .
|
Making the base frame of the easel
I cut 2 rear legs to 60cm length. I made the spindles with two broom handles, refining each end so that they fit in the original mortise and I adapted their length depending on the width of the vertical front frame, using the original mortises.
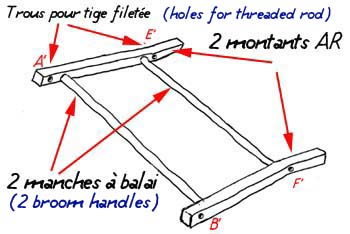
I also drilled in A ', B', E 'and F' holes for threaded rods.
Making of the rear frame
I took two other rear legs and have drilled in C ', D', E and F (according to plan) ...
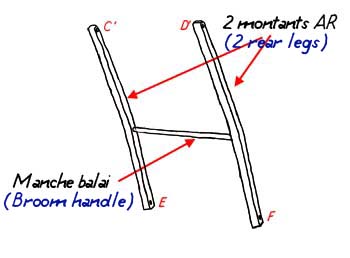
For the crossbar, I took the rest of the broom handle that I adapted to the width and refined at each of its extremities so they can fit into the original mortises
Assembling the frames
With the threaded rod and nuts, assemble A, A 'and B, B' ... so as to fix the vertical frame on the base and then fix the whole with the rear frame.
The horizontal shelf
This is 2 strips (8cm wide x 2 thickness) of wood cut to 60cm and glued to 90° angle
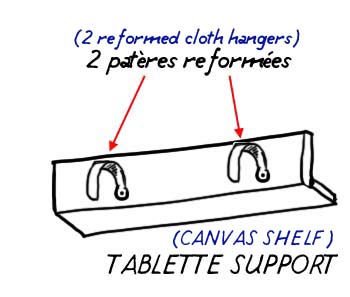
For hooks I bent and reformed the two cloth hangers so that they can hang on the bars to adjust the height of the table (depending on the size of the canvases).
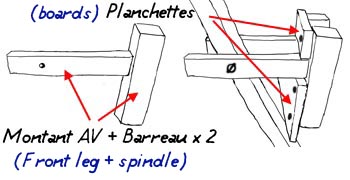
The top bracket
This support is formed by two portions of front legs (15cm), each with their bar about 20cm in length.
These two pieces are gripping the central bar (on which they are articulated) and their difference is maintained thanks to two small boards screwed by the rear.
A large bolt through the center bar fix the top bracket...

CHRISTEL
|